

In Android, Developer Options is a secret, hidden menu with a variety of advanced options. These features are mainly intended for developers, but many of them can be useful to average Android users and enthusiasts. We’ll share some of the best.
Before we start toggling things on, you’ll first need to perform a secret handshake to enable the Developer Options menu in Settings. Since these options aren’t intended for the average user, the menu is hidden by default. Follow our simple steps to quickly enable Developer Options.
Enable USB Debugging
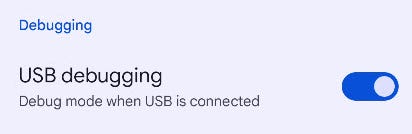
“USB debugging” sounds like an option only an Android developer would need, but it’s probably the most widely used hidden option in Android. USB debugging allows applications on your computer to interface with your Android phone over the USB connection.
This is required for a variety of advanced tricks, including rooting an Android phone, unlocking it, installing a custom ROM, or controlling your phone screen from your PC. You can also use ADB commands to push and pull files between your device and your computer.
USB debugging can be a security concern, as it gives your computer access to your phone. You could plug your device into a malicious USB charging port, which would try to compromise you. That’s why Android forces you to agree to a prompt every time you plug your device into a new computer with USB debugging enabled.
Access Android’s Built-In Task Manager
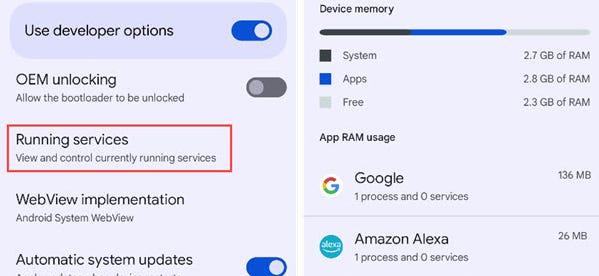
Did you know Android has a Task Manager like Windows does? It’s called “Running Services,” and it shows every single app that’s currently running on your device. You can also see each app’s corresponding processes and services, how much RAM it’s using, and how long it’s been running. This is also where you can stop those individual processes and services within apps, though you really shouldn’t need to do that.
Force All Apps to Use Dark Mode

Android 10 introduced a system-wide dark mode, and many apps now support it. However, there are a few holdouts that may be an unwelcome blast of bright light in your face. You can fix this with the “Override Force-Dark” toggle.
Keep in mind that this is forcing apps to be displayed in a mode that they don’t officially support. You may run into some issues with text being unreadable or other wonkiness. Still, it’s a pretty neat trick.
Disable or Speed Up Animations

When you move between apps and screens in Android, you’re spending some of that time looking at animations and waiting for them to go away. You can disable these animations entirely by changing the Window animation scale, Transition animation scale, and Animator duration scale options here. If you like animations—but just wish they were faster—you can speed them up.
On a fast phone or tablet, this can make switching between apps nearly instant. If you thought your Android phone was speedy before, just try disabling animations and you’ll be surprised how much faster it can seem.
Force the Highest Refresh Rate

It’s pretty common for high-end Android phones to have high refresh rate displays nowadays. However, many of these devices will switch between refresh rates to improve battery life. That means you’re not always getting the highest possible refresh rate all the time.
If you want to always use the highest refresh rate—after all, that’s what you paid for—you can simply toggle on the switch for “Force Peak Refresh Rate.” Keep in mind that this will impact battery life.
See Which Apps Get Priority Treatment

One of the reasons why you shouldn’t use task killers on Android is it’s specifically designed to manage resources for you. You can actually look behind the curtain a bit on how this works by visiting the “Standby Apps” section in the Developer Options.
Each app is given one of five values: “Active,” “Working Set,” “Frequent,” “Rare,” or “Restricted.” “Active” is the high-end of usage, while “Restricted” is the lowest. You’ll also see grayed out apps labeled “Exempt” if you’ve disabled battery optimizations, or “Never” if you’ve never opened them. Tap on an app to adjust its value.
Force-Enable FXAA For OpenGL Games
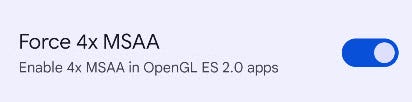
If you have a high-end phone or tablet with great graphics performance and you play 3D games on it, there’s a way to make those games look even better. Just go to the Developer Options screen and enable the “Force 4x MSAA” option.
This will force Android to use 4x multisample anti-aliasing in OpenGL ES 2.0 games and other apps. This requires more graphics power and will probably drain your battery a bit faster, but it will improve image quality in some games. This is a bit like force-enabling antialiasing using the NVIDIA Control Panel on a Windows gaming PC.
Disable Mobile Data When on Wi-Fi

When you’re connected to a Wi-Fi network, Android keeps your mobile data connection alive in the background. This is to make switching between Wi-Fi and mobile data as seamless as possible. It doesn’t use much data, but you can disable the feature if you’d like. Toggle off the switch for “Mobile Data Always Active.”
Fake Your GPS Location

The “Select Mock Location App” option allows you to use an app to set fake GPS locations, tricking Android into thinking you’re at a location where you actually aren’t. Use this option along with an app like Fake GPS Location and you can trick your Android device and the apps running on it into thinking you’re at locations where you actually aren’t.
How would this be useful? Well, you could fake a GPS check-in at a location without actually going there or confuse your friends in a location-tracking app by seemingly teleporting around the world.
Stay Awake While Charging

You can use Android’s Screen Saver (formerly called “Daydream”) to display certain apps while charging your device. However, if you want to display any app while charging your phone overnight, you can simply enable the “Stay Awake” option here. Android will keep your device’s screen on while charging and won’t turn it off.
If you want to undo any of these changes, you can quickly erase all your custom options by sliding the “Use Developer Options” switch at the top of the screen to “Off.” Most of the options here are only useful to developers debugging their Android apps. Don’t go along changing options in this menu without knowing what they do.