

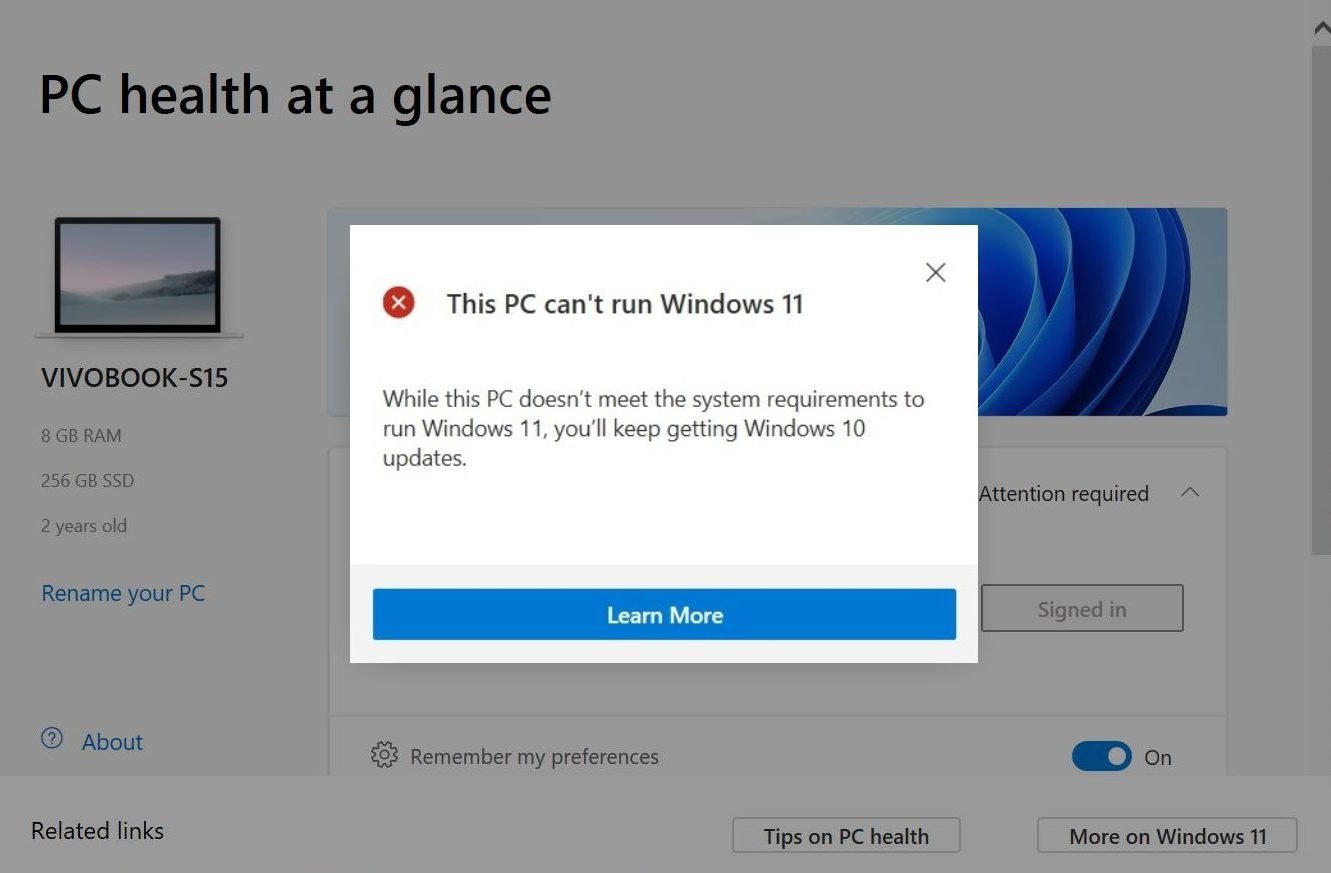
Our previous article told you how to check whether your current computer is compatible with Windows 11 or not through Microsoft’s PC Health Check tool. However, many people have been getting the “This PC Can’t Run Windows 11” message despite having powerful specifications. Well, here are easy ways to fix the “This PC Can’t Run Windows 11″ error in the PC Health Check application.
Minimum System Requirements for Windows 11
Before we start, make sure your computer supports the minimum requirements for Windows 11. If your PC is running too old specs, it won’t be compatible with the new OS. Below are the minimum system requirements:
- A modern 64-bit processor
- 1GHz clock speed, at least 2 cores
- 4GB of RAM and 64GB Drive
- UEFI, Secure Boot capable
- Trusted Platform Module (TPM) version 1.2 or newer
- 9-inch display with a minimum resolution of 1366 x 768
- Compatible with DirectX 12 or later with WDDM 2.0 driver
Here’s the complete list of Intel processors that support Windows 11.
Why Am I Getting “This PC Can’t Run Windows 11” Error?
Almost all modern computers are compatible with Windows 11. However, despite having a supported device, the Health Check app may show the “This PC Can’t Run Windows 11” error for you.
Possible Reasons for Windows 11 Incompatibility Error:
- Incorrect Report by Health Check tool.
- TPM is disabled on your computer.
- Secure Boot is not enabled.
Steps to Fix if Your PC Can’t Run Windows 11
1. Incorrect Report by Health Check App
For starters, Microsoft’s official compatibility document specifies two levels of hardware requirements for the new operating system- ‘Soft Floor’ and ‘Hard Floor.’ The first mentions TPM 2.0, while the other mentions that Windows 11 can work on TPM 1.2 or newer.
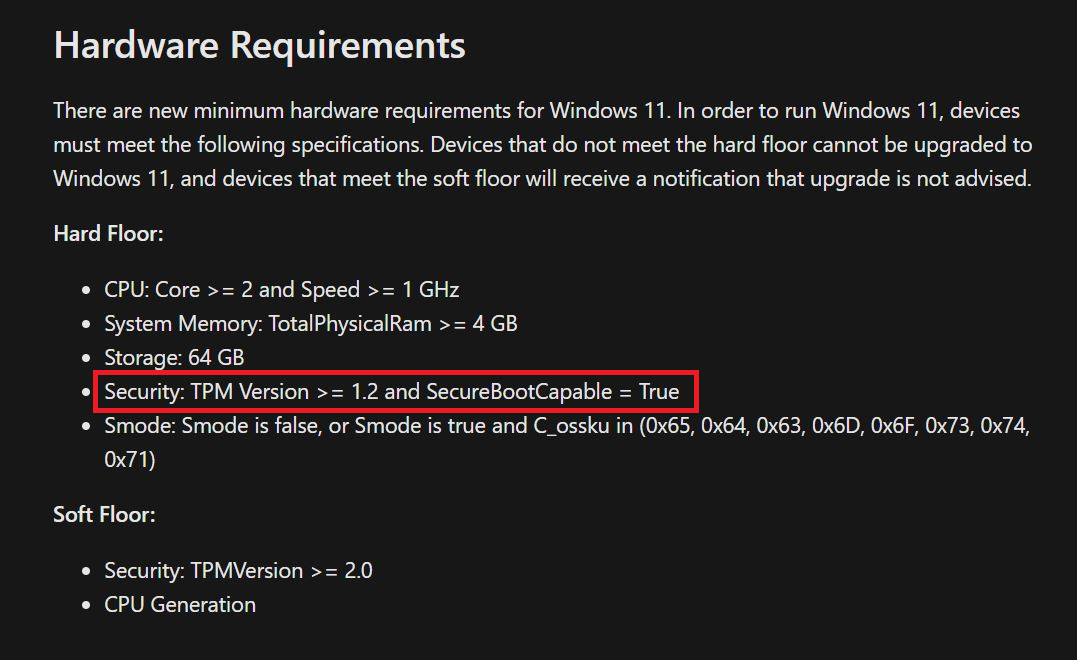
Evidently, the Health Check app checks your machine’s compatibility against the second-floor hardware requirements, which needs TPM 2.0 and 8th Gen Intel & Ryzen 2000 series processors.
But in reality, you can use Windows 11 on devices with TPM 1.2 security and any modern 64-bit dual-core processor with a 1GHz clock speed. So, the “Your PC can’t run Windows 11” message could likely be due to an incorrect analysis by the Health Check app.
Microsoft has already acknowledged the issue and will be updating its Health Check app in the coming weeks with better clarity on hardware requirements. “We’re going to improve the PC Health Check app over the next couple of weeks,” said Microsoft.
RELATED TIP 3 Ways To Measure Heart Rate, Breathing on Your Phone

So, wait for an update to the Health Check tool. You can download it by visiting the Windows 11 page and checking the “Check for compatibility” space. Once the update is released, we’ll add a direct download link here.
2. Enable TPM from BIOS
TPM or Trusted Platform Module is a security chip designed to provide hardware-based, security-related functions. For starters, TPM has been a requirement since 2016, so there’s a good chance that your PC already has it.
In fact, PCs shipped in the last few years have the TPM 2.0. So, it could be that your computer supports TPM, but it is disabled, causing the Health Check app to report that Windows 11 can’t run on your computer.
If disabled, you’ll have to open the BIOS menu and enable TPM manually.
Check if TPM is Enabled
To check if your computer has the compatible TPM, run the command get-tpm in the PowerShell window.
- Open the Start menu and search for Windows Powershell.
- Right-click on “Windows PowerShell” and tap Run as Administrator.
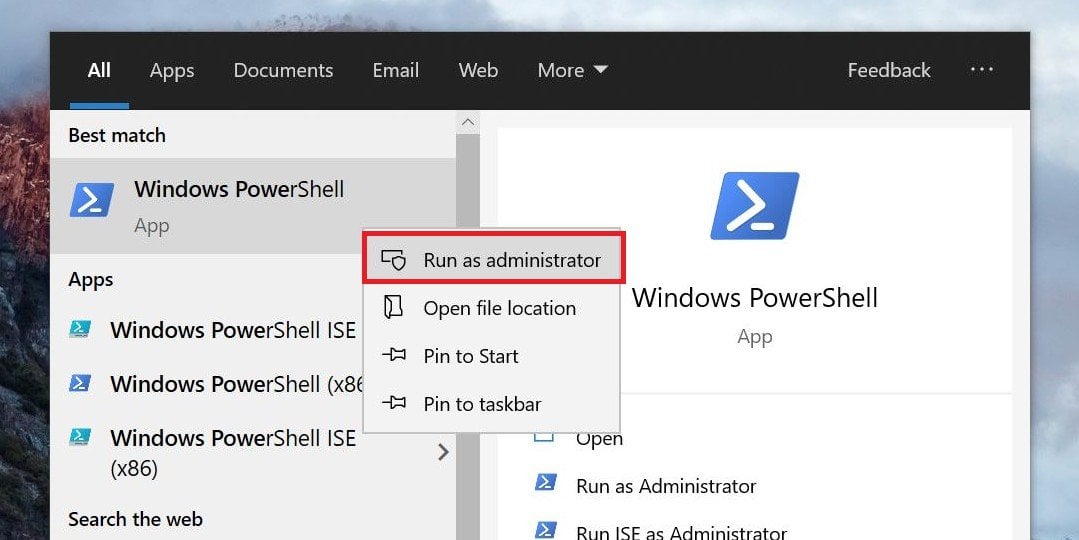
- Once the window opens, type and enter get-tpm.
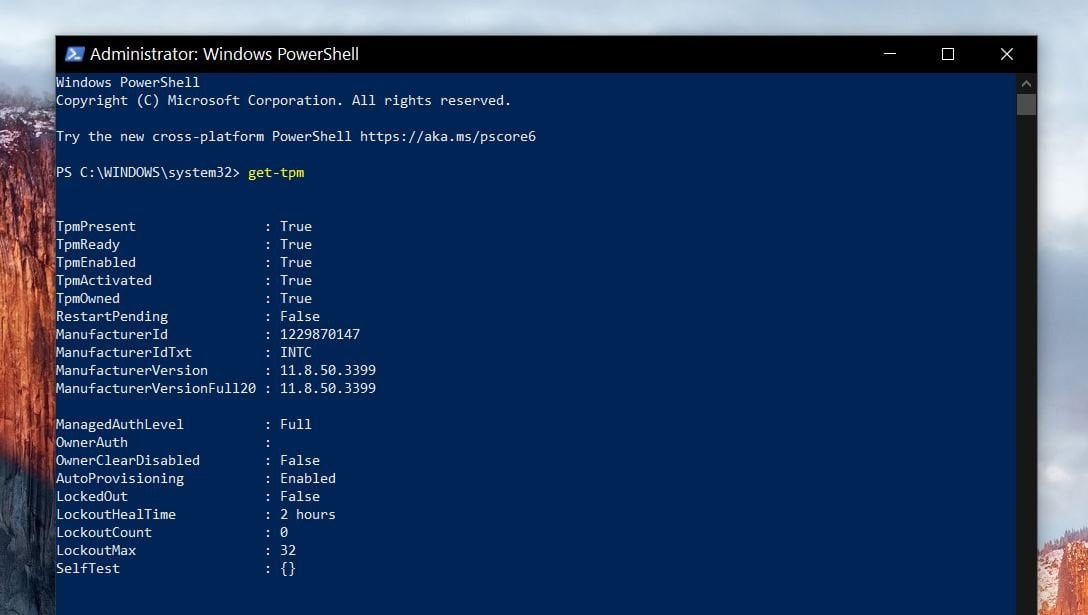
- Check whether TPM is present and enabled or not.
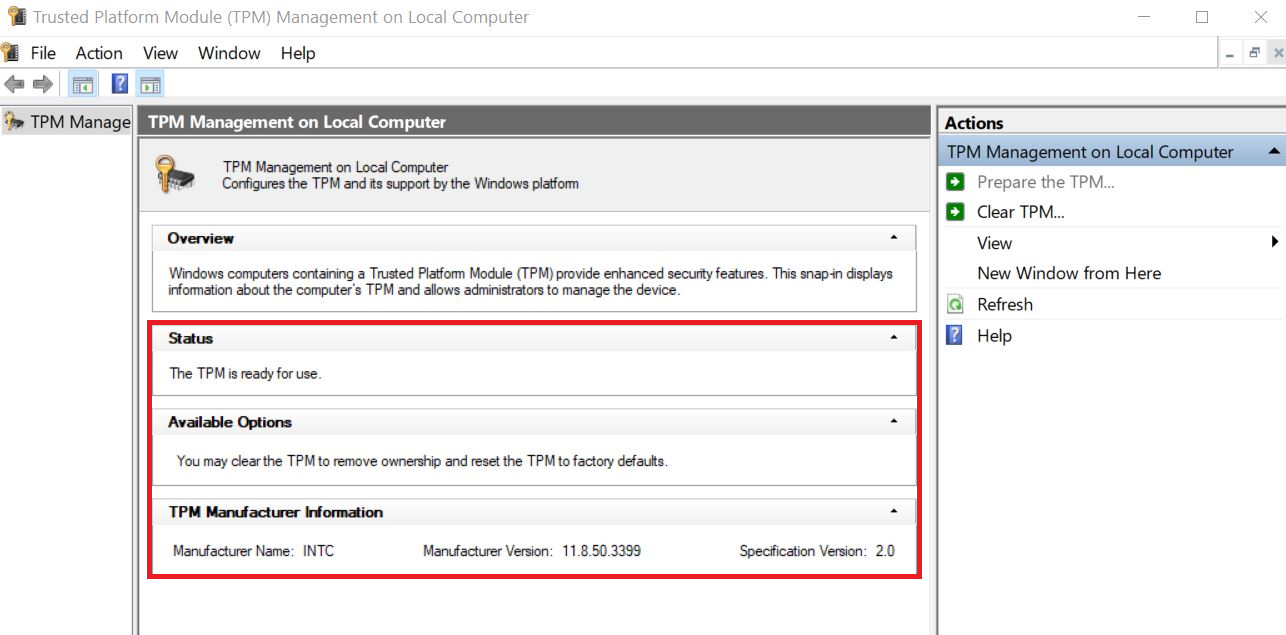
Alternatively, you can press Win + R, type tpm.msc, and press Enter. Once the TPM Management window opens, check the “Status” and your “TPM Specification Version.”
Enable TPM in BIOS Menu
If TPM is not enabled, you can enable it through the BIOS menu as follows:
- Shut down your computer.
- Reboot it and during startup, open the BIOS or UEFI menu by pressing F1, F2, F10, F11, DEL- the key varies depending on the manufacturer- check the user manual or manufacturer’s website for exact information.
- Once the BIOS or UEFI menu opens, tap the Security option.
- Here, look for TPM and check if it’s enabled. If not, enable it.
- Now, make sure to Save and Exit. Then, restart your PC.
You may find the option in Advanced Settings > Security > Trusted Computing or Settings > Miscellaneous > Trusted Computing on some devices.
3. Turn On Secure Boot
Secure Boot is a security standard to help make sure that a device boots using only software that the manufacturer trusts. This helps protect from malware and is usually available on all modern computers.
Your PC must support Secure Boot to be compatible with Windows 11.
Check if Secure Boot is Enabled
To check if Secure Boot is enabled on your computer:
- Press Windows+R to open the Run window.
- Type and enter msinfo32.
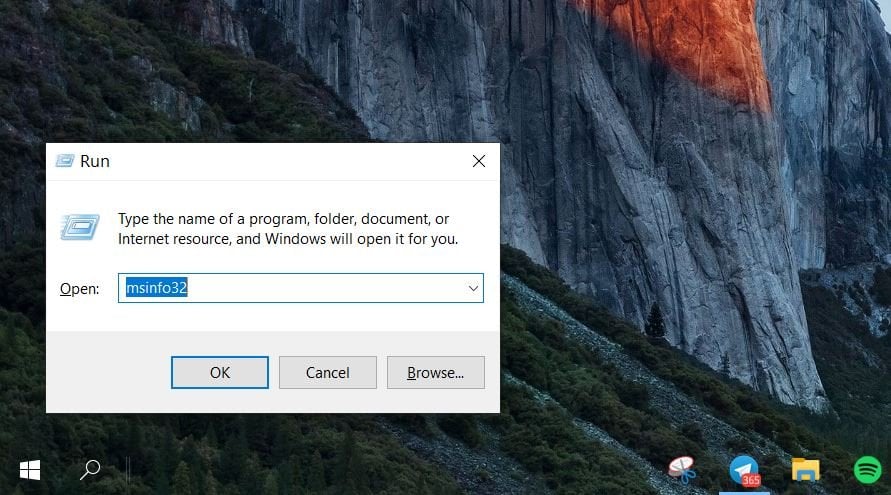
- Once the window opens, look for “Secure Boot State.”
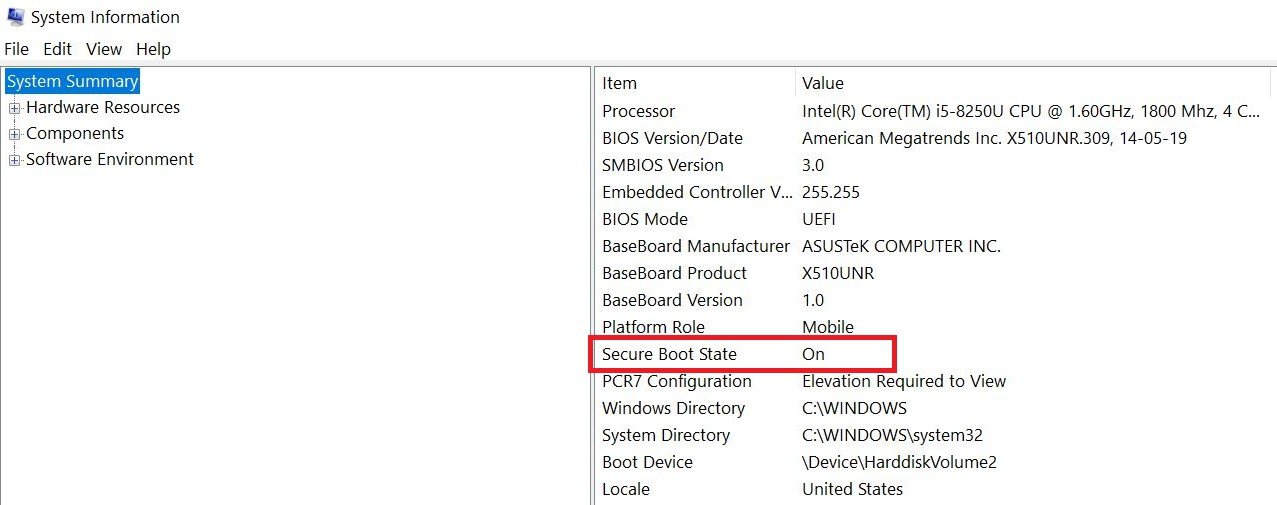
- Check whether it’s on or not. If not, enable it through the steps below.
RELATED TIP How to Hide Your Online Status From Friends on Facebook
Enable Secure Boot in BIOS Menu
Like TPM, you can enable Secure Boot from the BIOS menu.
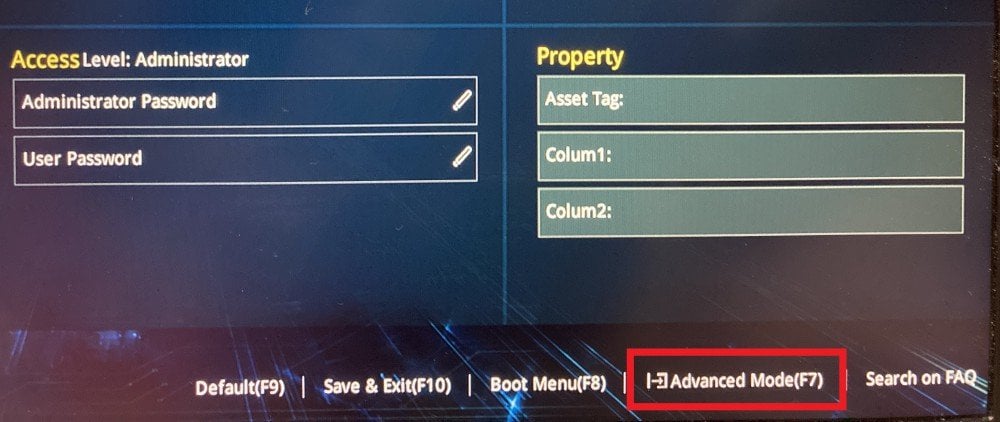
- Open the BIOS or UEFI menu by following the steps for TPM above.
- Go to the Boot tab. You may have to go to the Advanced mode.
- Look for the Secure Boot option. Check if it’s enabled.
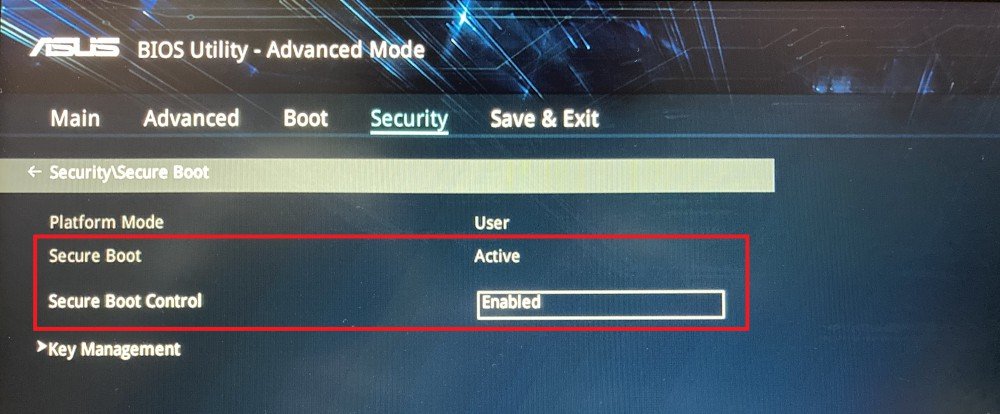
- If not, enable it.
- Save and exit, then restart your PC.
Finally, open the PC Health Check tool and check for compatibility to see if it passes the test. If not, recheck your computer specifications.
Anyways, once the Windows 11 builds are out, you’ll probably be able to bypass the requirements unofficially. However, if your PC is too old, certain features may not work properly.
Know Why Your PC is Not Compatible with Windows 11
WhyNotWin11 is a portable compatibility checker tool that scans your hardware and tells why your PC is not compatible with Windows 11. You can use this tool as an alternative to Microsoft’s PC Health Check tool:
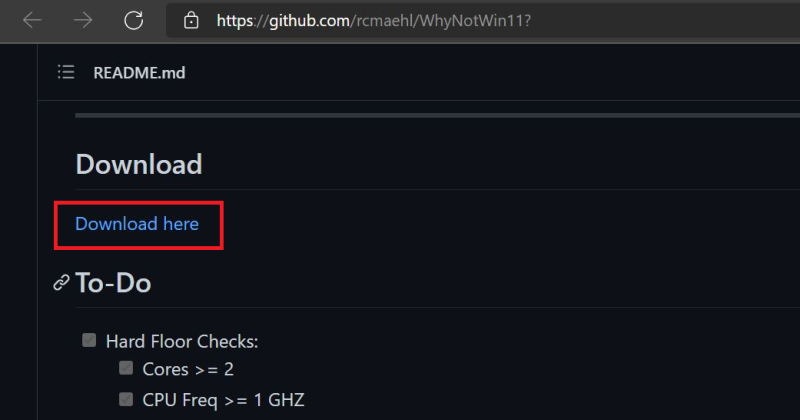
- Download WhyNotWin11 from GitHub.
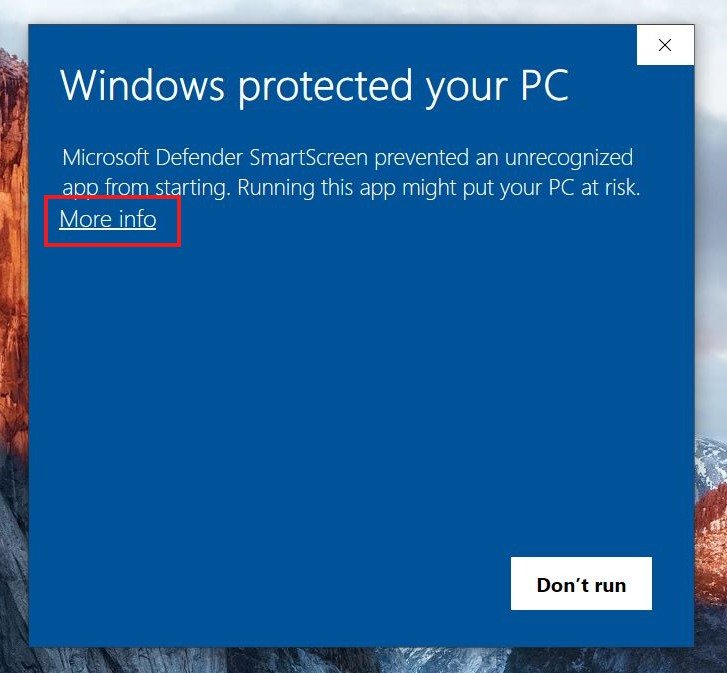
- If your browser blocks the app, click the three dots and keep the file.
- Similarly, Windows may flag the app and block the installation. Click More info and hit Run anyway.
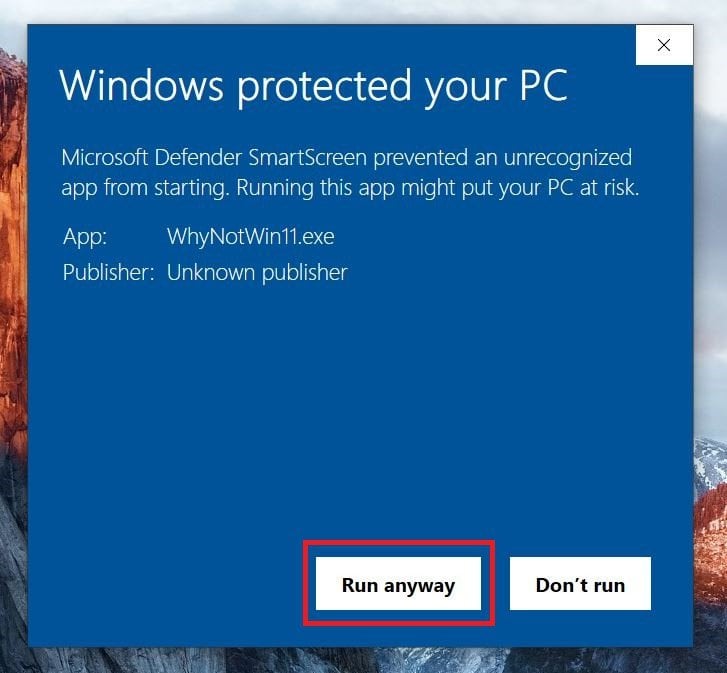
- Click OK when prompted to run the app.
- It’ll check and tell you whether your PC can run Windows 11 or not within no time.
- If your PC is incompatible, it’ll tell you the exact requirements that your machine is lacking.
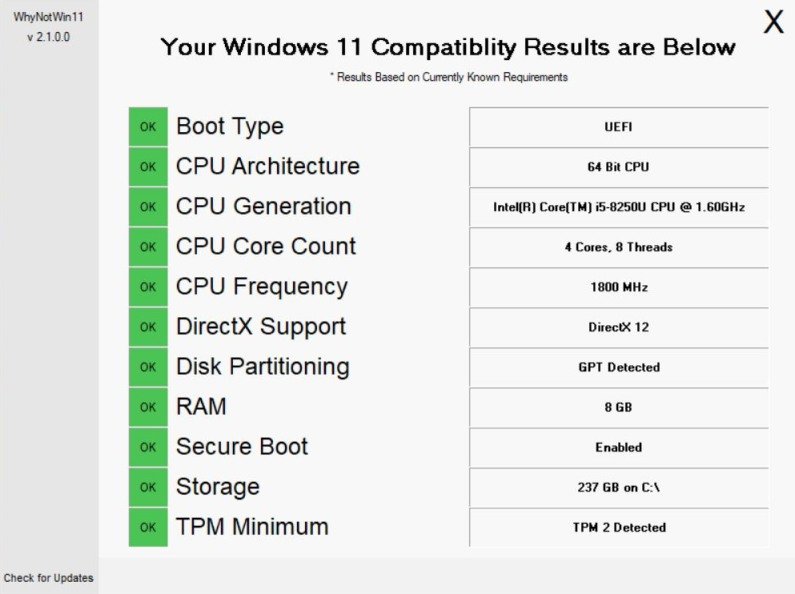
It works by matching your computer’s hardware with the currently known requirements:
- Boot Type
- CPU Architecture
- CPU Generation
- Core Count
- CPU Frequency
- DirectX Support
- Disk Partitioning
- RAM
- Secure Boot
- Storage
- TPM Minimum

If all the requirements are marked green and say “OK,” your computer is compatible to run with Windows 11. However, any of the parameters are shown in red with an X, then that’s what is causing compatibility issues. You can make changes if possible to make Windows 11 run on the device.
Wrapping Up
This was all about the “Your PC Can’t Run Windows 11” error in the PC Health Check app and how to fix it on your computer. I hope you now know what’s causing the issue or how to get rid of it.
Anyways, I’ll suggest you not break your head over the same. Just wait for Microsoft to update the Health Check app or use the WhyNotWin11 app to match compatibility. And, of course, you’ll always have the option to install Windows 11 unofficially.