
Ubuntu Linux is feature rich and comes with a curated selection of preinstalled software. Dig just a little bit deeper though, and you’ll find some features you ought to be using.
The Ubuntu Experience
Ubuntu needs no introduction. It’s the most popular Linux distribution for home users, hands down. It’s the distribution many Linux users cut their teeth on. Regardless of what distribution people might be using nowadays, chances are they started on Ubuntu, or at least detoured onto Ubuntu at some point in the Linux explorations.
Ubuntu is at the opposite end of the scale to distributions like Arch. Arch gives you a plain vanilla, minimalist, working Linux Installation. You need to install the software that you want, and only what you want. Ubuntu comes fully loaded with a wide range of applications.
The motivation for this is convenience and easing new users into the Linux world. They probably want to start doing something with their computer before they’ve unraveled the mysteries of finding and installing packages. Having instant access to all manner of applications suits them just fine.
Ubuntu also self-configures and makes sensible decisions about default settings for many things that the newcomer to Linux won’t be ready to make informed decisions about. But once you get a little bit of familiarity with Ubuntu, you might feel like spreading your wings a little and making your Ubuntu yours.
Here are five Ubuntu features you can use to make your use of Ubuntu more personal, or faster, or easier. These are features and applications you really should be using to improve your Ubuntu experience. Because some of them are GNOME-based, they’ll work on other distributions too.
1. GNOME Desktop Extensions
Setting your computer up so that it functions the way you want is important. Making sure it has the software you want to use and the directory structure you’re comfortable with improves your workflow.
For example, in the “Settings” application, selecting the “Ubuntu Desktop” option in the sidebar gives you access to a set of options that control how your desktop appears and behaves. You can decide whether to have a “Home” directory icon on the desktop or not, and the size and default location of desktop icons. GNOME Extensions take this a step further. They provide functionality that isn’t built into GNOME.
To use extensions you’ll need to install the Ubuntu Extension Manager.
sudo apt install gnome-shell-extensions-manager

To launch the Extension Manager, press the “Super” key and start to type “extension.” The “Super” key is usually located between the right-hand “Ctrl” and “Alt” keys. As you type, the Extension Manager icon appears.
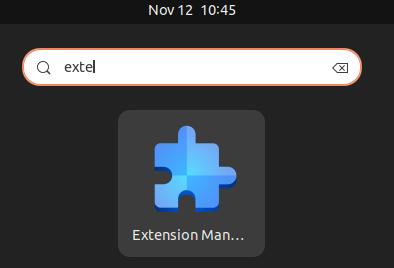
Click on the icon. The Extension Manager will launch.
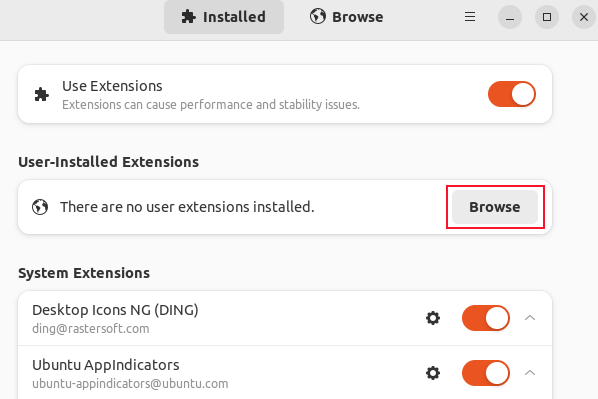
You can toggle all extensions on or off with a single slider. Each of the preinstalled system extensions has its own slider. Until you’ve installed some additional extensions, the “User-Installed Extensions” section is empty.
Click the “Browse” button to browse through a list of extensions.
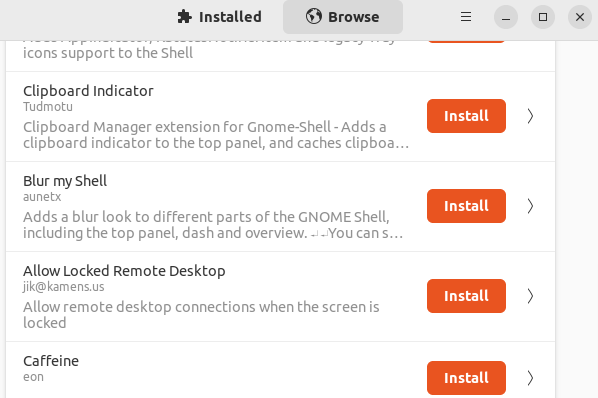
There are a lot of extensions. Using the search bar at the top of the window can be an easier way to locate extensions.
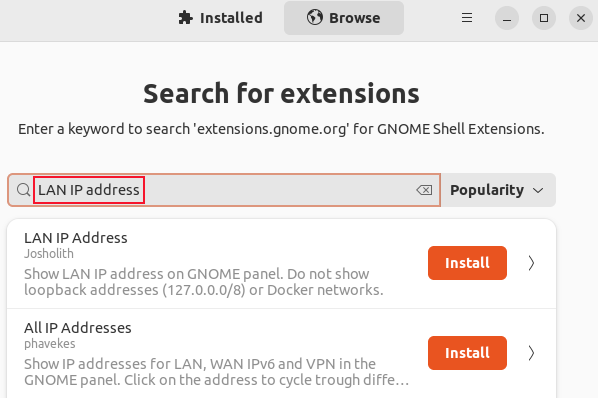
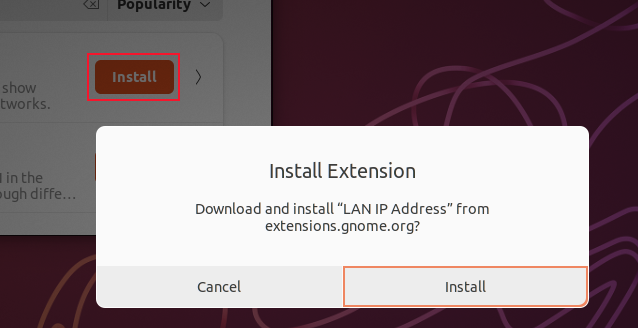
We searched for “LAN IP address”, and clicked the Install button to install it. We then had to click the “Install” button in a confirmation dialog.
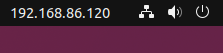
This extension displays the IP address of the computer in the top bar, near the system menu.
There are hundreds of extensions to choose from. Installing and uninstalling them with the Extensions Manager is easy.
2. The GNOME Tweaks Tool
To get control of settings that aren’t usually accessible, install the GNOME Tweaks tool.
sudo apt install gnome tweaks

To start GNOME Tweaks, press the “Super” key, and start to type “tweaks.” When the GNOME Tweaks icon appears, click on it.

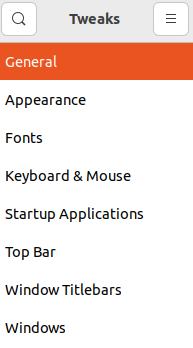
The options in the GNOME Tweaks sidebar are:
- General: On a laptop, you can choose to have the computer go into suspend mode when the lid is closed.
- Appearance: Lets you select desktop and lock screen background images, and to choose a theme for the cursor, icons, GNOME shell, system sounds, and legacy applications. Modern applications automatically follow your theme settings.
- Fonts: Lets you pick your system fonts, whether and how they are anti-aliased, and their scaling factor.
- Keyboard and Mouse: Lets you manage your input devices. For example, you can choose different keyboard layouts, and set the type of mouse acceleration you want to use.
- Startup Applications: This lets you choose to have your specified applications started when your computer boots up.
- Top Bar: Lets you format the clock in the top bar, and whether week numbers are shown in the clock’s calendar.
- Window Titlebars: Lets you move the maximize, minimize, and close buttons to the side you like, to show or hide the minimize and maximize buttons, and lets you set the action that happens for different mouse clicks on the window title bar.
- Windows: Lets you define the behavior of windows such as whether new windows are always centered, and how they react to mouse clicks or a hovering cursor.
3. Desktop Themes
One of the most impactful things GNOME Tweaks does is let you select a theme. Ubuntu comes with some preinstalled themes, and defaults to its Yaru theme. But there are thousands of free themes to choose from. The GNOME Look website is a good place to start looking.
You need to download your chosen theme. Note that there might be several downloads. A theme may provide the GTK theme, an icon theme, and a GNOME shell theme, and there might be dark mode and light mode versions of those.
GTK and GNOME shell themes need to go into your “~/.themes” directory. Icon themes need to go into your “~/.icons” directory. If these directories don’t exist, you can create them. There’s nothing special about them. Unzip the files into “~/.themes” and “~/.icons” directories.
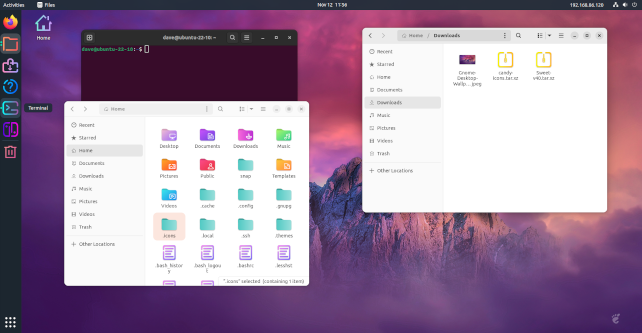
We downloaded the “Gnome Desktop Wallpaper 701”, “Sweet” theme, and “Candy” icons from the GNOME Look website.
We set the downloaded wallpaper as our desktop wallpaper by right-clicking it and selecting “Set as Background” from the context menu.
We extracted the icons TAR file and moved the extracted folder to the “~/.icons” directory. We extracted the theme TAR file and moved the extracted theme folder to our “~/.themes” directories.
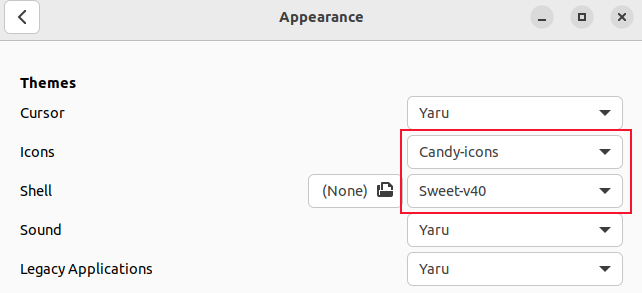
On the “Appearance” tab of the GNOME Tweaks tool, we selected “Candy-icons” from the “Icons” drop-down menu, and selected “Sweet-v40” from the “Shell” drop-down-menu.
As easy as that, we’d changed the appearance of our Ubuntu installation.
4. Custom Keyboard Shortcuts
Keyboard shortcuts let you define keystroke combinations to carry out actions for you. Although GNOME is a graphical desktop environment, being able to cause things to happen without moving your hands away from the keyboard is a great time saver.
Open the “Settings” application and navigate to Keyboard > View and Customize Shortcuts > Custom Shortcuts.
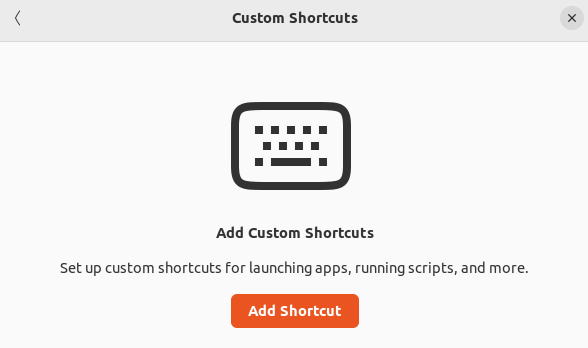
Click the “Add Shortcut” button. We’re going to set up a keyboard shortcut to open the file browser.
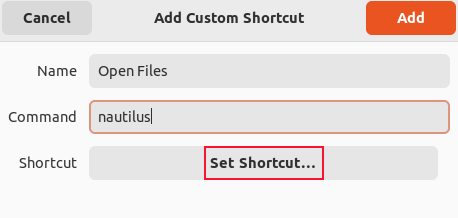
Type in a name for the shortcut. We’re using “Open Files.” In the command field, enter the command that you want to have executed when you invoke the shortcut. In our case, it’s “nautilus.” Click the “Set Shortcut” button.
GNOME waits for input. Make sure you press the keys you want to use at the same time, not one after the other.
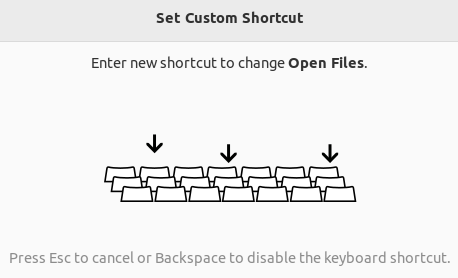
Press the key combination you want to associate with the keyboard shortcut. We’re using the Super key and the E key. GNOME shows you the name, command, and keystrokes that you have entered.
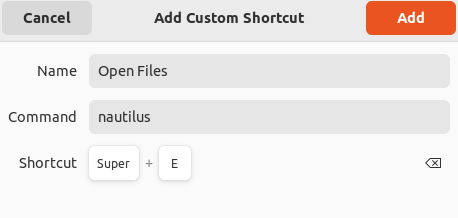
Click the “Add” button to save your shortcut. Now, whenever you press the Super and E key together, your file browser will open.
You can set as many keyboard shortcuts as you like, and each one saves you a little time and effort.
5. Deja-Dup Backups
Backups are vital. Everyone knows it. If you have a disaster and you don’t have backups, you’re going to lose data. That might be important documents or cherished photographs. The demons of failed hard drives don’t care.
Despite knowing good backups are vital, I keep meeting home users who don’t bother to back up their data. And yet on Ubuntu it is so simple to create backups. The simpler it is to back up, the more likely you are to do it. And if you can set your backups to happen automatically, even better.
The Déjà Dup backup software lets you back up to another folder or drive on the same computer, to an external drive, or to a network location. You can also back up to Google Drive or to Microsoft OneDrive.
Install Déjà Dup with this command:
sudo apt install deja-dup

If you want to back up to Google Drive you’ll also need this library:
sudo apt install python3-pydrive

To launch Déjà Dup, press the “Super” key and start to type “deja.” As you type, the Déjà Dup icon appears.
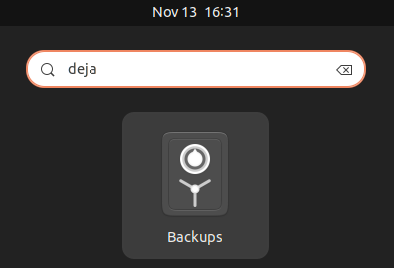
Click the icon. The Déjà Dup application launches.
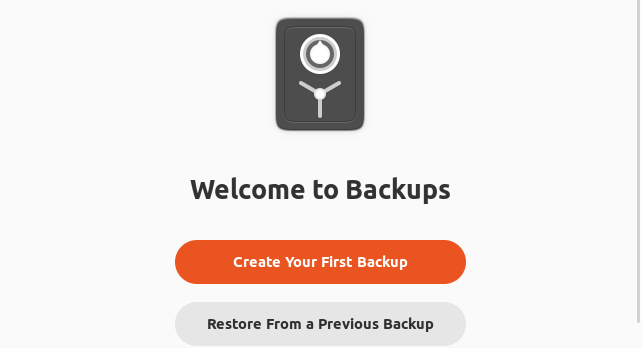
Click the “Create Your First Backup” button.
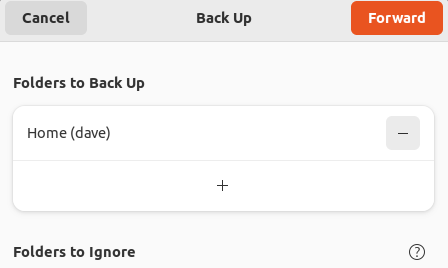
Déjà Dup is a personal backup tool. It backs up your personal data, it isn’t a system restore tool. So by default, Déjà Dup backs up your home directory. Click the “Forward” button.
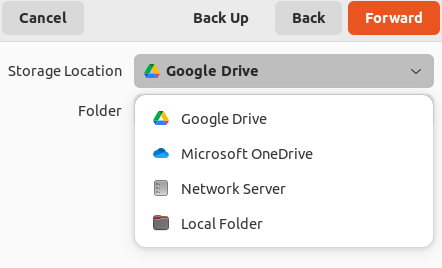
Select a location to for your backup. If you have an external USB drive and it is plugged in, it will show up in this menu too. We’re going to select Google Drive.
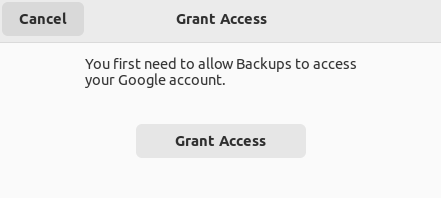
You need to authorize Déjà Dup to access your Google Drive. Click the “Grant Access” button. Your default web browser opens and prompts you to log into Google Drive. When you’ve done this, Déjà Dup continues.
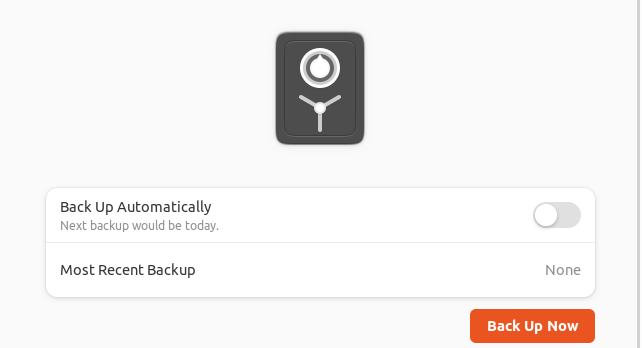
You can set up automatic backups, or choose to back up now. Click the “Back Up Now” button to back up immediately.
Stretch Your Wings
Ubuntu is great, straight out of the box. But by adding or tweaking features and apps, you can make your use of Ubuntu smoother and tailored to your own preferences. Removing operation friction is always a win.