
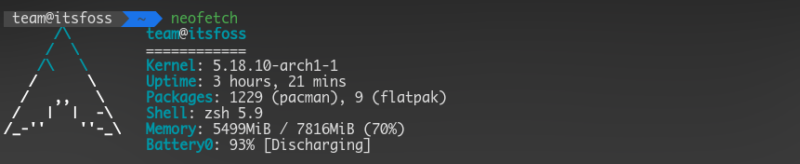
Neofetch is a simple command-line tool that displays an ASCII logo of the distribution along with a few system information in the terminal. It looks beautiful and you can easily show which distribution, desktop environment, and themes you are using when you share the screenshots of your desktop in various Linux communities.
For most users, that’s all there is to Neofetch.
But Neofetch is highly customizable. You can display any ASCII logo instead of the distribution’s, filter out the information to display or replace the logos with cowsay messages.
Interesting, isn’t it? Before I show you how to customize Neofetch, let me quickly go on installing it first, if you haven’t installed it already.
Installing Neofetch
Neofetch is available in the official repo of all major Linux distributions. To install it in Ubuntu and Debian-based distros, use:
sudo apt install neofetchFedora and Red Hat users can use the DNF package manager:
sudo dnf install neofetchArch and Manjaro users can use the pacman command:
sudo pacman -S neofetchopenSUSE users can use the Zypper command:
sudo zypper install neofetchOnce you have it installed, let’s see how to use it.
Using Neofetch
In its simplest form, enter the neofetch command in the terminal:
neofetchAnd it will show you the default output that consists of the ASCII logo of your distribution and some system information.
That’s simple. But you can configure it to show some additional information or hide some.
1. Display logo of another distro
By default neofetch shows the logo of the current distribution. No surprises there.
But you can have the ASCII logo of a different distribution than yours. Surprise!
Here is the Pop!OS logo in Kubuntu system.
To do that, you have to use the –ascii_distro flag.
neofetch --ascii_distro distronameYou know what! You can even display ASCII logo of Windows in Neofetch.
2. Show a smaller logo
The list of distros having ASCII art is listed in the man page of Neofetch. Now, there also exists a sublist of distros, which has a small ASCII art. That list can also be found in its man page.
To achieve this:
neofetch --ascii_distro <distroname>_smallYou can make it permanent by editing the respective line on the config file.
If a distro logo doesn’t have a small version, it displays the bigger one. And if you made a typo, it shows the Tux logo.
3. Hiding Multiple Infos from view
In Neofetch, there is a lot of information is shown by default. You don’t have to stick to them if you don’t want to.
You can hide some information from the display. You can do that in two ways: either by providing options through the command line or by editing the configuration file.
I will prefer editing the config file, because it is one time and will take effect immediately, and no need to type it repeatedly.
Open neofetch config with Vim or Nano or your favorite editor using:
nano .config/neofetch/config.conf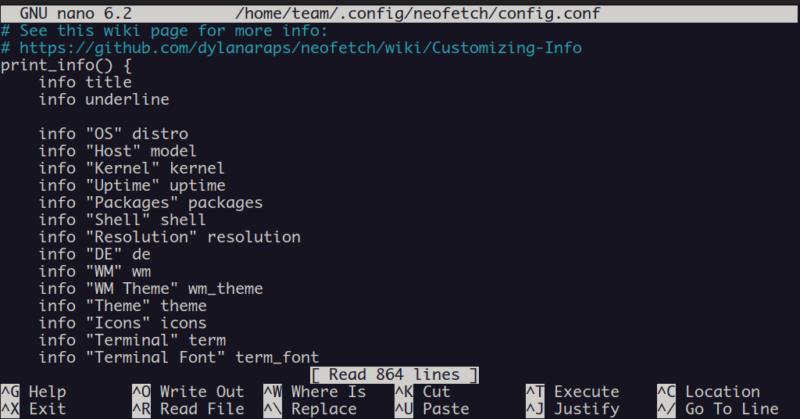
Here you can find multiple lines referring to “info”. Comment those that you want to hide and uncomment those to show. To comment, just add # at the beginning of a line.
Save the file and exit. Next, Neofetch run will be the modified one.
The same config file can be tweaked to show users in the system, CPU temperatures, battery information, etc.
4. Hide the logo or the info
You can tweak Neofetch to display only the system information and hide the ASCII logo.
neofetch --offAlso, you can have Neofetch with only the ASCII logo, without system information:
neofetch -L5. Use a custom image as ASCII logo
Neofetch supports custom images to be applied to the ASCII logo part. This is achieved by several backends. Images can be applied through jp2a, caca, sixel, w3m backends.
By using jp2a, you can have your own image as an ascii art in neofetch.
To do this, use Neofetch like this:
neofetch --jp2a /path/to/imageAnother type of output that is supported is the caca backend. On the terminal, enter:
neofetch --caca /path/to/image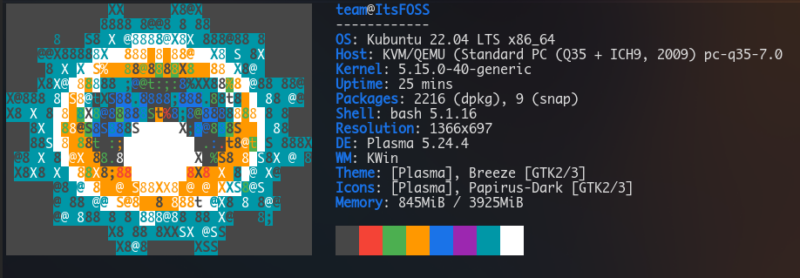
There are other backends also, which can be found on its man page.
6. Add gradient colors by using lolcat with Neofetch
With lolcat, you can have a colorful neofetch. Install lolcat using your distribution’s package manager first:
sudo apt install lolcatOnce lolcat is installed, pipe neofetch to lolcat to get a rainbow effect:
neofetch | lolcat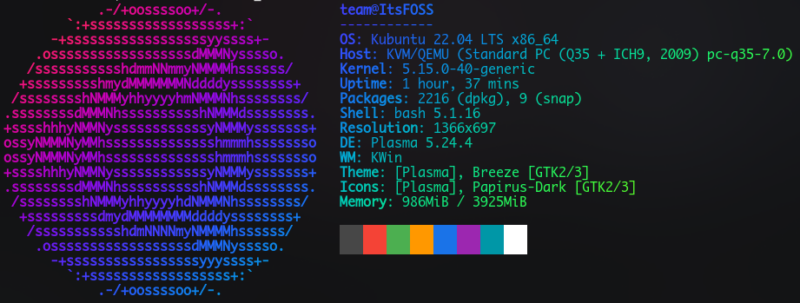
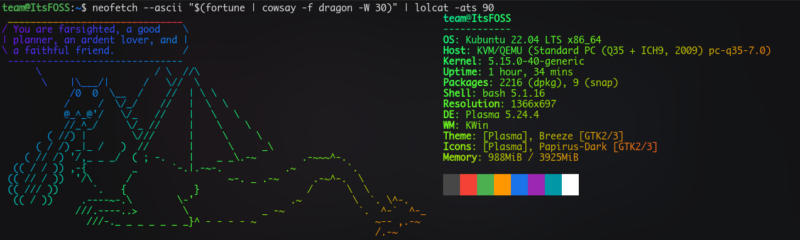
7. Use cowsay and fortune instead of logo
With the latest releases of Neofetch, you can now display cowsay and fortune in place of the ascii logo. For more fancy, the same output can be piped to lolcat.
neofetch --ascii "$(fortune | cowsay -W 30)" | lolcatCowsay program can also display other animal figures by specifying the cowfile with -f flag.
For more fun and if you have some time to invest, type the below code and see an animated neofetch appearing:
neofetch --ascii "$(fortune | cowsay -f dragon -W 30)" | lolcat -ats 608. Animate it
Speaking of animation, you can animate the entire Neofetch output with the pv command. It consumes a lot of time but if you are doing a screencast and want to amuse people, this could do the trick.
With pv command installed on your system, use it in conjugation with Neofetch:
neofetch | pv -qL 100This will begin typing character by character the neofetch art and info. Adjust the animation speed by changing the value from 100. Higher the value, faster is the animation.
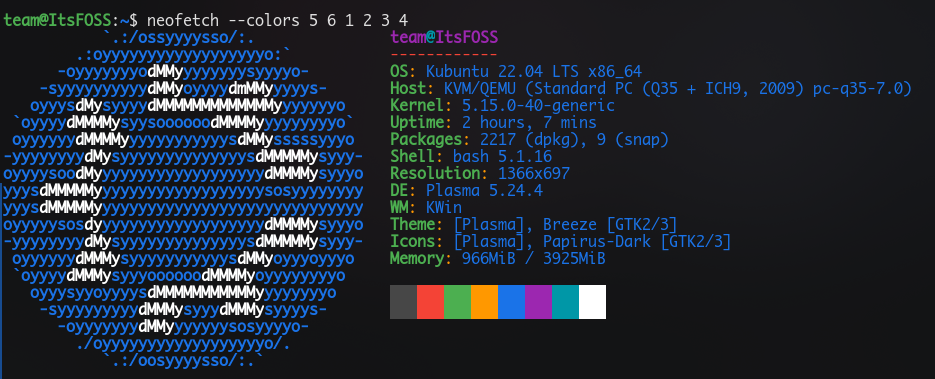
9. Custom colors for the title, underline and info panel
You can change the colors for the informational part. The parts of the informational panel are in the order: title, @, underline, subtitle, colon, info.
You can give a different part to each one of them by adding a color code in their position like this:
neofetch --colors 3 4 5 6 2 1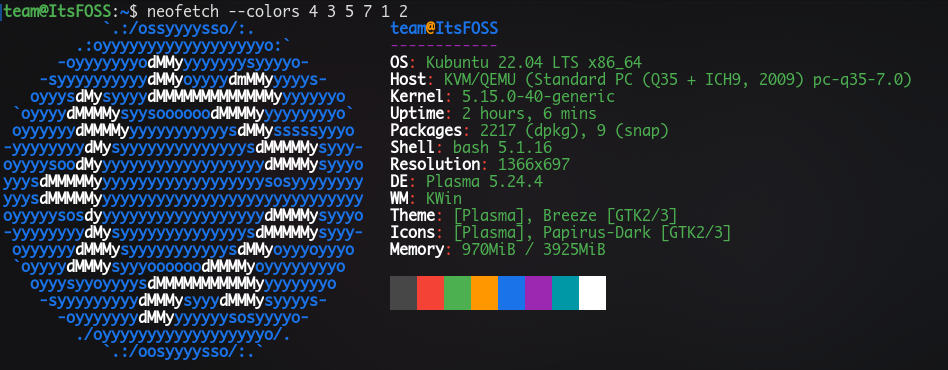
Wrapping Up
There are many more ways to tweak Neofetch. You can always look into its man page.
As I said earlier, for most users Neoetch is just a simple, no-option command to pretty display system information and distribution logo in the terminal.
Even I never bothered to look into customizing Neofetch. It was my teammate Sreenath who likes experimenting with these things and he came up with the idea and I had a feeling that It’s FOSS readers like you might find it amusing.
Over to you now. Did you find some surprising new usage of Neofetch? Do you know some other cool trick? Share it with us in the comments.