
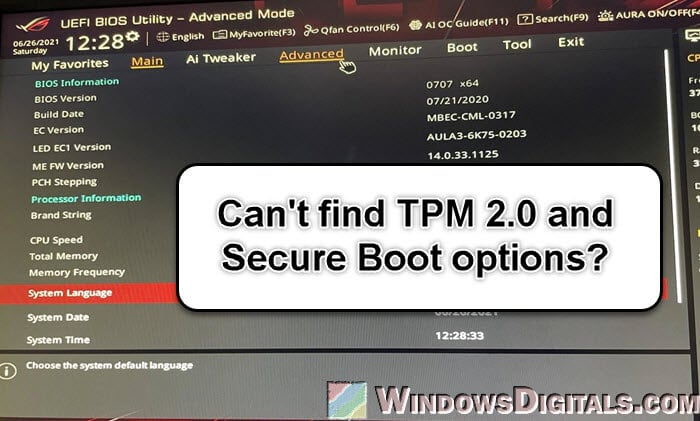
When setting up your computer for the latest software and games, you might encounter an issue where the software requires TPM 2.0 and Secure Boot. These security features are not just about protecting your system; they’re increasingly becoming a requirement for running certain applications and games. However, it’s not uncommon to find these options missing from your BIOS or UEFI. This can be confusing, especially when you’re trying to meet the necessary system requirements. In this article, we’ll discuss why TPM 2.0 and Secure Boot might be elusive in your BIOS settings and how you can resolve this issue.
Also see: How to Enable TPM 2.0 and Secure Boot on ASRock
What are TPM 2.0 and Secure Boot?
Before we go into the possible reasons behind their absence in the BIOS or UEFI, let’s briefly understand what TPM 2.0 and Secure Boot are and why they’re important.
TPM 2.0 (Trusted Platform Module): This is a hardware-based security feature that stores cryptographic keys and is used for secure boot, disk encryption, and more. It’s a critical element for overall system security and integrity, especially for running newer operating systems and software that require enhanced security measures.
Secure Boot: Part of the UEFI (Unified Extensible Firmware Interface) specification, Secure Boot ensures that your PC boots using only software that is trusted by the PC manufacturer. When enabled, it prevents malicious software from loading during the system start-up process, offering a first line of defense against a range of security threats.

Both TPM 2.0 and Secure Boot are not just about protecting your computer; they’re increasingly becoming prerequisites for running certain advanced software and modern games. These features ensure that your system meets the high-security standards required by the latest applications, making their presence in your BIOS crucial.
Learn more: Enabling TPM 2.0 and Secure Boot on Gigabyte Mobo
Motherboard doesn’t support TPM 2.0 and Secure Boot
One of the primary reasons you might not see TPM 2.0 and Secure Boot options in your BIOS is motherboard compatibility. Here’s what you need to know:
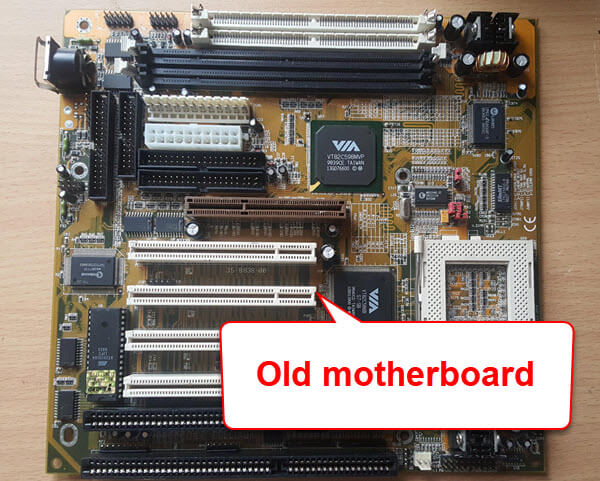
Older motherboards
If your motherboard is relatively old, it might not support TPM 2.0 or Secure Boot. These features became standard in more recent years, so motherboards manufactured before this shift may lack the necessary hardware or firmware support.
To determine if your motherboard supports these features, you can refer to the product specifications on the manufacturer’s website or consult the user manual. This information is often listed under security or boot options.
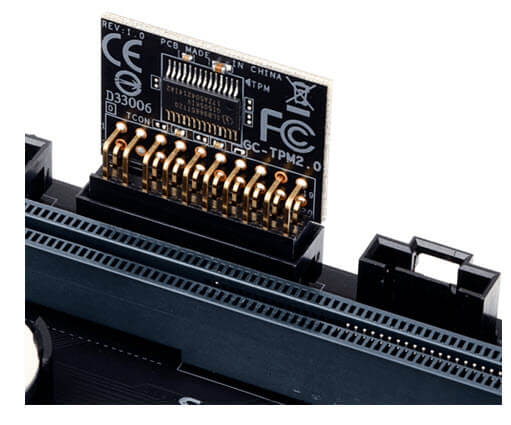
External TPM modules
For some older motherboards that don’t have an integrated TPM, there’s sometimes the option to add an external TPM module. This module can be purchased and installed in a compatible slot on your motherboard, provided the firmware supports it.
In summary, if you have an older motherboard, the absence of TPM 2.0 and Secure Boot options in your BIOS could simply be due to a lack of support from the hardware. In such cases, your options may include upgrading your motherboard to a newer model or exploring the possibility of adding an external TPM module, depending on your specific hardware and needs.
Pro tip: In-place Upgrade of Windows 11 on Unsupported Hardware
Different names for TPM and Secure Boot in BIOS
Another reason you might not find TPM 2.0 and Secure Boot options in your BIOS is due to them being listed under different names. This can vary depending on your motherboard’s manufacturer and the BIOS version. Here’s what you should look out for:
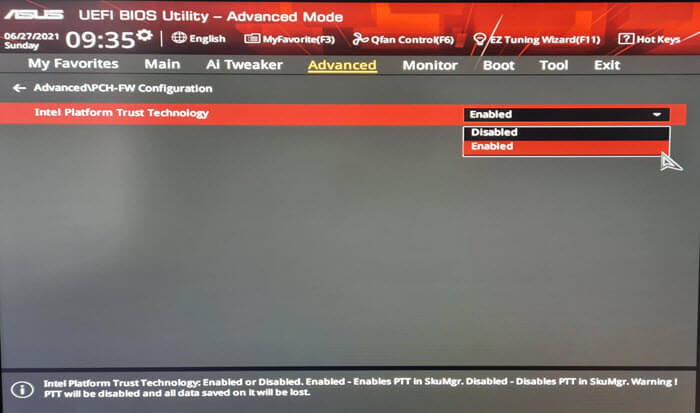
TPM 2.0 alternatives
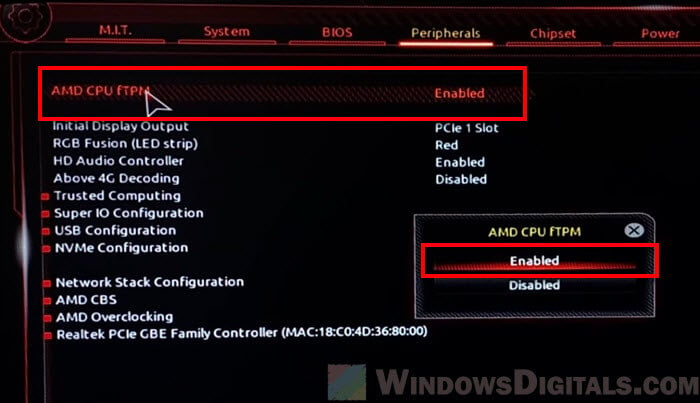
- On Intel motherboards, TPM might be referred to as PTT (Platform Trust Technology).
- AMD motherboards might label it as AMD fTPM (firmware TPM) or PSP TPM.
Since these settings can be nestled under various menu layers, it’s crucial to thoroughly navigate through your BIOS. Look under sections like “Security”, “Advanced”, or “Boot”.
Consulting the manual
If the BIOS terms are confusing, the motherboard’s manual is your best resource. It will have the exact terminology used and the location of these options in the BIOS. Manufacturers’ websites often have digital copies of manuals if you don’t have the physical copy.
Related resource: Virtualbox Windows 11: This PC doesn’t meet the requirements
Conditions for displaying Secure Boot option in BIOS
Secure Boot might not be immediately visible or adjustable in your BIOS due to specific conditions that need to be met first. This is particularly common with certain motherboard brands, like Gigabyte. Here’s what you need to know:
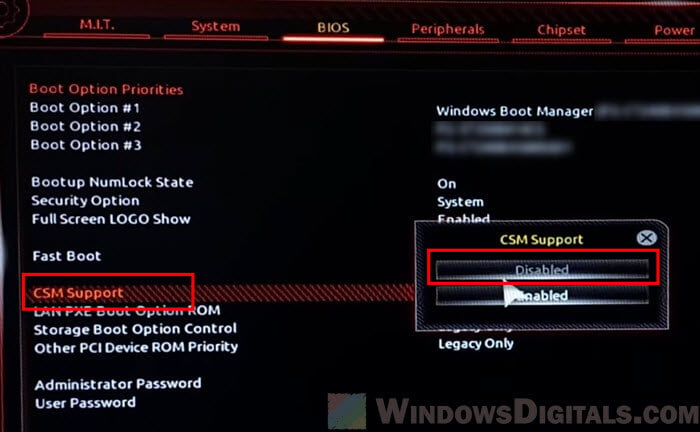
Disabling CSM (Compatibility Support Module)
On some motherboards, like Gigabyte, you need to disable ‘CSM Support’ to make the Secure Boot option visible or changeable. CSM is for older OS compatibility and can hide Secure Boot when enabled.
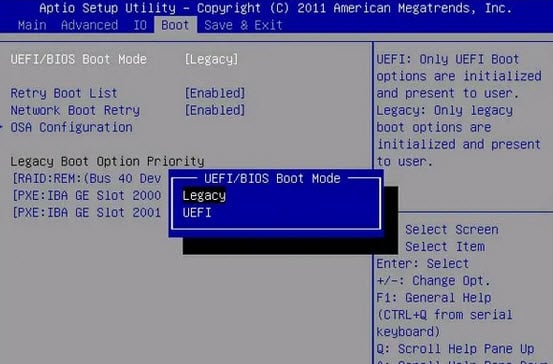
Legacy to UEFI mode switch
Switching from Legacy BIOS mode to UEFI mode is required on some systems to enable Secure Boot. This option is typically found under ‘Boot’ or ‘Storage’ settings.
Operating system type selection
In certain BIOS setups, specifying the operating system type (e.g., ‘Windows UEFI mode’) is necessary to access Secure Boot options.
Setting an admin password
Some systems require setting an Administrator password in the BIOS to unlock additional features, including Secure Boot.
Clearing Secure Boot keys
Clearing existing Secure Boot keys may be required before enabling or configuring Secure Boot on some motherboards.
Disabling fast boot
The “Fast Boot” feature might need to be disabled to access a full range of BIOS options, including Secure Boot settings.
It’s important to note that these steps can vary depending on your motherboard model and BIOS version. If you’re unsure, always refer to the manufacturer’s manual or support website for guidance specific to your hardware. This step is crucial for ensuring that your BIOS settings align with the requirements for running modern, UEFI-compliant software and operating systems.
Updating BIOS/UEFI firmware version for TPM 2.0 and Secure Boot support
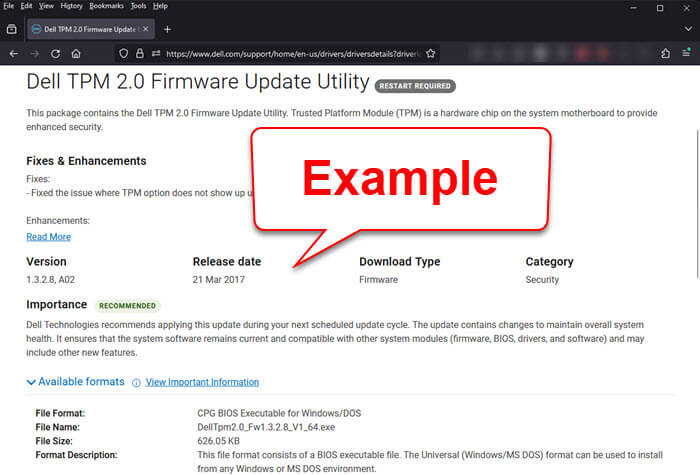
If your motherboard supports TPM 2.0 and Secure Boot but these options are not visible, it might be due to an outdated BIOS/UEFI firmware. In such cases, checking your motherboard manufacturer’s website for firmware updates can be a key step. Manufacturers often release new BIOS versions that enhance hardware compatibility and introduce support for features like TPM 2.0 and Secure Boot.
When you find that a newer BIOS version is available, and its release notes mention support for TPM 2.0 or Secure Boot, updating to this latest firmware is advisable. However, it’s important to be aware of the risks associated with BIOS updates. An incorrect update process can potentially lead to motherboard failure, rendering your computer inoperable.
Therefore, while updating your BIOS can unlock essential features and improve system stability, it should be approached with caution. If you’re not confident in performing the update yourself, seeking professional assistance is a wise choice to ensure the process is carried out safely and correctly. Remember, keeping your BIOS updated not only helps in enabling crucial features but also enhances the overall security and functionality of your system.
A brief guide to enabling TPM 2.0 and Secure Boot
Here’s a general step-by-step guide on how to enable TPM 2.0 and Secure Boot in most motherboards:
Enabling TPM 2.0:
- Access your BIOS settings during system startup, typically by pressing a key like Del, F2, or F12.
- Navigate to the security settings section. The exact location and naming can vary, so refer to your motherboard’s manual if needed.
- Look for the TPM option, which might be listed under different names like Intel PTT (Intel) or AMD fTPM (AMD).
- Enable the TPM setting and save your changes.
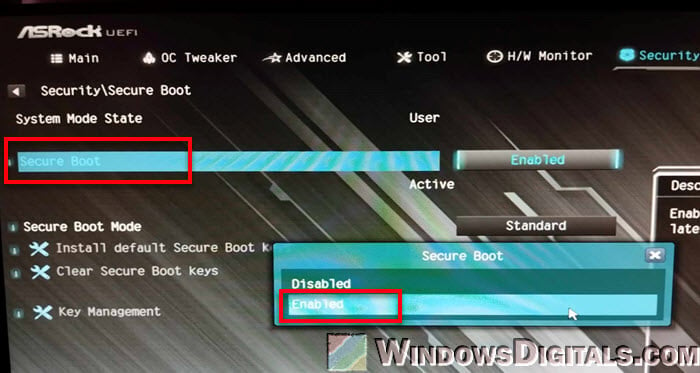
Enabling Secure Boot:
- In the BIOS, go to the boot or security settings section.
- Ensure that your system is set to UEFI mode, not Legacy or CSM, as Secure Boot requires UEFI.
- Find the Secure Boot option. If it was not visible before, ensure you’ve met the conditions like disabling CSM, as discussed earlier.
- Enable Secure Boot and save your changes.
After enabling these features, your system will be aligned with modern security standards, crucial for running certain software and games that require TPM 2.0 and Secure Boot (such as Valorant). If you encounter any issues or the settings are still not visible, consulting your motherboard’s manual or contacting the manufacturer’s support can provide model-specific guidance. These settings are part of your system’s security framework, so it’s important to understand their implications and configure them correctly.
Final thoughts
In most situations, if you’re struggling to find TPM 2.0 and Secure Boot options in your BIOS or UEFI, it’s likely because your motherboard doesn’t support them. The simplest first step is to double-check your motherboard’s manual for any mention of these features. If the manual isn’t clear or you don’t have it on hand, reaching out to online communities like Reddit can be a great way to get insights from others who have the same model. Often, someone else has faced the same issue and can offer valuable advice.
If you’re confident that your motherboard does support TPM 2.0 and Secure Boot but you still can’t find these options, remember there could be specific settings hiding or locking these features. As we’ve discussed, things like switching from Legacy to UEFI mode, disabling CSM, or even updating your BIOS can reveal these options. It’s a matter of understanding your specific motherboard’s requirements and navigating its BIOS setup accordingly.
So, take your time to explore these settings, and don’t hesitate to ask for help if you need it. With the right approach, you’ll be able to configure your system for optimal security and performance.