
If you’re worried about updating your Mac to macOS Big Sur or Catalina (perhaps due to incompatible software), or if you are testing a beta version of macOS Big Sur and don’t want to risk messing up your system, you don’t have to install the update on your Mac at all – you can install it on an external hard drive instead.
Installing the Mac operating system on an external drive is the safest way to get a good look at a new OS without changing anything on your Mac. It’ll leave your current configuration intact and allow you to play around with Big Sur or try out the beta of the next version of macOS.
In this tutorial we explain how to run macOS from an external drive in four simple steps:
- Prepare the external drive for the installation using Disk Utility.
- Get the macOS install files – we’ll show you how.
- Install macOS on the external drive.
- Run macOS on the external drive by pressing Alt/Option at start up on an Intel-powered Mac, or pressing and holding the on switch on an M1 Mac.
What you need
Make sure that you opt for flash storage because Apple’s APFS (Apple file system) is optimized for SSD and the computer will be sluggish if you boot from a hard drive.
It’s also worth investing in a USB C or Thunderbolt 3 drive as this will offer the fastest connection.
If you have one of Apple’s M1 Macs your choice is slightly more limited. The M1 Macs have a problem with the USB interface so you may encounter problems if you try to install Big Sur on and boot from SSDs connected via USB. This was worst in Big Sur 11.0.1, got better with 11.1 and even better in 11.2. So there seems to be a problem Apple’s developers are actively working on fixing, they just haven’t managed to completely fix it yet.
If you can’t wait for Apple to fix the problem, you could try a different port. For some it has worked to install on a disk connected via USB-A connector but not USB-C, but the situation has been vice versa for others. However, we wouldn’t recommend using USB-connected SSDs to boot macOS on an M1 Mac at the moment, because even if it works now it may not the next time Apple updates macOS.
A better solution might be to use a drive that uses Thunderbolt rather than USB (the port looks the same, but the standard is different). It should be connected directly to the computer, not via a dock.
That drive will need a good amount of space (back when we started running Mojave beta on a 32GB stick we found it wasn’t enough once we started using iCloud Desktop and other features that meant that our data started being downloaded).
Luckily you can get hold of a USB flash stick pretty cheaply, such as this San Disk USB Type-C drive with 256GB for £30.93 (RRP £59.99). It’s a bit harder to find a Thunderbolt powered SSD, and unfortunately they are a lot more expensive. One example is the Samsung X5 Thunderbolt 3 SSD, £291.36 from Amazon. (RRP £344.99).
If you want to use the external installation as if you are running it on your Mac we suggest you get the biggest USB C/Thunderbolt 3 drive you can afford.
If you were hoping to use this boot drive to run older versions of macOS on M1 Macs sadly it isn’t possible as the M1 Mac can only run the ARM version of Big Sur.
For buying advice, take a look at our guide to the best external drives for Mac.
Step 1: Prepare the drive for installation
Follow these instructions to prepare your external drive:
- Connect the external drive to your Mac.
- Launch Disk Utility (press Cmd + spacebar and start to type Disk Utility).
- Before this next step – if you are running High Sierra or later you will need to click on the View drop down below the close/minimise buttons. Choose Show All Devices from the options. Now you will see the root drive in addition to the external volume below it.
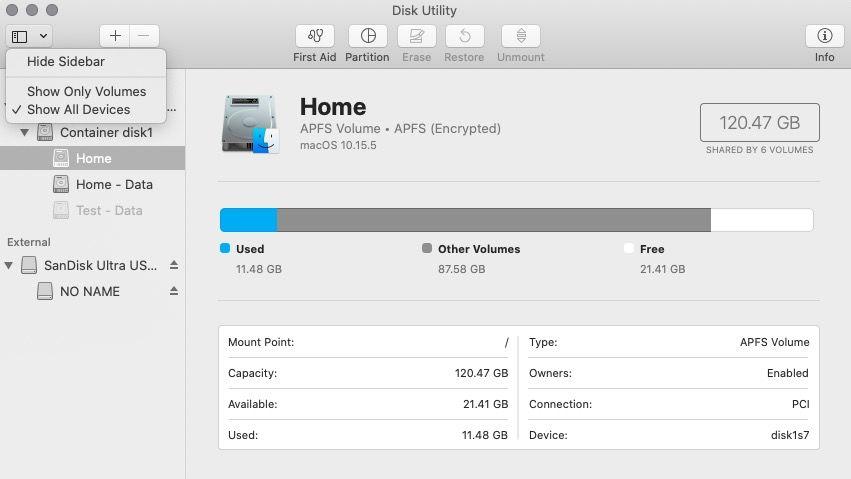
- Select the External drive in the sidebar (the next step won’t work if you only select the volume – in the screenshot above you would need to select the SanDisk, not the NO NAME).
- Click on Erase (you need to erase the drive so you can reformat it properly).
- Give your drive a name such as “macOS Big Sur” or “USB”.
- Choose Mac OS Extended (Journaled) as the Format.
- Choose GUID Partition Map as the Scheme.
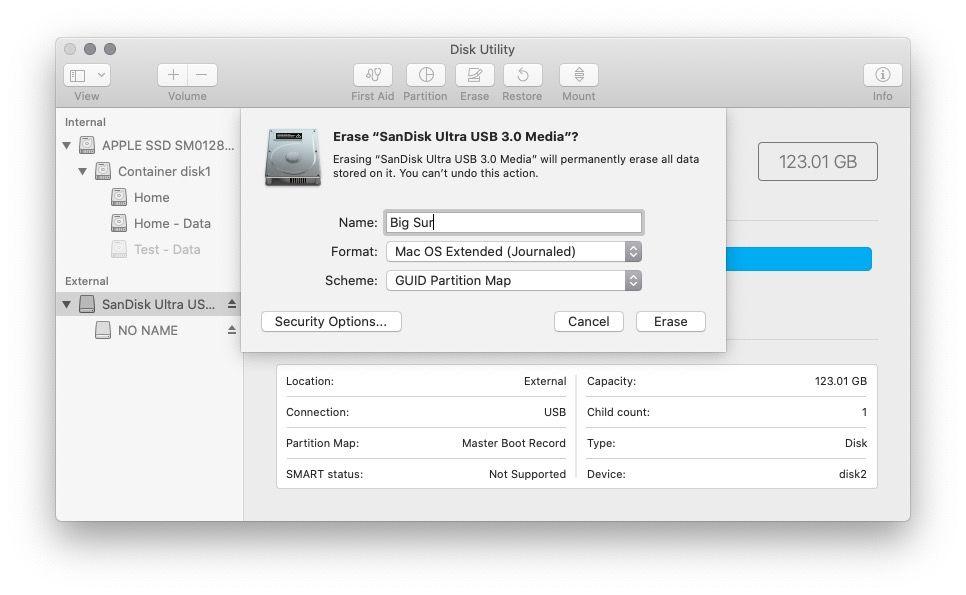
- Click on Erase.
- Wait while Disk Utility creates the partition and sets up the drive (this can take a few minutes).
- Then click Done.
Now you will see that your external storage has been renamed with the name you choose and it will be ready for you to install the macOS on it – but there is something else you need to do first.
Step 2: Get the macOS install files
This step will depend on whether you want to run a macOS beta, a full version of macOS, or even an older Mac OS X.
Here’s how to get the macOS Big Sur or Catalina installer:
- To download the macOS Big Sur installer click here to go to the Big Sur page on the Mac App Store. To download the macOS Catalina installer click on this link to the Mac App Store.
- Click on Get to download the installer.
- Software Update will search and then, if you are already running Big Sur (or Catalina), if will ask you to confirm that you do want to download macOS Big Sur (or Catalina).
- Click on Download.
Remember that you just want to download the software, not install it, at this stage.
If it’s a full version of an older version of macOS you are after, we explain how to get the installation files for macOS here.
If you are after a beta of macOS, you will need to sign up for the beta on your Mac and download the beta files. Once you have the files you’ll want to install them on the external drive rather than your Mac, so be careful. We have a complete guide to getting the macOS beta here. The beta files are about 12GB.
Step 3: Install macOS on the external drive
Now to install the beta or alternative version of the Mac operating system on your external drive.
- Open a finder window, go to Applications and find the Catalina or Big Sur installer (or whichever version of macOS you want to run). You can also find it by using Spotlight (press Command + spacebar and start typing the name of the OS)
- Click on the installer.
- A window should open (check the Dock if not). It will invite you to set up the installation of macOS Big Sur (or whatever) click Continue.
- Agree to the software licence agreement.
- Next, and this is important, click on Show All Disks. Do not click on Home as you don’t want to install on your main drive.
- Click on the external drive.
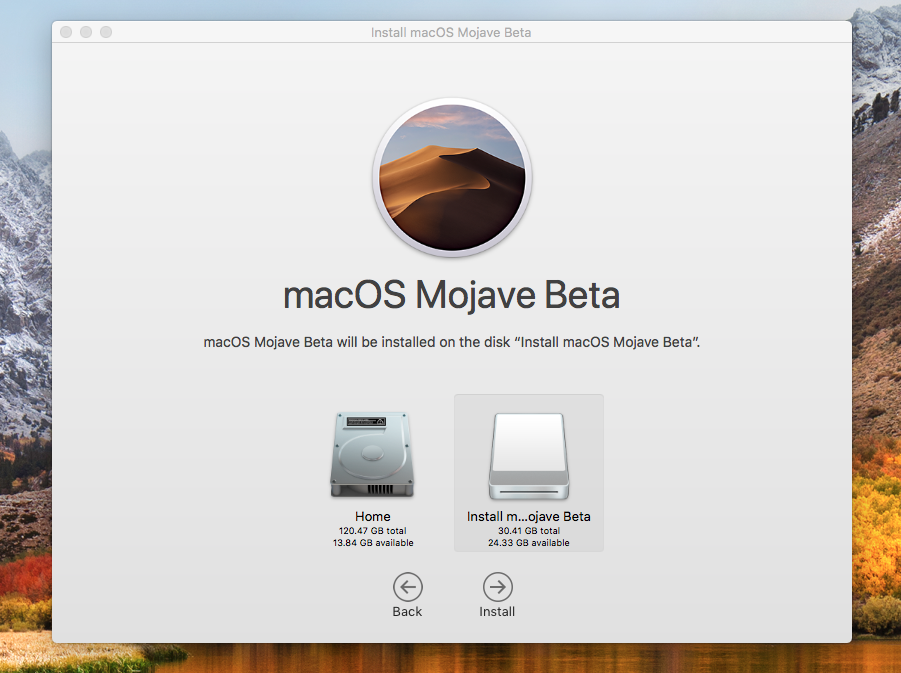
- Click Install.
Wait while the version of macOS installs on the drive. This process may take a while – if it tells you it will take 10 minutes it’s lying.
Note: This will not work if you didn’t set your external drive up correctly as a GUID Partition as per the steps above.
Step 4: Run macOS on the external drive
There are two ways to run the version of macOS from your external drive
Either:
- Open System Preferences > Startup Disk.
- Select the external drive you wish to use to start up the Mac and click Restart.
Or:
- Hold down Option/Alt during startup on an Intel-powered Mac, or press and hold the on button on an M1 Mac until you see the start up options.
- Pick the drive you wish to use to start up the Mac.
Once you have installed the macOS you want on the drive it should be easy to install subsequent updates there via System Preferences.
For more advice about installing macOS or Mac OS X read How to update the Mac operating system and How to install old versions of OS X on a Mac.