Domain Name System or DNS is a naming system for computers and other resources connected to a private network or the internet. When the DNS server is not responding on Windows 11, it implies your device cannot translate domain names into IP addresses.
This is a problem many users have faced. The problem may occur because your DNS server is down, the DNS cache is outdated, or you have incorrect network settings. Regardless of the course, you should be able to resolve it with the solutions in this guide.
1. Restart your Router or Internet Connection
Your first call should be a total internet reset. This may mean restarting your router or unplugging a modem. This solution is easy but effective since a bad internet connection may be why the DNS server is not responding.
You may also consider using a different internet source or switching to a more stable wired connection.
2. Restart Your Computer
If the problem continues after restarting your router, restart the computer. Restarting is often effective when the DNS problem is caused by minor glitches or conflicts between services and applications. Rebooting the computer gives every process a soft reset, forcing the problematic processes to shut down.
3. Flush the DNS Cache
A DNS cache is a technology for optimizing name resolution from a server. When data is stored in the cache, your computer may be able to resolve the names faster. However, if the cache becomes corrupted, you may have certain issues, like the DNS server not responding. You may clear the cache with the solutions below.
Step 1: Press Windows + I to open the Run dialog.
Step 2: Type cmd and hit Ctrl + Shift + Enter to open the Command prompt with admin rights.
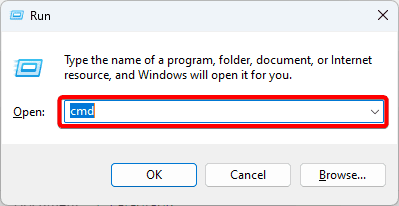
Step 3: Type the script below and hit Enter to flush the DNS cache.
ipconfig /flushdns
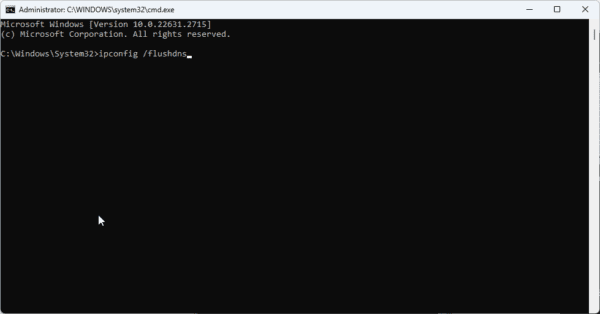
Step 4: Next, type the scripts below, hitting Enter after each one to complete the process.
ipconfig /registerdns
ipconfig /release
ipconfig /renew
netsh winsock reset
Step 5: Restart your computer.
4. Update the Network Driver
Drivers are what connect hardware and software components on Windows 11. On Windows 11, if the network driver is out-of-date or faulty, the DNS server can stop working. The only workaround in this case is to update the drivers by following the instructions below.
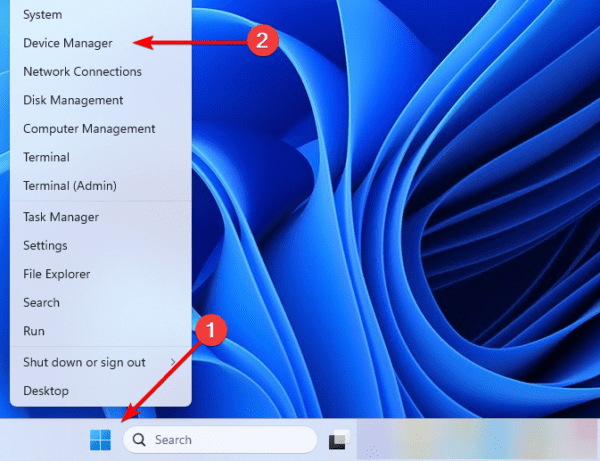
Step 1: Right-click on the Start menu and click Device Manager.
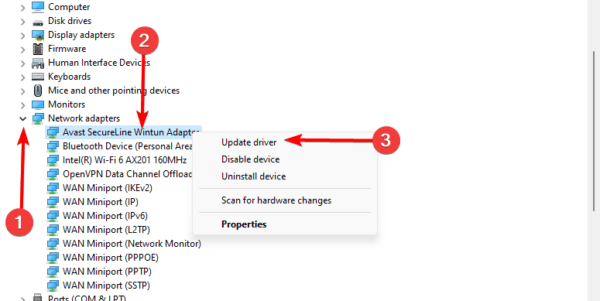
Step 2: Expand the Network adapters category, right-click on your driver, and select Update driver.
Step 3: Click Search automatically for drivers.
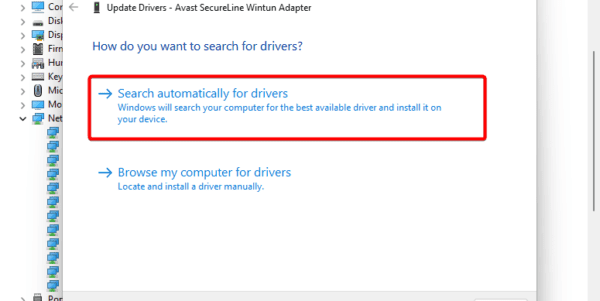
Step 4: Follow any instructions to complete the process.
5. Reset your Network From Settings
A complete network reset may be helpful when the Windows 11 DNS server is not responding. This is because a reset will erase the network troubleshooting record, delete any potentially conflicting virtual switches or VPNs, and uninstall and reload all your network devices.
Step 1: Press Windows + I to launch the Settings app.
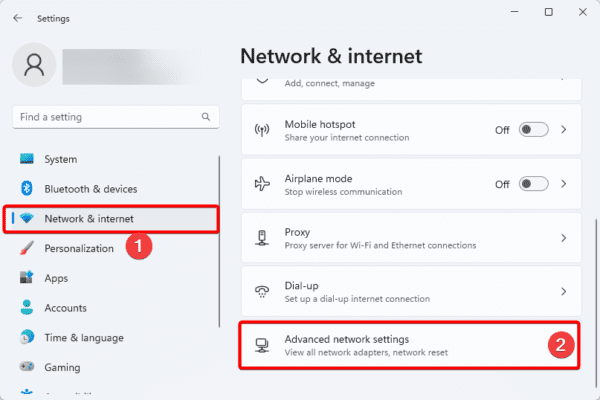
Step 2: Click the Network & internet option on the left pane, then click Advanced Network Settings on the right.
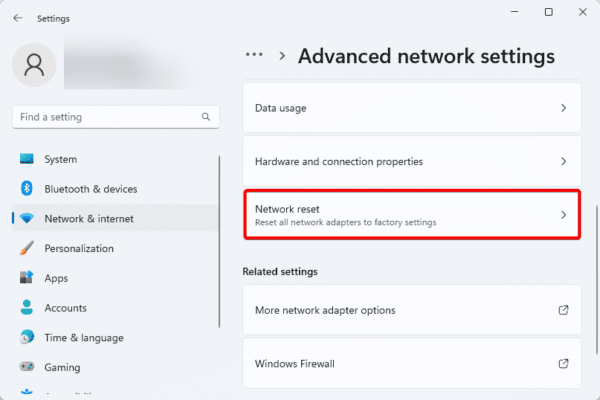
Step 3: Click Network reset.
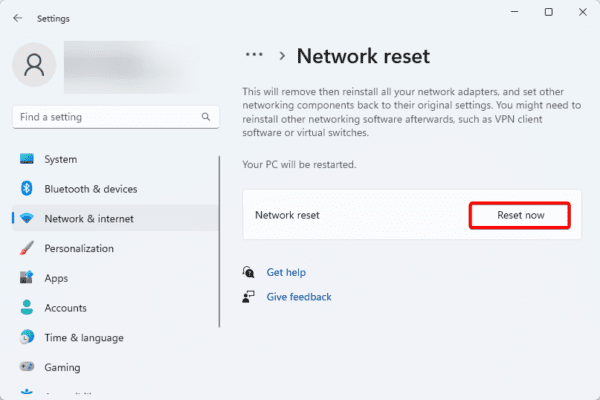
Step 4: Click the reset now button.
6. Boot in Safe Mode
Windows Safe Mode enables the machine to boot up with the fewest services, apps, and processes possible. This is a great step in troubleshooting DNS or networks since it removes conflicts as you troubleshoot.
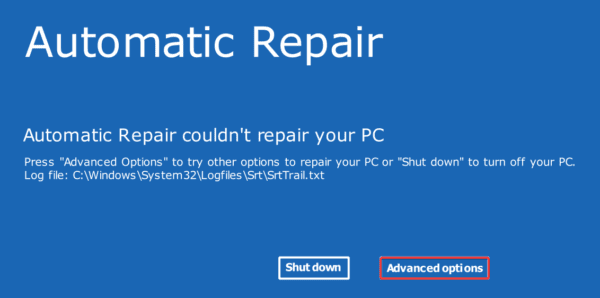
Step 1: Turn on your computer and shut it down as soon as you see the Windows logo. Repeat this step 3 or 4 times till you see the Repair window.
Step 2: Click Advanced options.
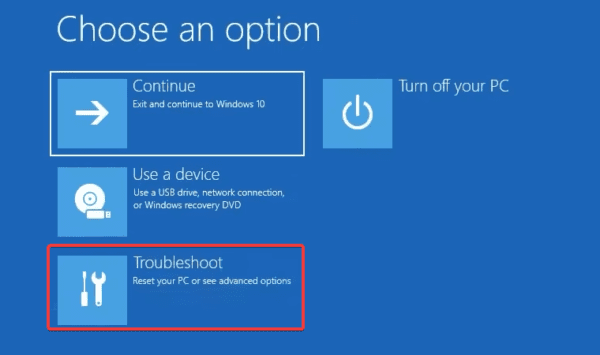
Step 3: Select Troubleshoot.
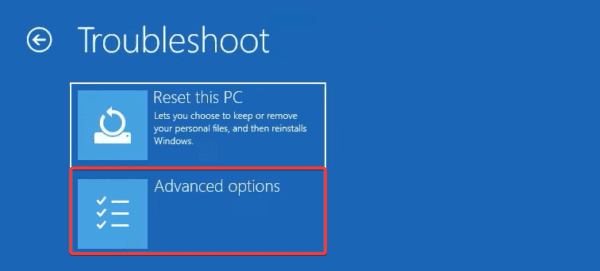
Step 4: Click Advanced options.
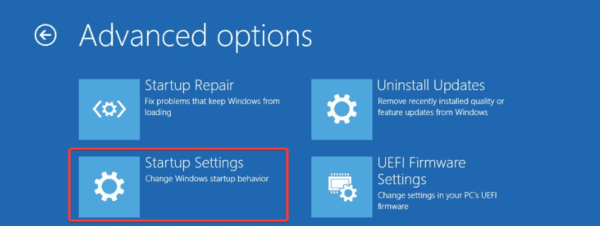
Step 5: Select the Startup Settings option.
Step 6: Click the Restart button.
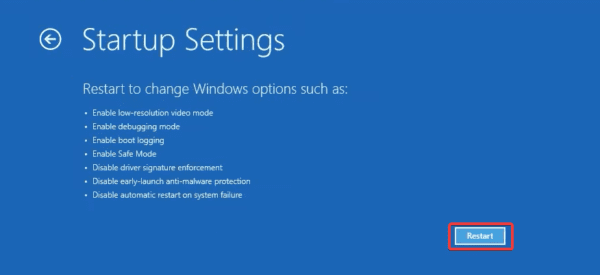
Step 7: Finally, press F4 to boot into Safe Mode or F5 for Safe Mode with networking.
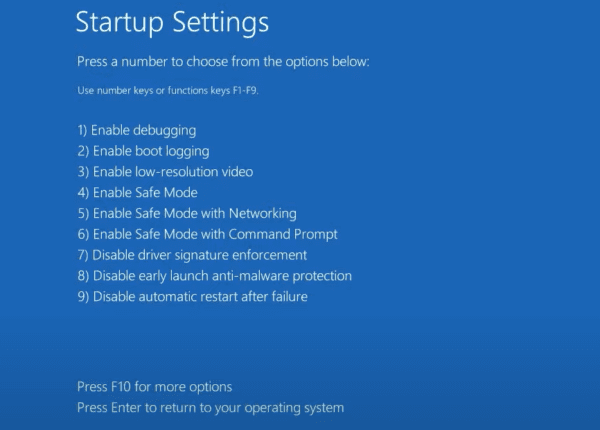
Check your internet connection when your computer restarts in safe mode to check whether the problem still exists. If not, a third-party program or service you’re using is probably to blame for the DNS issue you’re seeing. Regretfully, it isn’t possible to identify which one is to blame automatically. The software must be manually disabled or uninstalled to determine which is the problem.
FAQ
1. What does it mean when the DNS server is not responding on Windows 11?
This simply implies the device can no longer translate domain names to IP addresses.
2. What are the common causes of DNS server issues on Windows 11?
Common causes include a down DNS server, outdated DNS cache, incorrect network settings, or a faulty network driver.
Getting the best from your Connection
Connection problems like the DNS server not responding will spoil the user experience on a computer. You should follow any of the solutions in our guide to resolve it. Please let us know in the comment section what solution was most effective.
