
When my computer screen suddenly turned blue with the error code 0x00000111 RECURSIVE_NMI, it halted my workflow. As someone who relies heavily on my PC for both work and personal use, encountering this Blue Screen of Death (BSOD) was frustrating.
To find a solution, I combined my previous troubleshooting experiences with extensive online research. In this guide, I’ll share the insights I gained and the methods I used to resolve this issue successfully.
What is 0x00000111 RECURSIVE_NMI Blue Screen Of Death?
The 0x00000111 RECURSIVE_NMI BSOD is a critical error in Windows that occurs when a non-maskable interrupt (NMI) recurs more times than the system can handle. In simpler terms, it’s like an emergency signal in your computer that keeps getting triggered repeatedly, overwhelming the system.
This error typically indicates a severe issue, often related to hardware failure or conflicts.
What Causes RECURSIVE_NMI BSOD?
The RECURSIVE_NMI BSOD can be triggered by various factors, including:
- Hardware Malfunction: Faulty hardware components can cause serious system issues.
- Driver Conflicts: Incompatible or outdated drivers can interfere with system operations, causing the BSOD.
- Overheating Components: Excessive heat in the CPU or GPU can lead to system instability.
- Power Supply Issues: Inadequate or fluctuating power supply can disturb the normal working of the system.
- Corrupted System Files: Damaged essential files required for Windows operation can cause blue screen errors.
- BIOS/UEFI Firmware Issues: Outdated or corrupted BIOS/UEFI settings can be responsible for BSOD in Windows.
How To Fix the BSOD Error 0x111 RECURSIVE_NMI?
We’ll start with basic troubleshooting and move to more advanced techniques. You can also use the BSOD repair tool if this seems too overwhelming.
1. Preliminary Checks
- Restart Your PC
- Save all open work.
- Click the Start menu, select the power icon, and choose ‘Restart’.
- Observe if the BSOD reoccurs after the restart.
- Unplug and Plug the External Hardware
- Shut down your PC.
- Disconnect all external devices (USBs, printers, etc.).
- Reboot your computer and reconnect each device one at a time to check for conflicts.
2. Update Windows
Regular Windows updates can resolve many system conflicts and errors, including the 0x00000111 BSOD, by fixing bugs and enhancing system stability.
- Click on the Start button and open Settings from the Start Menu.
- In Settings, go to the Windows Update section located in the left pane.
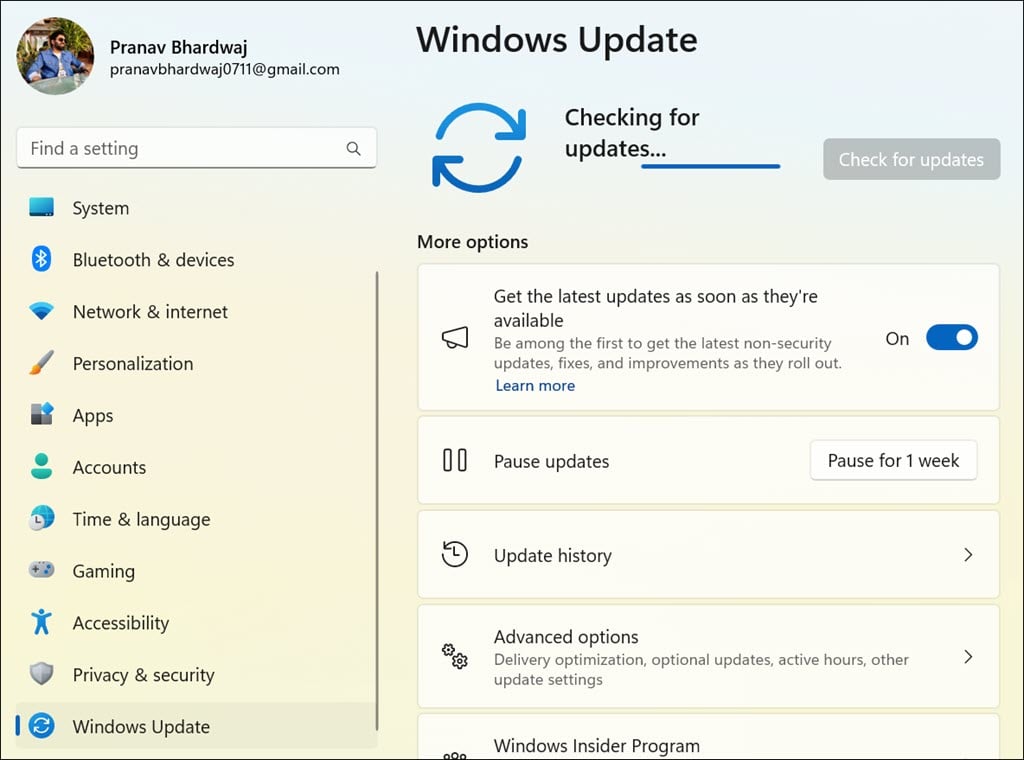
- Click on the Check for updates button on the right side.
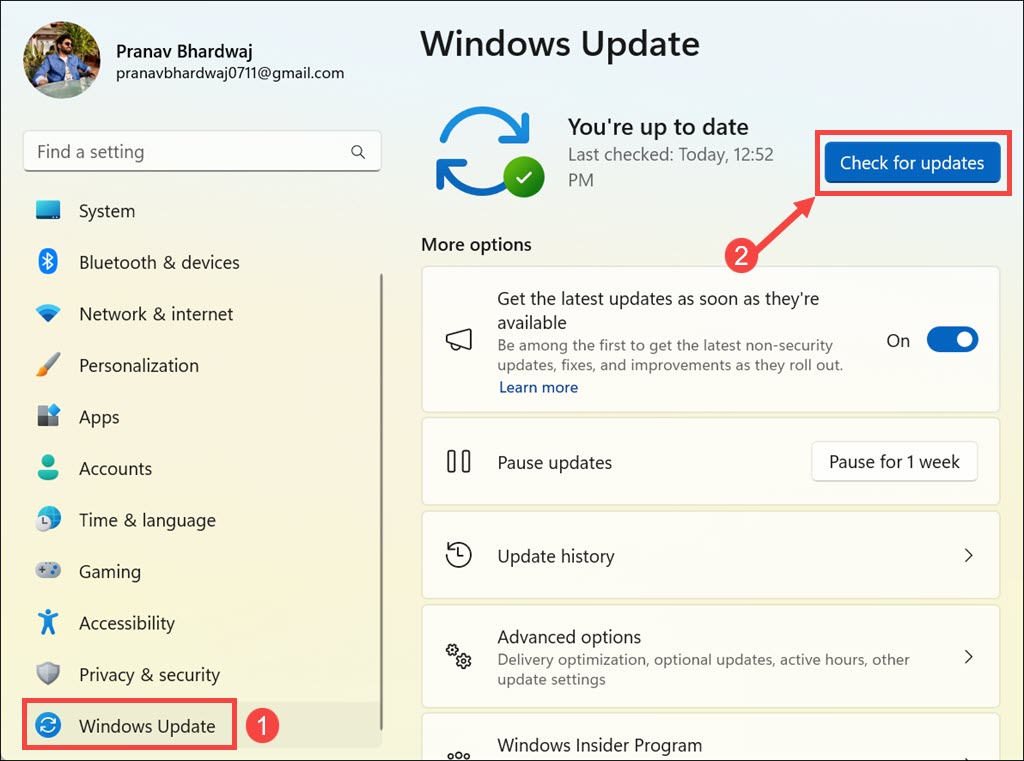
- Windows will search for any available updates for your system.
- Click on Install all to proceed with the installation.
- Restart your system and verify if the issue has been resolved.
3. Turn Off Fast Startup
Fast Startup in Windows is designed to reduce boot time, but it can sometimes lead to BSOD issues due to incomplete shutdowns.
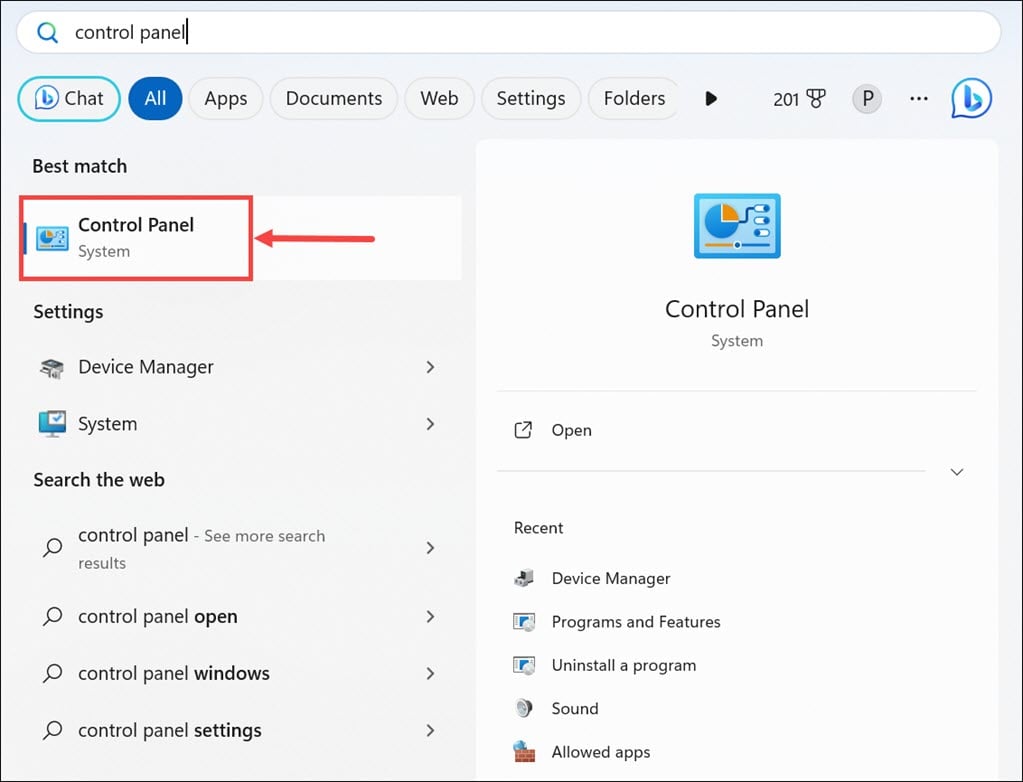
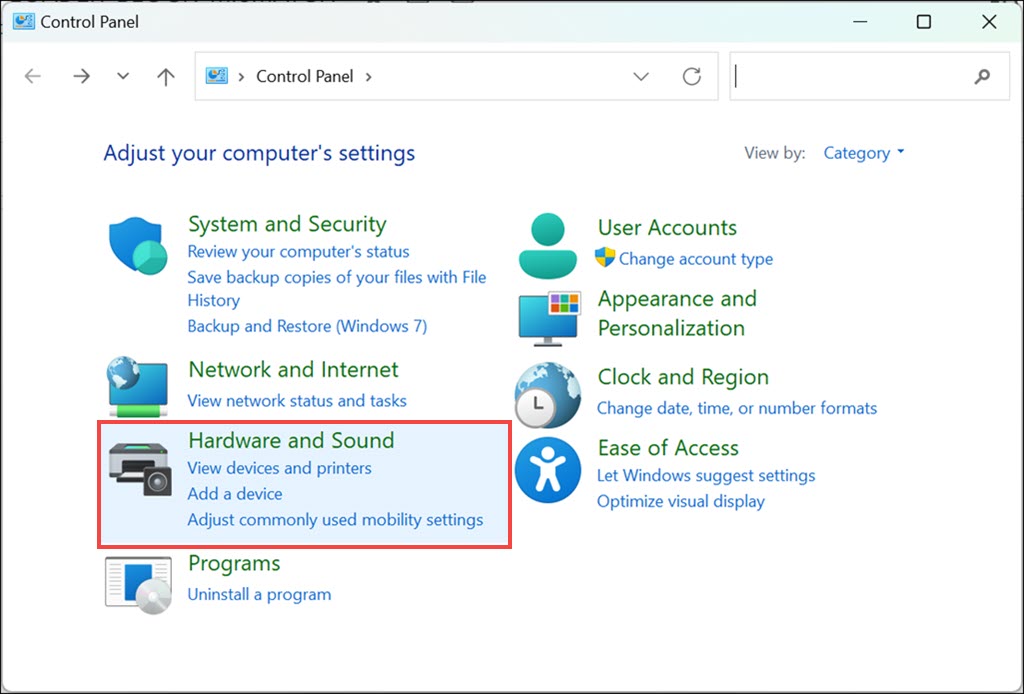
- Type “Control Panel” in the Windows search box and open it.
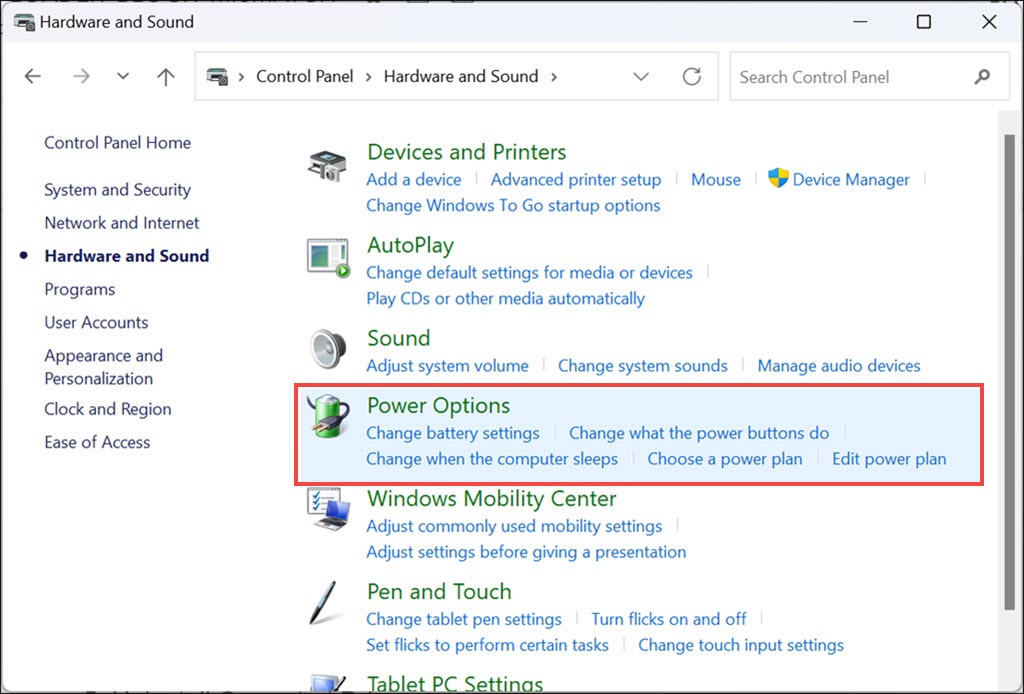
- Click on Hardware and Sound.
- Then, select Power Options.
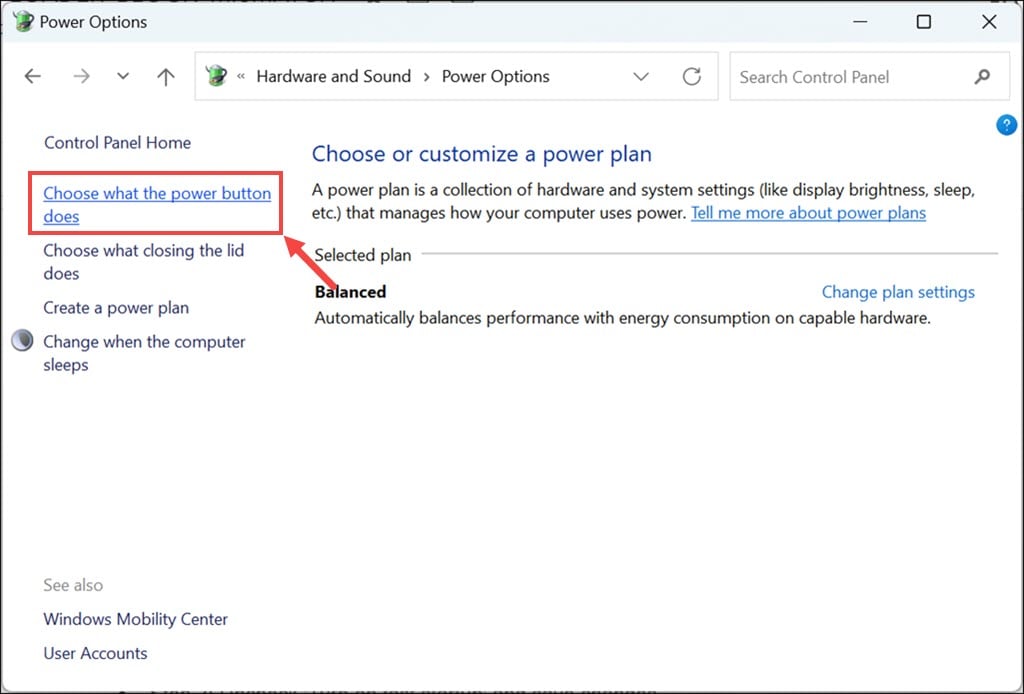
- On the left side, click Choose what the power button does.
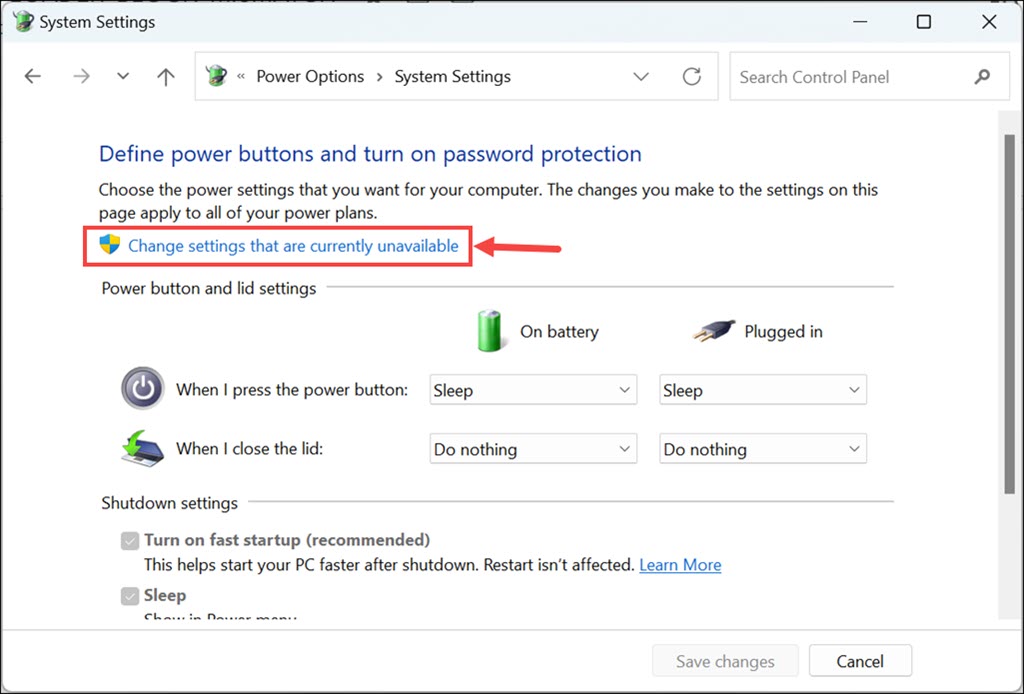
- Click on Change settings that are currently unavailable to access the “Shutdown settings”.
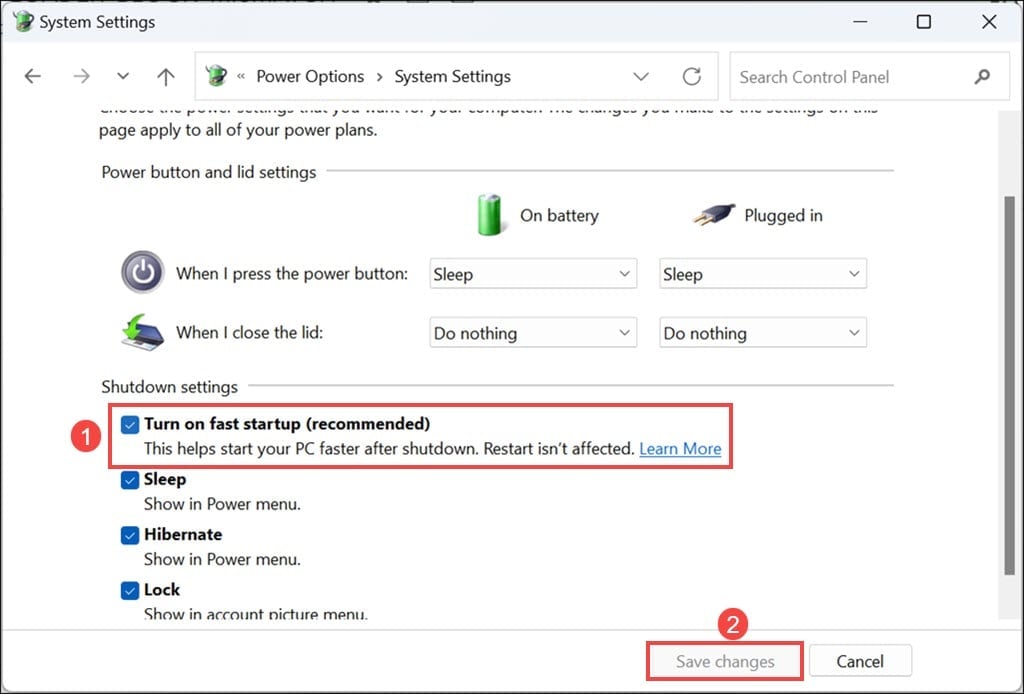
- In the “Shutdown settings”, find the Turn on fast startup (recommended) option and uncheck it.
- Click Save changes to apply your settings.
4. Start Windows in Safe Mode
Safe Mode starts Windows with a minimal set of drivers and services. It can help diagnose if third-party software or drivers are causing the BSOD.
- Force restart your PC multiple times until it enters Automatic Repair Mode.
- Once in Automatic Repair Mode, choose the Troubleshoot option.
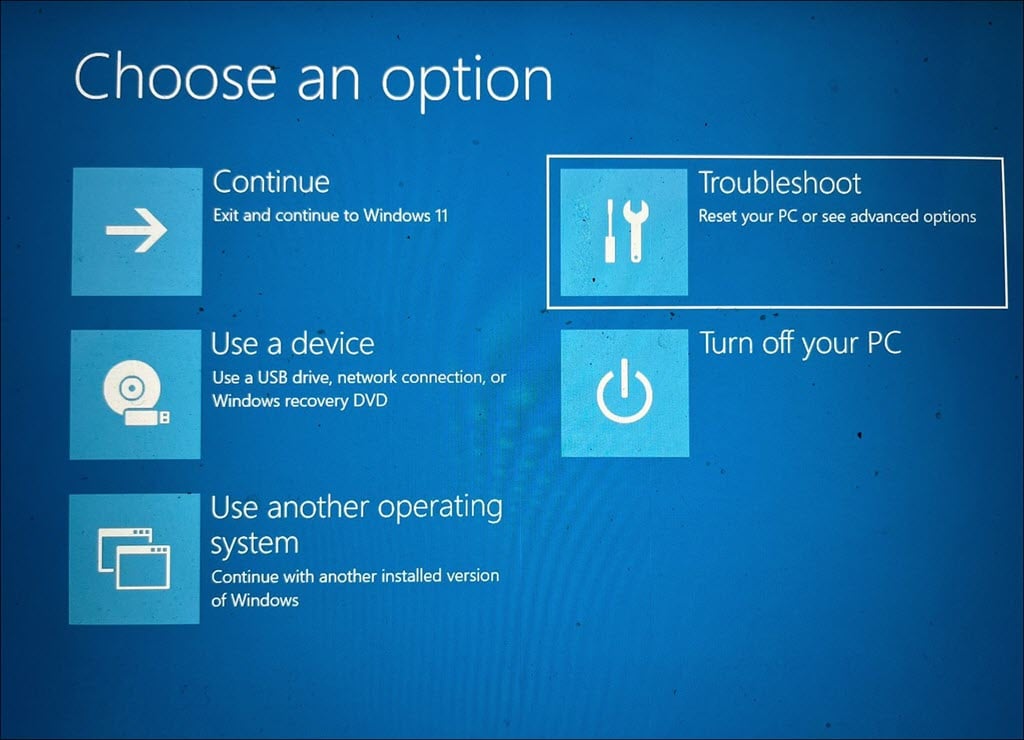
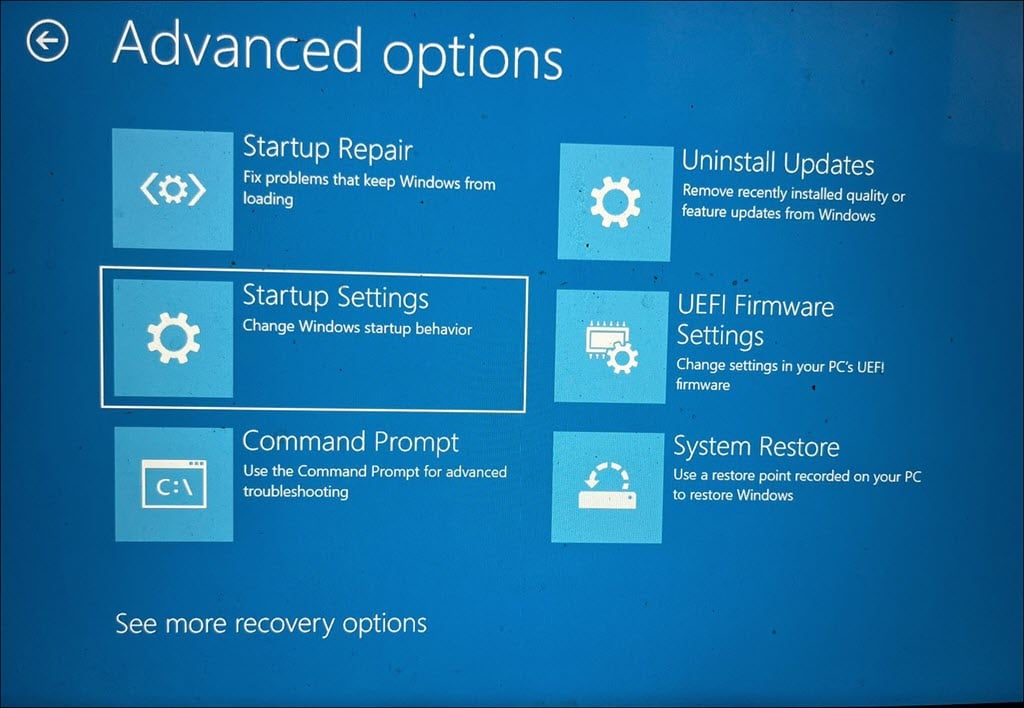
- Under “Troubleshoot,” select Advanced options.
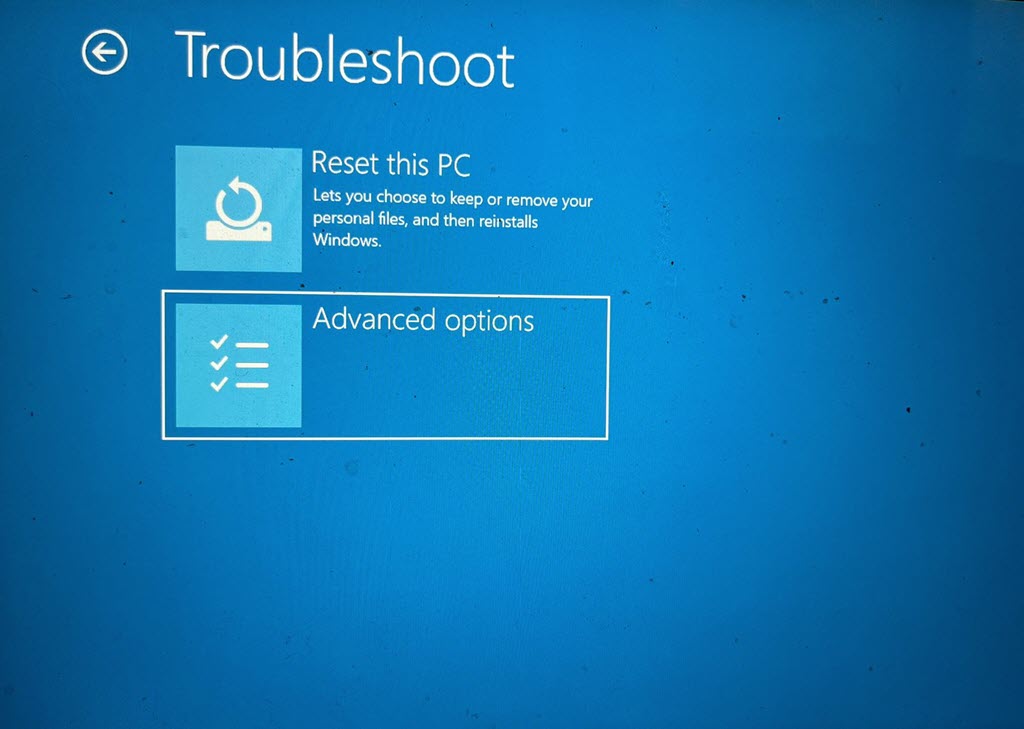
- Then choose Startup Settings.
- Click the Restart button on the following screen.
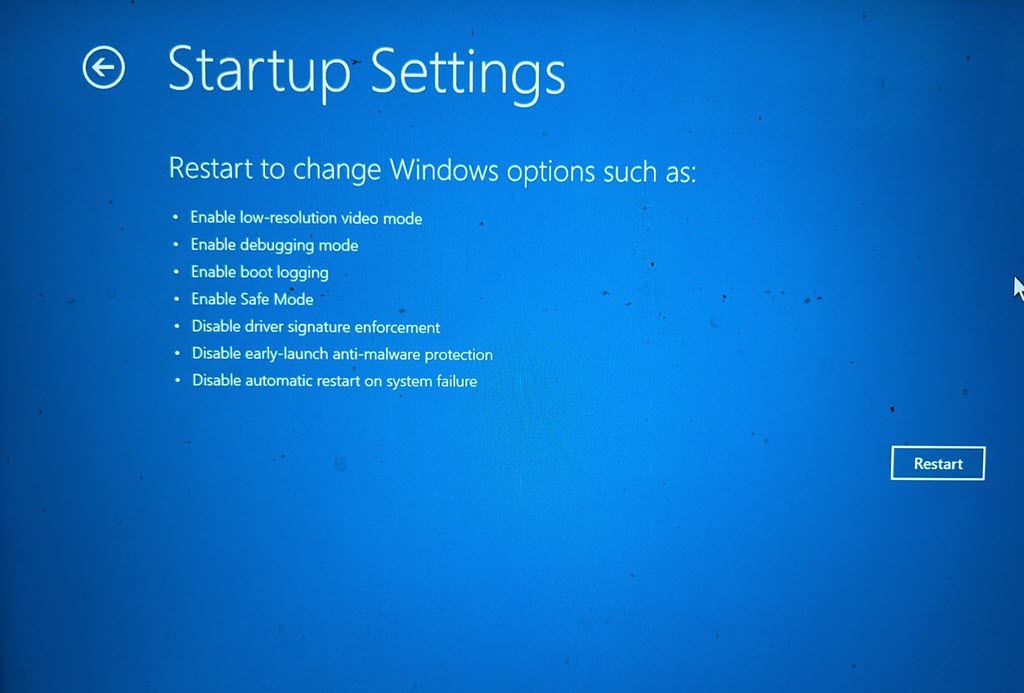
- After the system restarts, press F5 on your keyboard to boot Windows in Safe Mode with Networking.
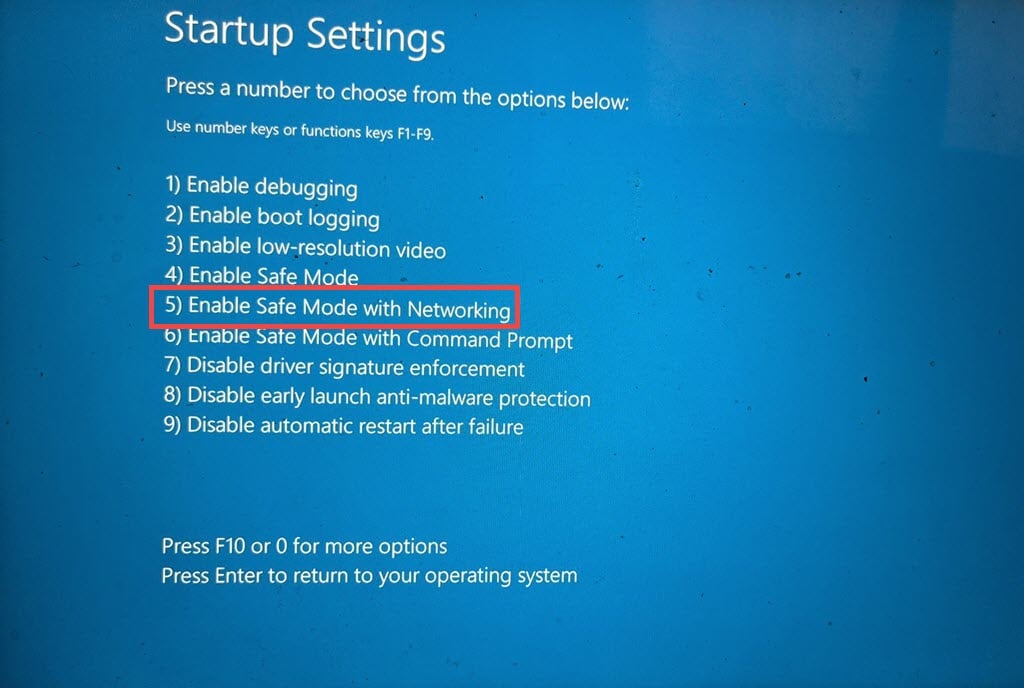
- Your system will now start in Safe Mode, allowing you to conduct additional troubleshooting.

5. Uninstall Corrupted Drivers
Corrupted or outdated drivers can be a significant cause of BSOD errors.
- Right-click on the Start button and choose Device Manager from the menu.
- In the Device Manager window, identify drivers marked with yellow exclamation or warning signs.
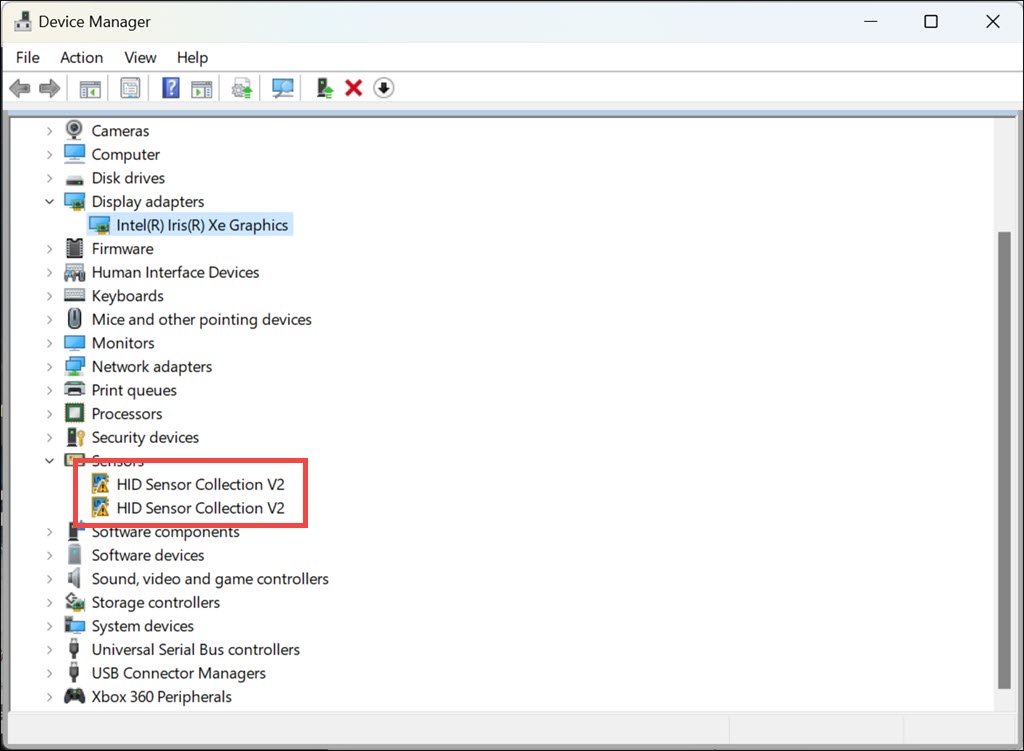
- Right-click on each of these drivers and select Uninstall device.
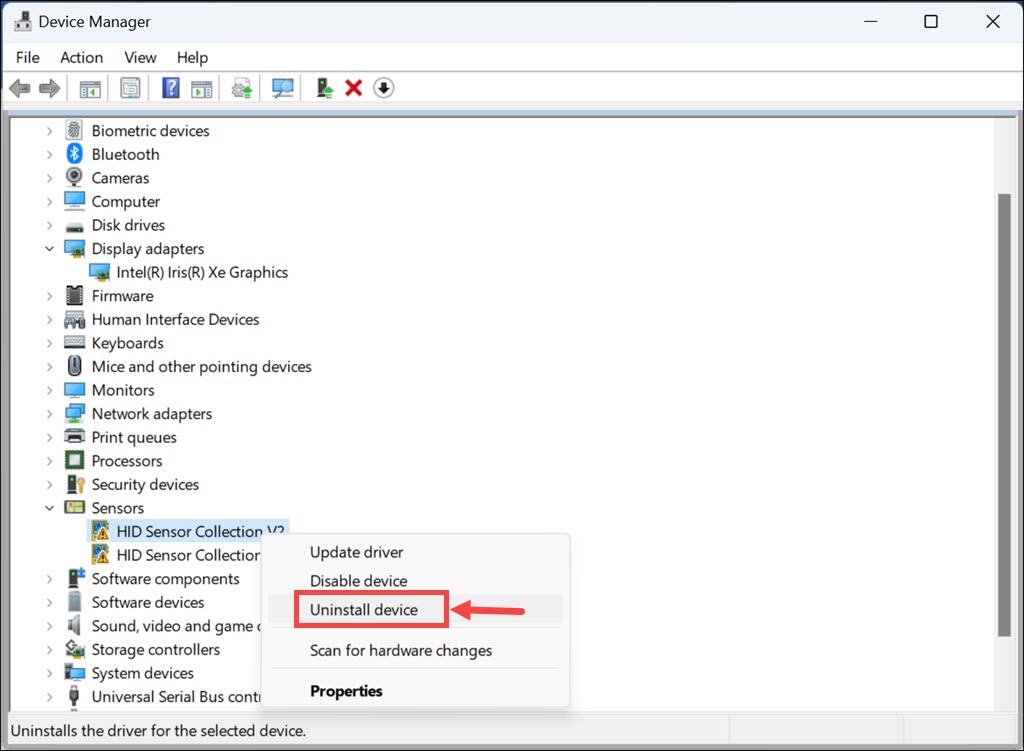
- Confirm the uninstallation when prompted.
- After completing these steps, restart your PC.
6. Update System Drivers
- Right-click on the Start button and choose Device Manager.
- Within the Device Manager window, find crucial drivers such as those for display, firmware, and disk drives.
- Right-click on each important device and select Update driver.
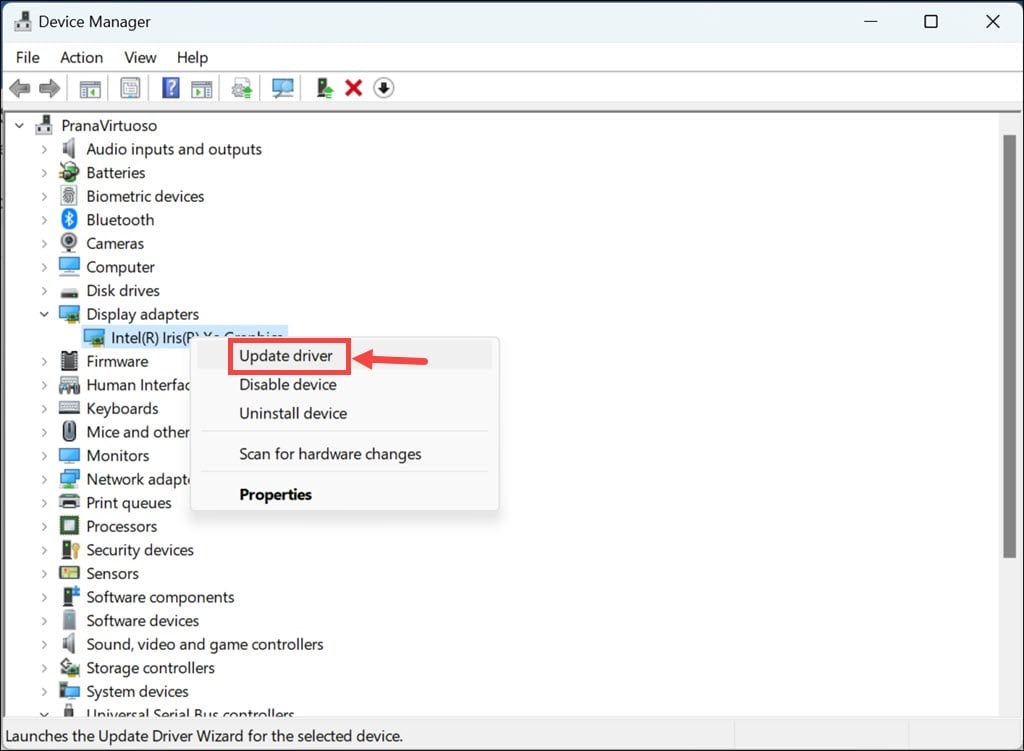
- Choose Search automatically for drivers.
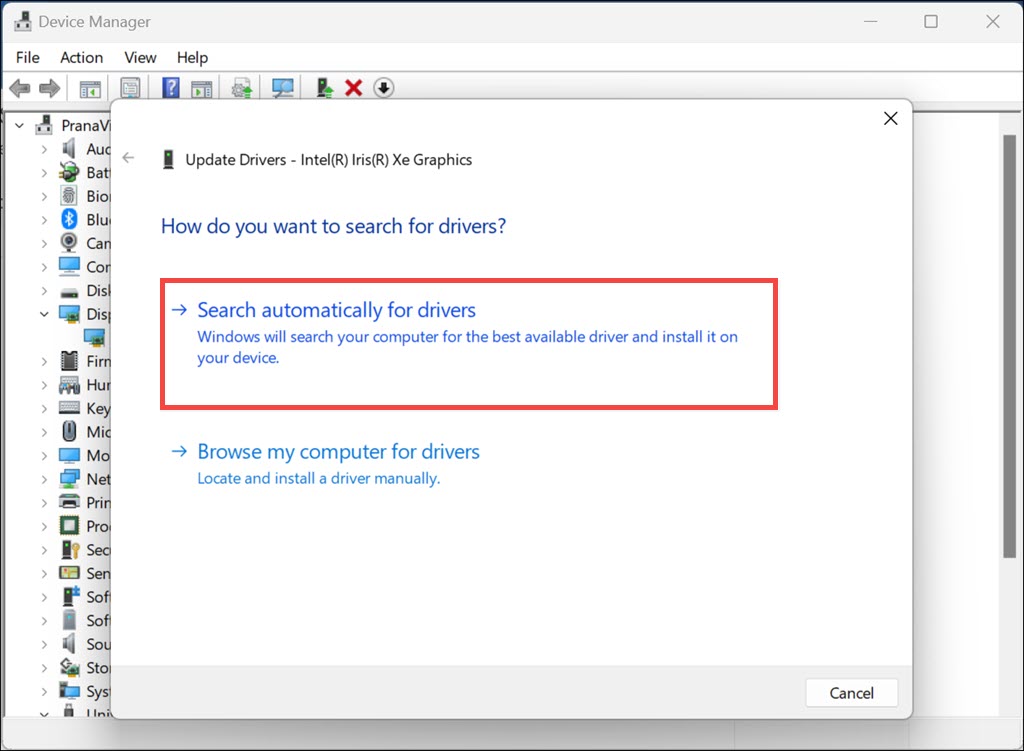
- Repeat this process for all major devices, and then restart your computer to ensure the updates are applied.
7. Run DISM and SFC Commands
The Deployment Image Servicing and Management (DISM) and System File Checker (SFC) tools in Windows repair corrupted system files, which can resolve BSOD errors.
- Right-click on the Start button and select Terminal (Admin) from the menu.
- First, execute the DISM command by typing
DISM.exe /Online /Cleanup-image /Scanhealthand pressing Enter. - Once the DISM command is complete, type
sfc /scannowand press Enter. - Wait for the scan to finish, then restart your system.
8. Uninstall Recent Windows Updates
Sometimes, recent updates can cause system conflicts leading to BSODs.
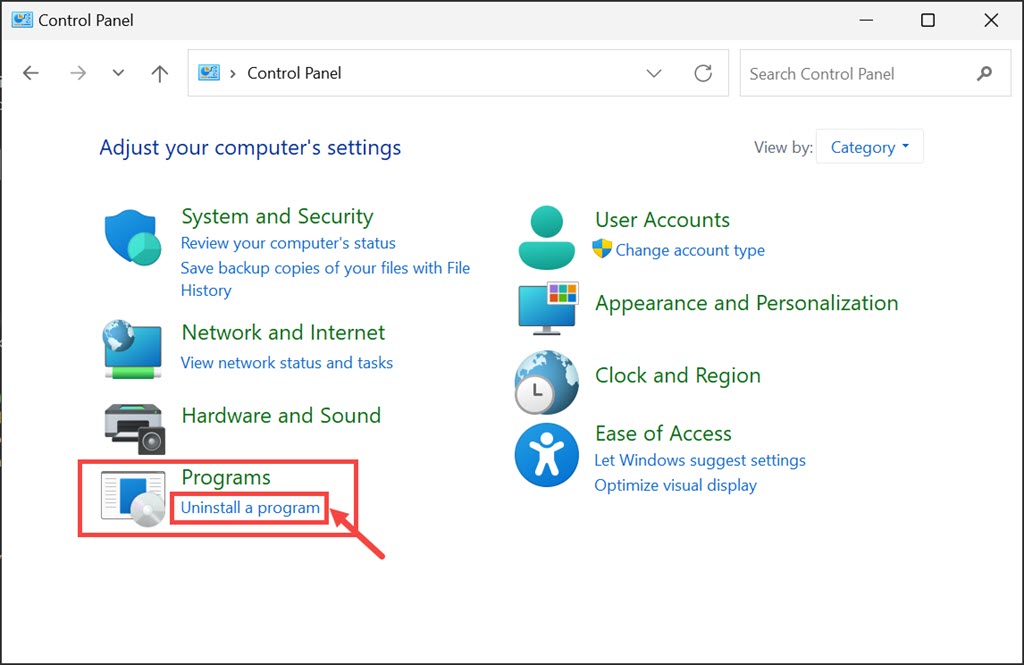
- Open the Control Panel by typing it into the Windows search box.
- In the Control Panel, navigate to the “Programs” section and select Uninstall a program.
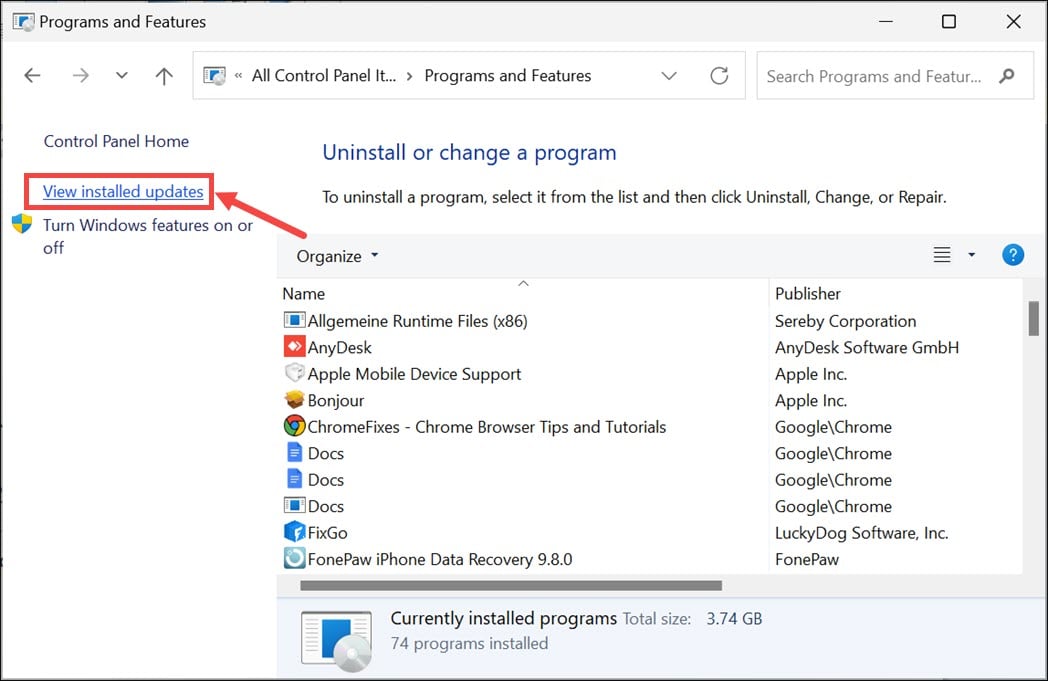
- Click on View installed updates on the left side to open the Windows update settings.
- Find the recently installed Windows updates and click the Uninstall button.

- Confirm by clicking Uninstall again.
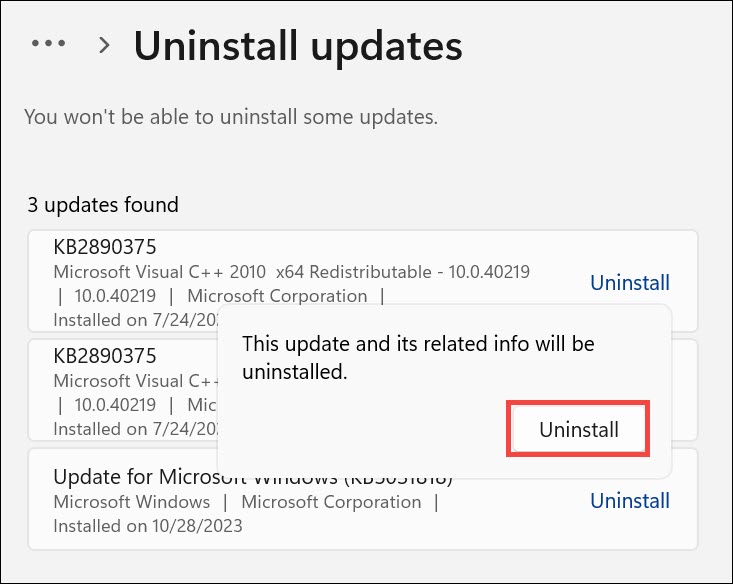
- After completing these steps, restart your system to see if the error has been resolved.
9. Uninstall Recently Installed Applications
Newly installed applications can sometimes conflict with your system, leading to BSODs.
- Open the Control Panel.
- Click on Uninstall a program located under the “Programs” section.
- Sort the programs by installation date, with the most recent first, by clicking on the Installed on column header.
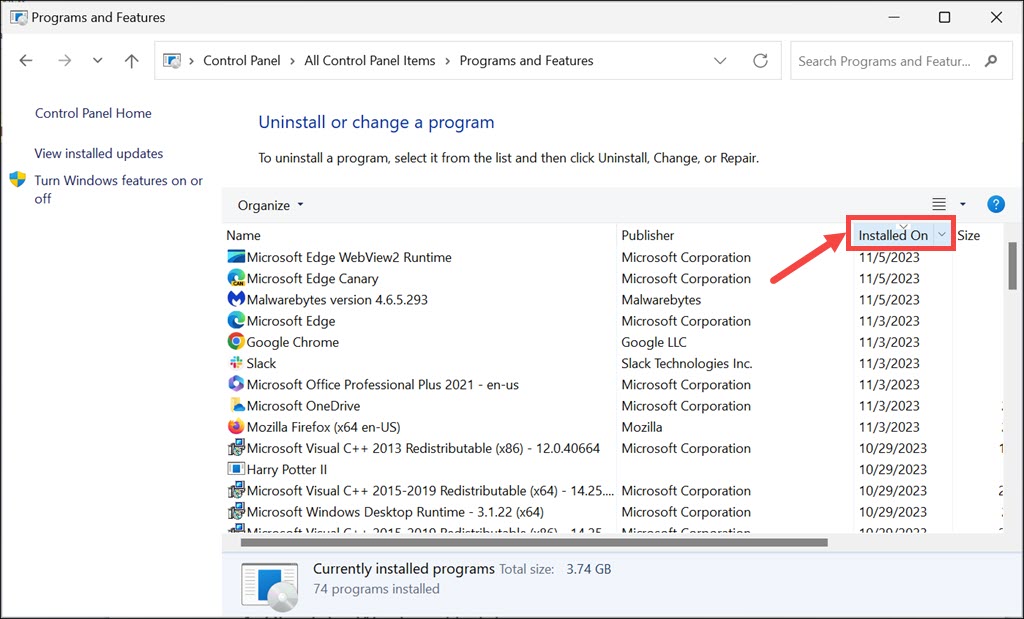
- Select the application that was installed most recently and click the Uninstall button.
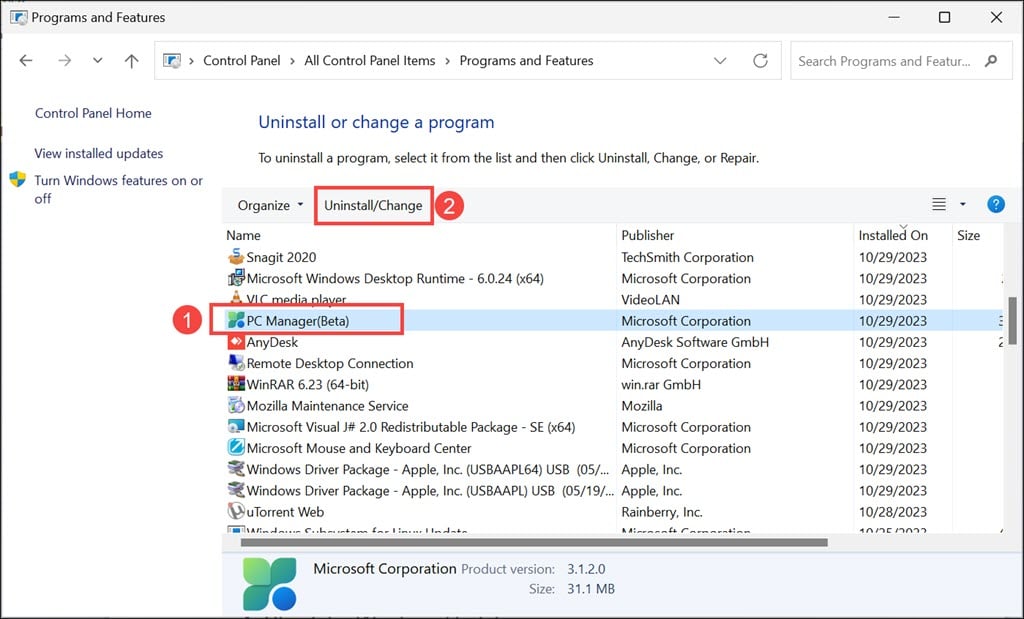
- Confirm the uninstallation when prompted.
- Repeat the process for each app.
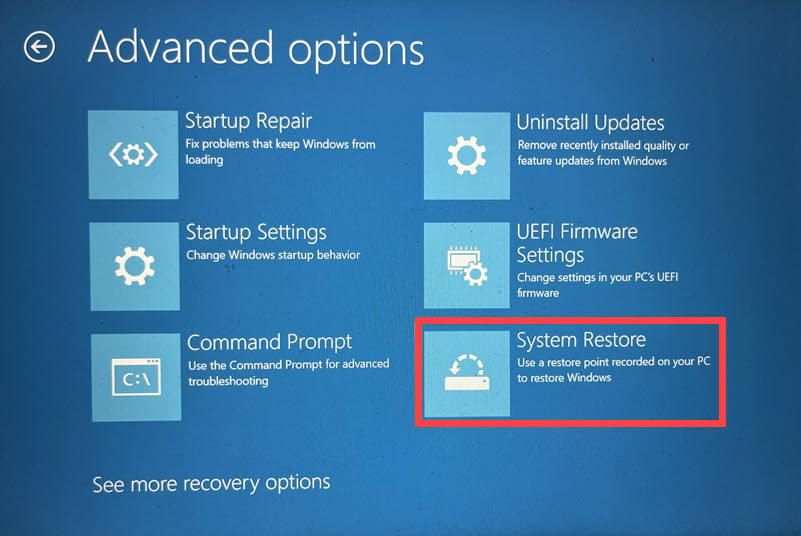
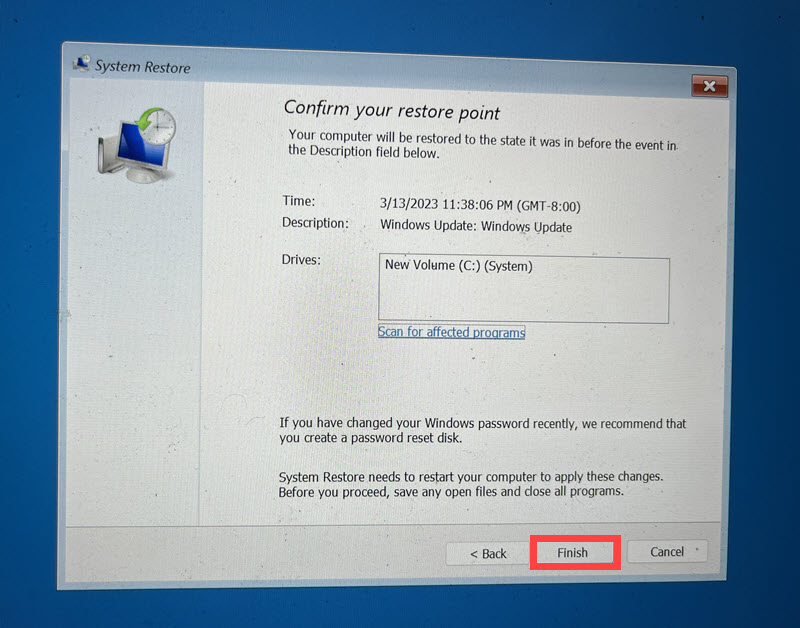
10. Restore Windows to a Previous State
System Restore can revert your system’s settings to a previous state without affecting personal files, potentially undoing any recent changes that caused the BSOD.
- Restart your system multiple times until it enters Automatic Repair Mode.
- In Automatic Repair Mode, select the Troubleshoot option.
- Under “Troubleshoot,” go to Advanced options.
- Choose the System Restore option.
- Click Next to start the process.
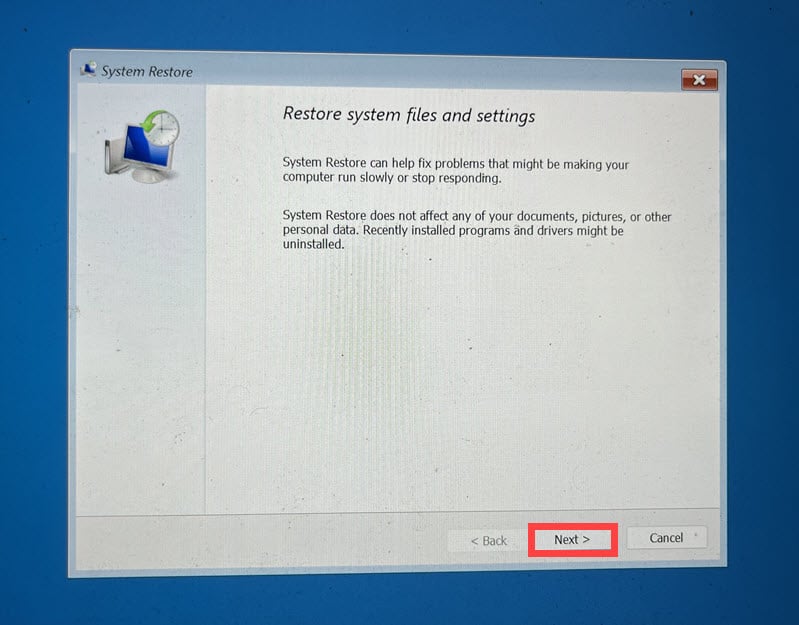
- Select a previously saved restore point. If you have multiple restore points, it’s recommended to choose the oldest one.
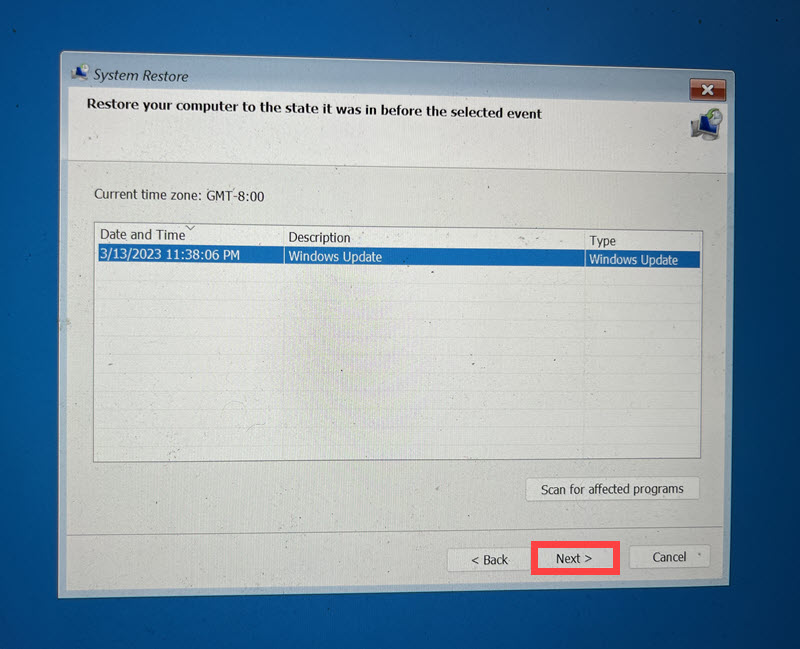
- Confirm your selection by clicking the Finish button.
11. Reset Windows
Resetting Windows reinstalls the operating system, which can resolve more complex system issues.
- Enter Automatic Repair Mode by restarting your system multiple times.
- Once in Automatic Repair Mode, select the Troubleshoot option.
- Under “Troubleshoot,” choose Reset this PC.
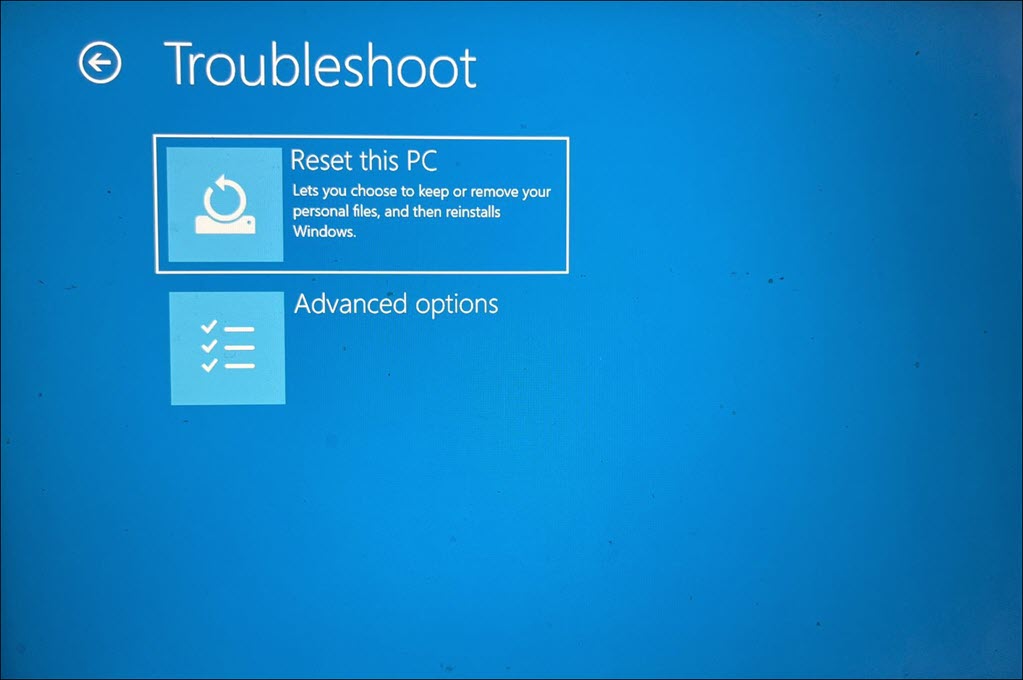
- Decide whether to keep your files or remove everything. For a completely fresh start, select “Remove everything.”
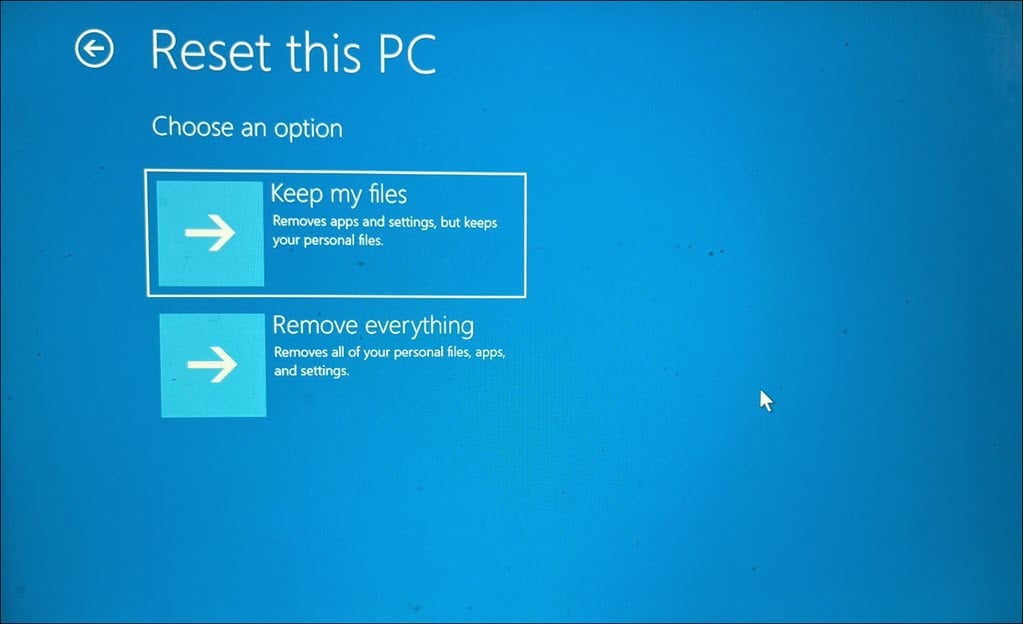
- Select your preferred method for reinstalling Windows, either through ‘Cloud download’ or ‘Local reinstall.’
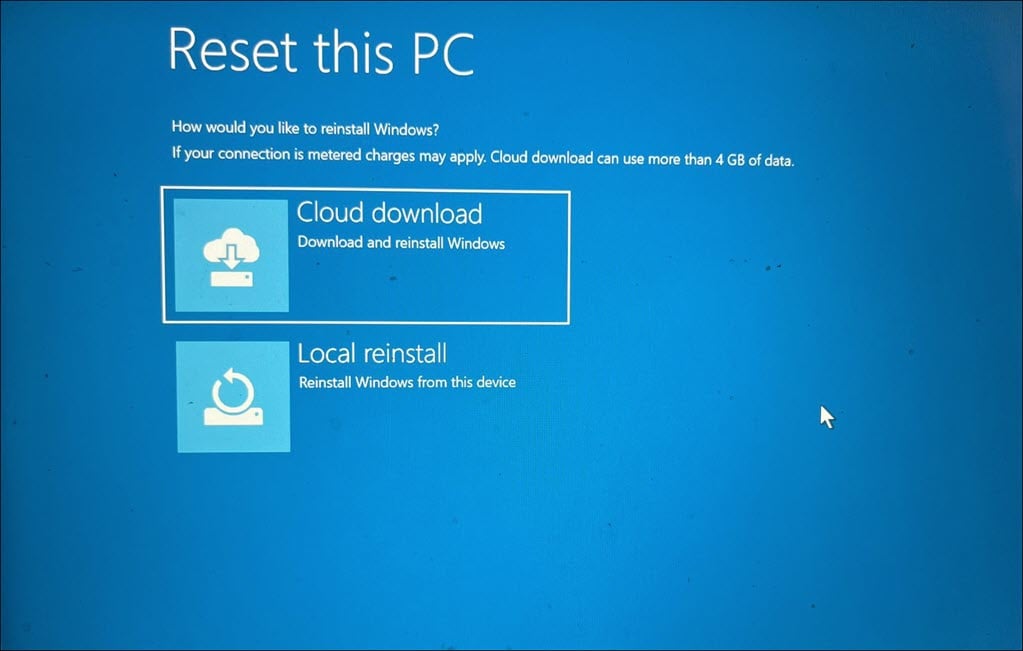
- Finally, click the Reset button.

Summary
In this extensive guide, I have listed various methods to resolve the challenging 0x00000111 RECURSIVE_NMI BSOD in Windows. From simple preliminary checks to advanced solutions like System Restore and resetting Windows, all these steps are crafted to address each cause.