
Ever taken a picture of a beautiful landscape only for the result to be noisy or blurry? Before deleting the photo, you can try some tools to salvage some details.

Fenophoto is a free photo enhancement utility for Windows that can transform an average looking snap into a good one.
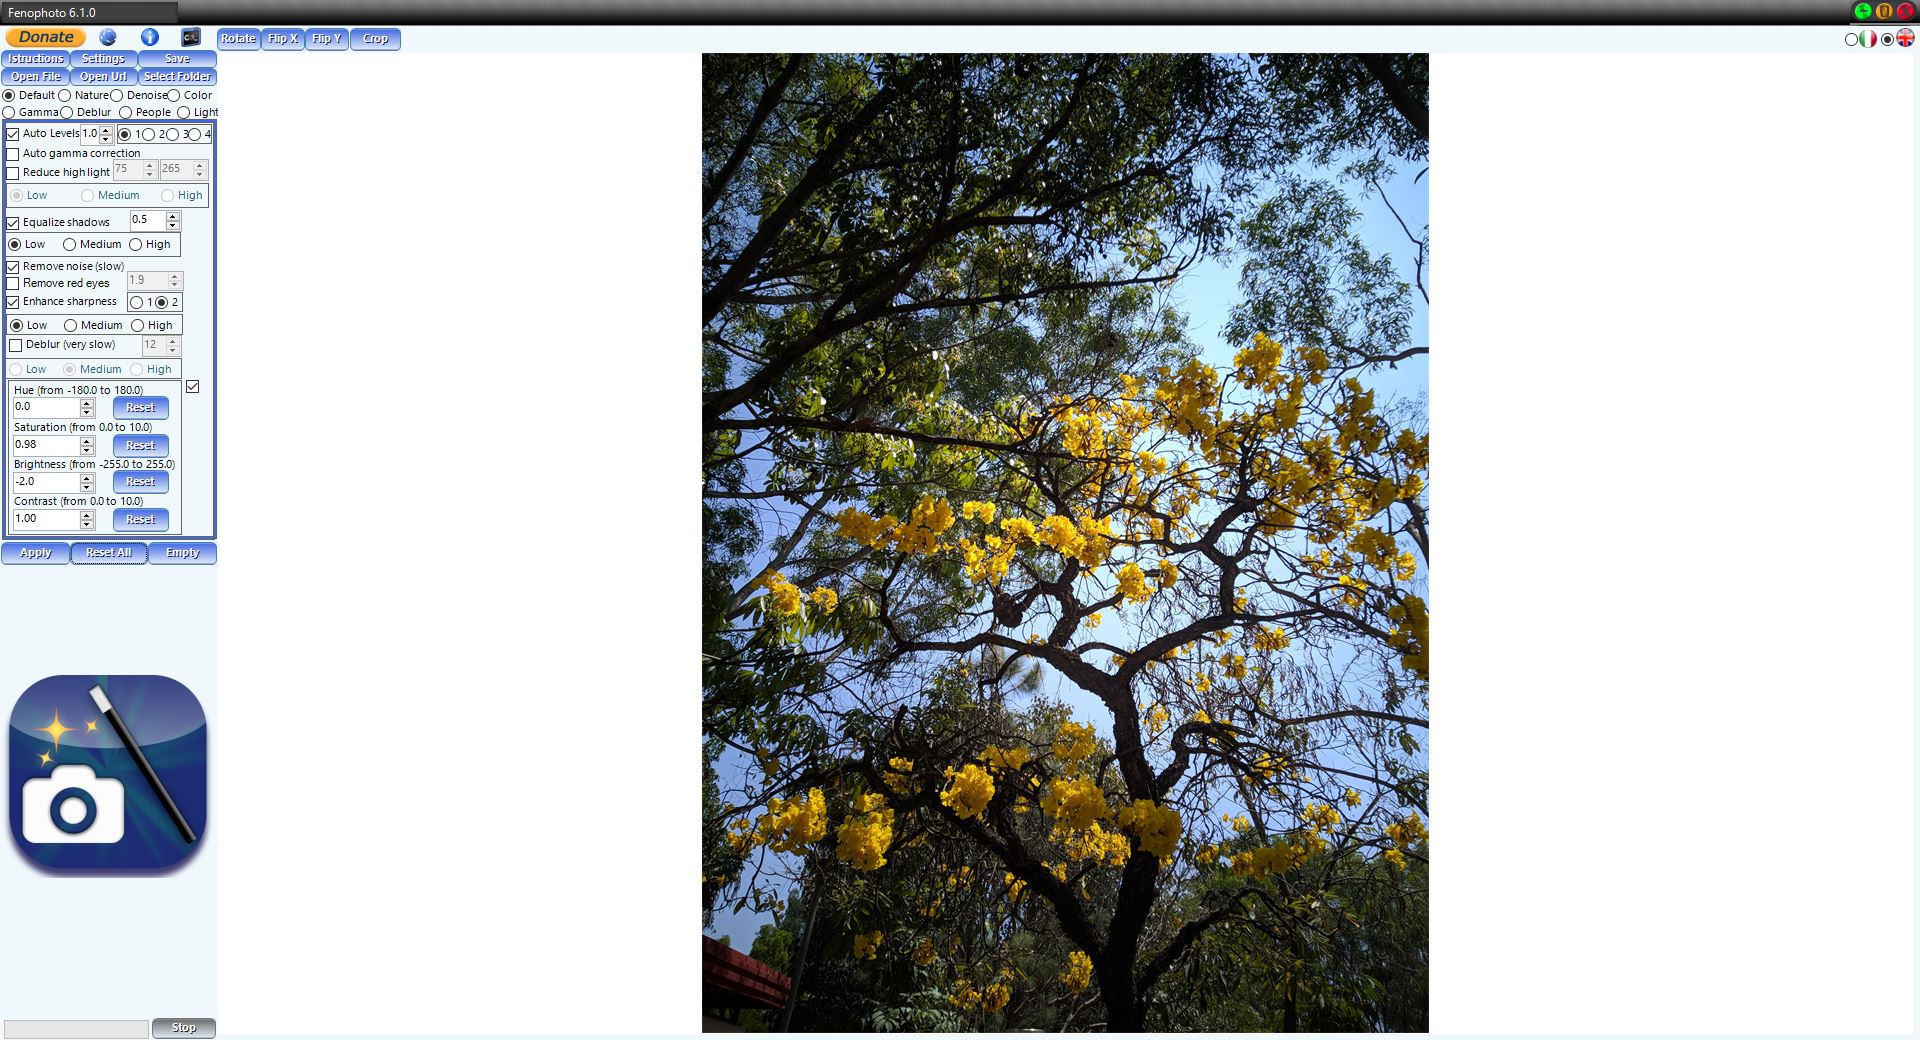
The layout of the interface is fairly simple, you have the photo viewer at the center with a toolbar at the top, and a side bar to the left. There is a help file that you can access by clicking on the instructions button. Learning to use the program is easy too, if you mouse over an element in the UI, a tool-tip pops up with a description of the feature.
Drag and drop an image to Fenophoto’s interface or use the Open File button on the top left. You may also use the Open URL option to load an online image. The program will display the picture and now you have to decide what you want to do with it.
The program supports the following image formats: JPG, JPEG, BMP, PNG, TIF, TIFF, GIF, WEBP, 3FR, ARI, ARW, BAY, CRW, CR2, CAP, DATA, DCS, DCR, DNG, DRF, EIP, ERF, FFF, GPR, IIQ, K25, KDC, MDC, MEF, MOS, MRW, NEF, NRW, OBM, ORF, PEF, PTX, PXN, R3D, RAF, RAW, RWL, RW2, RWZ, SR2, SRF, SRW, X3F, PBM, PGM, PNM, PPM, TGA, PCC, PCX, BW, RGB, RGBA, SGI, INT, INTA, RAS, SUN, DCM, DICOM, XPM, CUT
Want to edit all photos in a folder? Use the select folder option. In this method, the resultant images are saved to a new folder in the source directory.
The default profile can be used to automatically apply some filters, but Fenophoto has seven other profiles that you can choose from depending on the image’s content or the picture’s quality. The options are: Nature, Denoise, Color, Gamma, Deblur, People and Light. For e.g., if you want brighter and vivid colors, select the Color option. Working with a landscape image? Use the Nature filter, and so on.
Regardless of the profile that you select, you can modify the image properties individually. These include controls for adjusting the Levels, Gamma Correction, Reduce high light, Equalize Shadows, Remove Noise or Red Eyes, Enhance the Sharpness, adjust the Hue, Saturation, Brightness, and Contrast. Each parameter has its own sub-setting that you can select. The tool bar at the top is useful for rotate, flip or to crop the image.
I tried the program with some photos that I captured. One of the pictures was taken from a moving vehicle, I want it to look better. Here’s a comparison with the default profile, original image and the nature profile.
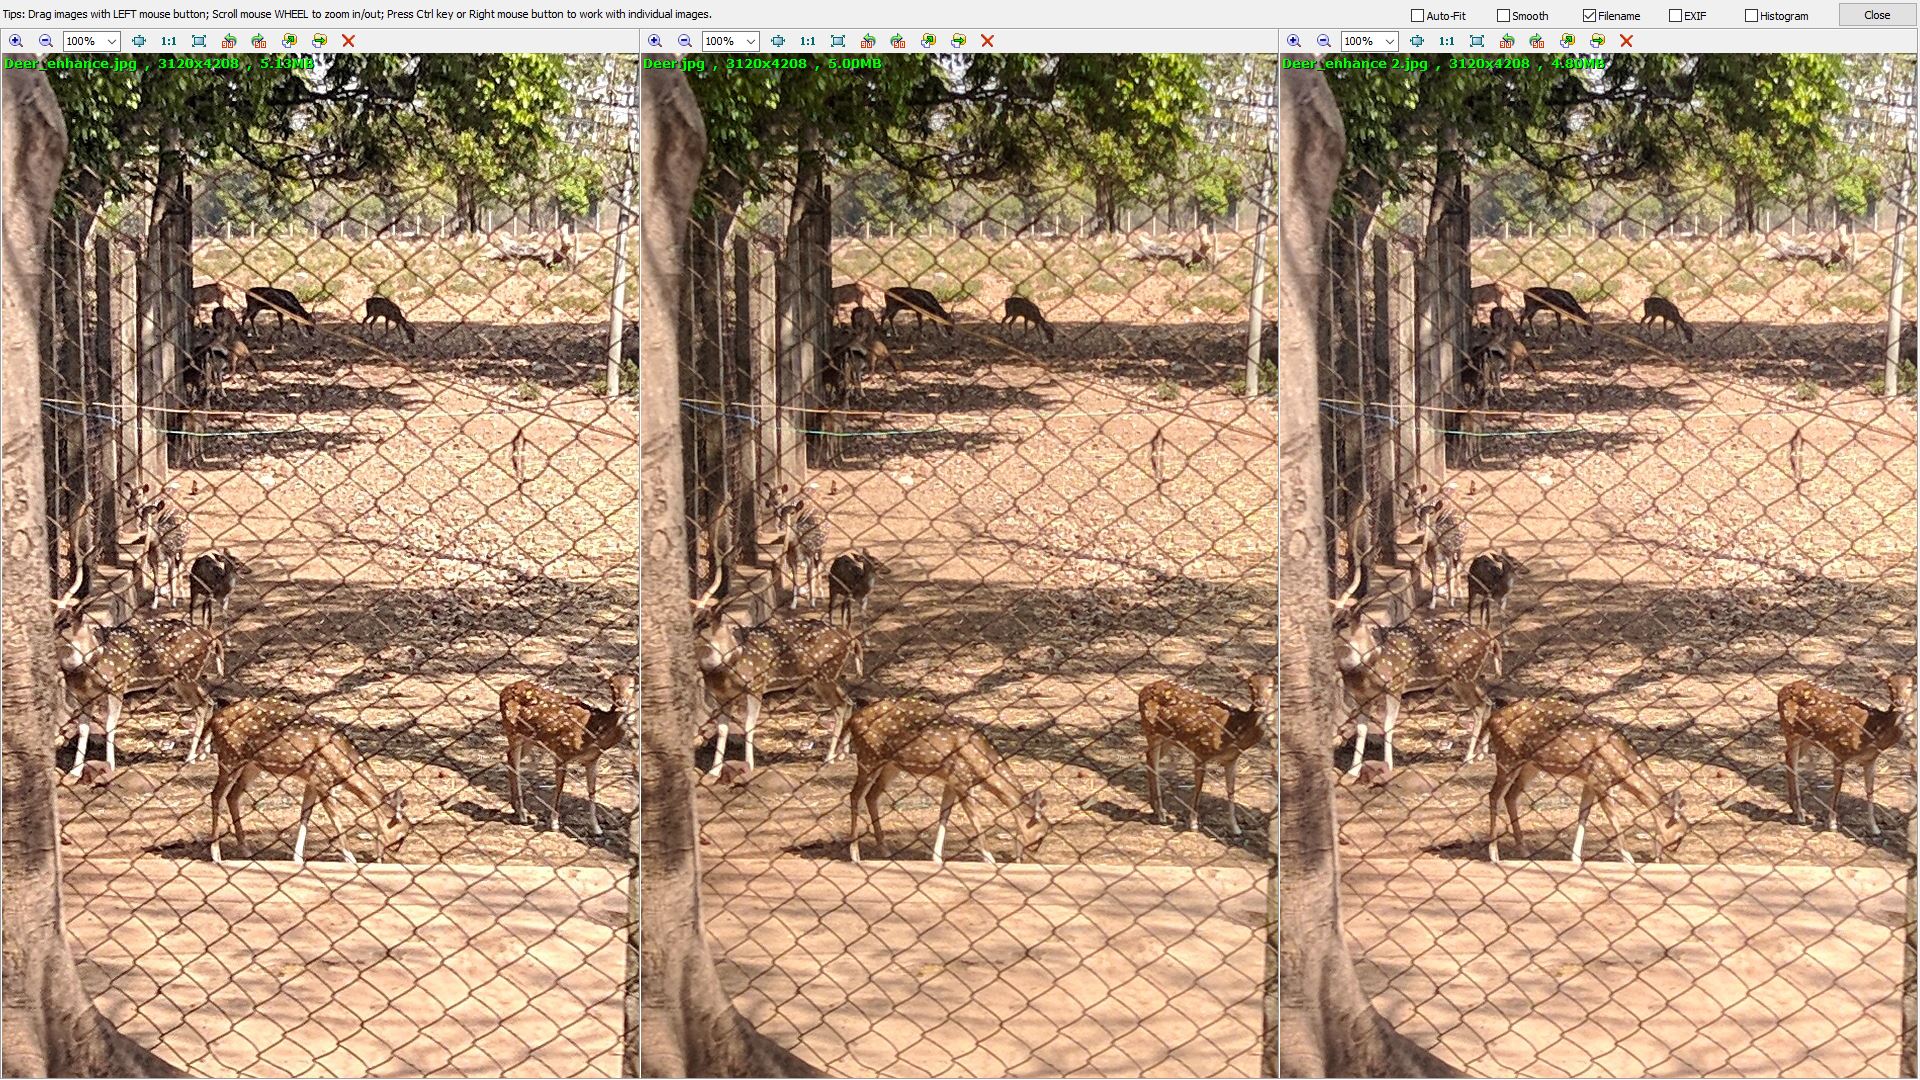
The photo on the left is the enhanced version from Fenophoto (default profile), and it has considerable difference in the quality. The leaves are duller, but the fence and the deer are clearer and the overall brightness is higher. The one on the right, which is the Nature profile (no noise reduction or sharpening) preserved the color of the leaves a little better, and the shadows a tad softer.

Note: The Deblur tool that can be used to remove blur effect from pictures, is done through an online service. Since the name wasn’t mentioned, I traced it using Glasswire and the IP address is the same as the software’s homepage, which has a server in Italy. It is understandable that users may think it is not good for privacy. The process is done within the program’s interface and the maximum resolution supported by the service is Full HD, i.e., 1920 x 1080 pixels, so if you have a larger image you’ll need to resize it manually.
When you are happy with the settings, hit the “Apply” button to apply the effects to the image. The preview on the right is not always accurate, so you may want to save the image to see it actually looks. Selecting the save option allows you to save the image in JPG, PNG or BMP formats. The new file is saved with an “_enhance.” in the name, so image.jpg will be saved as image_enhance.jpg in the source folder, but you can rename it to whatever you want or save it in a different directory. You can also choose the compression level or adjust the width of the image from the save dialog window.
The installer is a bit heavy at 100MB, but the program works wonders. Fenophoto is not memory intensive, but it takes a few seconds to load, process or save images. Tinker with the settings and you might be able to get a nice image.

Fenophoto
For Windows