
The latest iteration of Word is geared more toward folks using the Web. The default line spacing has been changed to 1.15 — a more casual look that works well if you are creating content for the Web. If you are not, however, and most are not, you can change this setting.
Line Spacing
Most companies and their employees are going for the older, more formal look, and this can still be achieved.
Follow the steps below to learn how:
- In your Quick Styles Gallery, right-click on Normal.
- Select Modify.
- From the Format list, select Paragraph.
- You can also right-click the background in your document or inside a paragraph, to select Paragraph.
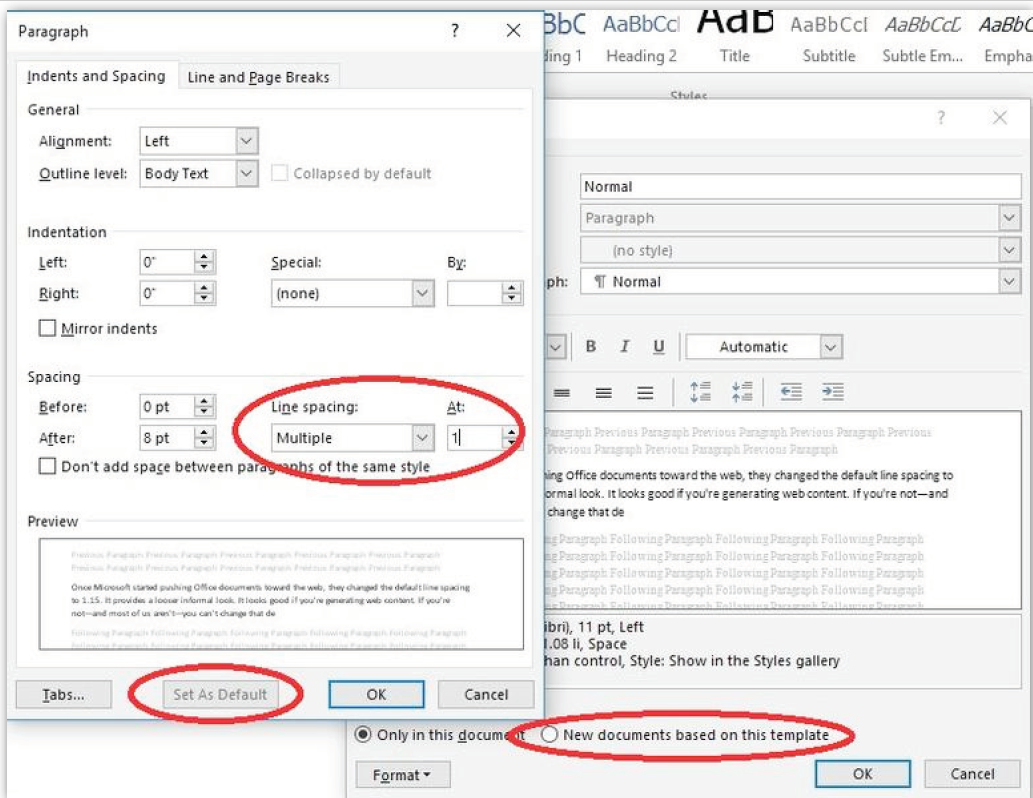
- In the Spacing area, change the At setting from 1.15 to 1, or change Multiple to Single.
- If it has been enabled, click Set As Default.
- Click OK.
- If Set As Default is not enabled, click OK and tick the New Documents Based on this Document option at the bottom.
If you are wondering about the Multiple setting, a Multiple setting of 1 is similar to Single, but not the same. The Line Spacing setting determines how Word will handle spacing when a line has more than one font size. This distinction will not matter to many of us. Also, line spacing is not always the same size as your font. Many fonts use a smaller measurement for line spacing.