Do you often activate the CapsLock key on your keyboard accidentally? Want to completely disable the CapsLock key on your Windows 10 PC? Here are three ways to disable the CapsLock key in Windows 10.
Before we tell you how to disable the CapsLock key, it is important to note that Windows 10 does not offer a straightforward method to disable the CapsLock key.
You need to either manually edit the Registry (relatively easy though) or use a third-party tool to disable the CapsLock.
NOTE: When the CapsLock key is disabled, you can hold down the Shift key to type a letter in capital.
Method 1 of 3
Disable the CapsLock key via Registry in Windows 10
This method is probably the easiest way out there to completely disable the CapsLock key in Windows 10.
Step 1: Open the Registry Editor. To do so, type Regedit in the Start/taskbar search field and then hit the Enter key.
Click on the Yes button when you get the User Account Control key.
Step 2: In the Registry Editor, navigate to the following key:
ComputerHKEY_LOCAL_MACHINESYSTEMCurrentControlSetControlKeyboard Layout
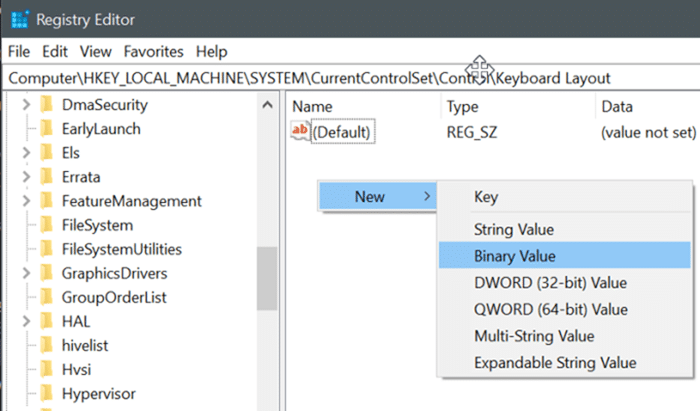
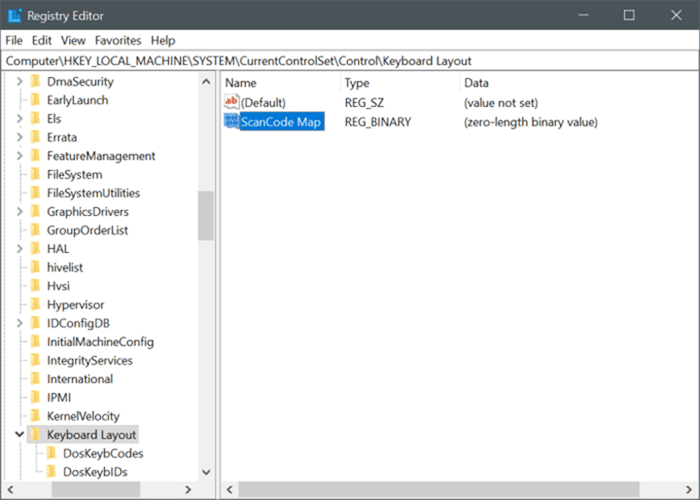
Step 3: Select the Keyboard Layout key in the left pane. On the right-side, right-click on an empty space, click New and then click the Binary Value. Name the new Binary Value as ScanCode Map.
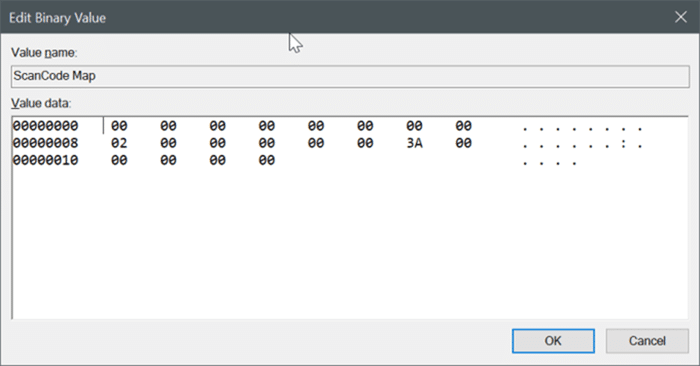
Step 4: Finally, double-click on the ScanCode Map to change its default binary value. Add the following binary value to disable the CapsLock key.
00 00 00 00 00 00 00 00 02 00 00 00 00 00 3A 00 00 00 00 00
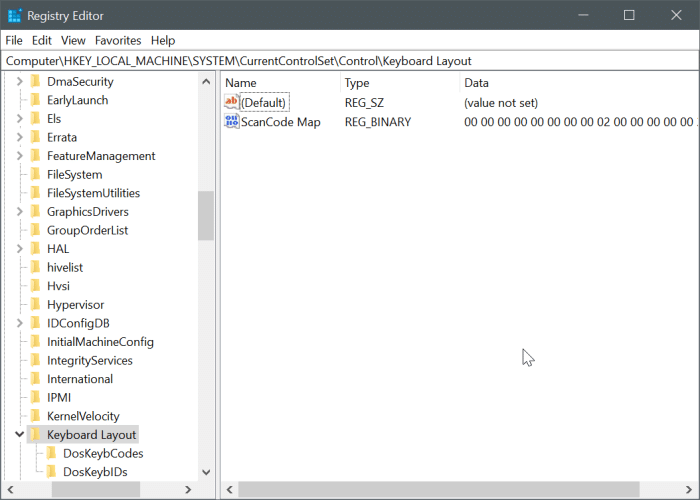
Click on the OK button to save.
Step 5: Reboot your computer once to apply the change. From here on, Windows will not turn on the CapsLock when you press the CapsLock key. However, you can temporarily turn on the CapsLock by pressing the Shift key.
To enable the CapsLock key
Step 1: In the Registry Editor, go to the following key:
ComputerHKEY_LOCAL_MACHINESYSTEMCurrentControlSetControlKeyboard Layout
Step 2: Right-click on the ScanCode Map binary value and delete it.
Step 3: Restart your computer.
Method 2 of 3
Use KeyTweak to disable the CapsLock key in Windows 10
KeyTweak is a free utility designed to help PC users to disable any key on a computer running Windows 10. Here is how to use it to disable the CapsLock key.
Step 1: Download and install KeyTweak (free) on your computer. You can get it from this page: majorgeeks.com/files/details/keytweak.html
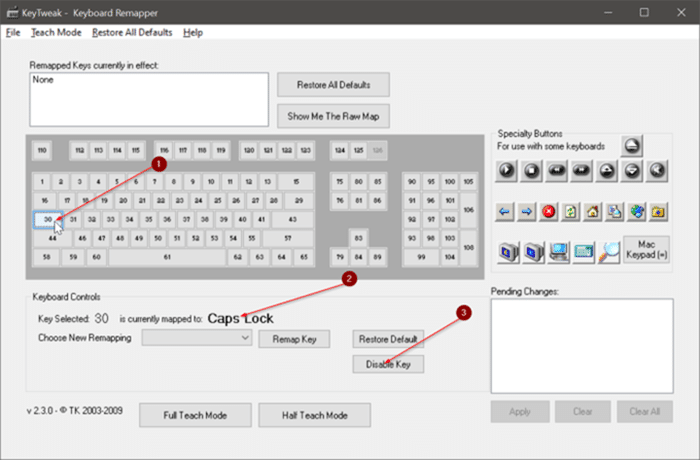
Step 2: Run the KeyTweak program. Select the CapsLock key from the keyboard diagram, make sure that the selected key is the CapsLock key, and then click on the Disable Key button.
Finally, click on the Apply button.
Method 3 of 3
Remap the CapsLock key to Shift or any other key
You might want to remap the CapsLock key to any other key instead of disabling it altogether. This way, you will still be able to use the key. For instance, you might want to remap the CapsLock key to the Shift key.
For remapping, we use a free application called SharpKeys.
Step 1: Download, install, and run SharpKeys on your PC. You can get it from this URL: github.com/randyrants/sharpkeys/releases
Step 2: Once launched, click on the Add button.
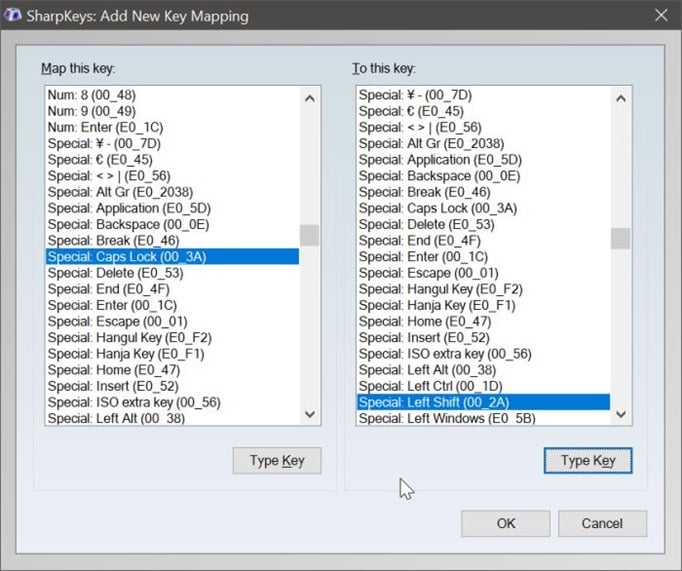
Step 3: When you get the following screen, click on the Type key button on the left-side and then press the CapsLock key on your keyboard to select it.
Next, click the Type key button on the right-side and then press the Shift key or any other key that you would like to remap the CapsLock key to . Click the OK button.
Step 4: Finally, click on the Write to Registry button to save the changes.
Step 5: Reboot your computer once to apply the remapping.

