
I’ve recently encountered the MULTIPLE_IRP_COMPLETE_REQUESTS BSOD error while using LogMeIn Hamachi on my laptop.
Initially baffled, I dove deep into researching various fixes. Through my previous experience in solving BSODs, I found some effective solutions.
What Is 0x44 Blue Screen Of Death Error?
The MULTIPLE_IRP_COMPLETE_REQUESTS or 0x44 stop error typically occurs when a driver tries to complete an I/O request packet (IRP) that has already been completed or canceled. This leads to a critical system crash.
In simpler terms, imagine a delivery person trying to deliver a package that’s already been delivered. This redundancy creates confusion and, in the case of Windows, results in a system halt to prevent damage.
What Causes MULTIPLE_IRP_COMPLETE_REQUESTS Error?
This error is often triggered by driver conflicts or hardware issues, particularly when using software like LogMeIn Hamachi. The common causes include:
- Driver Conflicts: Clashes between two or more drivers vying for the same resources.
- Faulty Hardware: Problems with critical hardware components, such as RAM or hard drives.
- Outdated or Corrupt Drivers: Drivers that are obsolete or corrupted, leading to system incompatibilities.
- Software Conflicts: Issues arising from software, notably LogMeIn Hamachi, which can interfere with system drivers.
- Corrupted System Files: Vital Windows files becoming corrupted or damaged.
- Malware Infection: Malicious software that can corrupt drivers or essential system files.
How to Fix MULTIPLE_IRP_COMPLETE_REQUESTS Blue Screen of Death?
If you find it too complicated to follow the troubleshooting methods, try using a BSOD repair tool.
1. Preliminary Checks
- Restart Your PC
- Close all running applications.
- Click on the Start menu, select the power icon, and choose ‘Restart.’
- After restarting, observe if the BSOD error reoccurs.
- Unplug and Plug the External Hardware
- Power down your computer.
- Disconnect all external devices (USB drives, printers, etc.).
- Power on your computer and check if the error persists. If it doesn’t, reconnect each device one at a time to identify the problematic hardware.
2. Update LogMeIn Hamachi
Outdated versions of LogMeIn Hamachi can sometimes conflict with your system’s drivers. Ensuring you have the latest version can resolve these conflicts.
- Launch the Hamachi application on your PC.
- Look for the Help option and click it. Select the Check for updates option.
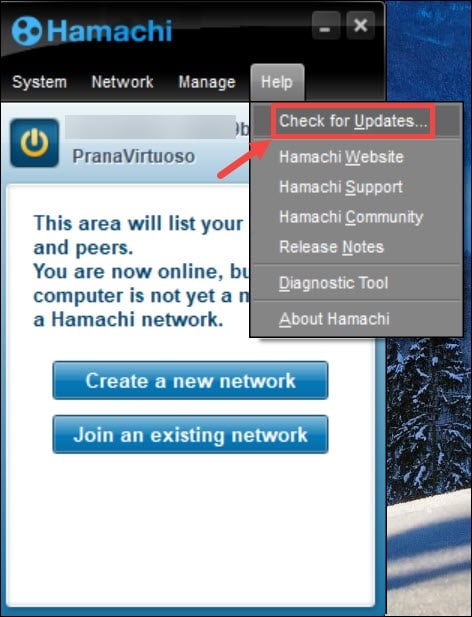
- If an update is available, follow the prompts to download and install the latest version.
- After updating, reboot your PC to ensure all changes take effect and check if the BSOD error is resolved.
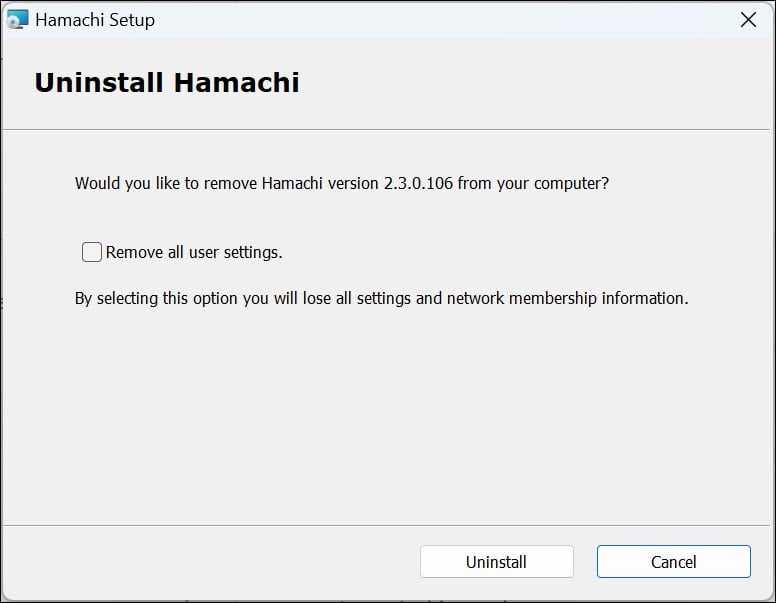
3. Uninstall LogMeIn Hamachi
If updating LogMeIn Hamachi doesn’t resolve the issue, uninstall it to determine if it’s the root cause of the MULTIPLE_IRP_COMPLETE_REQUESTS BSOD.
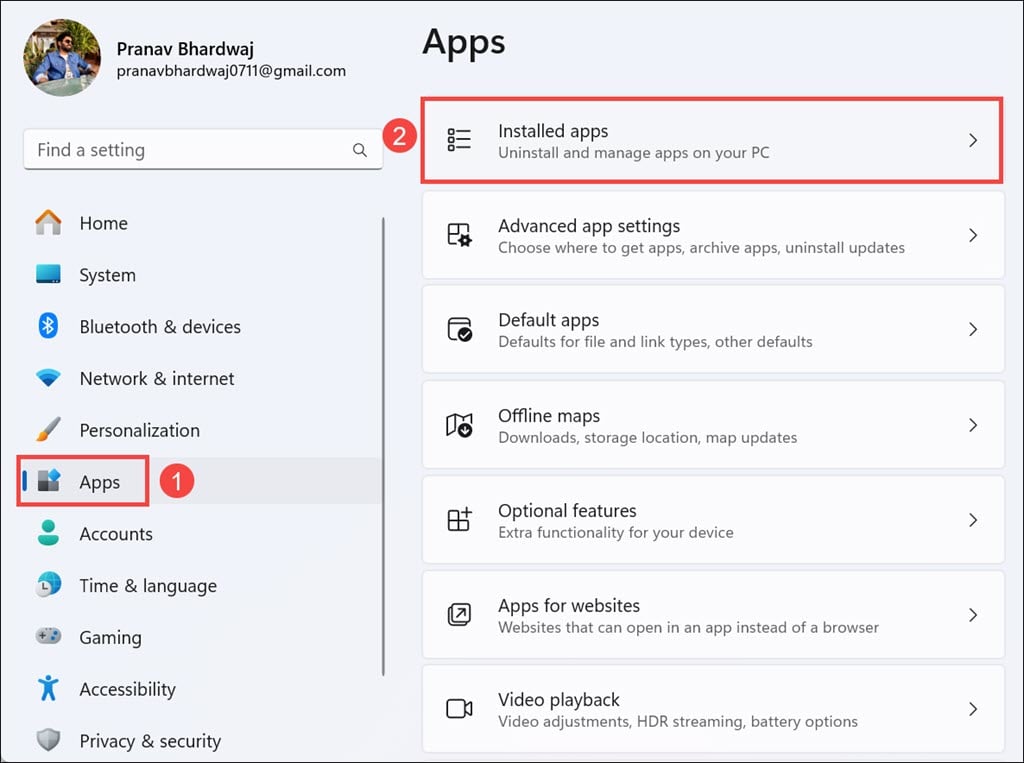
- Press Windows + I to launch Windows Settings.
- Switch to the Apps section on the left and select Installed apps on the right.
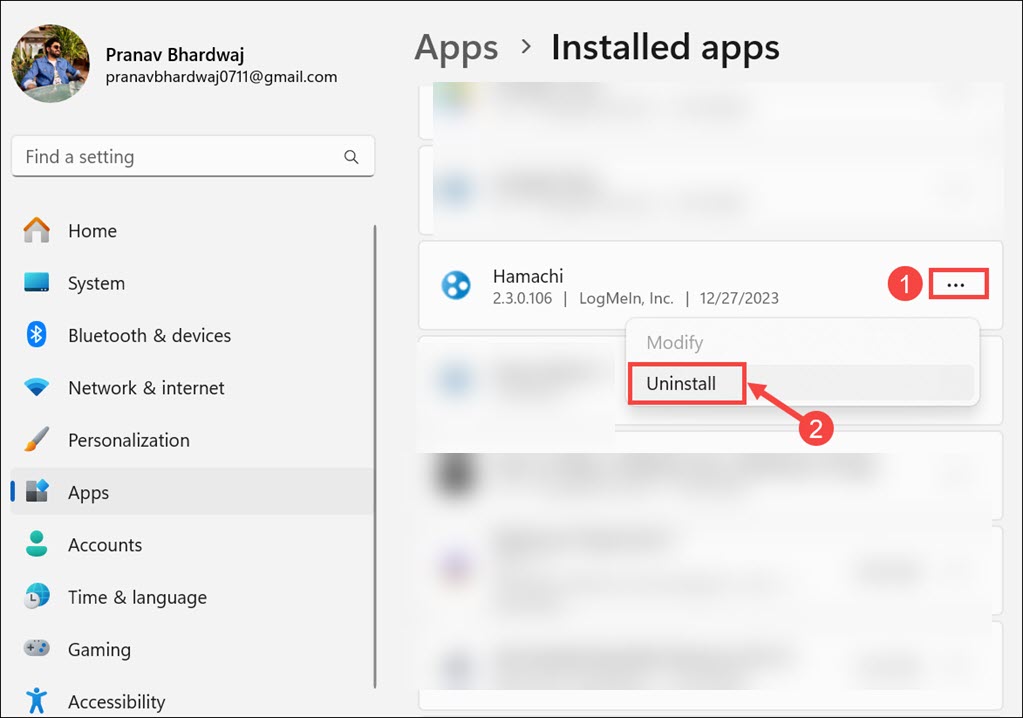
- Scroll down and look for the Hamachi app. You can also search for it on the search bar.
- Now, click the three dots icon next to Hamachi and select the Uninstall option.
- Next, select the Uninstall button.
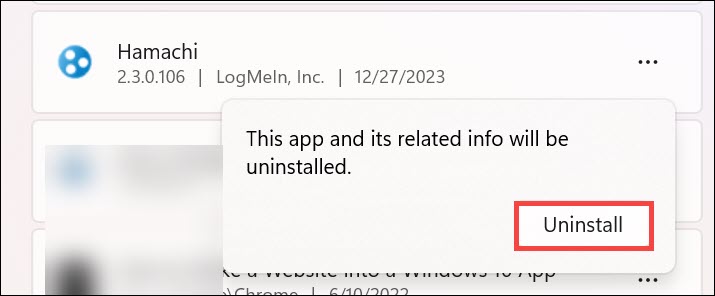
- Follow the on-screen instructions.
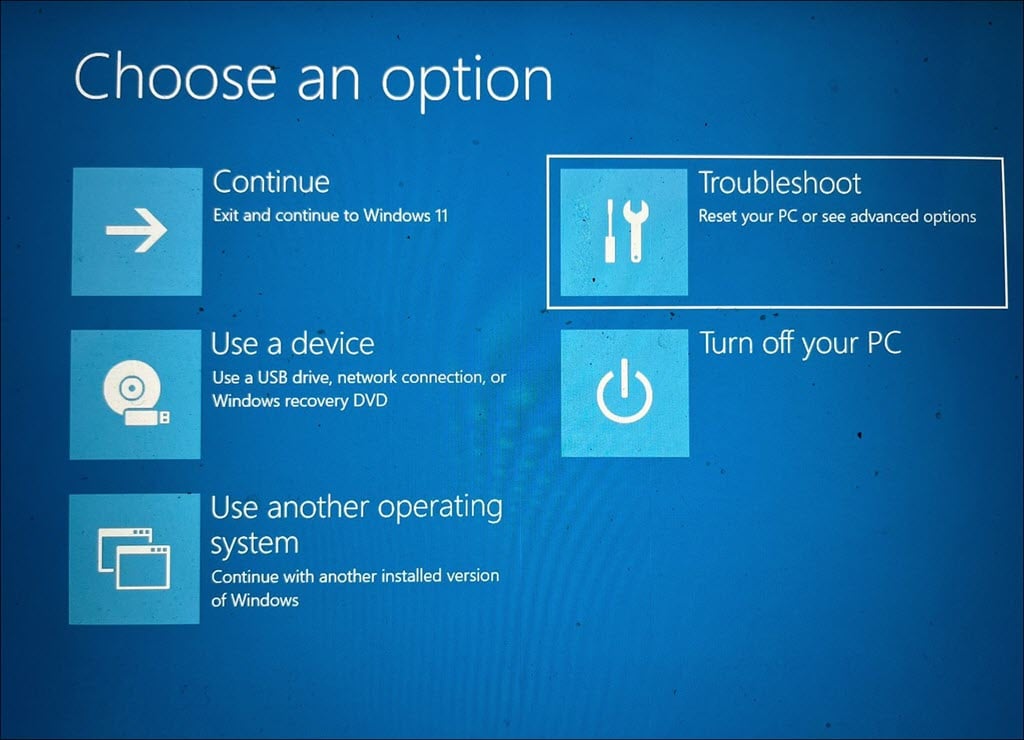
4. Start Windows in Safe Mode
Safe Mode in Windows starts the system with minimal drivers and services. It’s a diagnostic mode that helps isolate the cause of the BSOD.
- Open the Start Menu, press and hold the Shift key, and then choose the Power icon followed by the Restart option.
- After your system restarts, select Troubleshoot.
- Then, choose Advanced options.
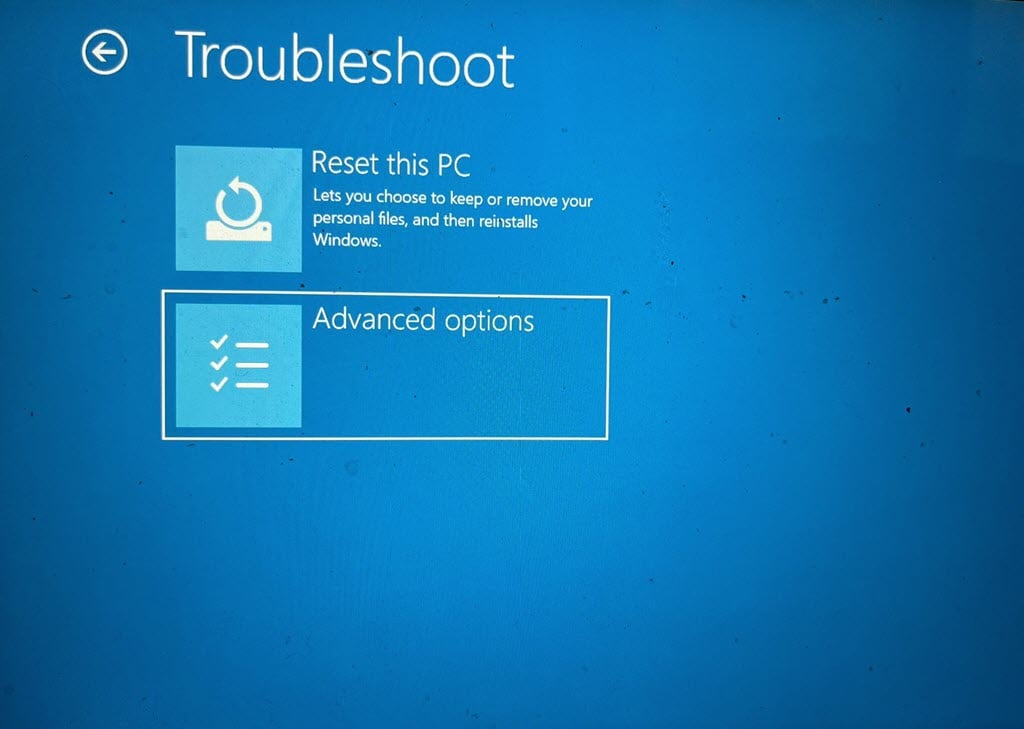
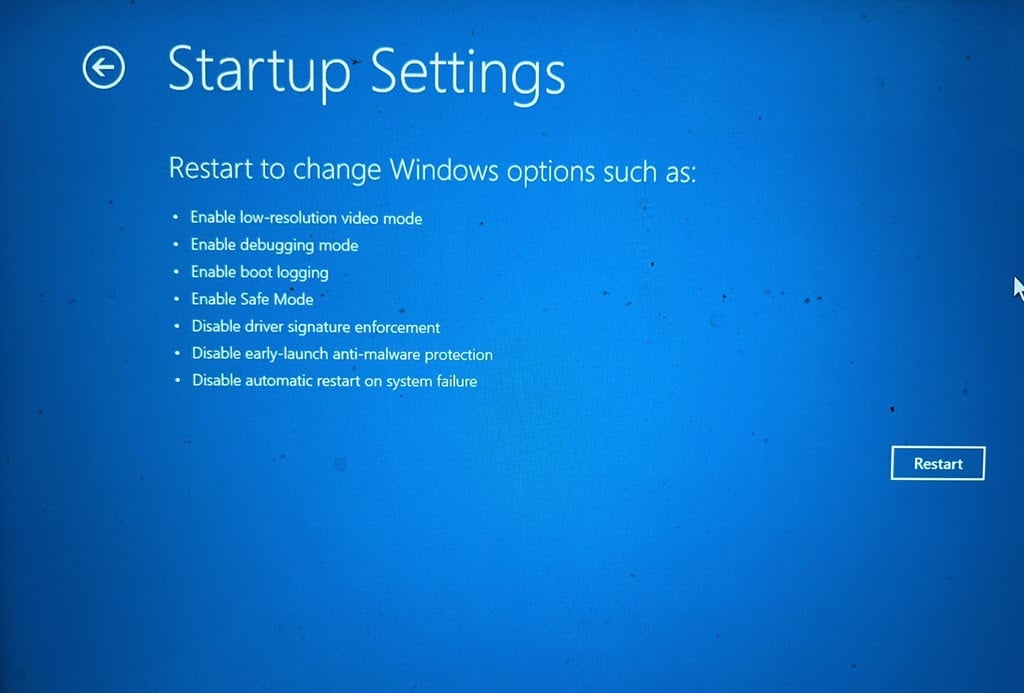
- In Advanced options, select Startup Settings.
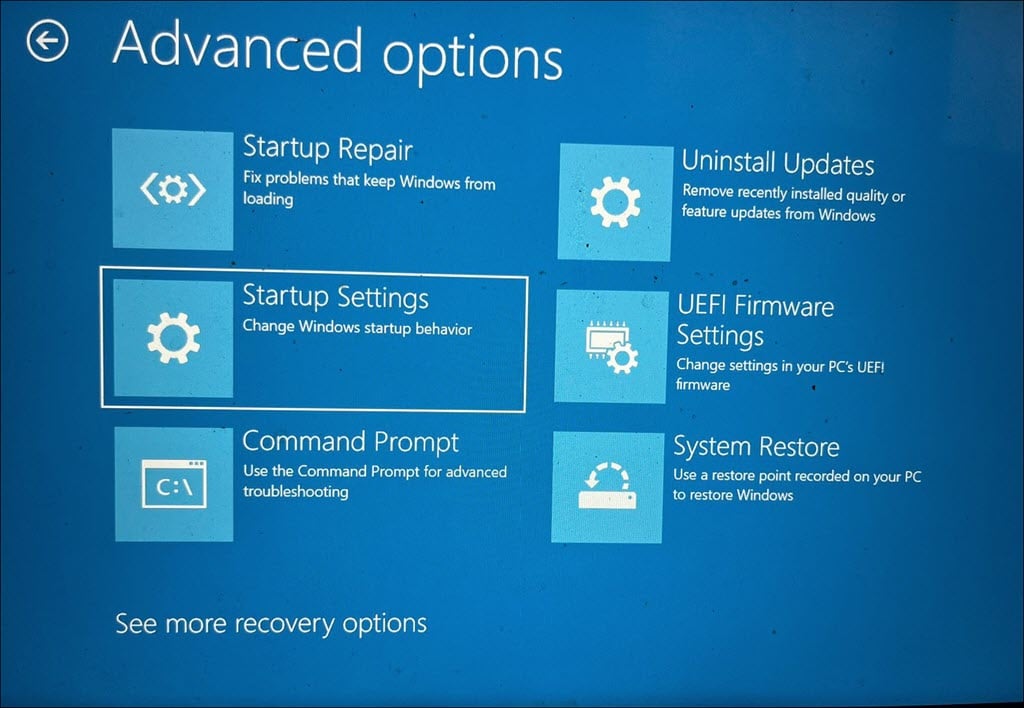
- On the following screen, click the Restart button.
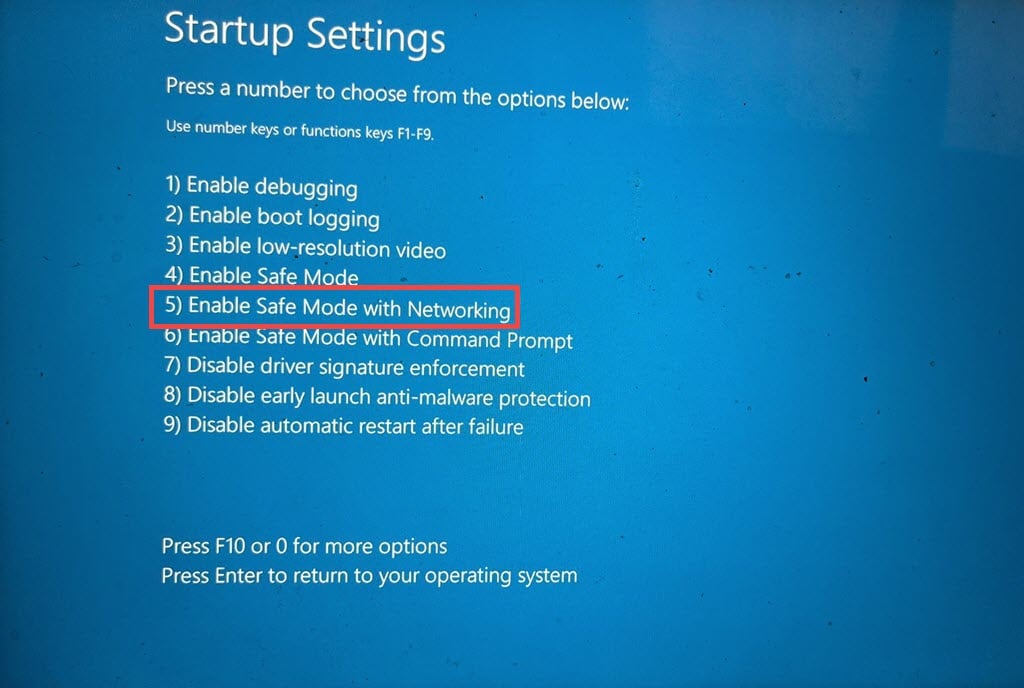
- When your system restarts, press F5 on your keyboard to boot Windows in Safe Mode with Networking.
- Your system should now be operating in Safe Mode.
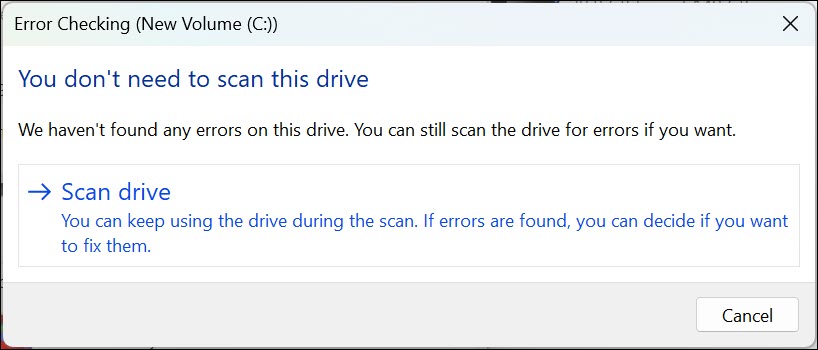
5. Check for File System Errors Using Windows Disk Scan Utility
The Windows Disk Scan utility checks for and repairs file system errors.
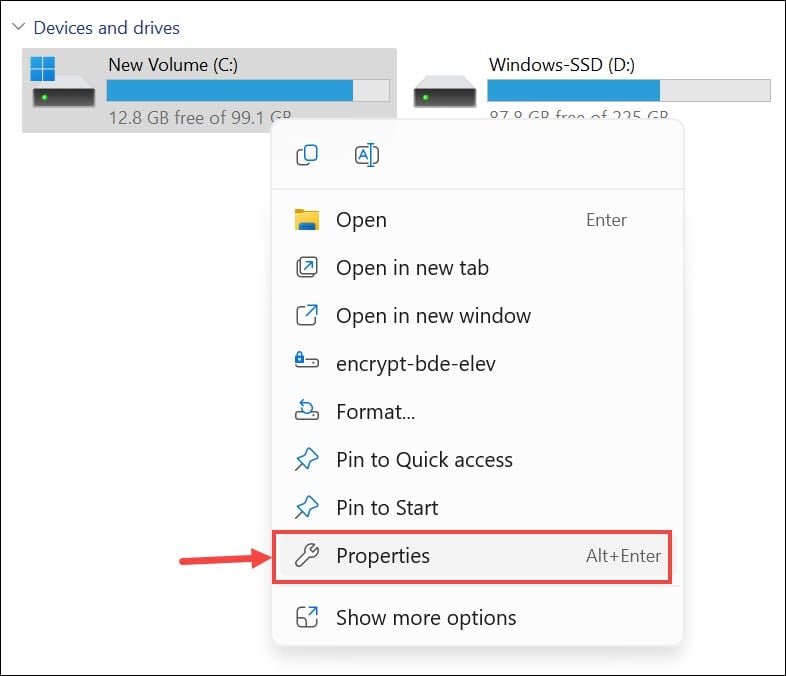
- Launch File Explorer and right-click on your system drive (usually the C: drive).
- Select Properties from the context menu.
- Navigate to the Tools tab and click Check.
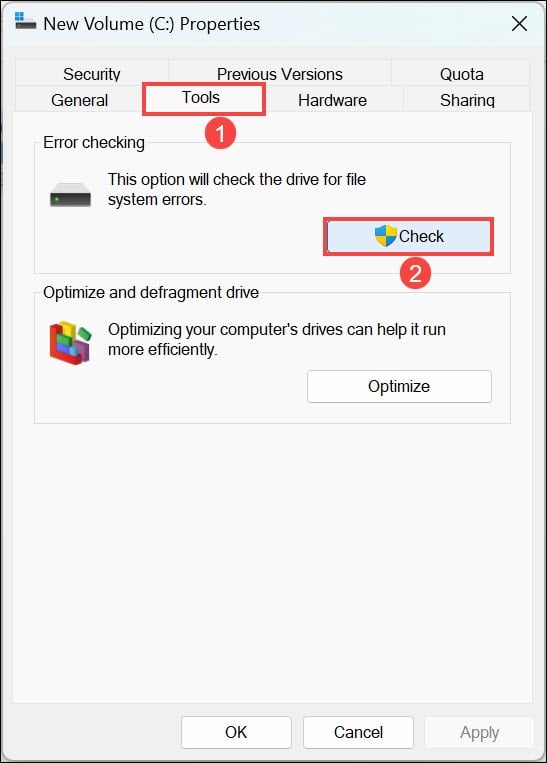
- Follow the on-screen instructions to scan and repair any found errors.
6. Run Windows Memory Diagnostic
The Windows Memory Diagnostic tool checks for errors in your RAM.
- Press the Windows key, type “Windows Memory Diagnostic,” and select it.

- Select Restart now and check for problems. Save any open work, as this will reboot your PC.
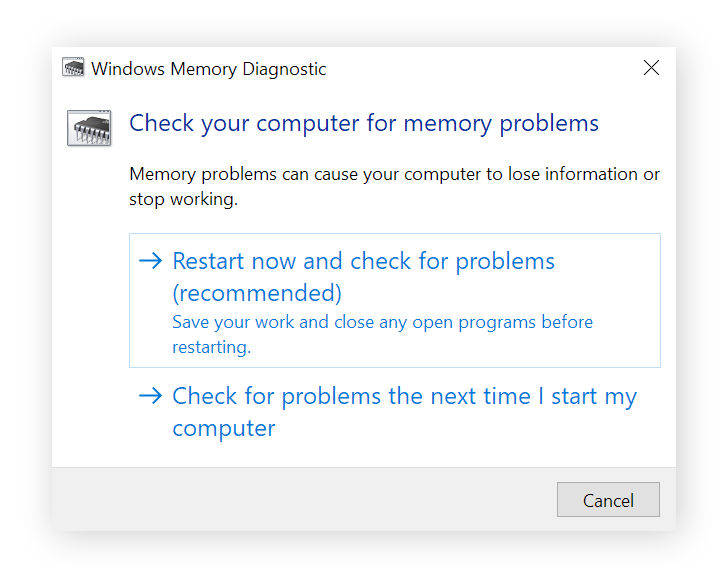
- Upon restart, the tool will check your RAM for errors. Review the results after logging back into Windows.
7. Uninstall Corrupted Drivers
- Right-click the Start button and select Device Manager from the menu.
- In Device Manager, identify devices that have a yellow exclamation mark.
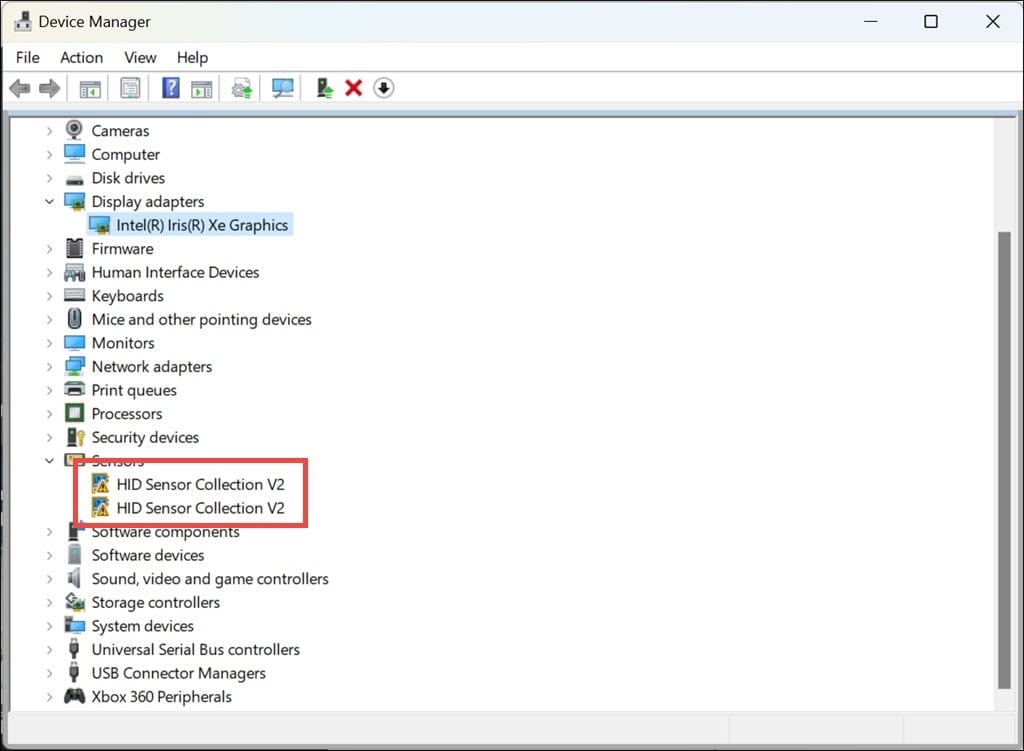
- Right-click on each and select Uninstall device.
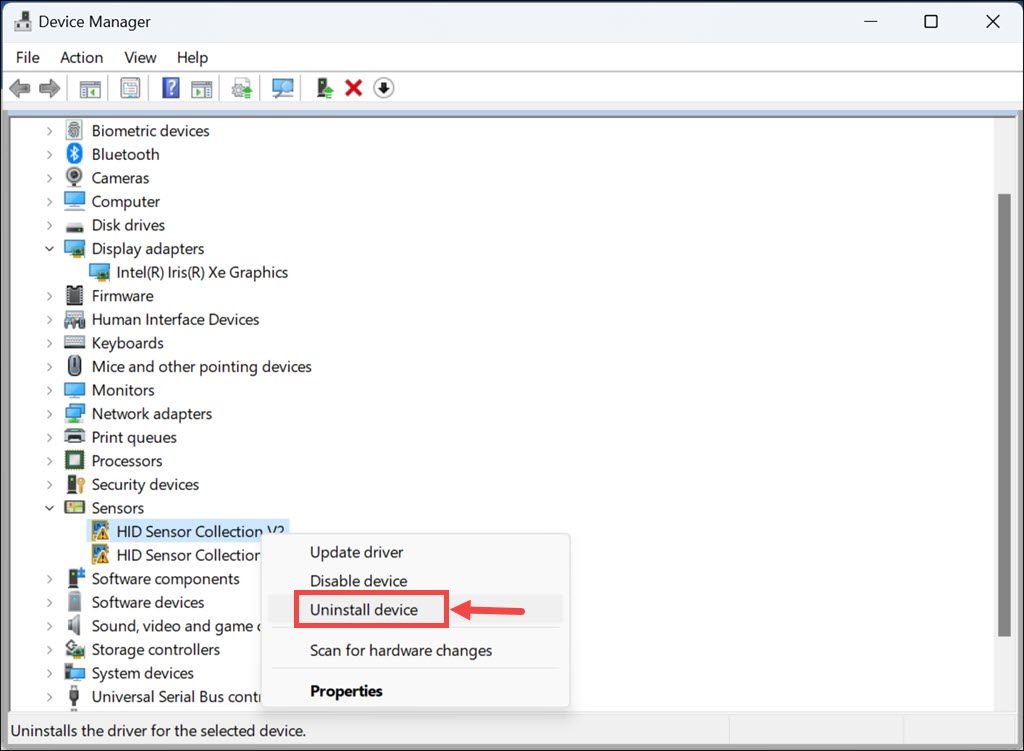
- Once you have uninstalled the problematic drivers, restart your PC. Windows will automatically reinstall the required drivers upon reboot.
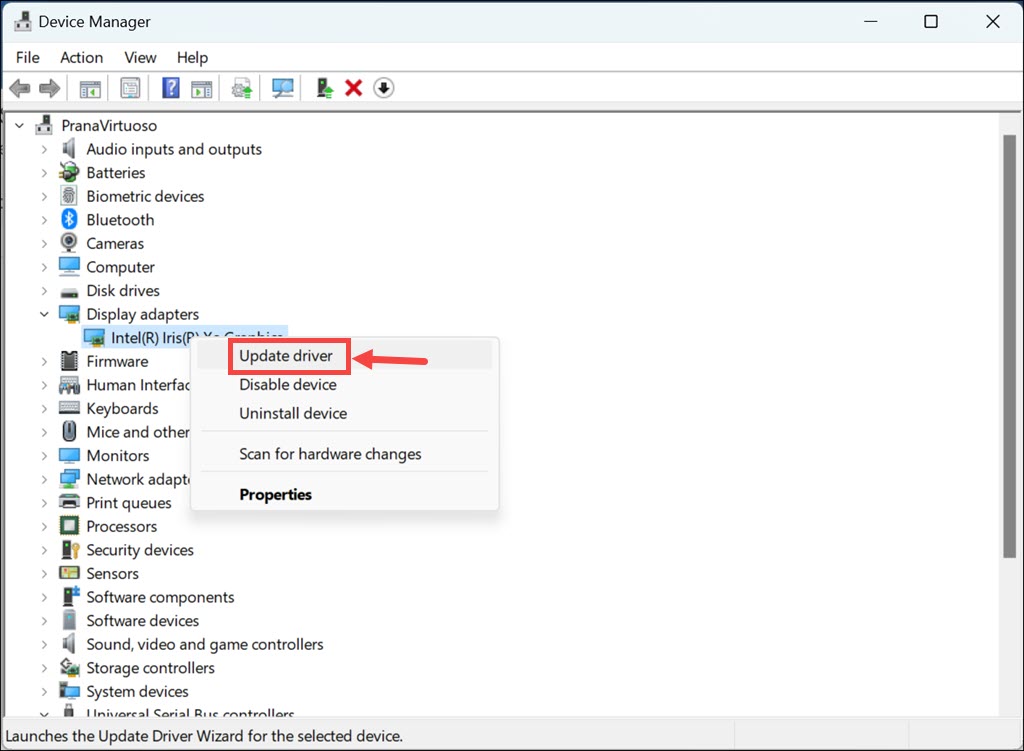
8. Update Drivers
- Open Device Manager again.
- Right-click on each important device (such as display adapters, disk drivers, etc.) and choose Update driver.
- On the following screen, select Search automatically for drivers.
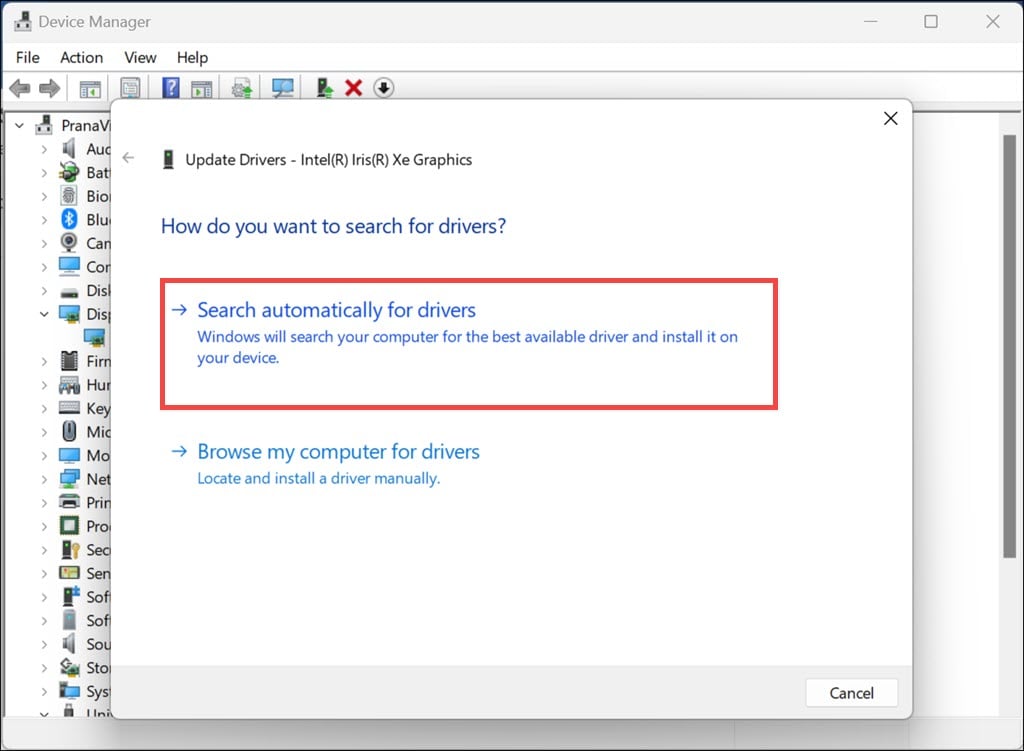
- Follow the on-screen instructions to install updates.
- After updating the drivers, restart your computer to ensure the changes take effect.
9. Run Check Disk (chkdsk) Command
The Check Disk utility is a Windows tool that scans your hard drive for errors and fixes them.
- Right-click the Start button and select Terminal (Admin).
- In the Terminal window, type
chkdsk /f /rand hit Enter to start the command. - Allow the command to complete its process. After it’s finished, restart your computer.
10. Run DISM and SFC Command
Deployment Image Servicing and Management (DISM) and System File Checker (SFC) are essential tools for repairing and restoring corrupted system files in Windows.
- In the Start menu, search for “Command Prompt” or “Terminal,” right-click on it, and choose Run as administrator.
- In the opened window, type
sfc /scannowand press Enter. This process may take a while.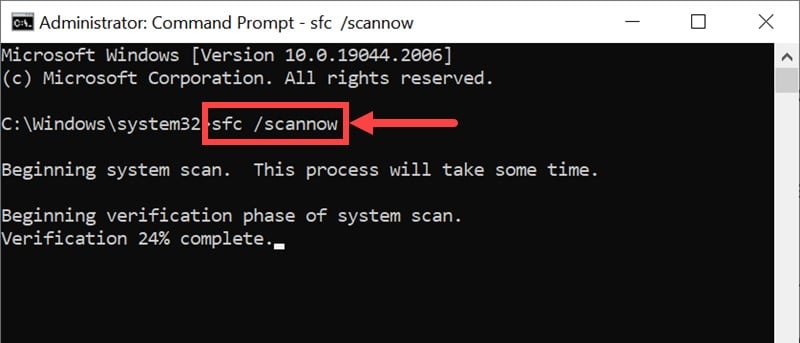
- After completing the SFC scan, type
DISM /Online /Cleanup-Image /RestoreHealthand press Enter. This tool will repair the Windows system image and address any issues SFC couldn’t fix.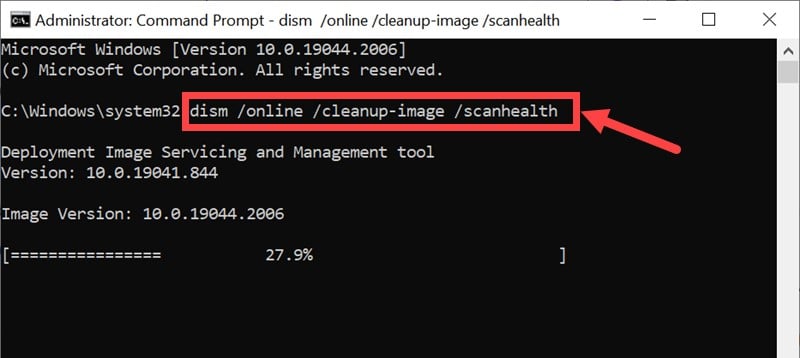
- Restart your computer to ensure all changes take effect properly.
11. Check for BIOS or Firmware Updates
Updating the BIOS or firmware can resolve compatibility issues and improve hardware functionality.
- Press Windows key + R, type “msinfo32,” and press Enter. Note the BIOS version/date.
- Go to your PC or motherboard manufacturer’s website and check for the latest BIOS/firmware updates.
- Carefully follow the manufacturer’s instructions to update the BIOS or firmware. This typically involves running an update utility or flashing the BIOS from a USB drive.
- After updating, restart your PC to ensure the new BIOS/firmware is active.
12. Scan for Malware
Running a thorough malware scan is critical to ensure your system isn’t infected.
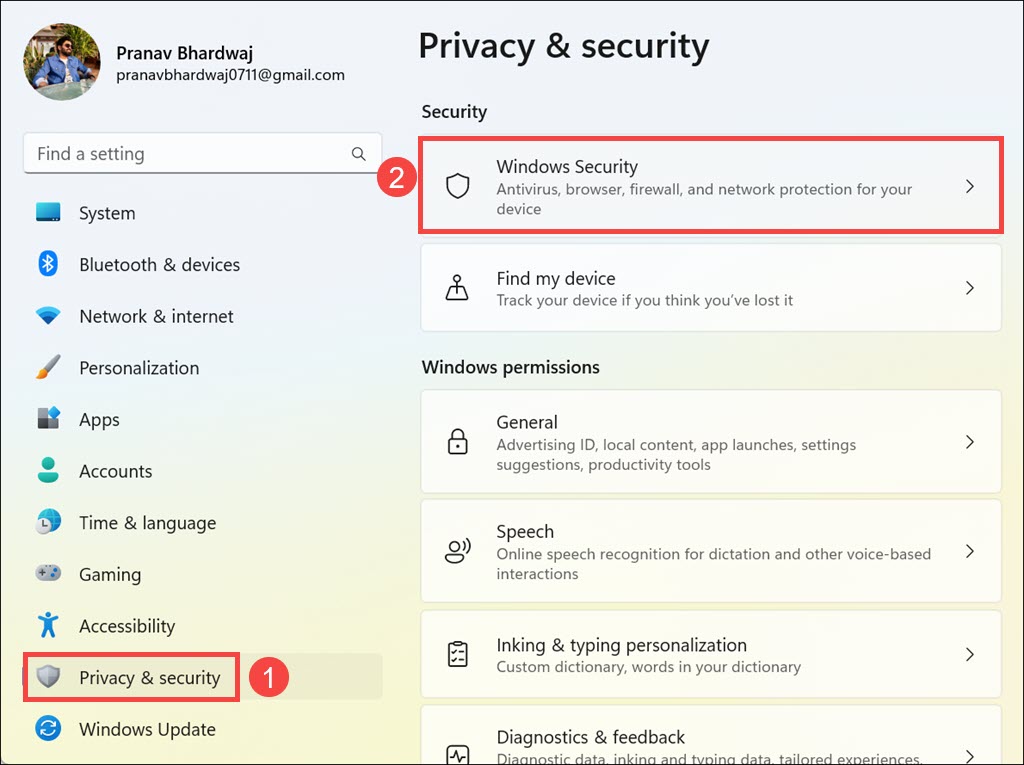
- Press Windows + I to open the Windows settings.
- Within the settings, go to the Privacy & security section on the left side, then select Windows Security on the right side.
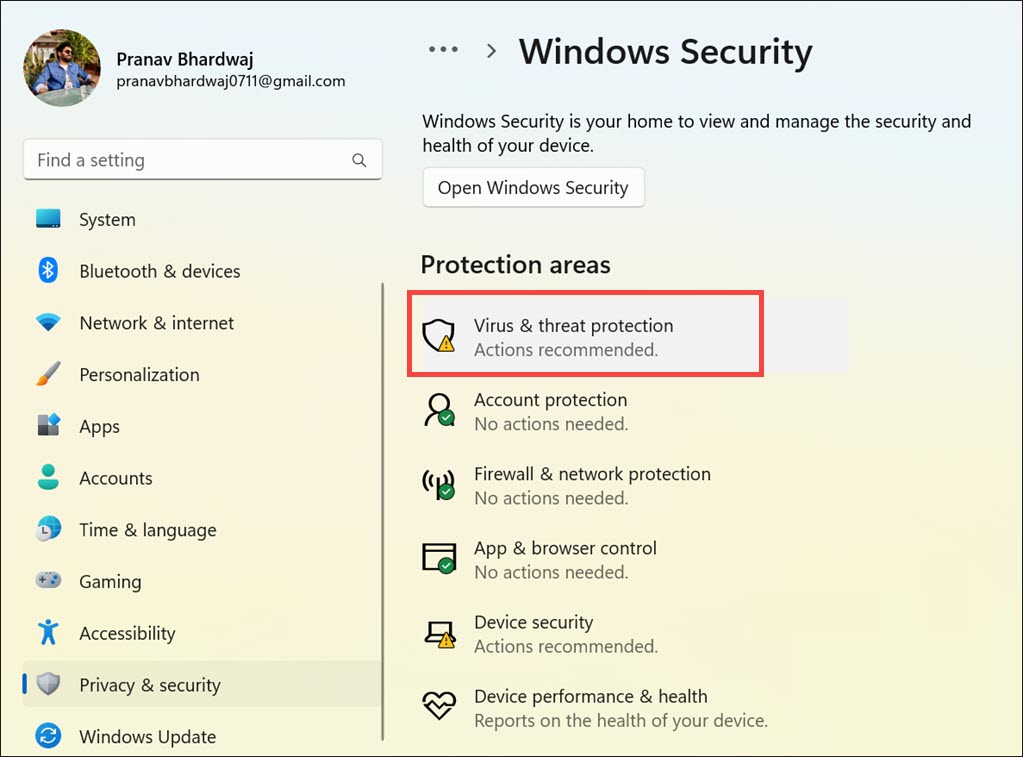
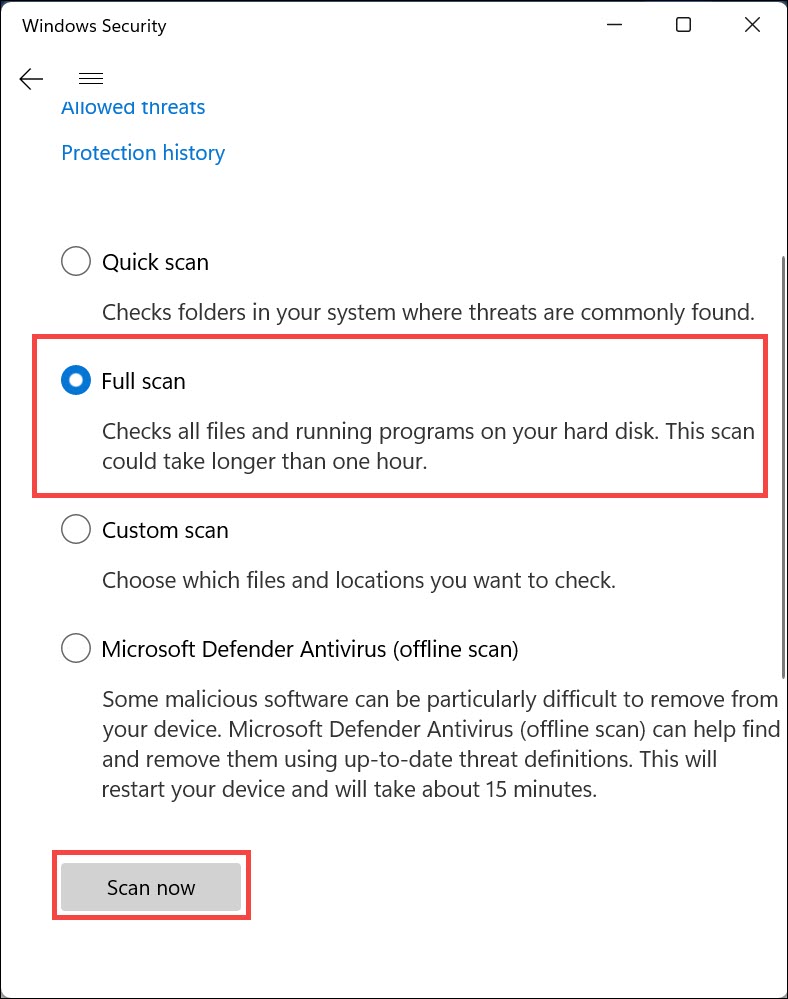
- Under “Windows Security,” click the Virus & threat protection option.
- Choose Scan options.
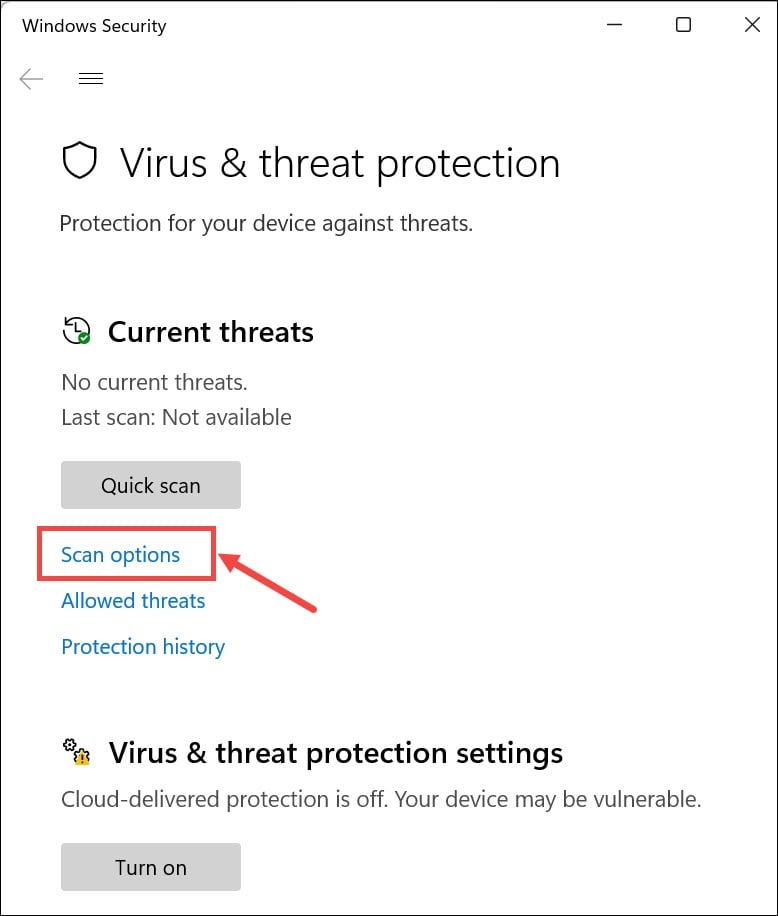
- Select Full scan and click the Scan now button.
13. Uninstall Recent Windows Updates
Occasionally, recent Windows updates can introduce system instabilities that may lead to BSODs.
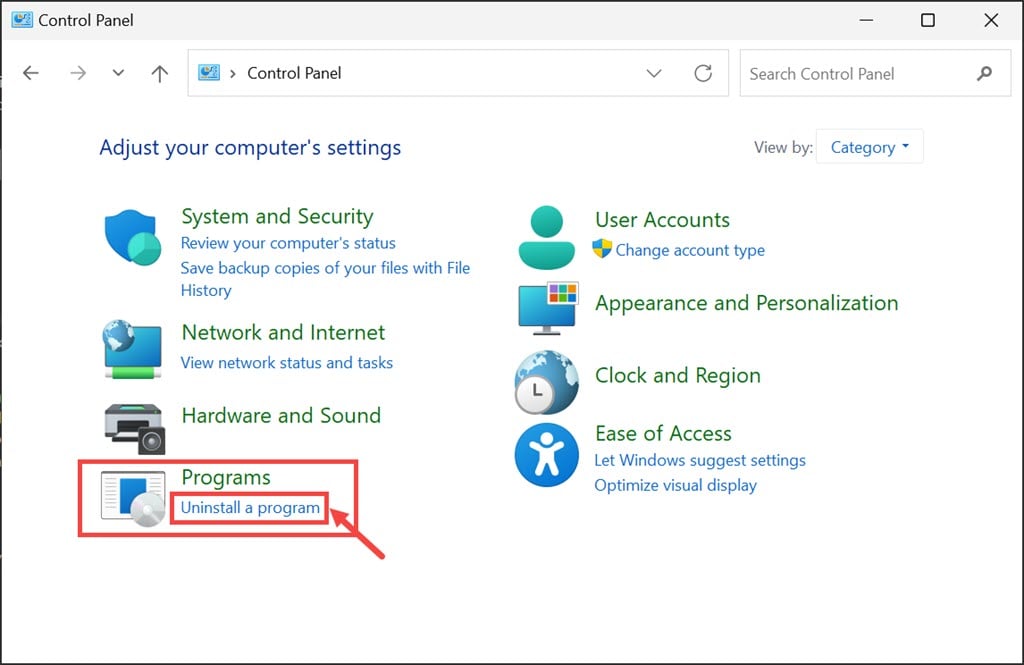
- Type Control Panel in the search bar and open it.
- Navigate to the Programs section and click on Uninstall a program.
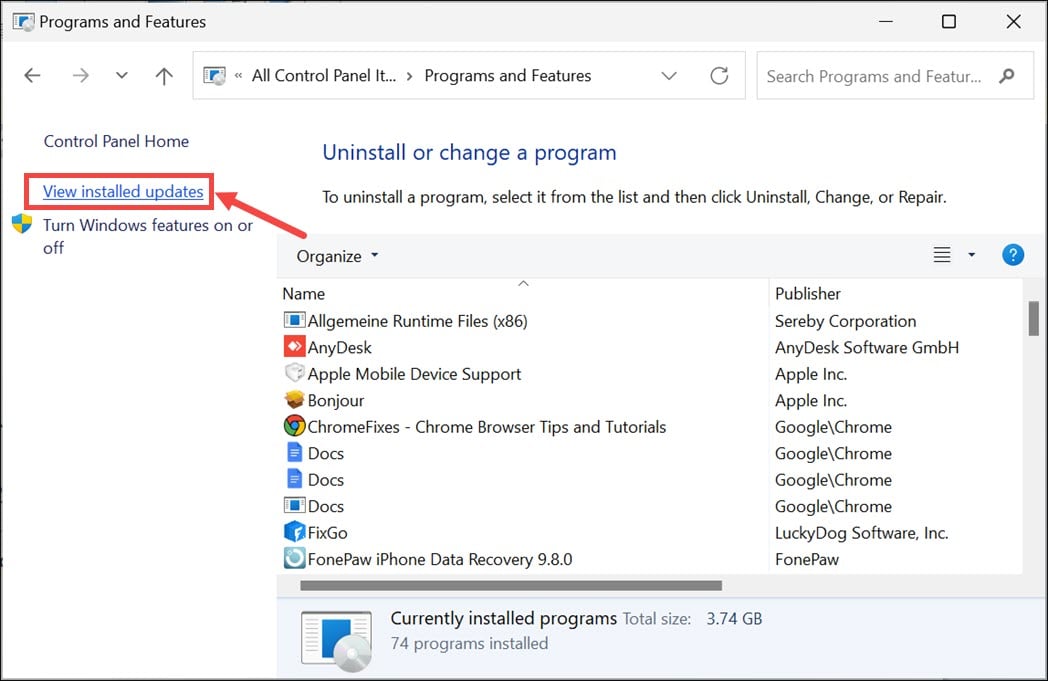
- In the left sidebar, click on View installed updates.
- Locate the most recent updates and click Uninstall for each of them.
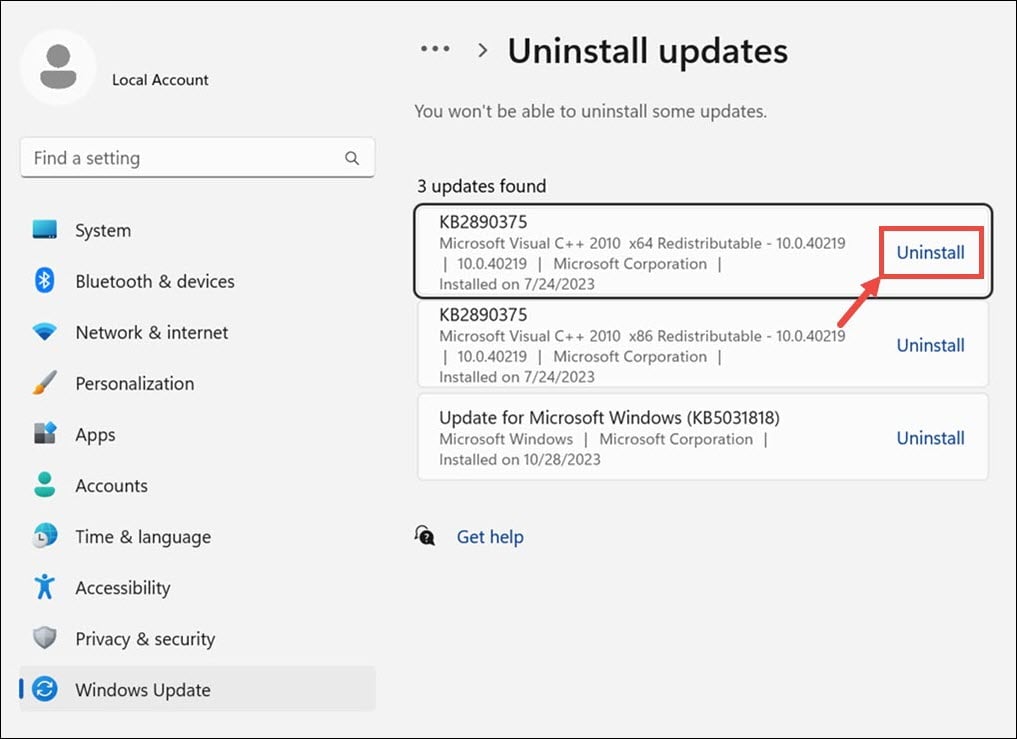
- Confirm the uninstallation of each update as prompted.

- Restart your PC and check if the issue is resolved.
14. Uninstall Recent Apps
Newly installed applications can sometimes cause conflicts, leading to BSOD errors.
- Open the Control Panel.
- Click on Uninstall a program, found under the “Programs” section.
- Click on the Installed on column header to sort the programs by their installation dates.
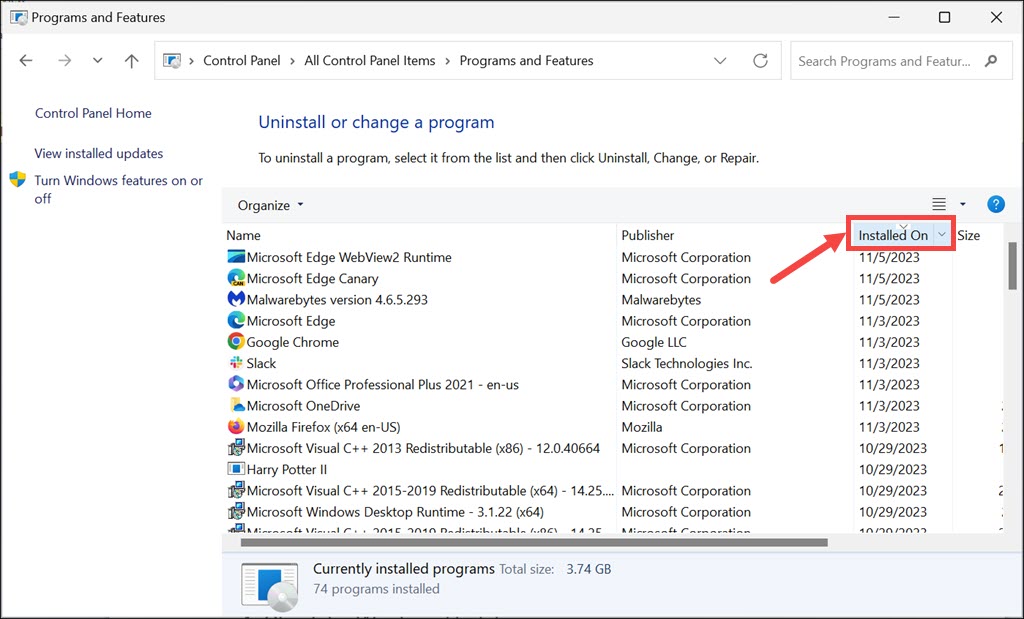
- Find and select the most recently installed application, then click the Uninstall button.

- Confirm the uninstallation when prompted.
- Restart your PC to check if the issue is resolved.
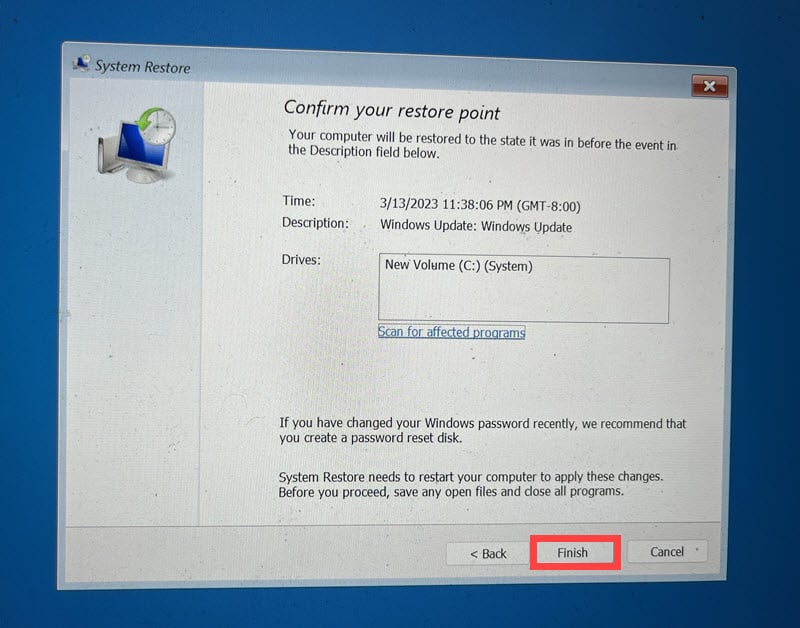
15. Restore Windows to a Previous State
System Restore will revert your computer to a previous state before the error started occurring.
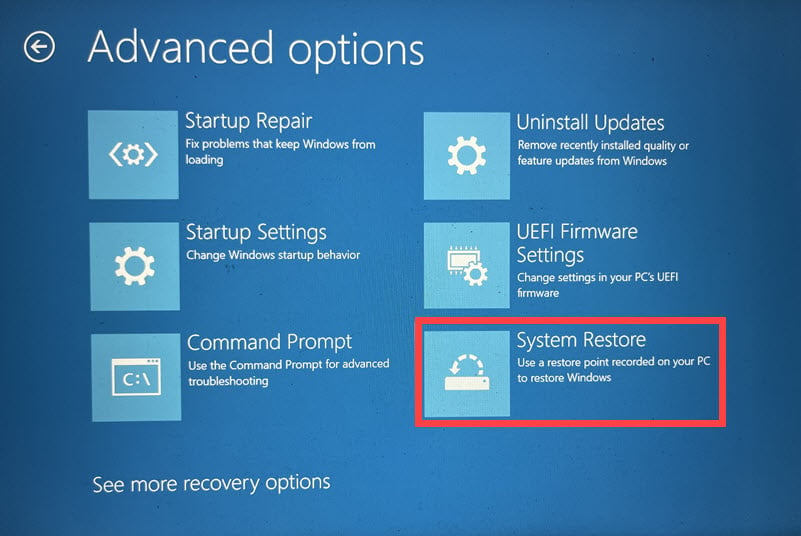
- Enter Automatic Repair Mode by force restarting your computer several times.
- Once in Automatic Repair Mode, select Troubleshoot.
- In the “Troubleshoot” menu, go to Advanced options.
- Find and select System Restore.
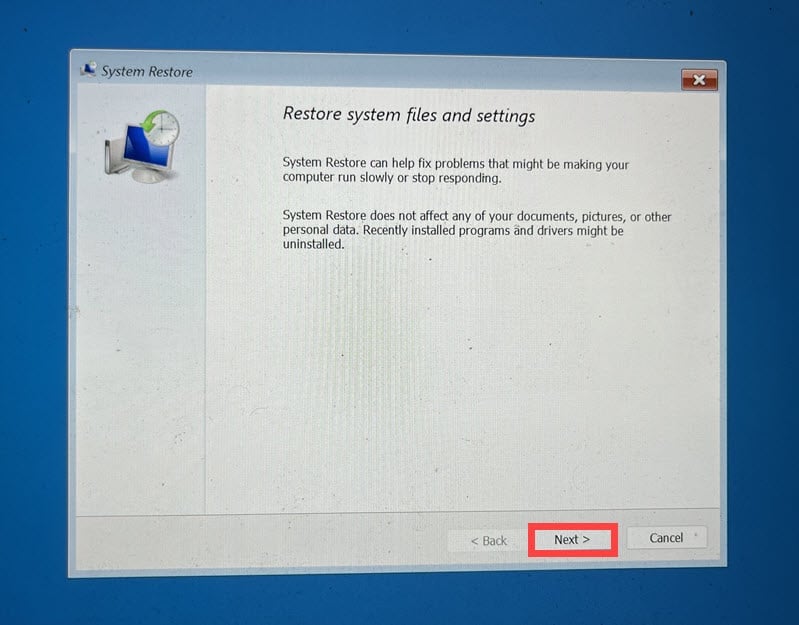
- Click Next to initiate the process.
- Select a restore point from the provided list, preferably the oldest one.
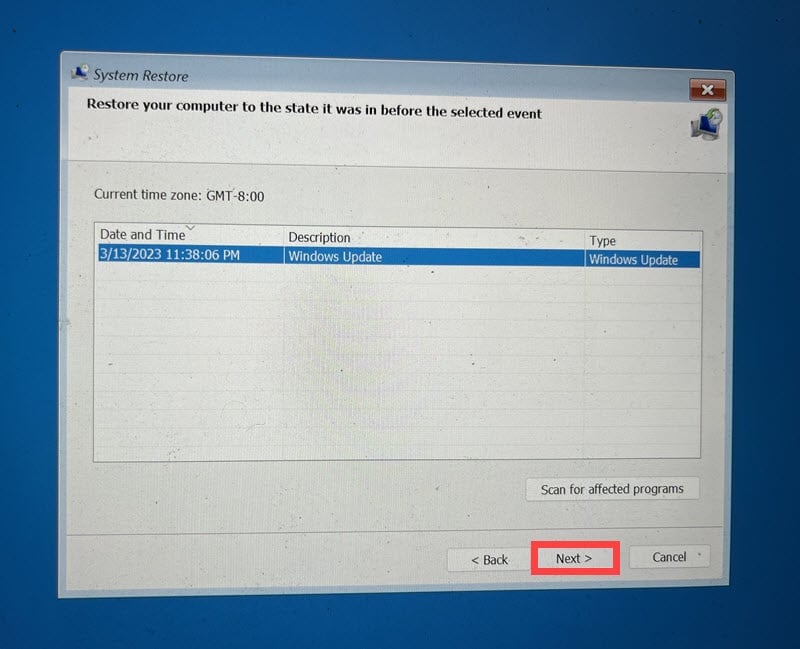
- Click Finish.
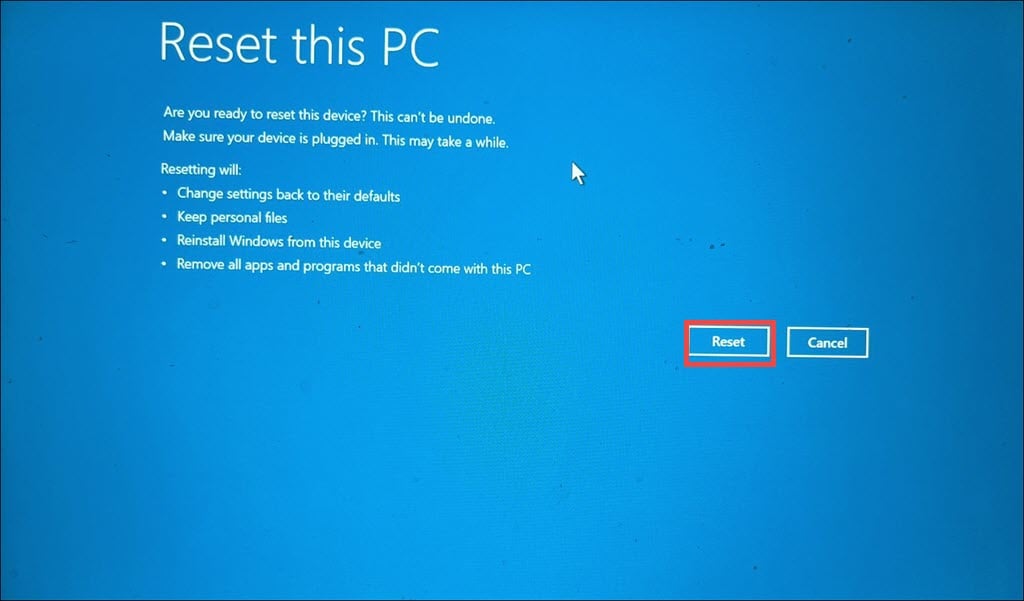
16. Reset Windows
Resetting Windows can help resolve persistent system issues by reinstalling the operating system.
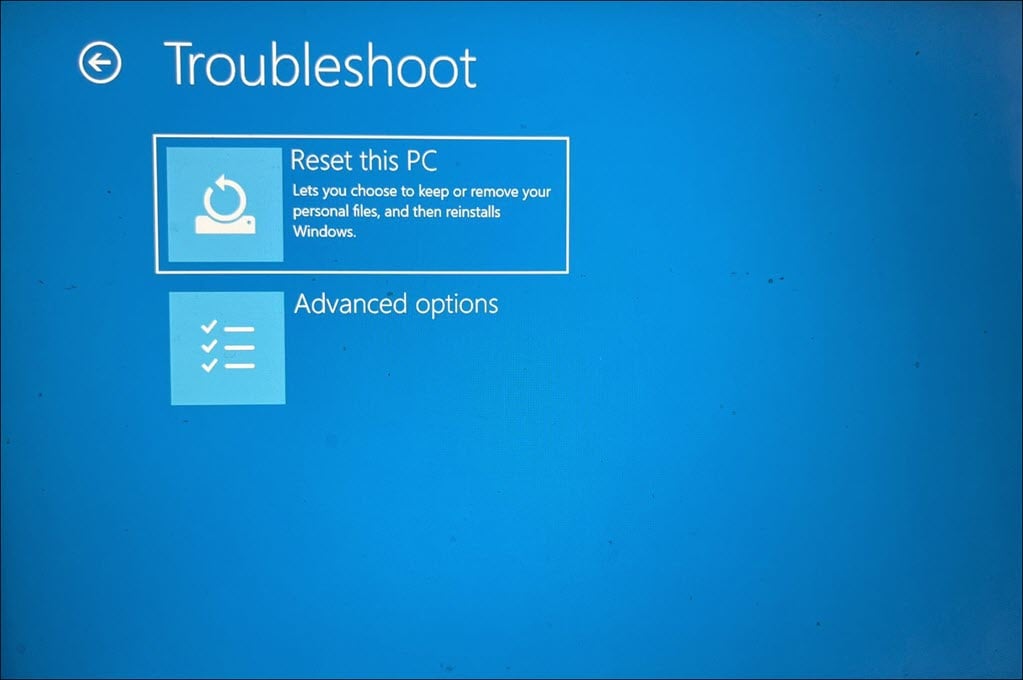
- Trigger Automatic Repair Mode by restarting your device several times.
- In Automatic Repair Mode, choose the Troubleshoot option.
- On the subsequent screen, select Reset this PC.
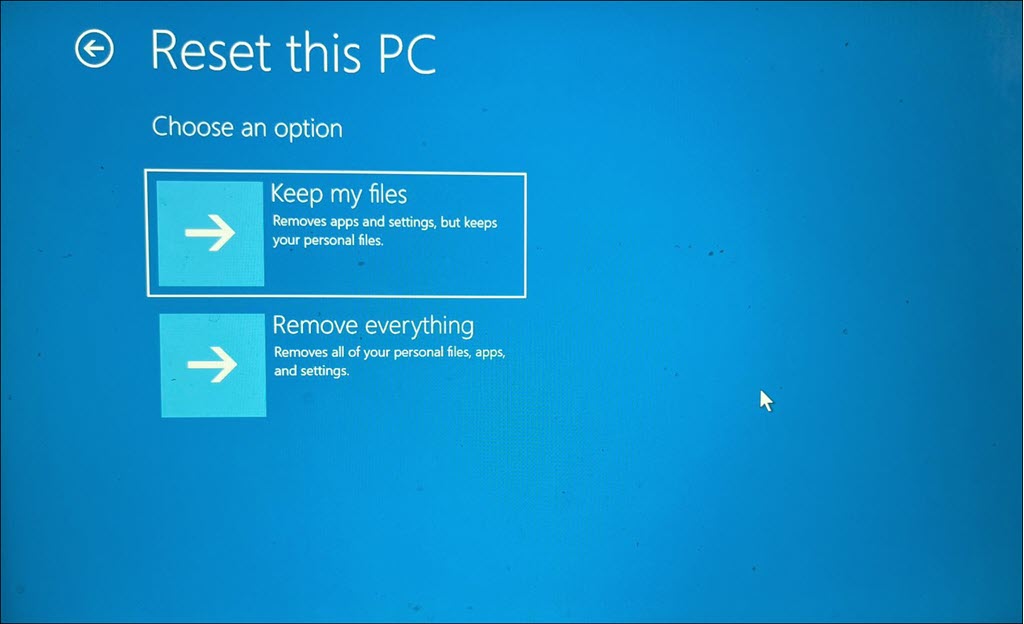
- You’ll have the option to either keep your files or remove them. For a full reset, opt for Remove everything.
- Choose your preferred method of reinstalling Windows, either via Cloud download or Local reinstall.
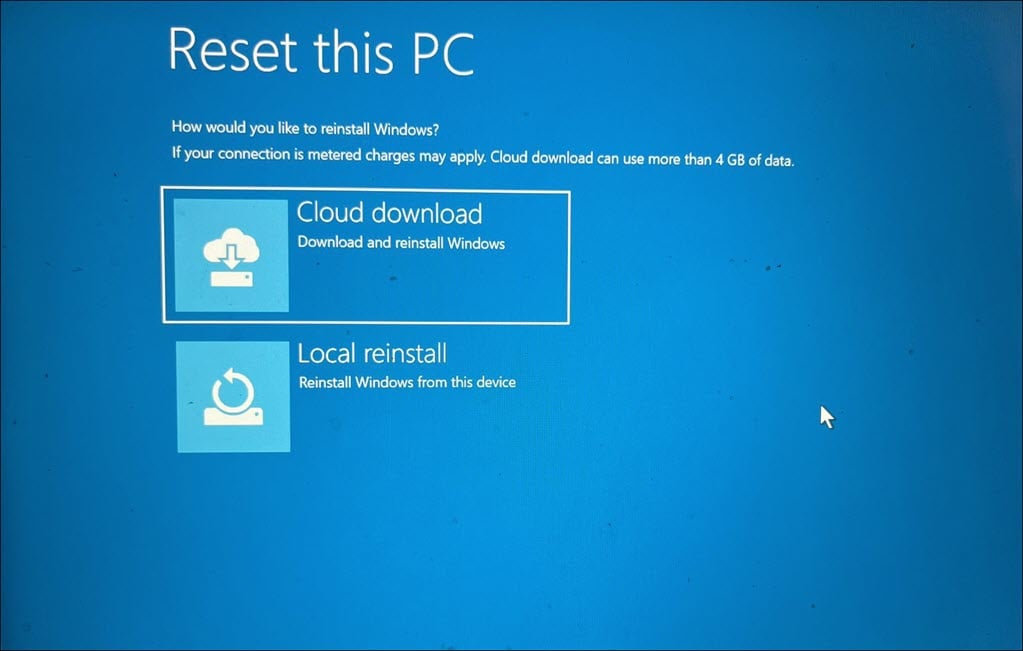
- Click the Reset button.
Summary
In this comprehensive guide, I listed various methods to tackle the MULTIPLE_IRP_COMPLETE_REQUESTS BSOD.
Starting with basic preliminary checks and moving through to more advanced solutions like system restoration and Windows reset, you can systematically address and resolve this error.