- Have you ever connected your headphones, then you got the message Windows 10 won’t recognize headphones?
- Disable front panel jack detection. This is one of the simplest ways to resolve Windows 10 won’t recognize headphones issue.
- If you have any other audio problems, check our Fix Audio Issues section to troubleshoot it.
- Do you have any issues with your laptop or PC? Come to our Laptop & PC Troubleshooting Hub.
Have you ever connected your headphones ready to tune to your favorite jam, or privately watch a movie, then you got the message Windows 10 won’t recognize headphones?
It can be frustrating and annoying. However, there are various solutions to resolving the issue and get you back on track.
How to fix headphones not recognized in Windows 10
Solution 1: Disable front panel jack detection
This is one of the simplest ways to resolve the Windows 10 won’t recognize headphones issue.
If you have the Realtek software installed on your computer or laptop, follow these steps to disable the headphone’s jack detection:
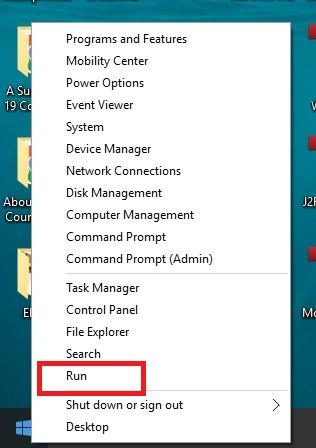
- Right-click the Start button
- Select Run
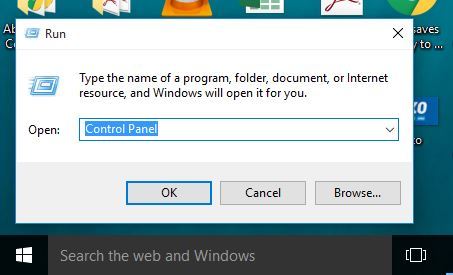
- Type Control Panel then press enter to open it
- Select Hardware and Sound
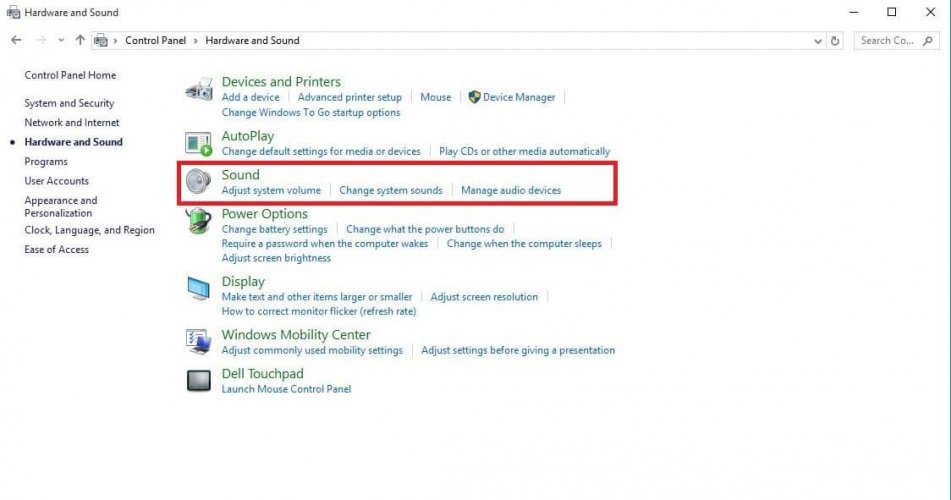
- Find Realtek HD Audio Manager then click on it
- Go to Connector settings
- Click Disable front panel jack detection to check the box
Try on your headphones again to see whether this solution works for you.
If disabling the front panel jack detection doesn’t fix the Windows 10 won’t recognize headphones issue, try the next solution.
Solution 2: Change default sound format
Another reason why your headphones may not be recognized by Windows 10 is the sound format. If this is not set correctly, then you may have the same problem over and over.
Here’s how to go about changing the default sound format:
- Right-click Start
- Click Control Panel
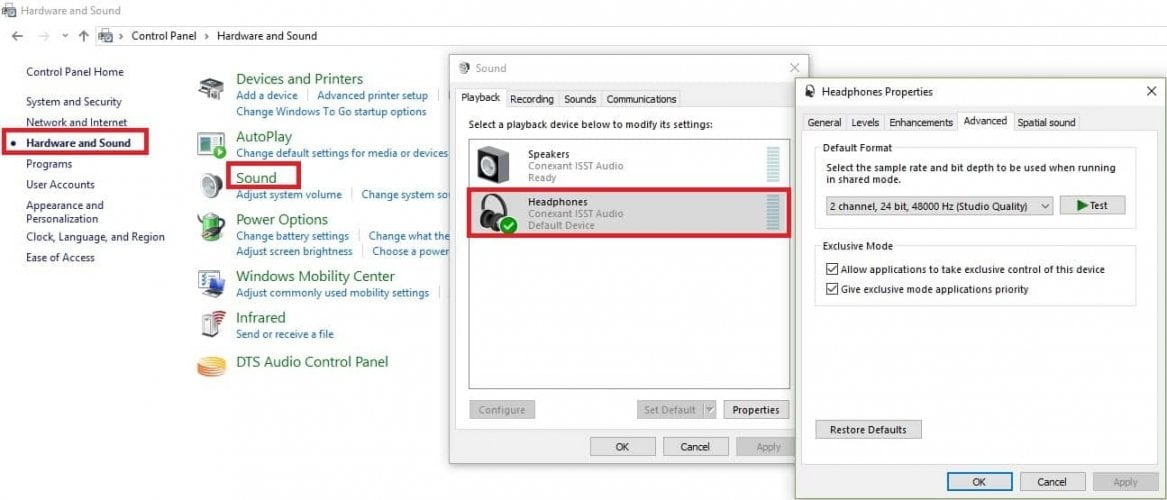
- Click Hardware and Sound
- Select Sound
- Under Playback, double click on Default Playback device
- Switch to Advanced tab
- Change the default sound format from the drop-down menu
Try plugging in your headphones again to check if this solution fixes the Windows 10 won’t recognize headphones issue.
Solution 3: Set headphone as a default playback device to fix
If changing the default sound format doesn’t work for you, try setting your headphone as the default playback device using these steps:
- Right-click the Start button
- Click on Control Panel
- Select Hardware and Sound
- Click Sound
- Under Playback, right-click and select Show Disabled devices
- From the list of headphones, right-click on your headphone device name
- Select Enable
- Click Set as Default
- Click Apply
Once you follow all these steps, plug in your headphones again and check if they’re working.
Solution 4: Update audio/sound driver
You can update your audio/sound driver in two ways:
- Using a utility tool
- Let Windows automatically update your driver
How to update audio/sound driver using a utility tool
Sometimes the issue could be caused by outdated or incompatible audio or sound driver.
In this case, you need to update the driver by using a genuine driver download, then update the utility tool that can scan your drive and pick out the faulty one in a short time.
Once this is done, the utility tool will automatically download and install the best version for your computer.
Once you download the utility tool, take the following steps to update your audio/sound driver , and resolve the Windows 10 won’t recognize headphones issue:
- Scan your computer by starting the utility tool, then click on scan to perform a full scan
- The utility tool will disclose a list of all your outdated, incompatible, broken, corrupted, or missing drivers including the audio/sound driver
- Update your audio/sound driver by clicking repair to fix the issue. Your utility tool, at this point, will automatically download and install the best match for your audio/sound driver. At this point, you can also update all other problematic drivers.
- Remember to back up your drivers before installing new updates to prevent any crashes
- Finally, reboot your computer to effect the audio/sound driver update
How to update your audio/sound driver by letting Windows automatically update your driver.
Follow these steps to do this:
- Right-click the Start button
- Click on Control Panel
- Go to Hardware and Sounds
- Click on Sounds
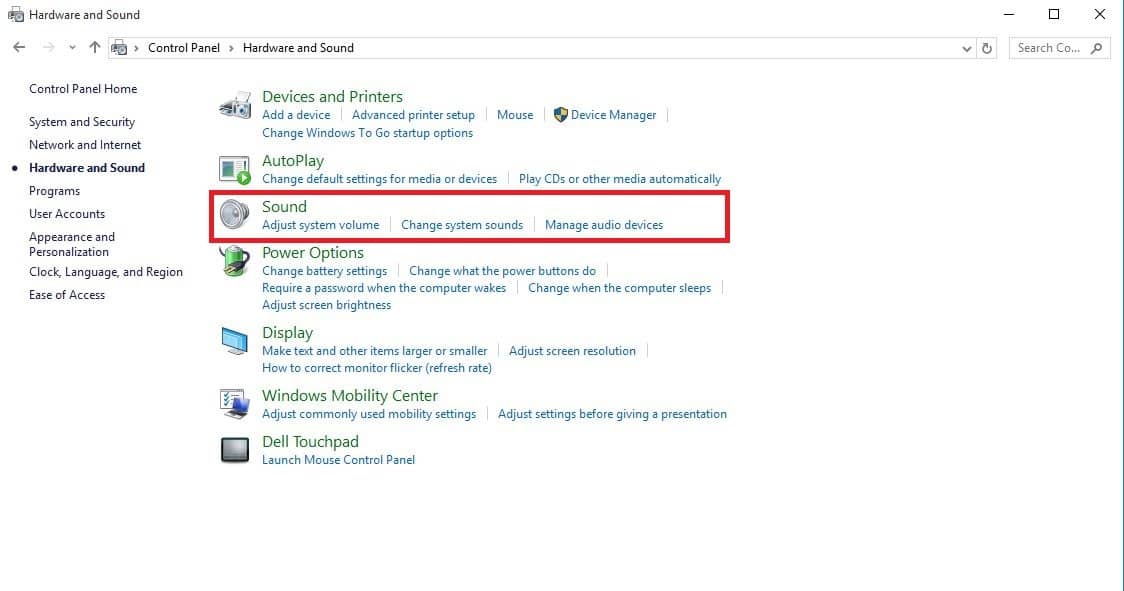
- Go to the Playback tab
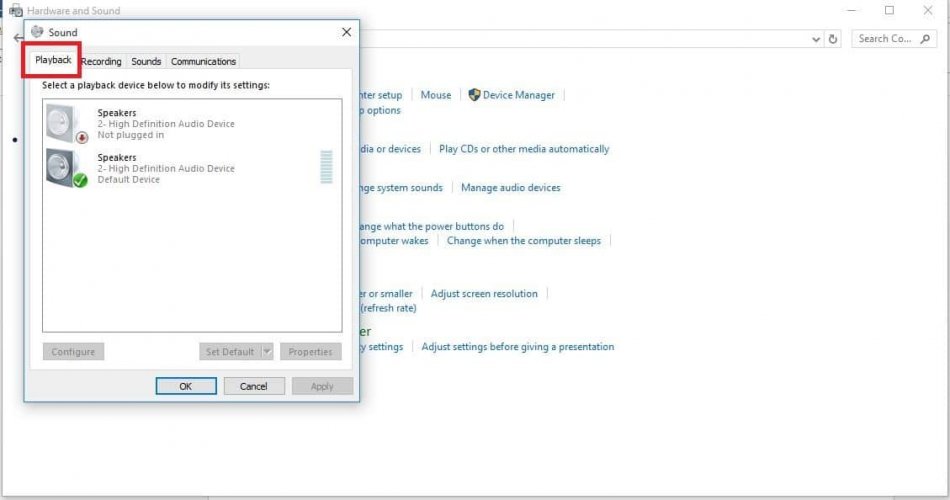
- Select your headphones and click on properties
- Go to Controller Information then click on Properties button
- Click Change Settings (this may require administrator permission)
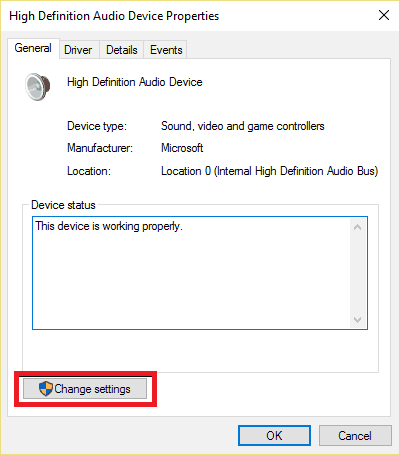
- Go to Driver tab
- Select Update Driver
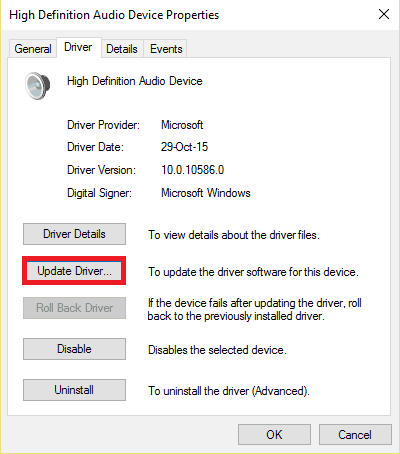
- Let the update download automatically
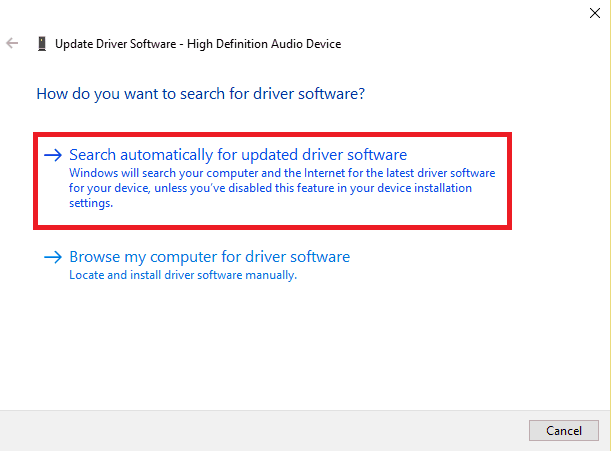
- Once this is complete, plug in your headphones to check whether they’ll work.
This guide will help you become an expert in updating outdated drivers in Windows 10!
Update drivers automatically
Downloading drivers manually is a process that carries the risk of getting the wrong driver installed, which may lead to serious malfunctions.
The safer and easier way to update drivers on a Windows computer is by using an automatic tool such as TweakBit Driver Updater.
Driver Updater automatically identifies each device on your computer and matches it with the latest driver versions from an extensive online database.
Drivers can then be updated in batches or one at a time, without requiring the user to make any complex decisions in the process. Here is how it works:
-
-
-
- Download and install TweakBit Driver Updater

- Once installed, the program will start scanning your PC for outdated drivers automatically. Driver Updater will check your installed driver versions against its cloud database of the latest versions and recommend proper updates. All you need to do is wait for the scan to complete.
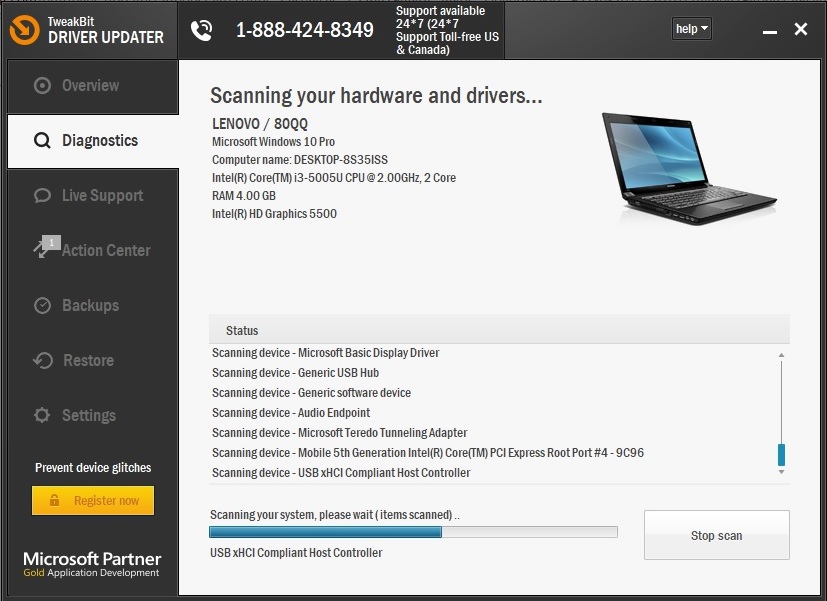
- Upon scan completion, you get a report on all problem drivers found on your PC. Review the list and see if you want to update each driver individually or all at once. To update one driver at a time, click the Update driver link next to the driver name. Or simply click the Update all button at the bottom to automatically install all recommended updates.
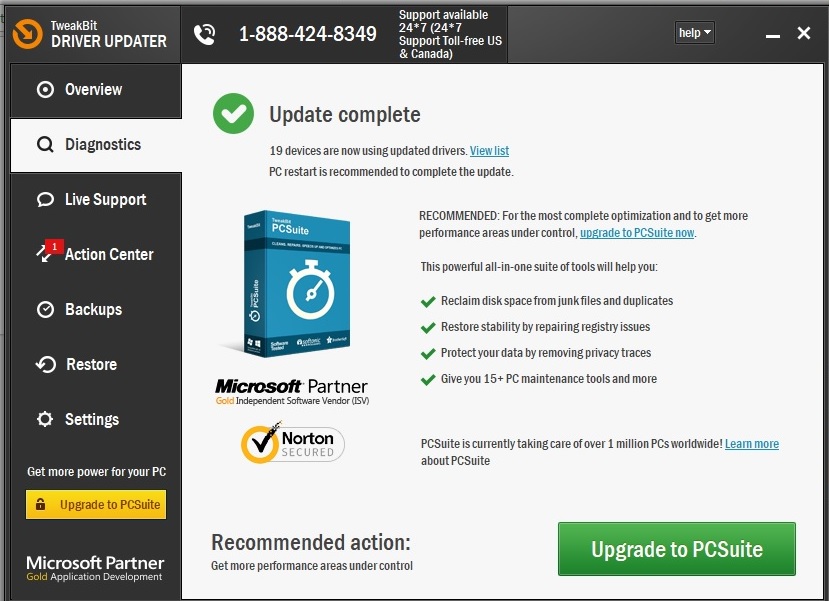
Note: Some drivers need to be installed in multiple steps so you will have to hit the ‘Update’ button several times until all of its components are installed.
- Download and install TweakBit Driver Updater
-
-
Disclaimer: some functions of this tool are not free.
You can also try another driver updating software from our great list!
We hope that these solutions helped you to fix the Windows 10 won’t recognize headphones error.
If you’ve come across other solutions to fix this problem, you can list the troubleshooting steps in the comments below.
FAQ: Read more about the headphone problems on your computer
- Why are my headphones not working when I plug them in?
If the headphone jack not working in Windows 10, try to disable Front Panel Jack detection. Open Realtek HD audio Manager in Control Panel. Then check the Disable front panel jack detection under connector settings in the right-side panel.
- Why won’t my headphones work on my laptop Windows 10?
Perhaps, your computer doesn’t recognize the headphones. Make sure that the headphones are set as enabled and set as Default Device.
- Why is my headset not working?
Check the audio settings and restart the device. Open up the audio settings on your device and check the volume level and any other settings that might mute the sound.

