
So you’ve heard all the buzz about Windows 11. It has a new taskbar, a new Start menu, new wallpapers, and new design elements. It’s even going to be able to run Android apps. Those are all big changes, so it’s only natural that you might want to try it.
Thankfully, you can do just that thanks to the Windows Insider Program. And in this guide, we’ll show you how to download Windows 11 right now.
Before downloading
The first thing you’ll want to do is make sure your PC meets the system requirements for Windows 11. If you’re running Windows 10, you may find some new requirements that are harder to meet, like the 4GB of RAM, 64-bit CPU, or TPM 2.0 module. In fact, there’s a list of CPUs that are compatible, and it’s a fairly limited list. You can try this tool to check whether you’ll be able to upgrade, and that should tell you if it’s a good idea to try the preview. You may be able to install preview builds on PCs that don’t meet all the requirements, but you might have some issues because of it.
Another thing to keep in mind is that builds in the Windows Insider Program are in development and aren’t completely stable. You need to be comfortable with some stability issues if you’re planning to go that route. Once you’ve ensured that you and your PC are ready, read on to see how to download and install Windows 11.
Download Windows 11 using Windows Update
The only official way to download Windows 11 right now is through Windows Update and the Insider Program. You’ll need to join the Insider Program and check for updates through Windows Update as usual. We have a guide on how to prepare for the Windows 11 preview builds, and if you’ve followed that, all you need to do is check for updates again. Go to Settings -> Update & Security and click Check for Updates.
This will download and install Windows 11 in the easiest way possible, and you won’t have to set up anything after the installation.
Generate your own ISO
Thanks to the work of the Windows community, it’s possible to generate an ISO file using the update files served through Windows Update. This is an unofficial method, so naturally we only recommend it for users who are comfortable with taking risks.
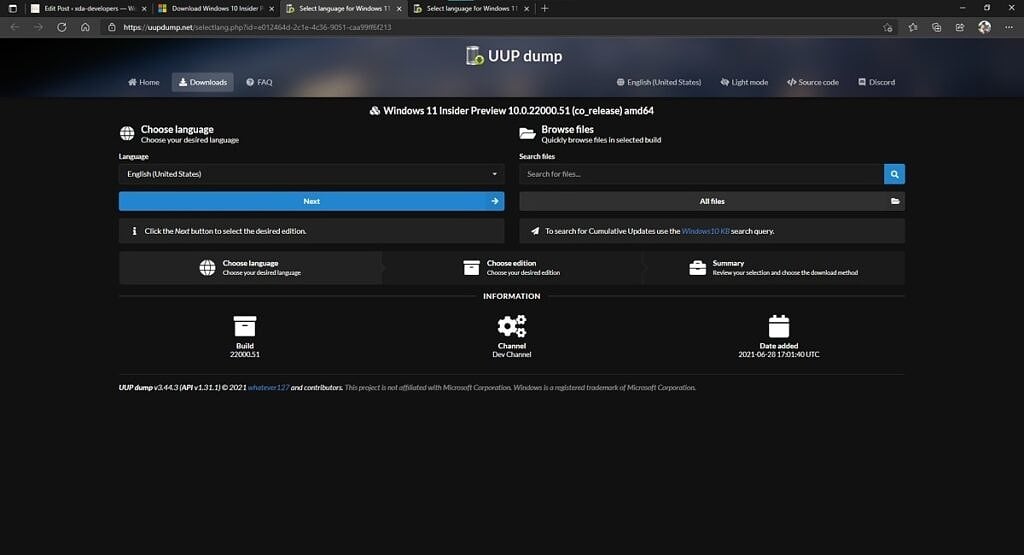
- Visit this link to start generating a Windows 11 build for x64-based processors (Intel or AMD), or this one for ARM-based processors.
- Choose your language on the dropdown list, then click Next under it.
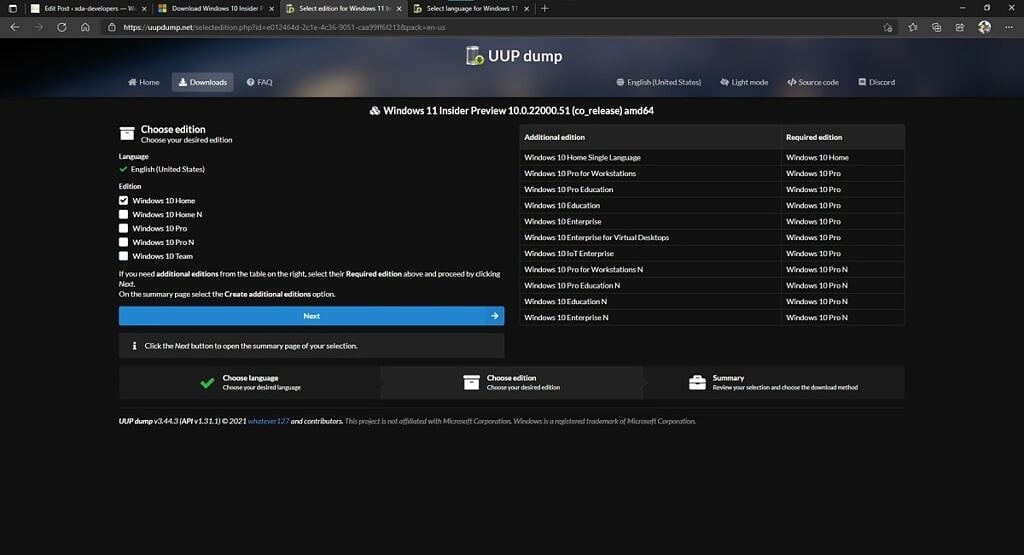
- Choose the editions of Windows you want. You can check your current edition in Settings -> System -> About. Otherwise, make sure you have the product key for the edition you want to activate. For Education and Enterprise Editions, you’ll need to select Windows 10 Pro here.
- Leave all the options on the next page in the default settings, unless you want additional editions. Then, click Create download package.
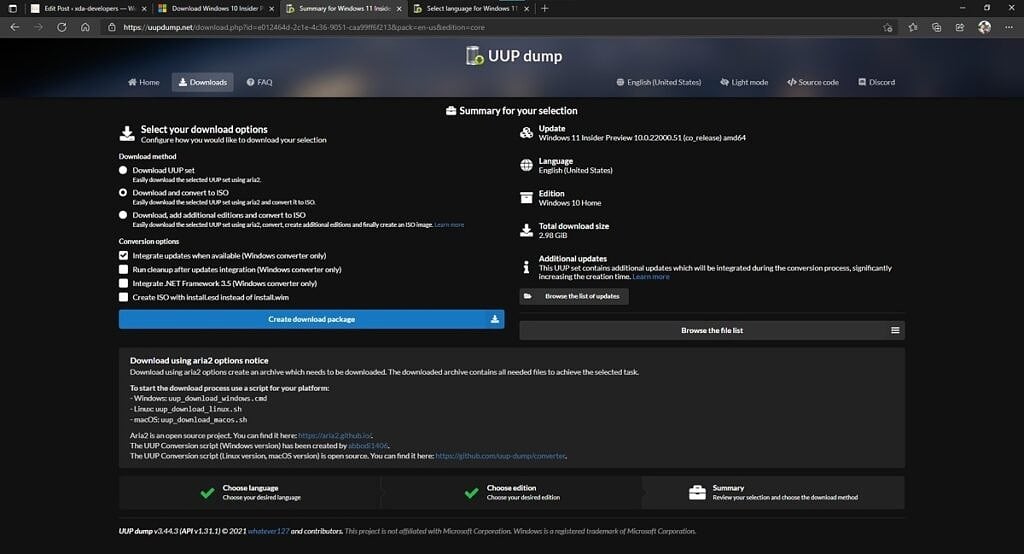
- If you want additional editions, you’ll need to select Download, add additional editions and convert to ISO, then choose the edition you want.
- You’ll start downloading a .zip file. Extract it to a folder of your choice and open the extracted folder.
- Open the ConvertConfig file using Notepad and make sure the second line reads AddUpdates = 1. If it’s 0, change it to 1, then save and close the file. This should ensure the build you download is fully updated, but it might not work fully as intended. It’s nothing you can’t work around later, though.

- Run the UUP_download_windows file (or the equivalent for the operating system you’re currently running). You’ll need to stay connected to the internet while the files download.
- You should end up with an ISO file with a name similar to this. If you have an ISOFOLDER instead, try deleting and then run the convert-UUP.cmd file to try to compile the ISO again.
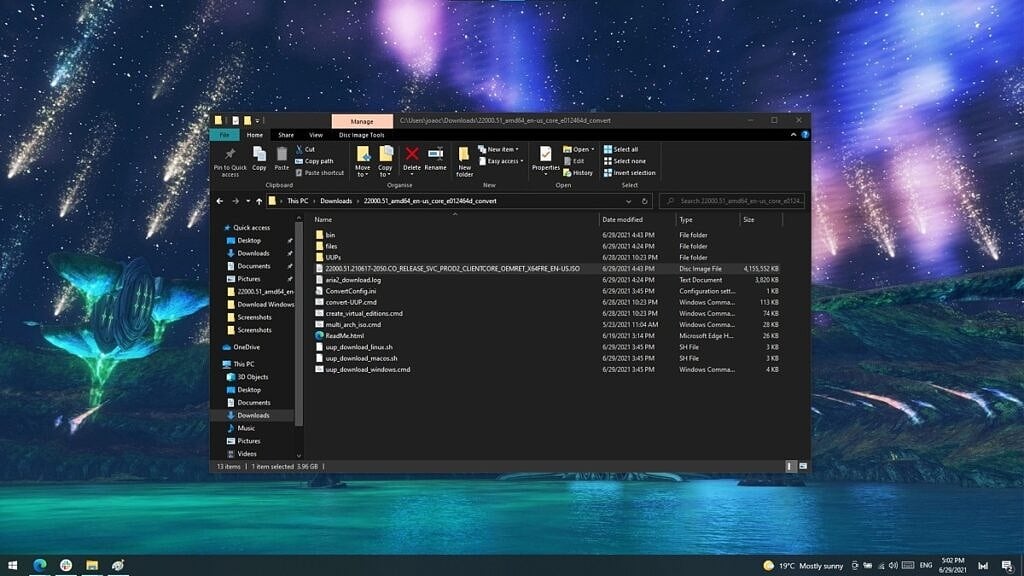
- You can now mount the ISO file or burn it to a flash drive to use as installation media.
Download a Windows 11 Insider Preview ISO (when it’s available)
If you’d rather wait to get an official ISO, we can help with that, too. Microsoft often releases ISO files for Insiders when builds are stable enough, so we may get them soon. Here’s what you’ll need to do:
- Go to the Windows Insider downloads page. You’ll need to be signed in with a Microsoft account enrolled in the Insider program.
- Scroll down to Select edition and choose the build you want to download. You’ll likely want the one at the top, from the Dev channel, since that’s where Windows 11 should arrive first. For now, only Windows 10 builds are available. Click Confirm.

- Choose your preferred language. Not every language that’s available for Windows is compatible with the Insider program, so you may have to settle depending on where you’re from.
- Click the download button, and the ISO file will start downloading.
This is definitely the simpler method, but sadly, it’s not available yet. We’ll update this article once Windows Insider ISOs are live. Later down the line, once Windows 11 is available to everyone, you should also be able to download a stable build of Windows 11. Microsoft offers the Media Creation Tool and Upgrade Assistant apps, which usually do exactly that. It’ll be a while before Windows 11 versions of the tools are available, since the operating system is only coming this holiday.
Creating installation media
Now that you have an ISO, you’ll need to turn it into installation media. If you’re just upgrading to Windows 11, you can actually mount the ISO in Windows and run the setup file from there. Double-click the ISO file, run the setup file, and you’re good to go.
If you want to create a USB installation media that you can use for other PCs or for a clean installation, you’ll need a program like Rufus. This can take your ISO file and flash it onto your flash drive so you can boot from it. Before you get started, make sure you don’t have any important files on the USB drive, since they will be deleted during the process. The USB drive will also need to have 8GB or more of capacity. Once that’s taken care of, here’s what you need to do:
- Download Rufus and install the program (or download the portable version).
- Plug in your USB drive and run Rufus.
- Click SELECT, and find the ISO file you downloaded before. All the other options will be filled in automatically.
- Click START and wait until the process finishes.
How to install Windows 11
Actually installing Windows 11 is a very simple process. Once you have created installation media, you can simply launch the setup file in your flash drive, then click through the installing process. Once the installation process is finished, you’ll be running Windows 11.
However, if you want a clean experience and set up your Windows 11 PC as a brand-new machine, you can do a clean installation. This means deleting all the data on your drive, but it’ll allow you to have the cleanest experience. Make sure you’ve backed up all the data you need before starting. With your USB installation media plugged in, follow these steps:
- Go to Settings -> Update & Security -> Recovery.
- Under Advanced startup, click Restart now.
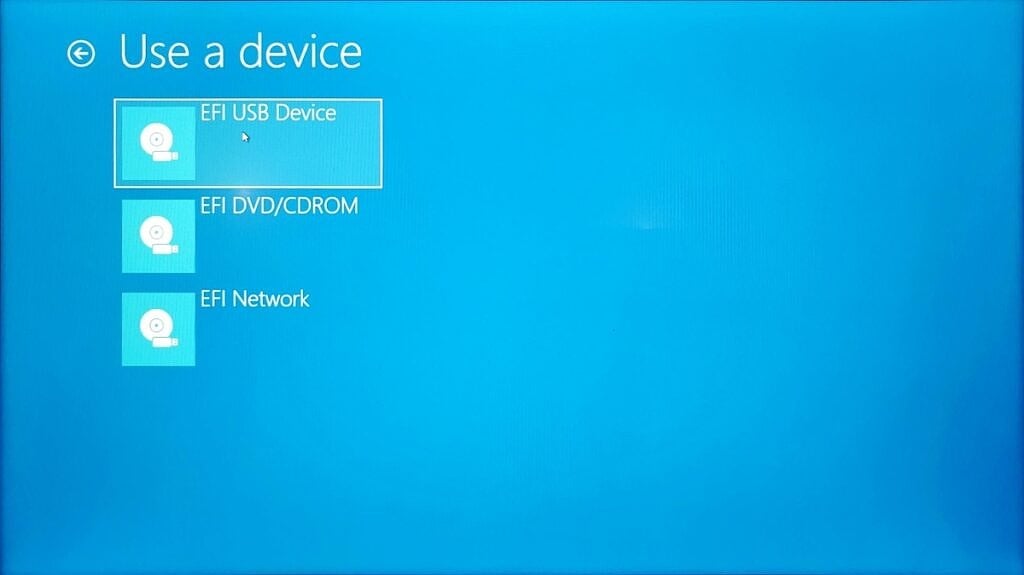
- In the menu that shows up, click Choose a device, then click your USB drive.
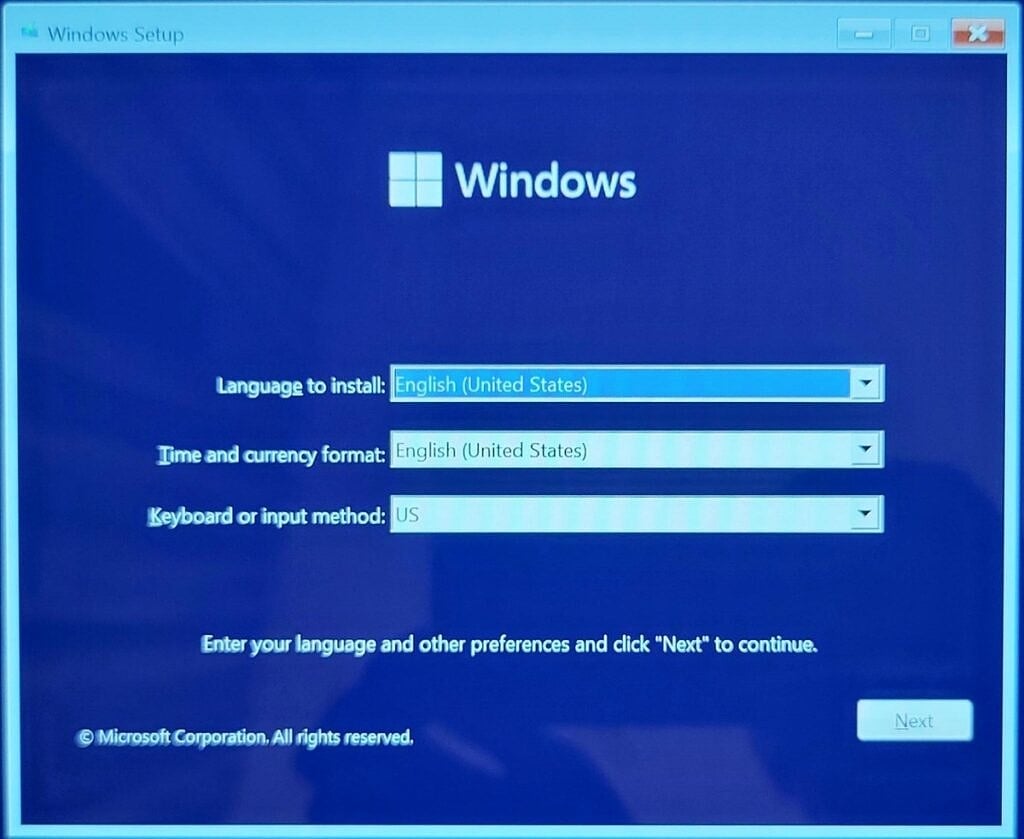
- From here, you’ll be taken to the installation environment. Choose your language and keyboard settings, then click Install Now and accept the license terms.
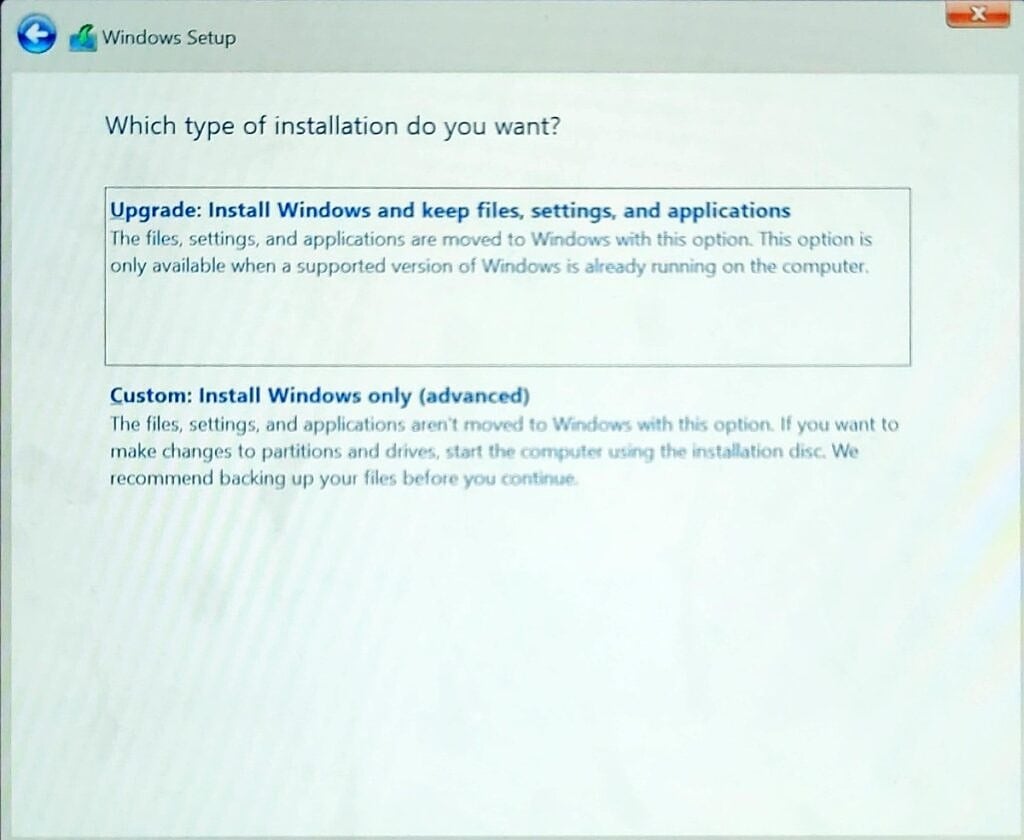
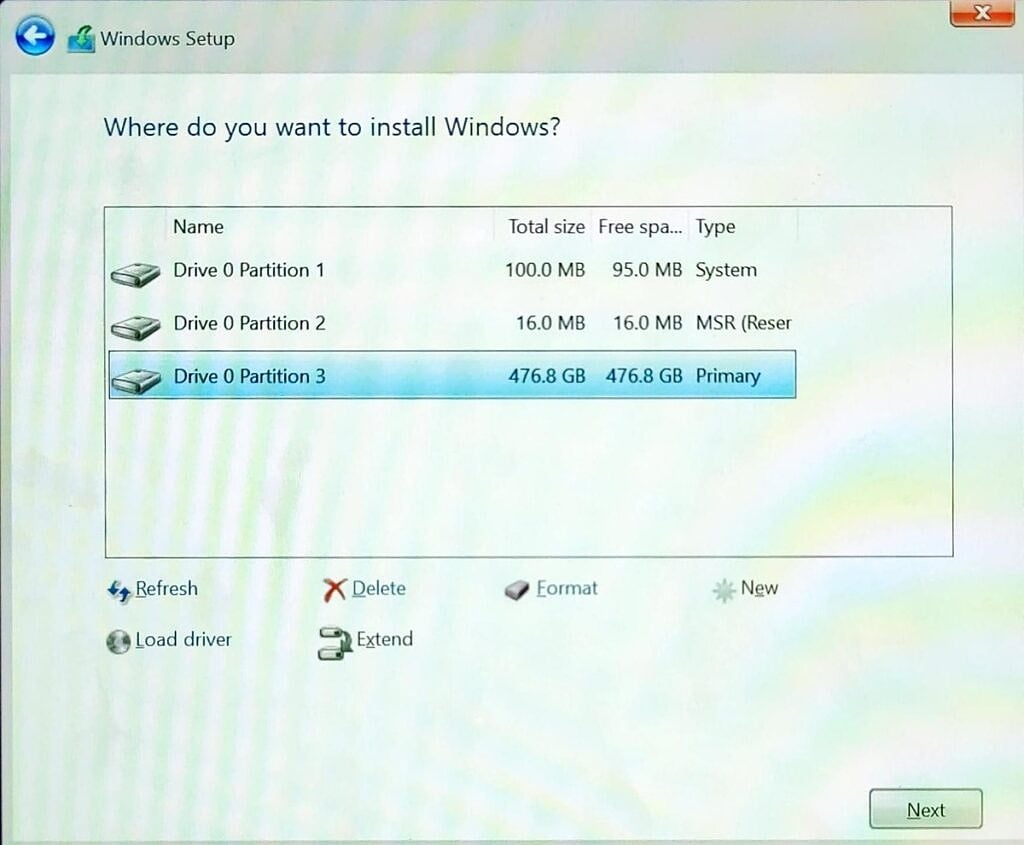
- In the next screen, you’ll need to choose Custom: Install Windows only (advanced).
- You’ll see the list of drives and partitions on your PC.
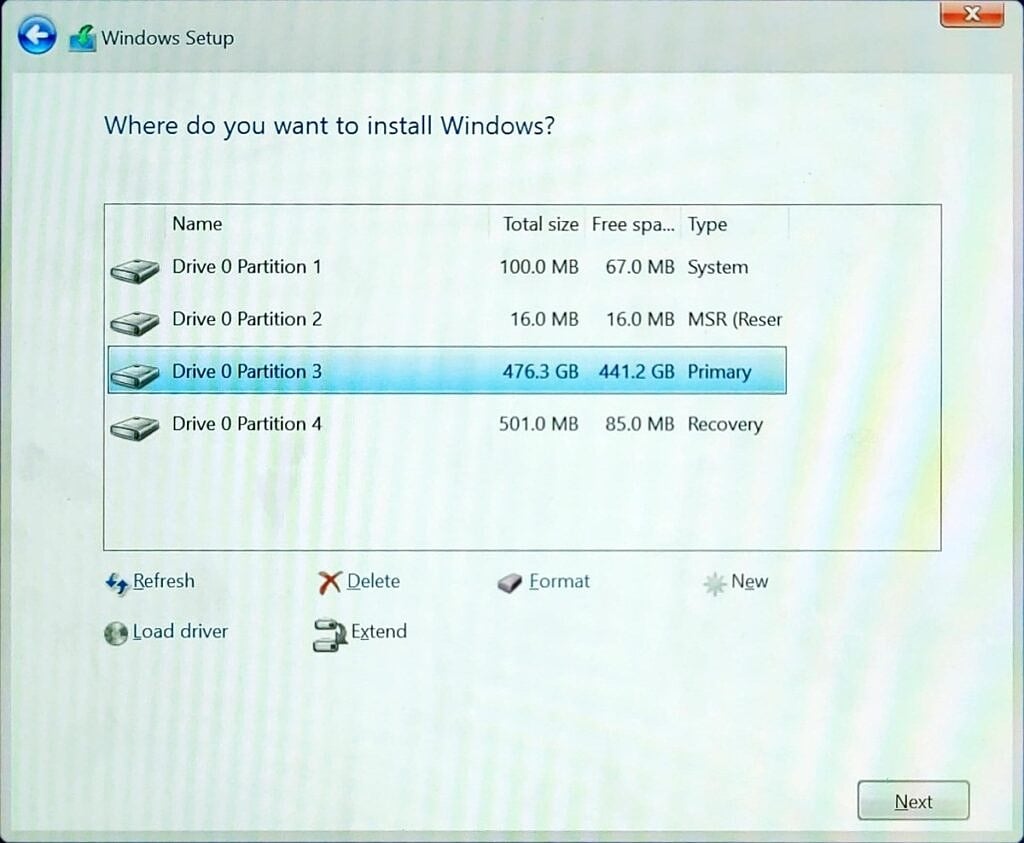
- You can choose to format them or delete them and create a new partition in the unallocated space. Either way, you’ll be losing your data. In this case, we deleted the partitions and created a new one. Windows automatically creates a couple of additional partitions that are necessary for it to function.
- Click Next and the installation will begin.
Once the installation finishes, you’ll be taken to the out-of-box experience (OOBE). This is what you see when setting up a new PC for the first time, or after a reset.
Setting up Windows 11
To get ready to use Windows 11, you’ll need to get through a few steps. Here’s the whole process:
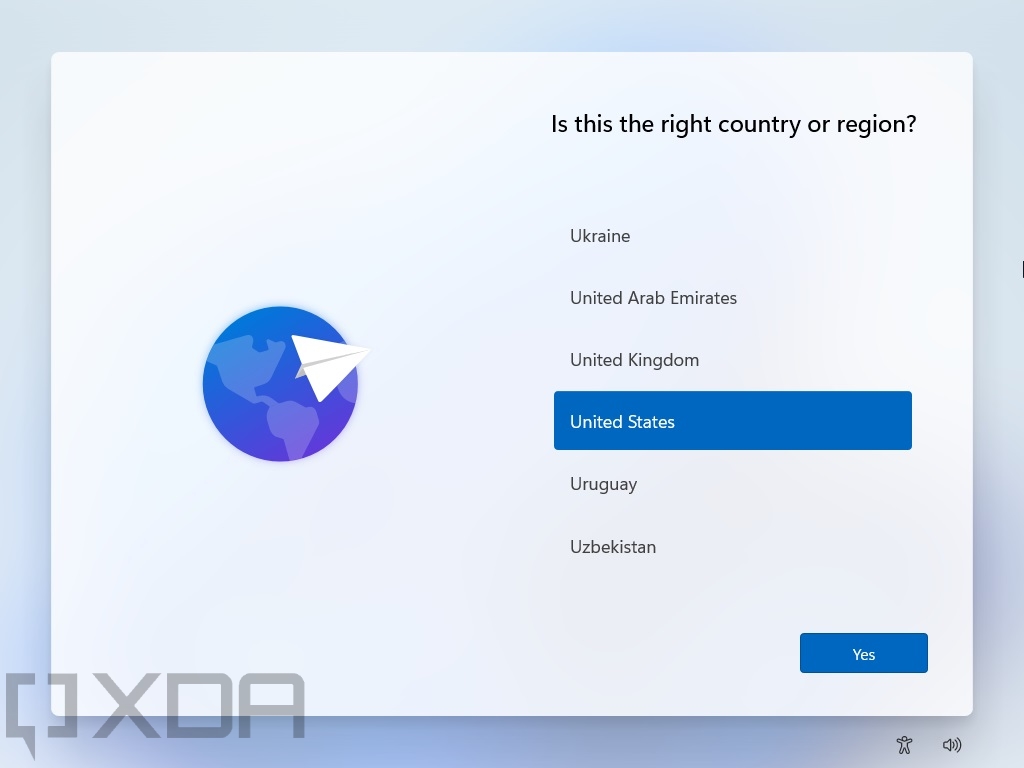
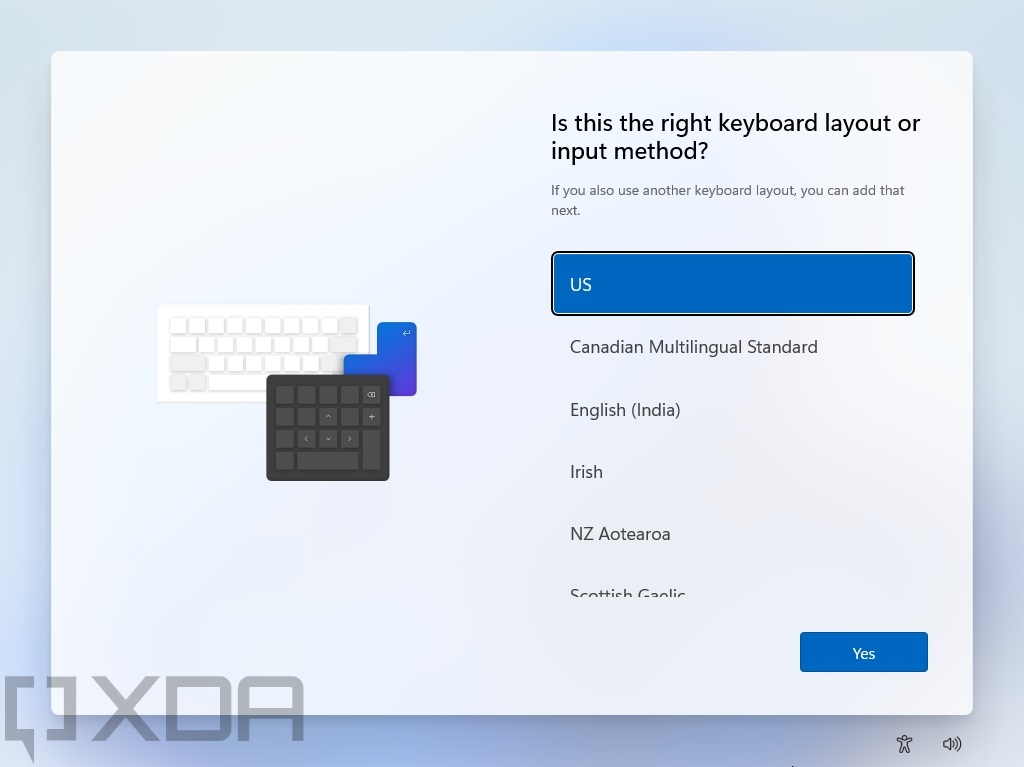
- First, you’ll need to choose your region and keyboard layout.
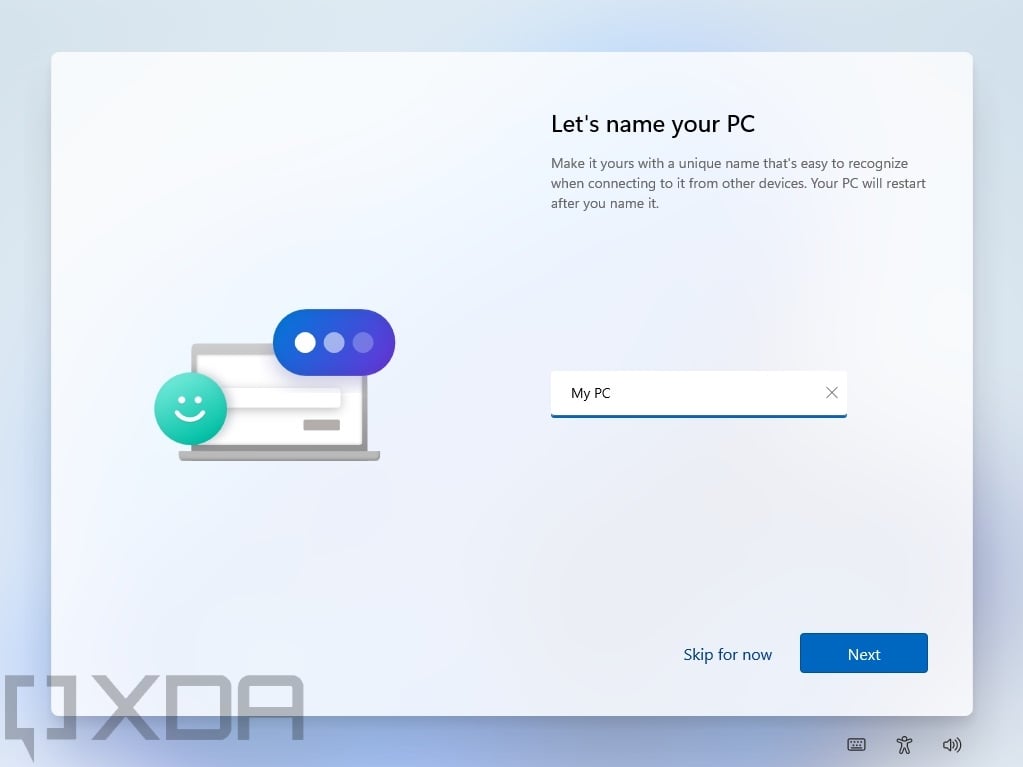
- Accept the license terms, then you’ll get the chance to name your PC.
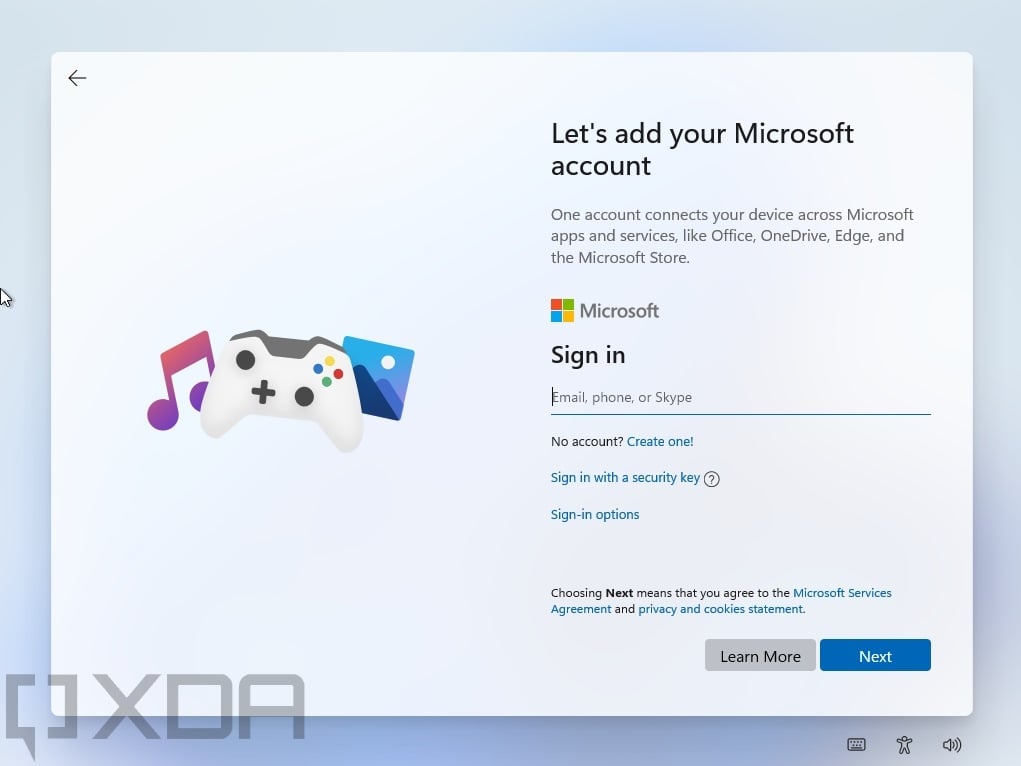
- You’ll then be asked to sign in with a Microsoft account. This is mandatory for Windows 10 Home users, but some editions can use local accounts.
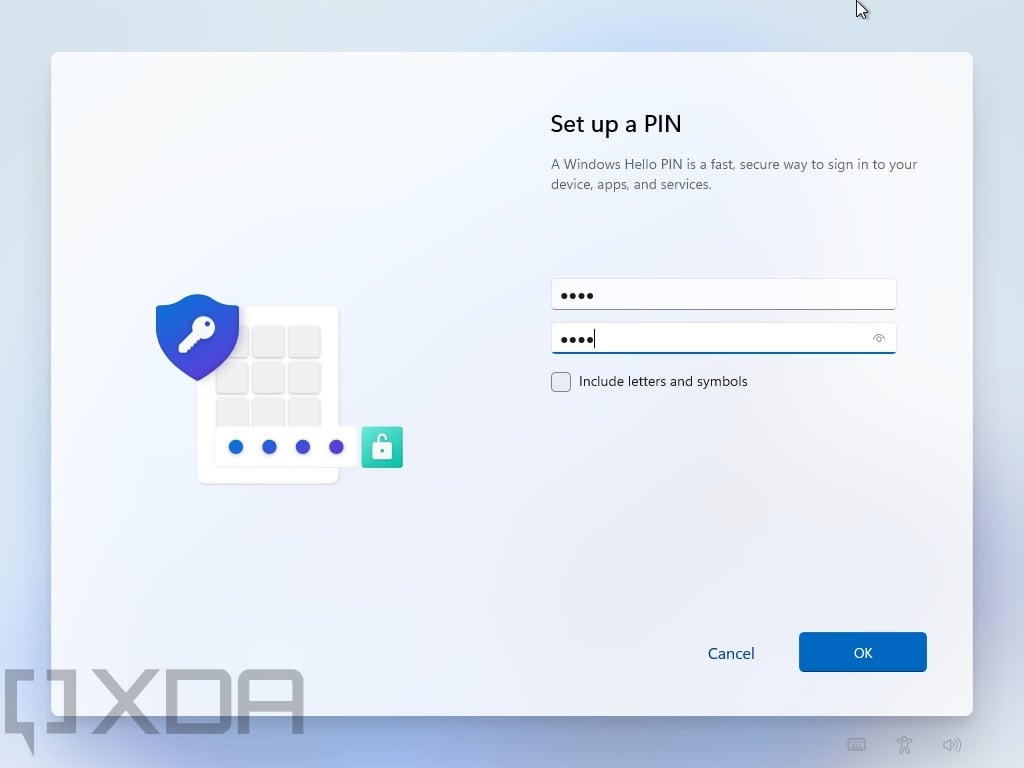
- Once you’ve signed in, you can set a PIN to replace your password. If you signed in using Microsoft Authenticator, setting a PIN is mandatory.
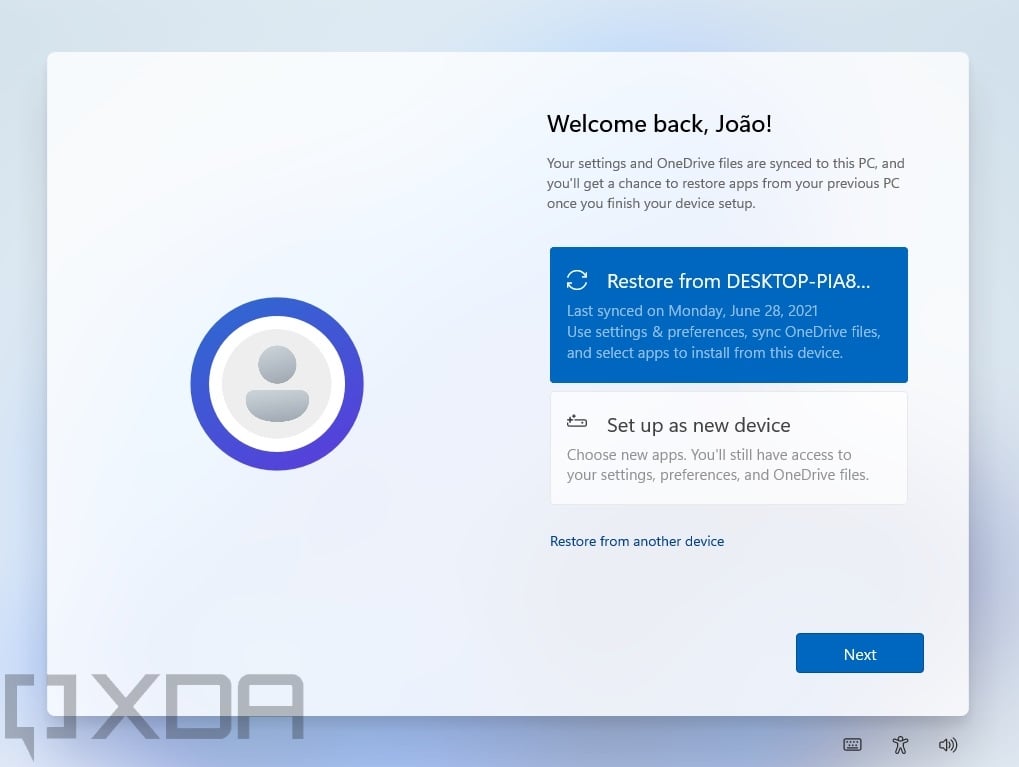
- One thing that’s new in Windows 11 is the ability to back up your settings and installed apps, which makes setting up a new computer easier. If you’ve used Windows 11 before, you’ll see an option to restore from your previous backup.
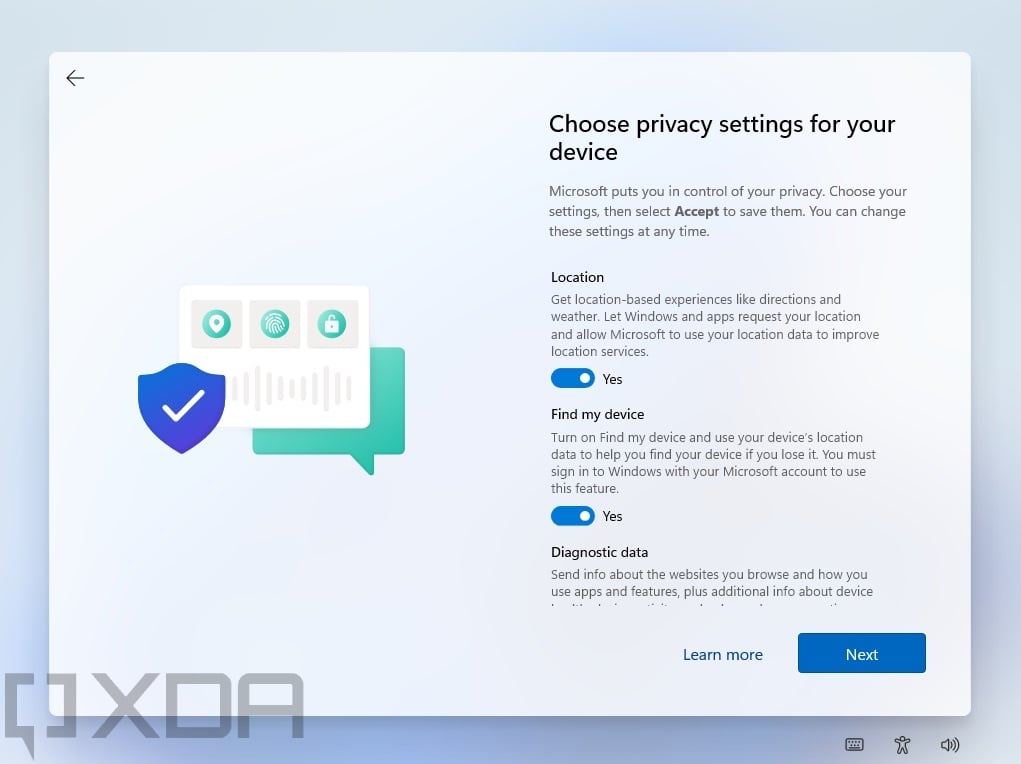
- Next up, you have a few privacy settings to go through. These include allowing apps to use your location, how much diagnostic data you want to sent to Microsoft, or whether apps can use your advertising ID. Choose the apps that suit you, then click Next.
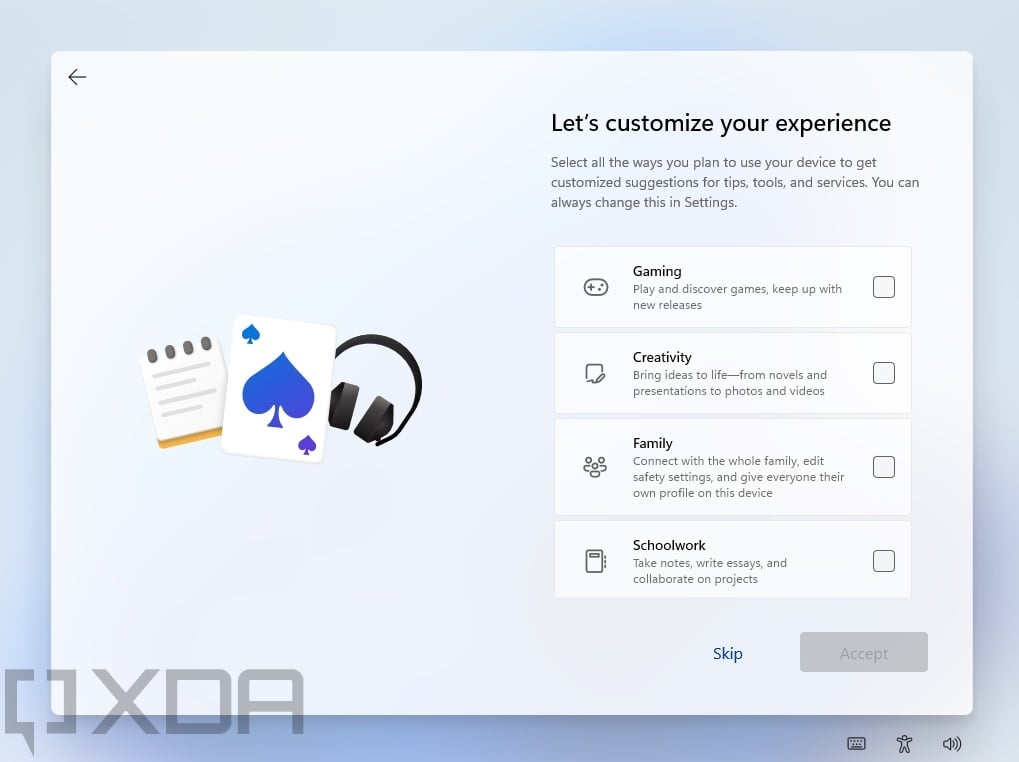
- The next thing you can set up is your device usage. You can tell Windows what you’re more likely to do with your PC, and you’ll get suggestions and tips based on that. You can also choose nothing and click Next here.
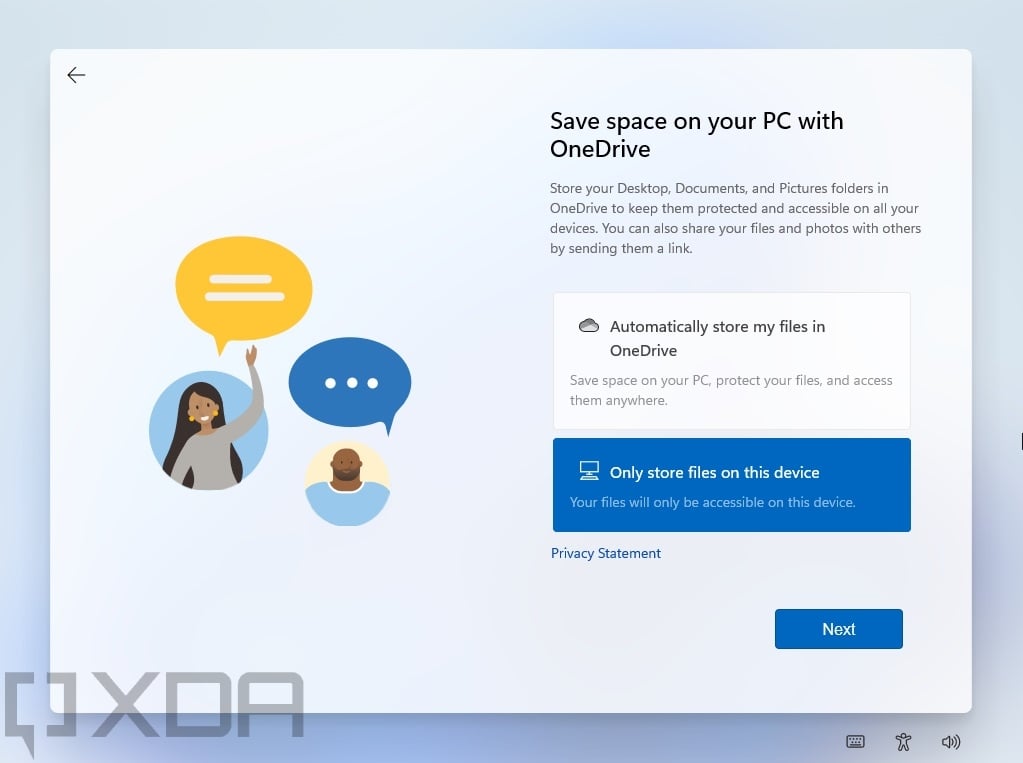
- Finally, you can set up if you want to save your files on OneDrive or only on your PC. Saving your files to OneDrive means you’ll have them backed up in case something happens to your computer, but you may need a Microsoft 365 subscription to fit all your files.
- After a brief setup period, you’ll be taken to the Windows 11 desktop. If you used UUP dump to generate your ISO and you notice something doesn’t look quite right, you may need to enroll in the Insider Program and check for updates to get all the features of Windows 11.
That’s all you need to know about downloading and installing Windows 11 right now. Since it’s still in early testing, there isn’t an abundance of options for downloading the operating system, but more will be available later. We’ll update this article as more options become available, so you can more easily choose your preferred one.
The post XDA Basics: Here’s how to download and install Windows 11 appeared first on xda-developers.