
COVID19 is changing how we work and will change permanently how we work in the future. Quarantine and social distance will and is normalizing work from home. For those of us who rely on RDP, Remote Desktop, to get work done it’s tricky to manage the resources between the remote terminal and the host.
If you need to join a video call, do you join via your host machine or do you join inside the RDP session? There are both pros and cons for doing one or the other. In this tutorial, we will show you how to use your webcam and enable USB passthrough inside the RDP session and have the remote machine to be able to use your host’s webcam.
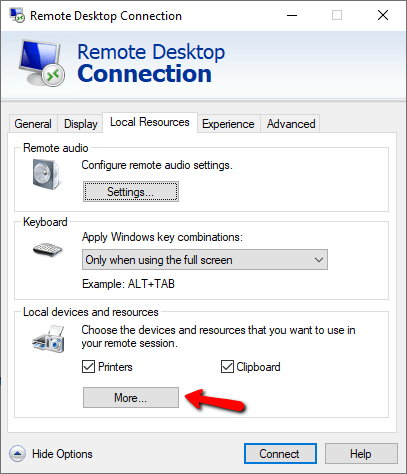
To do this you would need to have a webcam, preferably USB connected or your built-in webcam from your laptop or one of the monitor’s display. Open up mstsc.exe or Remote Desktop Connection. Go to the Local Resources tab and expand the section. Under Local devices and resources > More …
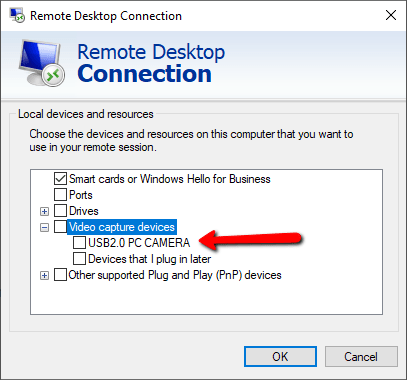
Here you should see your USB webcam listed under the “Video capture devices” > “USB2.0 PC CAMERA“. Enable this and save the session.
Next time when you start your RDP session your remote machine will now have access to this webcam and you can use this webcam to join any meeting within your remote desktop session. With my testing, the additional setting adds little bandwidth when used as a remote desktop’s webcam. After all, with a highly optimized RDP protocol in Windows, your normal broadband connection should be able to handle this no problem.
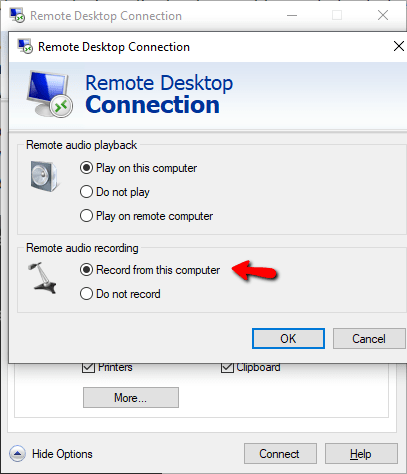
Update: if you also wish to connect to your local microphone you can enable the pass-through via RDP session. Under the same Local Resources > Config remote audio settings. Go to Settings, under Remote audio recording select “Record from this computer” instead of the default “Do not record”. This way you can use local resources while joining meeting rooms inside an RDP session with local webcam and local microphone.
The post How To Allow USB Webcam Passthrough RDP Session appeared first on Next of Windows.