
It’s nothing new taking a regional screenshot natively on Windows. You can do that with the Snipping Tool since Windows 7. But what’s new is doing so with a new keyboard shortcut, introduced in Windows 10 Creative Update, to capture a region of your screen and copy it to the clipboard for pasting into any other Windows app.
Press Win + Shift + S, move your mouse to select the region you want to take a screenshot, and that region will be copied to the clipboard as soon as you released the mouse button. The keyboard shortcut was adopted from OneNote 2016’s popular screenshot feature. And because of this, it will no longer available in OneNote.
Can I click a button to start taking a regional screenshot?
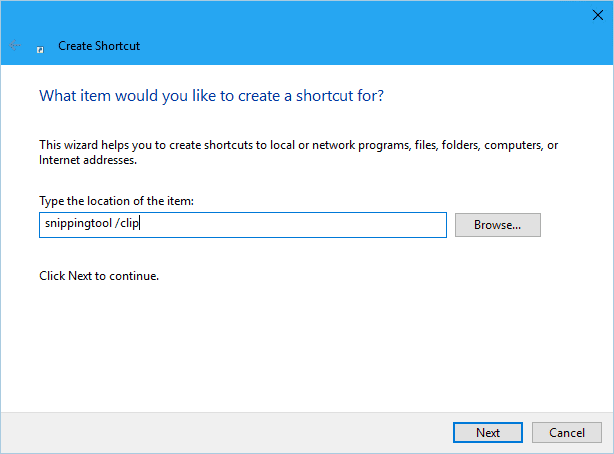
What’s behind the scene is still the old-school Snipping Tool with a new switch called /clip. We can create a shortcut on your desktop to let you click and start taking the screenshot.
Right-click on the desktop, go to New and select Shortcut. Type the following command in the location box.
snippingtool /clip
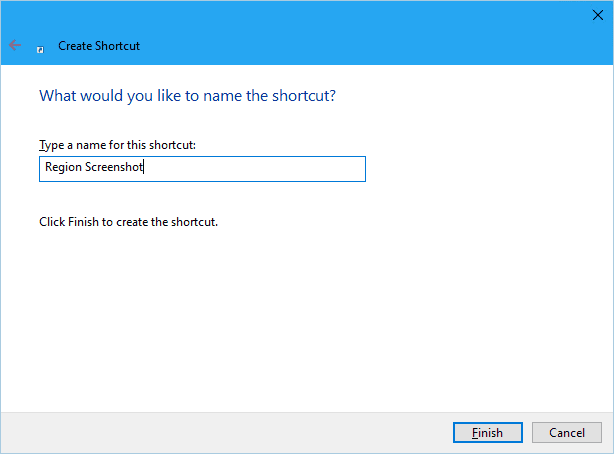
Go to Next, provide a name for the shortcut, for example, “region screenshot”, and done.
Now since we have the shortcut ready on the desktop, we can even assign a new keyboard shortcut that works more conveniently, such as Ctrl + Shift + S, if needed. Right-click the shortcut, go to Properties, then type S in the Shortcut key box. And click OK to save it.
