
To change the system description on your local Windows 10 computer,
- Open File Explorer,
- Right-click This PC and choose Properties, and
- Click Change settings
This will open the System Properties dialog, where you can update the Computer description to whatever that suits your need.

If this means a lot of clicks, you can also run the following lines in an elevated PowerShell window.
$value = @{Description = 'My own gaming computer'}
Set-CimInstance -Query 'Select * From Win32_OperatingSystem' -Property $value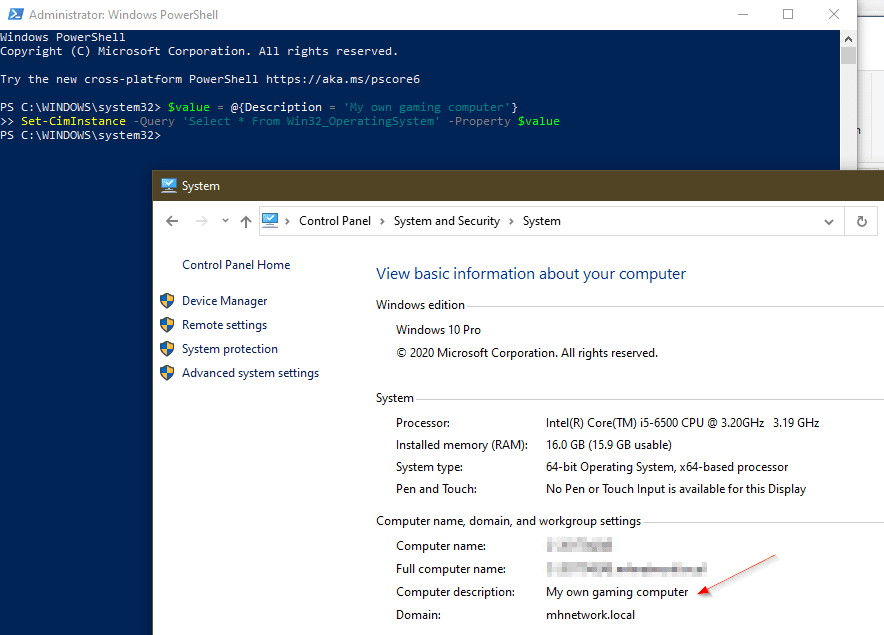
Since it uses the CimInstance cmdlet, you can simply add -ComputerName switch to access and set the description value on a remote computer.
$value = @{Description = 'My own gaming computer'}
Set-CimInstance -Query 'Select * From Win32_OperatingSystem' -Property $value -ComputerName $computer
It runs even easier, as it doesn’t need you to elevate the PowerShell window.
Now let’s change remote computer’s description to the username that is currently logged on that computer.
$value = @{ Description =
  Get-CimInstance Win32_ComputerSystem -ComputerName $computer | Select -ExpandProperty username}
Set-CimInstance -Query 'Select * From Win32_OperatingSystem' -Property $value -ComputerName $computer
Now, what would be more valuable is to run the script through all computers on your network. Tha way, you can change the description based on the username that’s logged on that computer. Later on, when needed, you can read that information as an identifier to identify the computer.
(Get-CimInstance -Query 'Select * From Win32_OperatingSystem' -ComputerName $computer).Description
The post How To Change Operating System Description on Local and Remote Computers appeared first on Next of Windows.