
If you’ve taken a great photo of your subject but the background just doesn’t fit, don’t worry – you can easily change the background to whatever you’d like in a few steps using photo editing programs such as Adobe Lightroom or Photoshop.
In this Photoshop tutorial, we’ll show you how you can replace the background image, including how to select your subject and color match the original images.

How to Change Background Images Using Photoshop
There are several steps to replace a background image in Adobe Photoshop CC. Firstly, you need to import both the original image and your new background image. Then, you need to select and mask your subject, subtract the background, and overlay the subject on the new background. Finally, you can add finishing touches such as color to match the two images.

Of course, this will be easier with an image that has a clearly defined subject and background, such as the image we’ve chosen to illustrate the process. If there are several subjects, or there is a foreground or an unclear background, it will be more difficult to create a convincing image.
With that out of the way, here’s how to change the background of an image.
Step 1: Import the New Background Image
The first step is to open your image and import the new background. The trick here is to use a background image that fits the perspective of your subject as best as possible.
In our example, a lady is looking into the distance and her upper body is visible. Choosing an image with too much of a foreground would not match it, so we’ve chosen a distant landscape with a similar perspective as the new background.
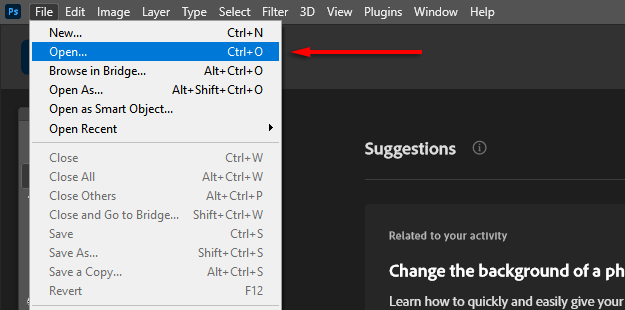
- Open the image in Photoshop by either clicking and dragging the file in or by selecting File > Open and choosing the image file.
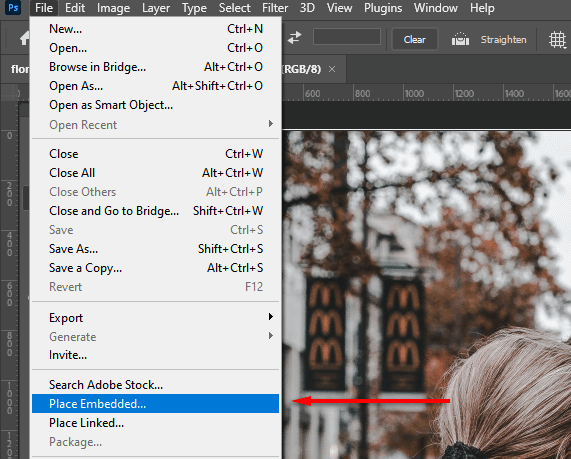
- With the image open in Photoshop, select File > Place Embedded.
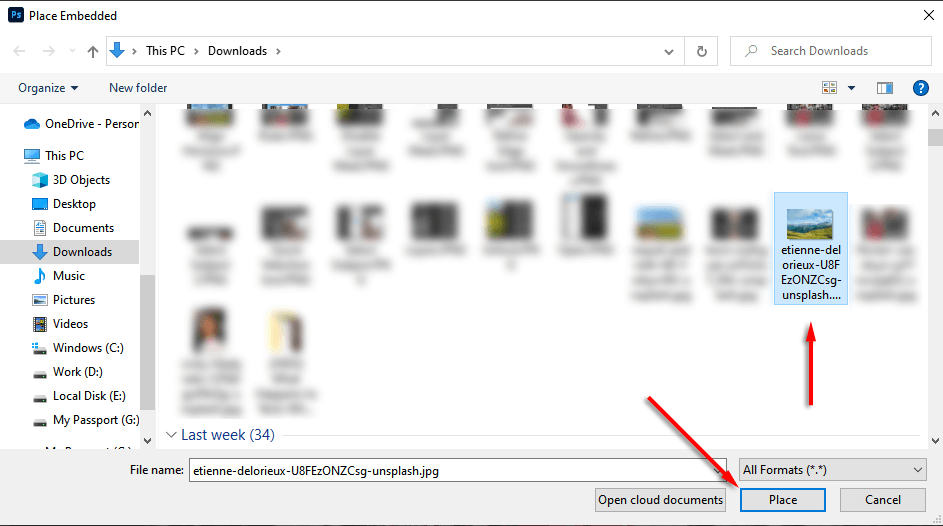
- Navigate to your new background image and select Place.
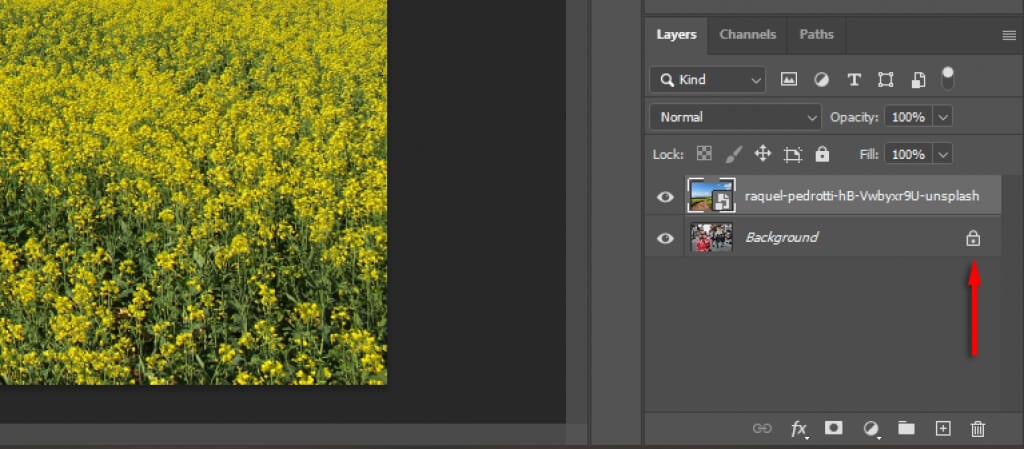
- Place the new layer below the original layer by clicking and dragging it in the Layers panel. You may have to unlock the original layer by clicking the lock icon first.
Step 2: Select and Mask the Subject
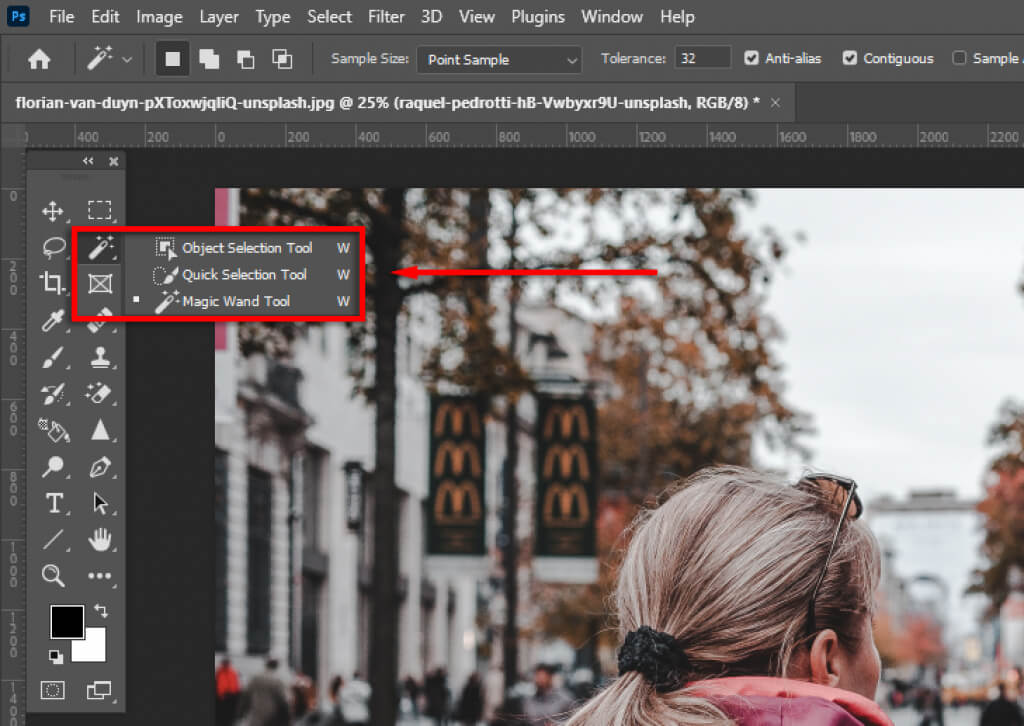
There are several ways to create a selection. If you have a clear subject, Adobe Photoshop’s automatic subject selection tool is the easiest to use. However, you can use a combination of the Quick Selection tool, the Magic Wand tool, and the lasso tool to select your subject, too.
Select Your Subject
- Click Select.
- Click Select Subject and let Photoshop perform its magic.
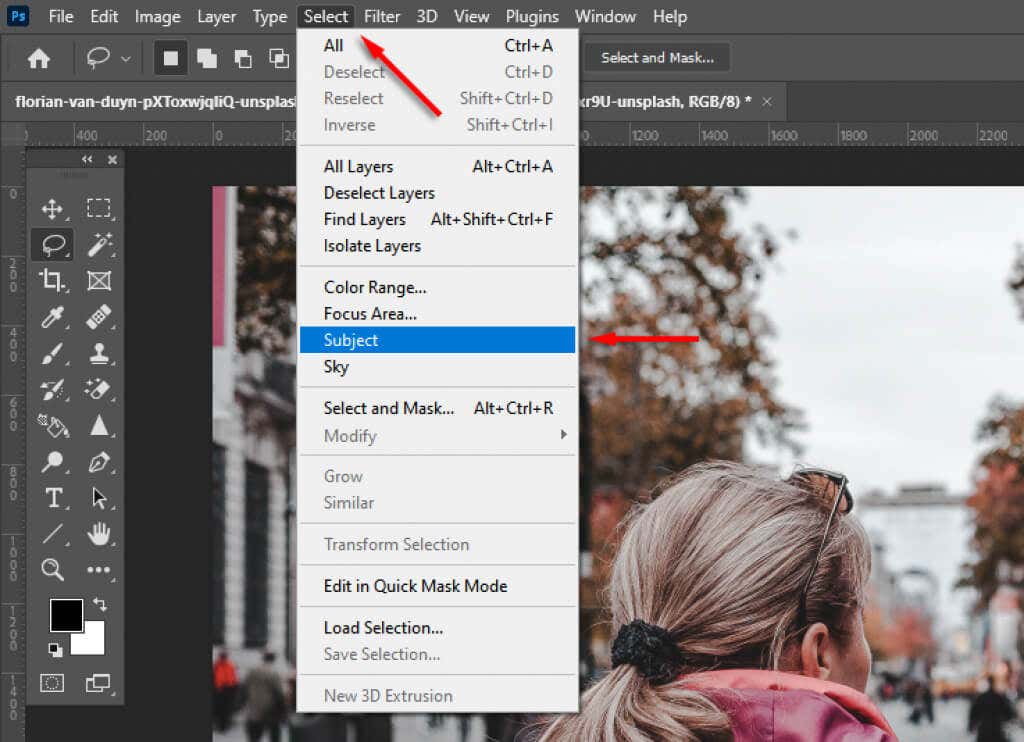
- Alternatively, use the Quick Selection or Magic Wand tool to select as much of your subject as possible.
- Use the Lasso tool to refine your selection. This will be necessary for harder to identify subjects. In our example, you can see that Adobe has picked up some wrong areas.
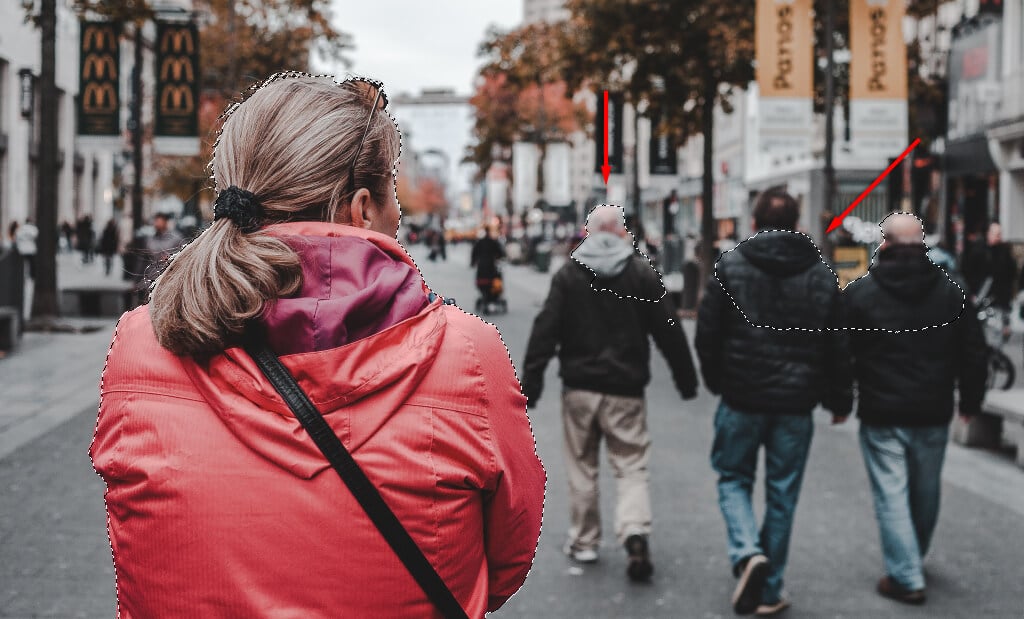
- With the lasso tool, holding shift and circling an area will add to the selection while holding alt will subtract.
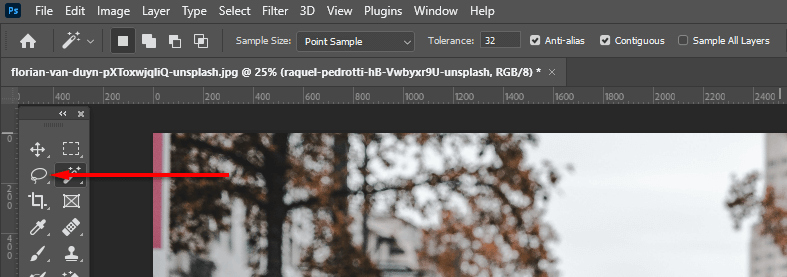
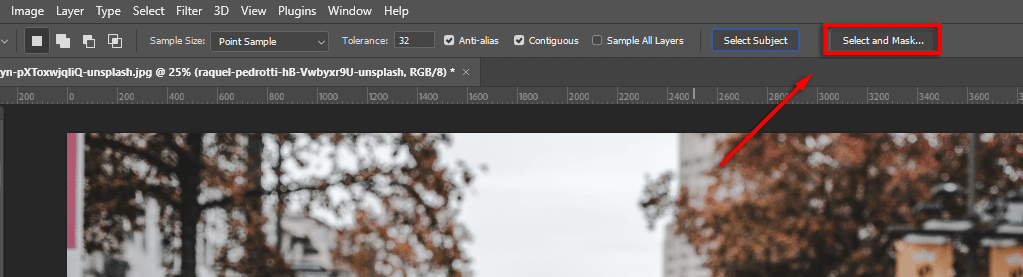
- Click Select and Mask… to cut out your subject.
Refine the Selection
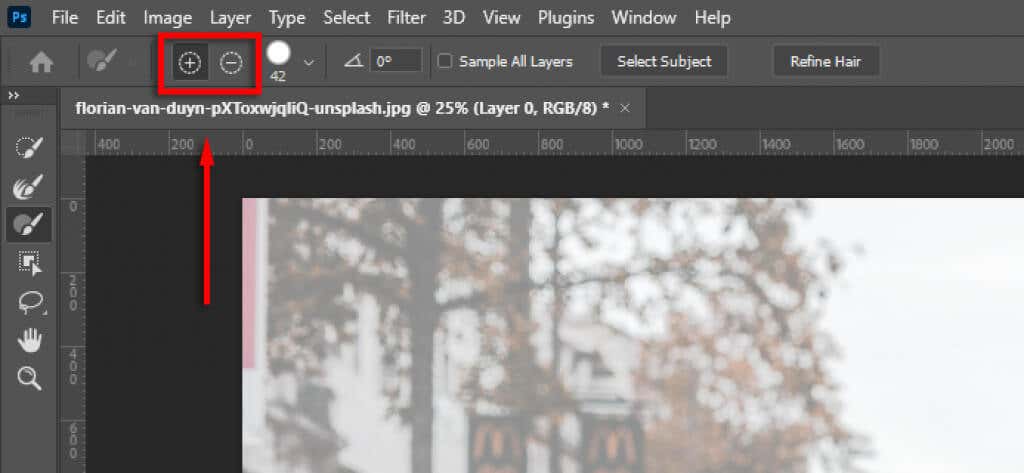
- Refine the selection further if needed by using the lasso and brush tools from the toolbar. To add to your selection, make sure the add to selection button is selected. To remove areas, click the subtract from selection button.
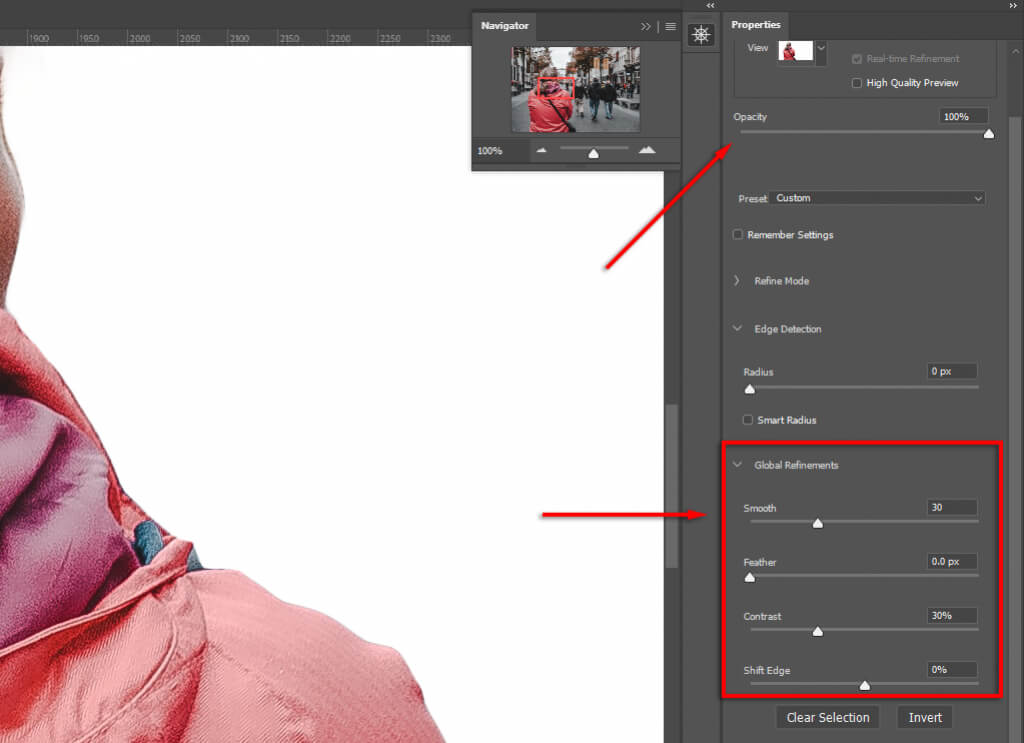
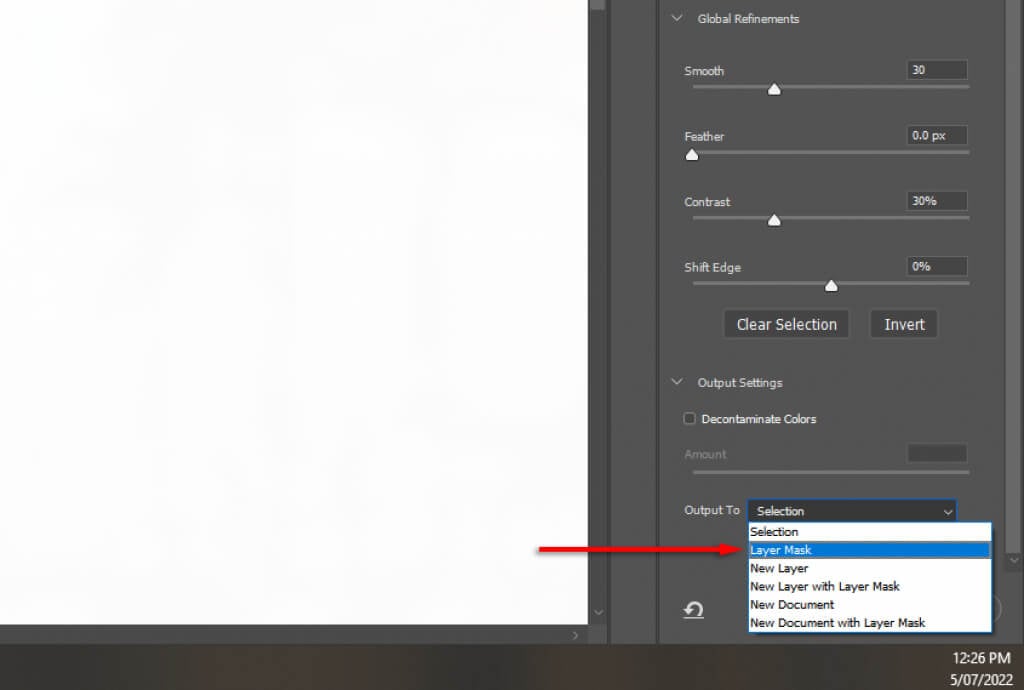
- Finally, zoom in to the edge of your selection. If the edges look unnatural, under Global Refinements, change the Smoothness and Contrast sliders until the selection looks more natural. It can be helpful to adjust the Opacity slider to 100% to better see the edges.
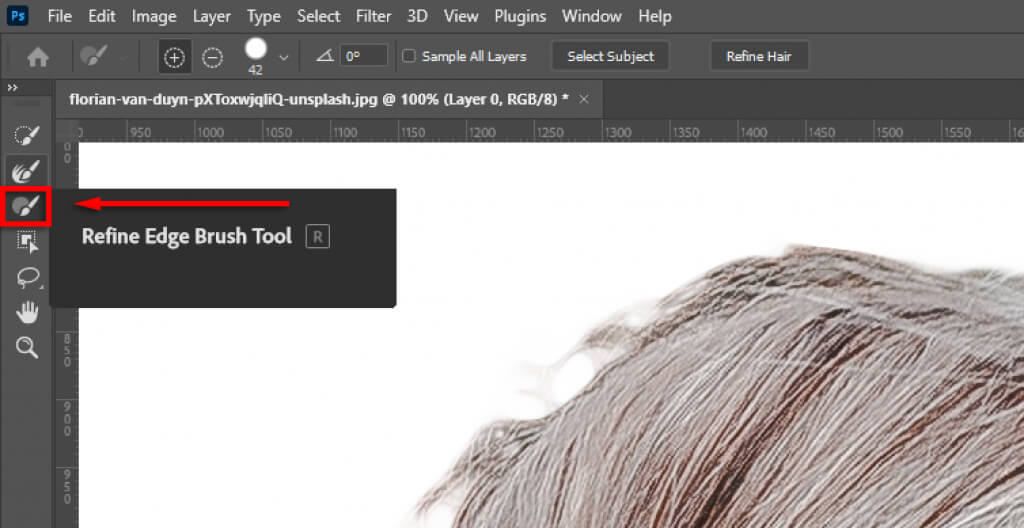
- Click on Refine Edges to fine-tune any difficult areas, such as hair. Then select Refine Hair (if it is hair) to let Photoshop refine the edge automatically, or use the brush to add areas to your selection.
- In the Output Settings, select the drop-down menu and click Layer Mask then select OK.
Note: The more time you spend refining your selection, the better your results will be. Zoom in and pay close attention to any areas that Photoshop has accidentally added or removed. You can always adjust your selection later by double-clicking the mask layer.
Position Your Subject in the Composition
Now, simply click and drag your subject to where you would like them to appear in the final image. This is entirely up to preference.
Step 3: Match the Perspective
Matching the perspective from the original photo to your new background will help make the image look more realistic. To do so, you can use the ruler tool to mark where the horizon is in the original image, and line the new background up so that it’s in more or less the same position.
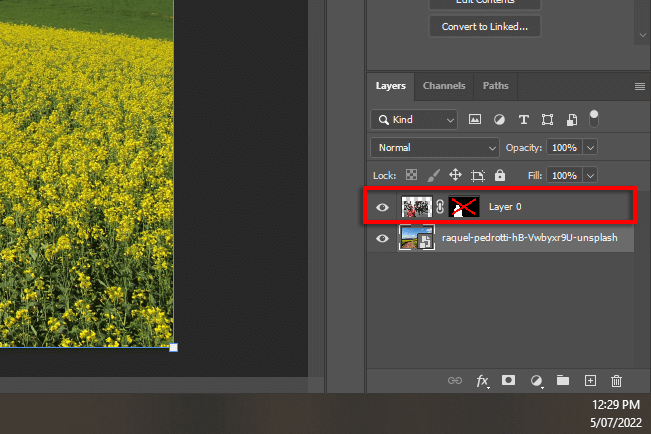
- Disable the layer mask by holding shift and clicking the layer mask so that the original background is clearly visible. If successful, the layer mask should have a red cross covering it.
- Click and drag from the horizontal ruler to create a line where the horizon would likely be.
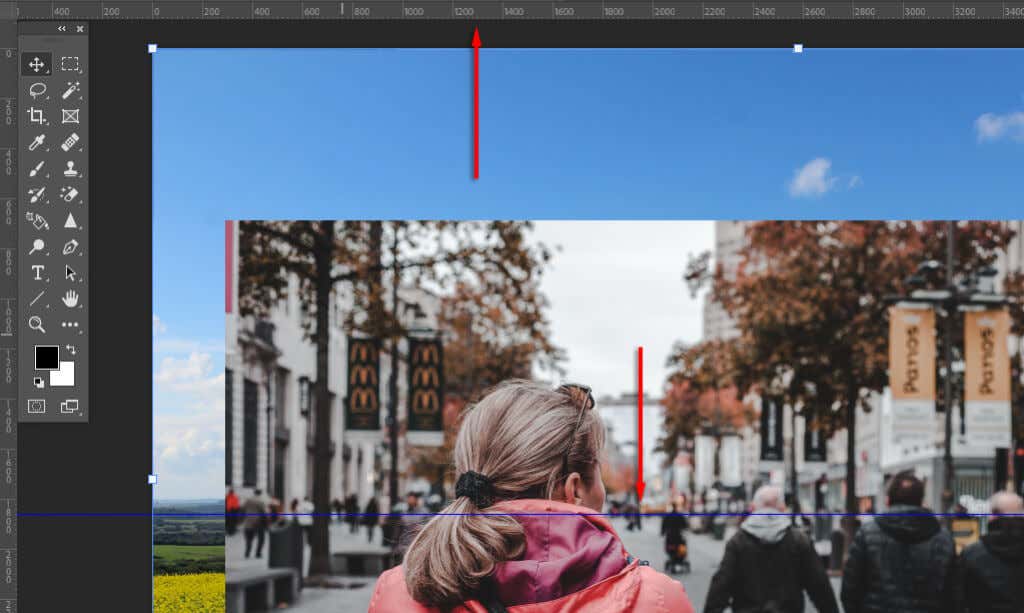
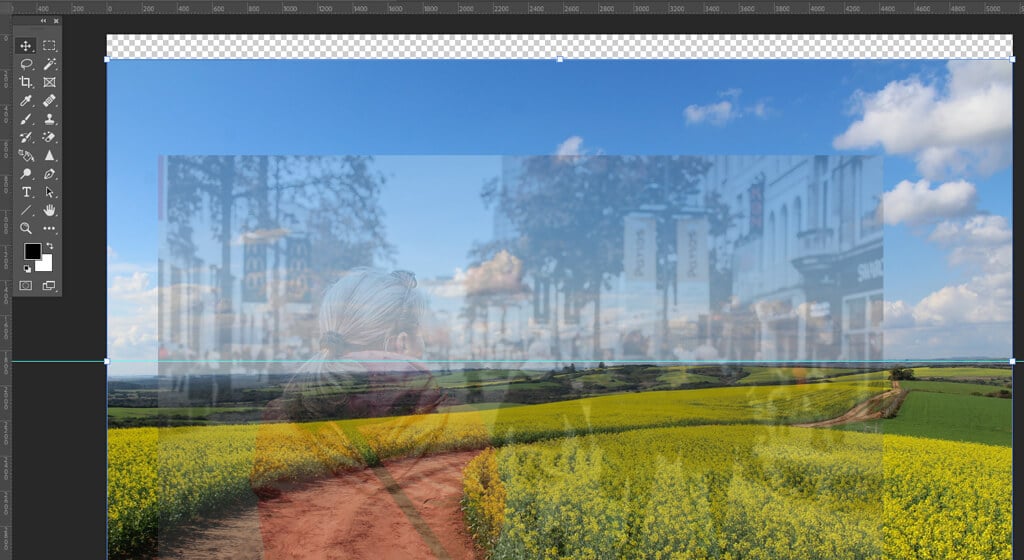
- Using the Move tool, position or resize the new background so that the horizon aligns with the original perspective. To make this easier, slide down the opacity on the top layer.
Step 4: Content-Aware Fill
If you have reached the edge of your image and introduced a transparent background, you can use the Content Aware Fill tool to create a background in that area. If your background has no transparent pixels, you can skip this step.
To fill the transparent area:
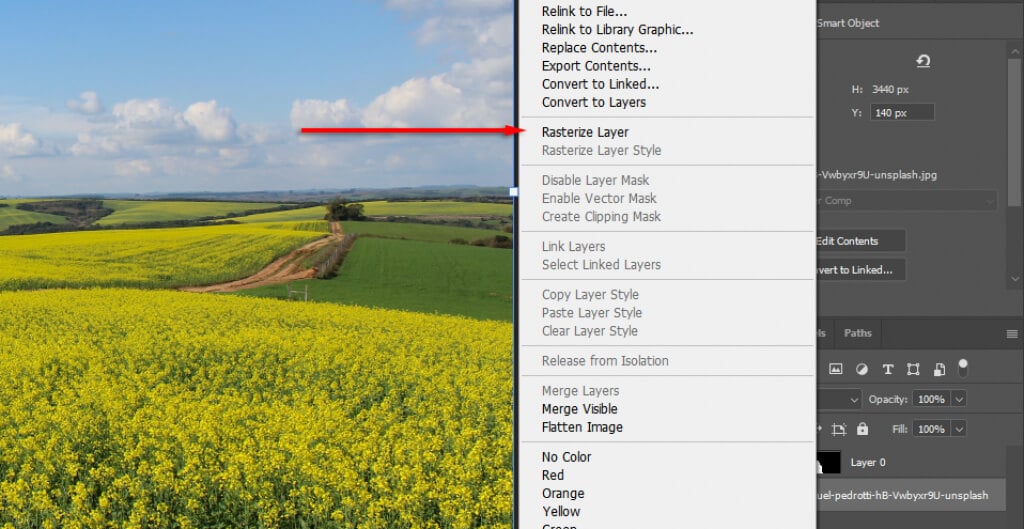
- Right-click your background layer and select Rasterize Layer.
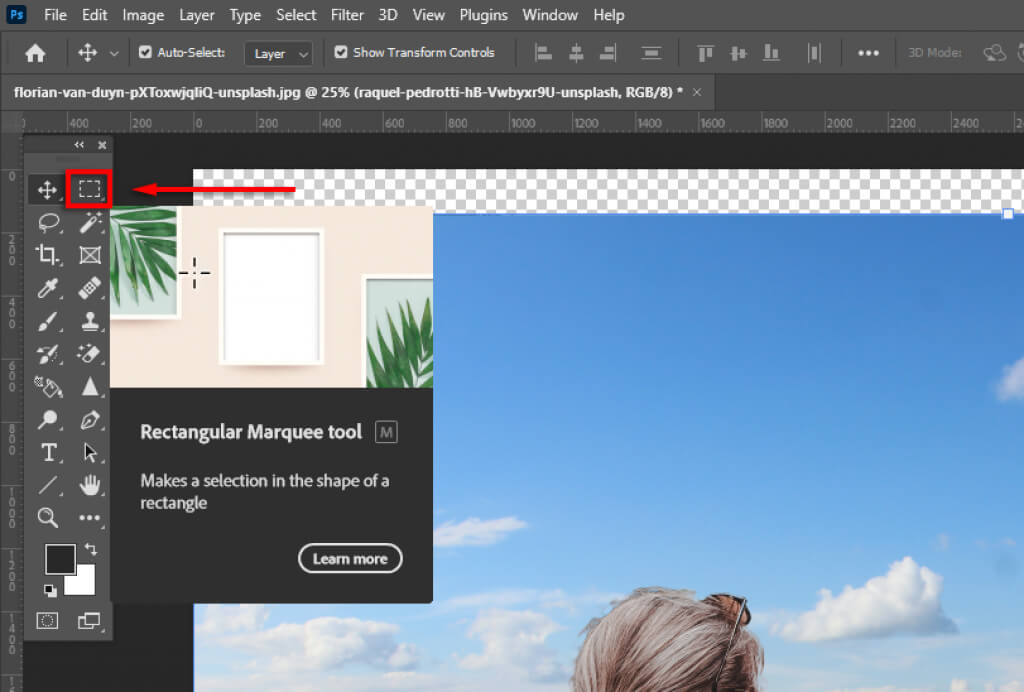
- Select the Rectangular Marquee Tool and make a selection that includes the transparent area as well as a small amount of your background.
- Click Edit > Content-Aware Fill.
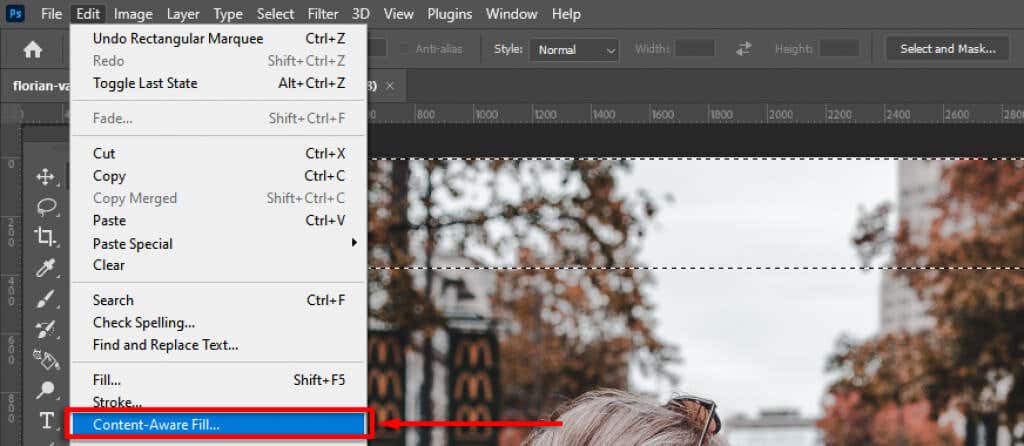
- Click OK.
Step 4: Match Depth of Field
The next step is to match the depth of field of your original image. For this, you have to image how cameras work, and which parts of the image should be in focus. In our example, the woman in the foreground is in focus, meaning everything in the distance will be out of focus. The further away, the more out of focus it will be.
To add this effect, we’ll introduce blur to the background image:
- Select the background layer.
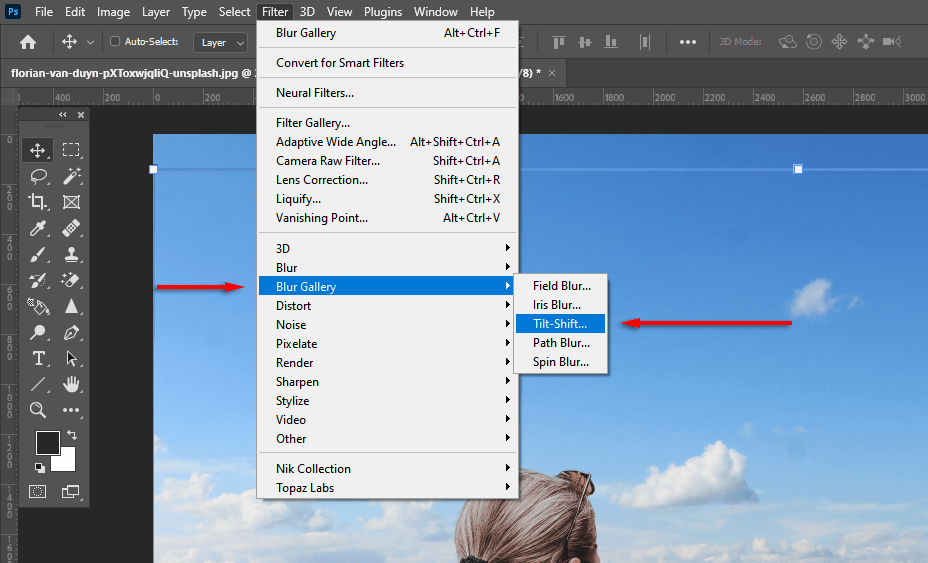
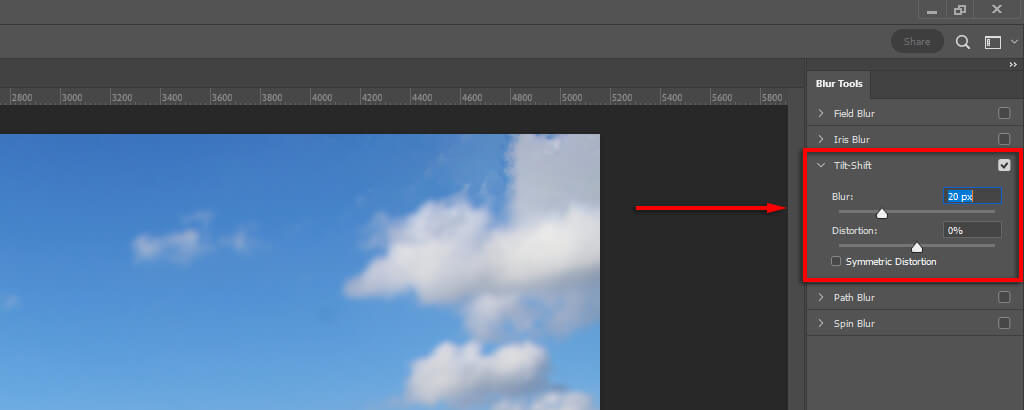
- Select Filter > Blur Gallery > Tilt Shift. Other blur effects will work as well (such as Gaussian blur), but tilt shift will give the effect of gradually increasing blur into the distance.
- Drag the middle circle down until it is where your subject’s plane of focus will be (in our case, the woman’s feet). Everything above the top dotted line will be out of focus.

- Change how much blur is introduced with the Blur slider. Move this around until it looks realistic then select OK.
Step 5: Match the Lighting
You may notice that your subject and the new background have different light sources. This can be difficult to adjust, so it’s better to choose a background with a similar light source. In our example, you can see in the background that the light source is to the left (the shadows fall to the right). However, in the subject, the light source is more top down.
This can be adjusted by introducing lighting and shadows. To do so:
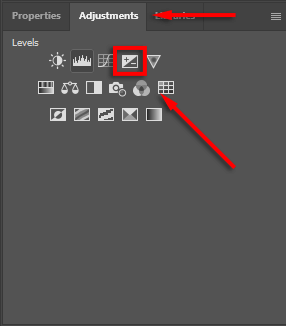
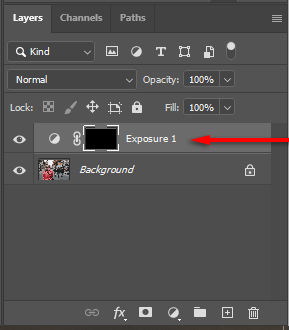
- Select Adjustments then Exposure.
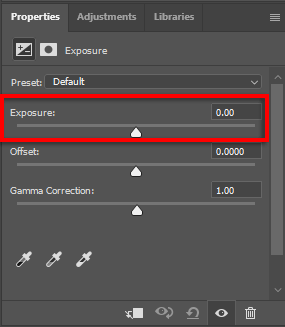
- Press Ctrl + I to invert the mask.
- Lower the exposure, then paint using white to introduce shadows to the correct side of your subject.
- Repeat steps 1 to 3 but raise the exposure to add highlights.
Step 5: Color Match Your Images
At this point, you should have your subject nicely aligned on the new background. However, you will notice that the two images have different color tones. To fix this, you may need to:
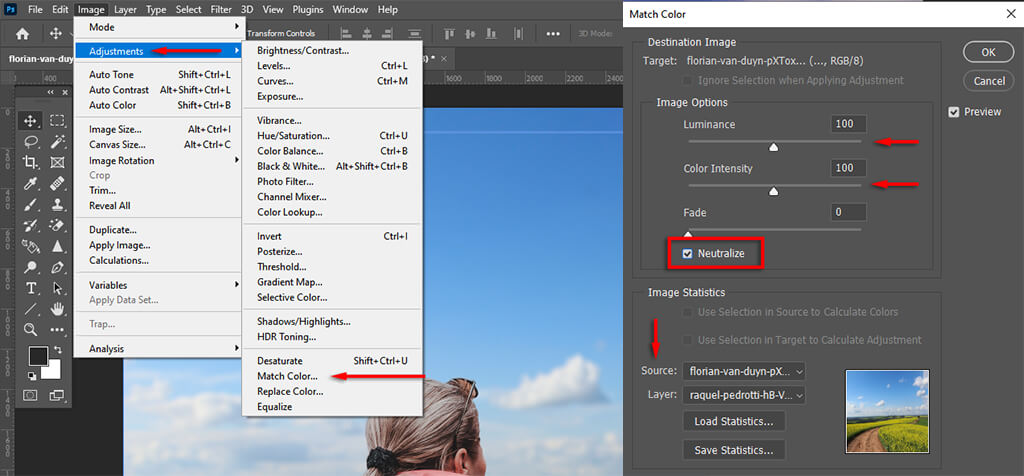
- Match the colors automatically by selecting the background layer, then clicking Image > Adjustments > Match Colors. For Source select your subject. Then, click Neutralize to match the colors. Play around with the Luminance and Color Intensity sliders if necessary, then select OK.
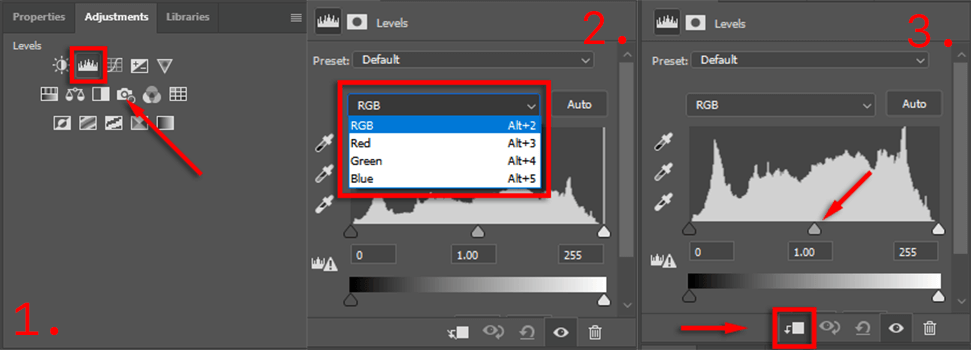
- Alternatively, match the colors manually by adjusting the RGB levels. To do so, select Adjustments then Levels. Make sure the adjustments only affect your subject by selecting the clipping mask icon. Now adjust the red, blue, and green channel individually until the subject colors are more closely aligned with the background color.
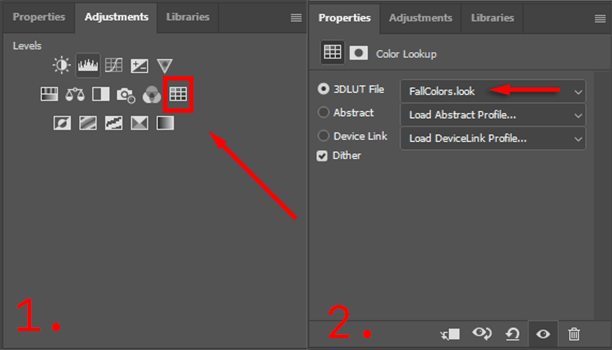
- Finally, add a global adjustment layer to make the subject and background match each other. This can include adding grain, color filters, or vignettes to improve the cohesiveness. To add global color adjustments, the best way is to select Adjustments > Color Lookup. Then, choose a 3DLUT file in the Properties panel that looks good with your image and adjust the opacity slider to change its intensity.
This will take some playing around to get it perfect, but the more attention you pay to details, the better your image will look in the end.
Export Your Final Image
That’s it. Simply click File then Save As to save your final image as a JPEG. As you can see, background removal is relatively simple, but it will take a keen eye for detail to get it perfect – so don’t give up!