
If you have more than one Wi-Fi network with different profiles set up at your work or home, you may end up having a priority issue as to which network you should connect first. Lately, I had this issue at my work where my laptop kept connecting to a Wi-Fi network that has a blind spot in my office. Even though the signal strength indicated that I had an excellent connection with the hotspot, the speed is worse than the dial-up.

To avoid this, I need to give the second Wi-Fi network a higher priority. But Windows 10 doesn’t have an easy GUI-based way to change the Wi-Fi network connection priority. If you have the same needs as mine, here are two options that you can try. Thanks to Winhelponline for the tip.
The hard way – Netsh command-line
Netsh command-line is truly your friend when you need to do things like this. First of all, use the following command to list all available network profiles you have set up on your computer.
netsh wlan show profiles
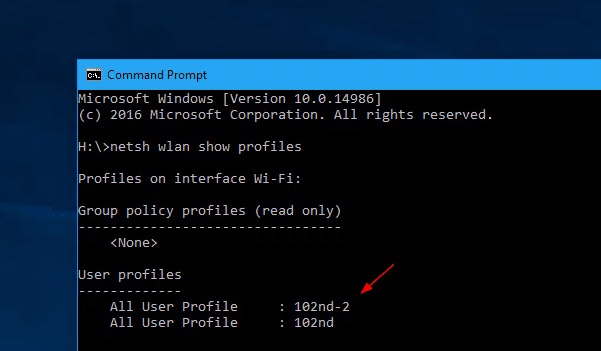
Note the name of the interface and the profile you want to bump up the priority. And use the following command to execute it.
netsh wlan set profileorder name="102nd" interface="Wi-Fi" priority=1
This will give the highest connective priority to a profile named “102nd” to the Wi-Fi network interface. Now, re-run the first command to check if the priority change request has been applied.

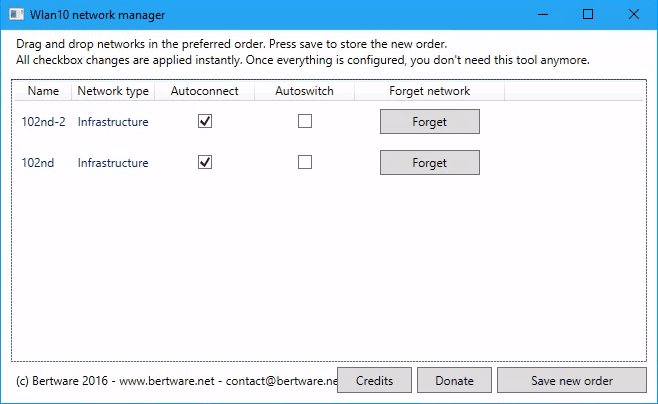
WLan10
WLan10 is a free portable open source tool that will make this change a lot easier. Simply open the tool on your Windows 10 computer, drag and drop all stored network profiles in the order you would like and click the Save new order button. The tool will take care of the rest.
That’s it. Problem solved.
Also, note that the methods explained above also apply to both Windows 7 and Windows 8.1 computers as well.