

Compressing images in your Microsoft PowerPoint presentation can help reduce the overall file size of the presentation and save disk space on the device it’s stored on. Here’s how to compress images in Microsoft PowerPoint.
Note that this feature is only available for desktop versions of Office and not Office for the web.
Compress Images in PowerPoint for Windows
Open the PowerPoint presentation that contains the images you’d like to compress and then select a photo.

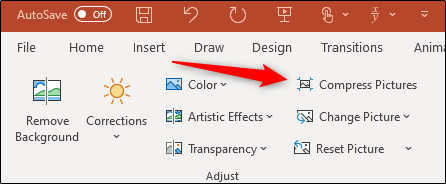
Once selected, you’ll automatically be in the “Picture Format” tab. Here, click the “Compress Pictures” button in the “Adjust” group.
The “Compress Pictures” window will appear. In the “Compression Options” group, you can choose if the compression applies only to the selected picture. If you uncheck this option, PowerPoint will compress all of the images in the presentation, which overrides any changes you may have made to those images.
RELATED: How to Reduce the Size of a Microsoft Word Document
In the “Resolution” group, choose which resolution you would like to use. Once ready, click “OK.”

The image or images will now be compressed.
Compress Images in PowerPoint for Mac
Open the PowerPoint presentation that contains the images you’d like to compress and then select a photo. Once selected, click “Compress Pictures” in the “Picture Format” tab.

The “Compress Pictures” window will appear. Select the picture quality you’d like to use, then select if you’d like to apply the compression to all images in the presentation or only the selected image. Also, if you want to delete the cropped areas of the pictures, check the box next to that option.
When ready, click “OK.”

The image or images will now be compressed.