
A sun or lens glare effect can be a great addition to a video, especially if you want to put some emphasis on a landscape or environmental shot. It can also be a neat effect or transition for music videos. It’s an effect that you can do through the camera itself; however, it can be much easier to add it during video editing to get the desired effect.
Adobe Premiere Pro CC makes it very easy for beginners to add lens glare effects, as they have some specific effects already created to help achieve it. Using these effects as a base, you can alter them in the Effect Controls panel and make them look like you want. In this tutorial, we’ll show you how to use the lens glare effects and how to edit them to your desire.

How to Add a Sun Glare Effect
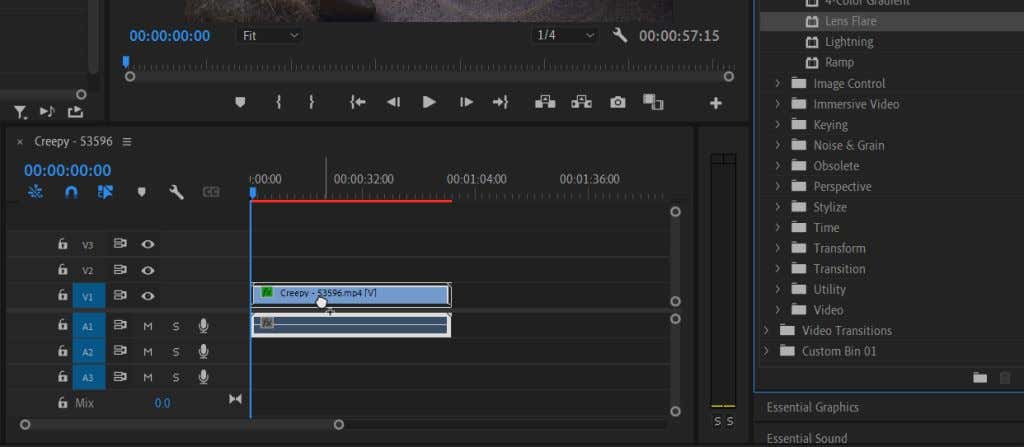
You’ll first need to place the clip you want to have a sun glare effect on the timeline in the spot you want. Then, you can follow the steps below to add your sun glare.
- Go to the Effects panel. Then, select Video Effects > Generate > Lens Flare.

- Click and drag on the Lens Flare effect and apply it to your chosen clip.
Once applied, you’ll see that it’s just a static optical flare image, and you’ll want to make a few changes, so it looks natural.
Editing the Sun Glare Effect
Select the clip you applied the Lens Flare effect to, and look in the Effect Controls panel. Under Lens Flare, there will be quite a few options for you to tweak so that it fits your video. You can preview the changes in the video playback panel.
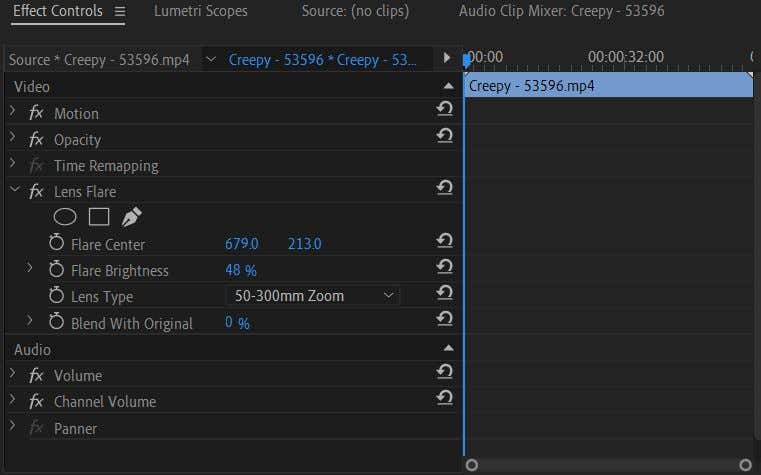
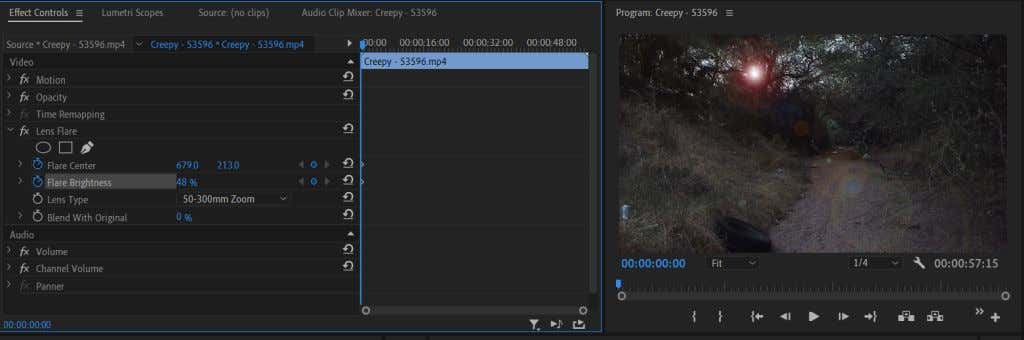
- Look at the Flare Center option. This will allow you to change the placement of the lens flare. You can move it up and down, or left and right.
- Under Flare Brightness, you can change the intensity of the main point of light to create a dim or bright light. You can change this to match your footage’s light levels.
- Use the Lens Type option to emulate the lens flare effect of different types of lenses. You can change this if one of the options looks better to you.
- The Blend With Original option helps you blend the lens flare into the clip, which changes the opacity and blending mode of the effect if you want a subtle look.
Knowing these options will come in handy as we will animate the lens flare. You rarely see a static lens flare in a video since it comes about through the actual movement of the lens and an external light source. Read on to learn how to animate the lens flare effect in a way that looks natural.
Animating the Lens Flare Effect
If you’re not familiar with using keyframes in Adobe Premiere Pro, read our article on keyframes first, so you have a good handle on the basics. Then, follow these steps to animate your lens flare light effect.
- First, using the Flare Center option, place the center on the “light source” your lens flare is originating from. For example, the sun, a street lamp, etc. Once you’ve placed it, make sure your timeline cursor is at the point in the clip where you want the flare to start, and then click the stopwatch next to Flare Center to place a keyframe. And, set your Flare Brightness to the brightest you want it to be and set a keyframe.
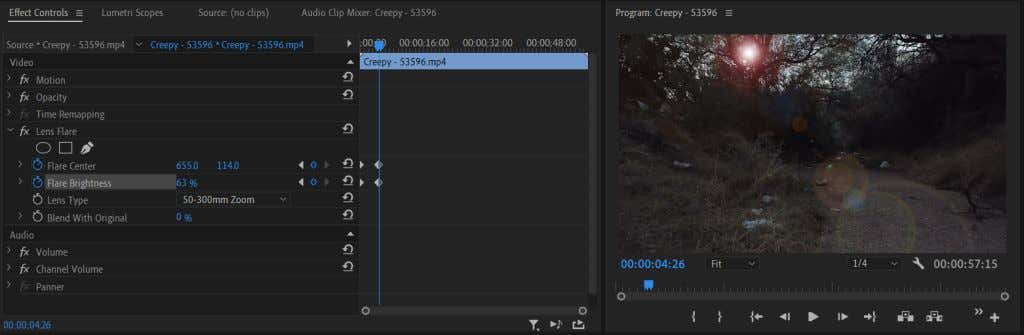
- Now, move your timeline cursor to the point in the video you want the lens flare to end. This will be the point in the video when the light source has gone out of view. If you don’t have an actual light source, you’ll have to follow the camera’s speed to emulate the effect of having one and place your cursor at the point where the light source should realistically be.
- Using the Flare Center option again, move the lens flare relative to the direction the light source is moving. You may also want to try turning down the Flare Brightness as the camera moves and the light source gets further away. If your light source eventually moves off-screen or is no longer visible, turn down the Flare Brightness all the way.
Animating the lens flare is a time-consuming task. You’ll need to keep a lot of the environmental factors of the shot in mind to create the most natural sun flare.
Tip: When any object passes over your light source, turn down the Flare Brightness when it does so and turn it back up once it’s passed.
Creating a Sun Glare Effect in Adobe Premiere Pro
Sun glare can be a great addition to a video or intro. It can be a big help, for example, if you want to create the illusion of sun or sunlight. It adds depth to the environment and increases the visual allure.
You can also create a lens glare effect in Adobe After Effects or download overlay templates or preset packs to use in Premiere. However, if you need a quicker option that gets the job done, using Adobe Premiere Pro’s lens flare effect can create one that’s just as good.
Have you run into any trouble creating a lens glare effect in Premiere? Let us know in the comments.