
Workspaces are a nice, neat way to organize your work.
Suppose you have too many applications open. Your taskbar will be cluttered and it might be difficult for you to find/move between different programs.
Workspaces come in handy in this situation. You can group applications in different workspaces. So, let’s say you have many programming-related applications opened. And you are also working on documentation.
You can organize them in separate workspaces. Click and drag an application window and it should show the option for moving the application to a different workspace.
This will ease your work in a more organized way and will save some time as well as frustration.
Sounds good? Let me show you how to create workspaces in Linux Mint with Cinnamon and switch between them.
Create new workspaces
Creating or accessing a workspace in Linux Mint is easy. Just press CTRL + ALT+ UP. It will show you a screen like the one below.
Just click on the + sign on the right side to add a new workspace other than the default 4.
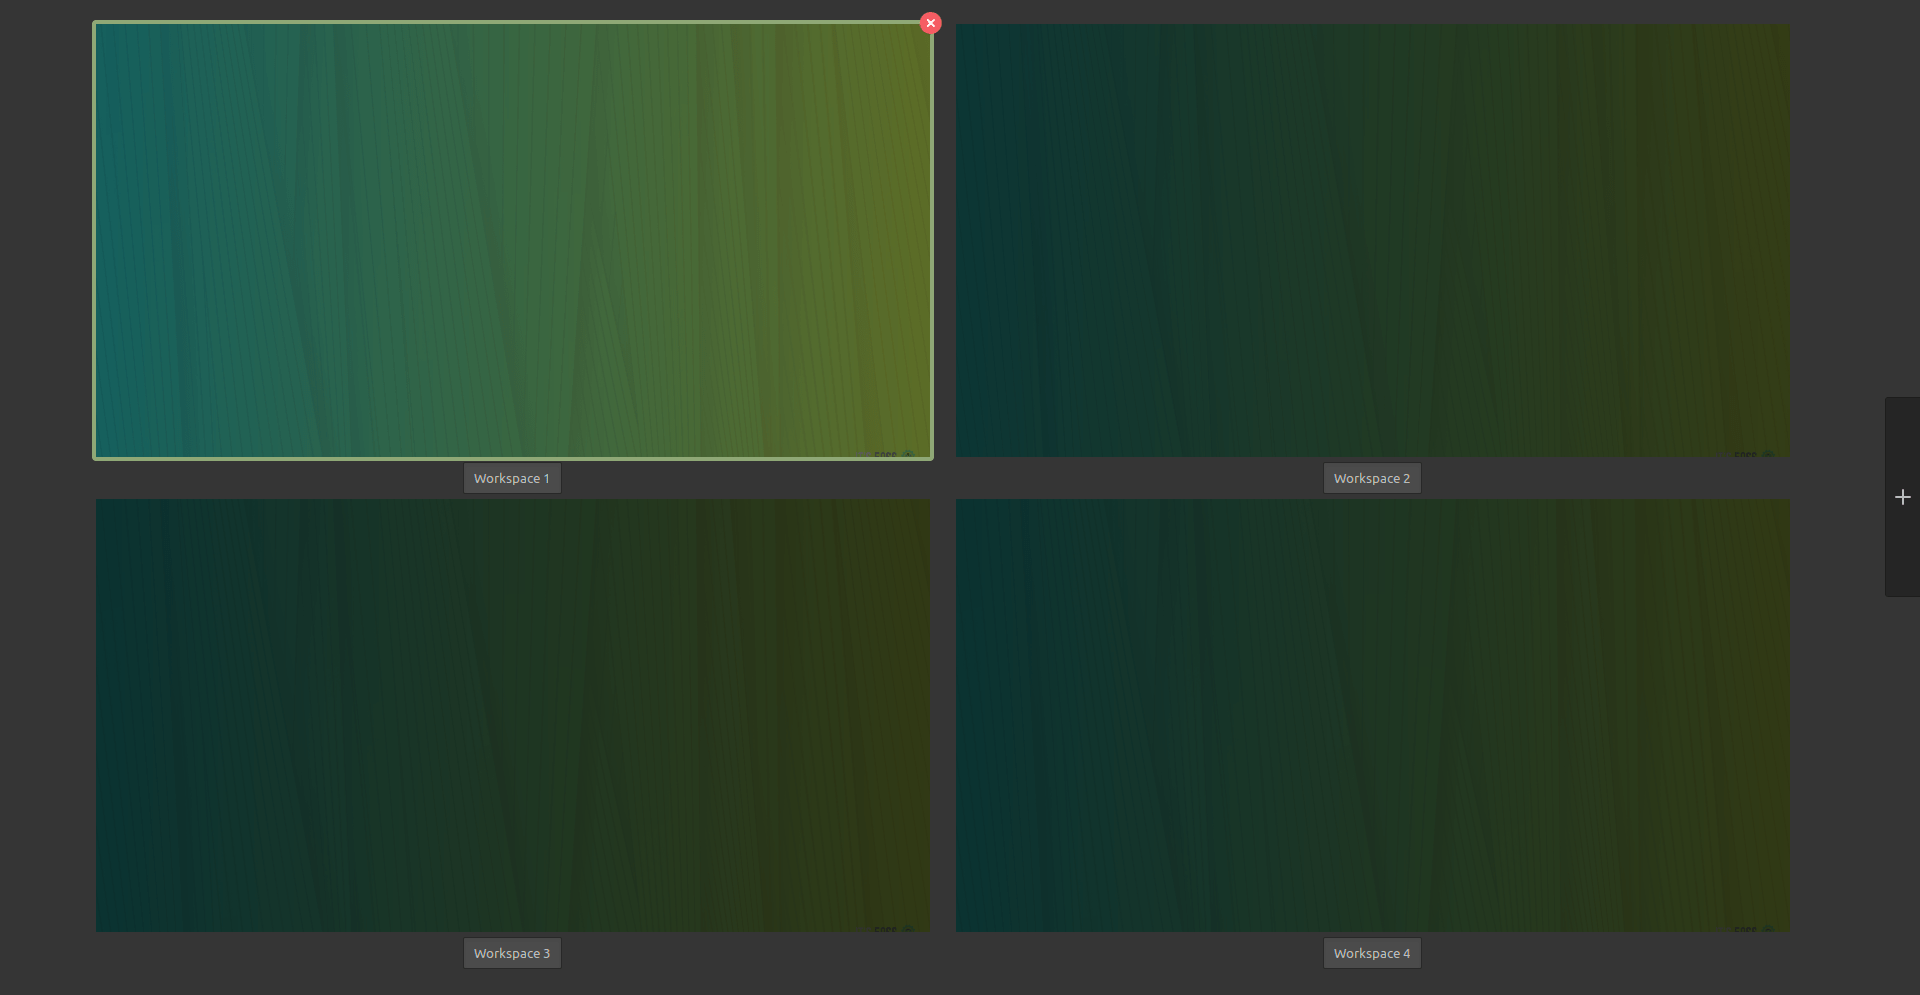
The workspaces in Linux Mint are persistent. Once created, these workspaces will always be there, even after the next boot.
Switching between workspaces
There are two ways to access the workspaces and switch between them.
- Use Ctrl+Alt+Up arrow key and bring all the workspaces and then move between them using the arrow key or the mouse itself.
- Use the hot corner and move the mouse in the top left corner.
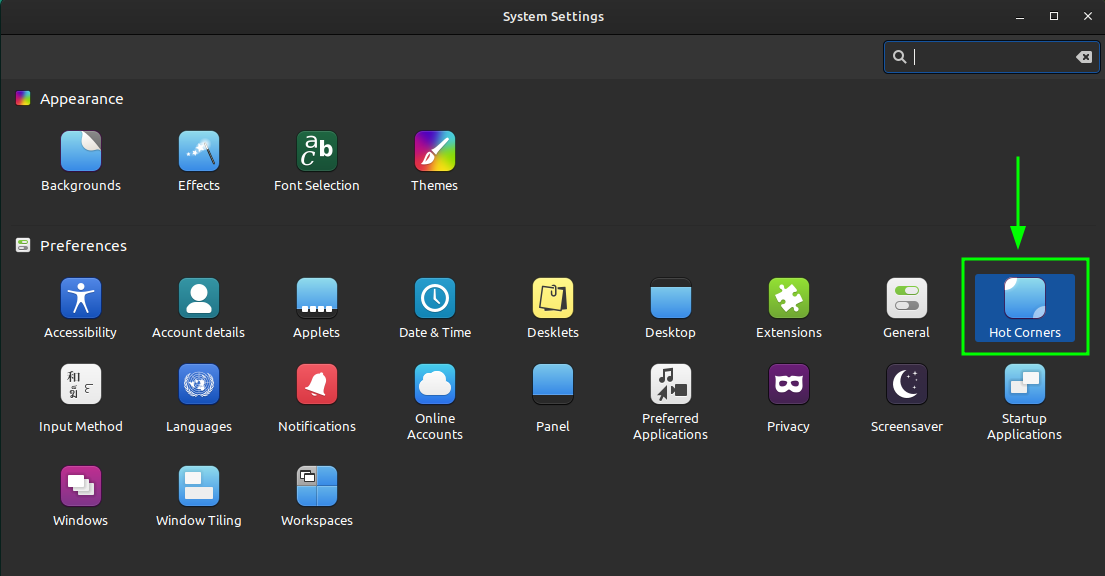
By default, the Hot Corner feature is disabled in the latest releases of Linux Mint.
To enable Hot Corner to switch between workspaces, you should go to the System Settings and select Hot Corners option.
Now, enable the top left corner by toggling the button. By default, this corner is dedicated to show all workspace (you can change that as well).
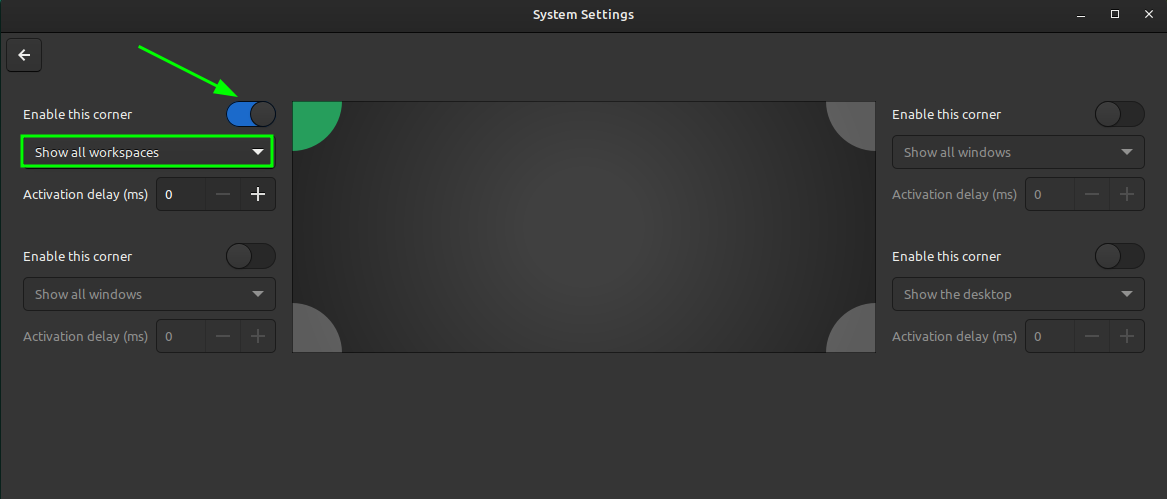
You can now access the workspaces grid by hovering over the top left corner.
Also, if you want, you can add new workspaces by pressing the + symbol on the right. Or rename existing workspaces by clicking on the name according to your need.

Delete a workspace
You can in fact create several workspaces by clicking the + sign. In case you want to delete a workspace, click on the X sign on the top right of a workspace while hovering over it.

I hope this quick post helped you to create a workspace in Linux Mint. Do you use workspaces frequently? Let us know your views on workspaces. Meanwhile, you may also check a post on things to do after installing Linux Mint 20.