
You ever wonder if you could change the color of your mouse pointer or even change the image? That thing is so boring and you know me, I hate things that are boring. Yes, I know you can modify the mouse pointer to black or other another image using the mouse settings like Jim wrote in his article called Make Your Mouse Pointer Easier to See (which is a must read). I’m talking about changing the color to red, bright pink or something (sword) that helps you see it better or shows some spunk. Now I have figured out a neat trick on how you can do this in Windows 10. So, sit back and get ready to learn how you can change the color or image of your mouse pointer.
How to Customize Your Mouse Pointer
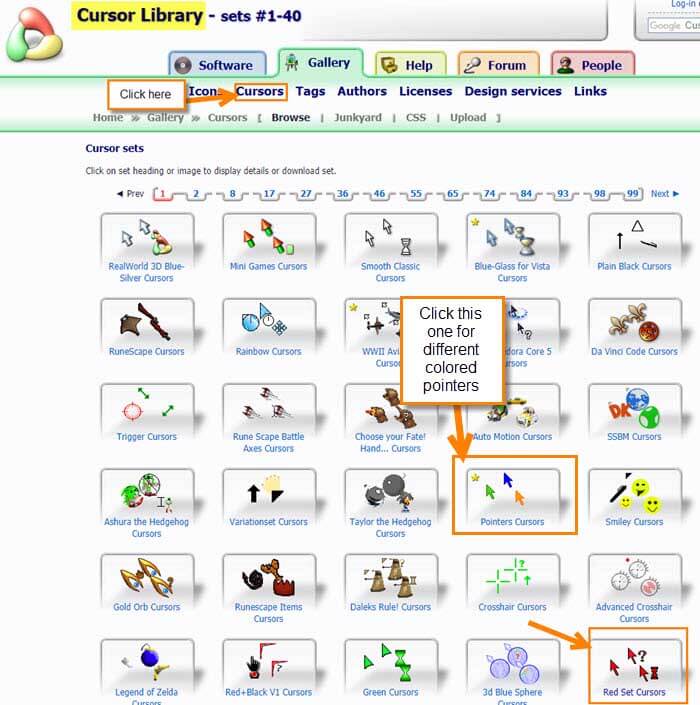
Step 1: You will need to download the mouse image that you wish to use. There are many sites out there, but this one has some cool mouse cursors and is easy to navigate. Go to the website, Cursor Library. They have many options to choose from. Let’s choose the Cursor Set, “Pointers Cursors” you can see in the middle.
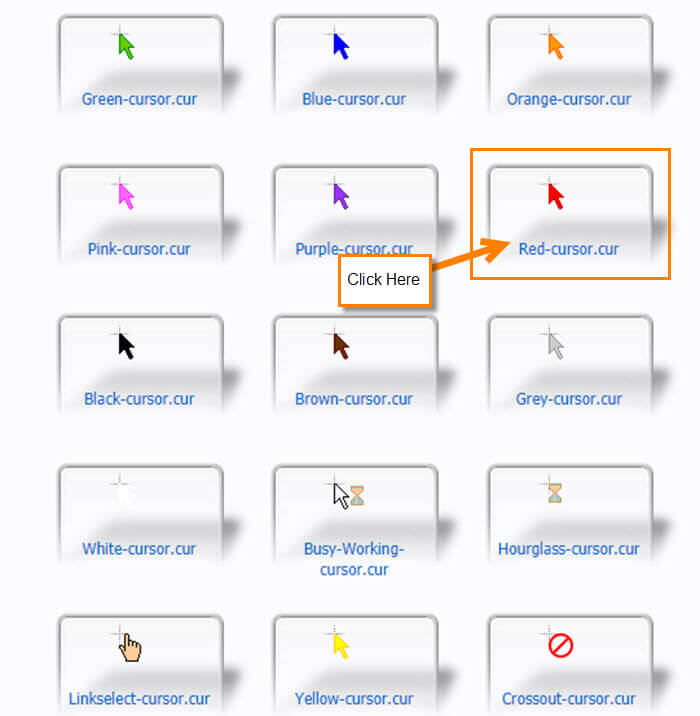
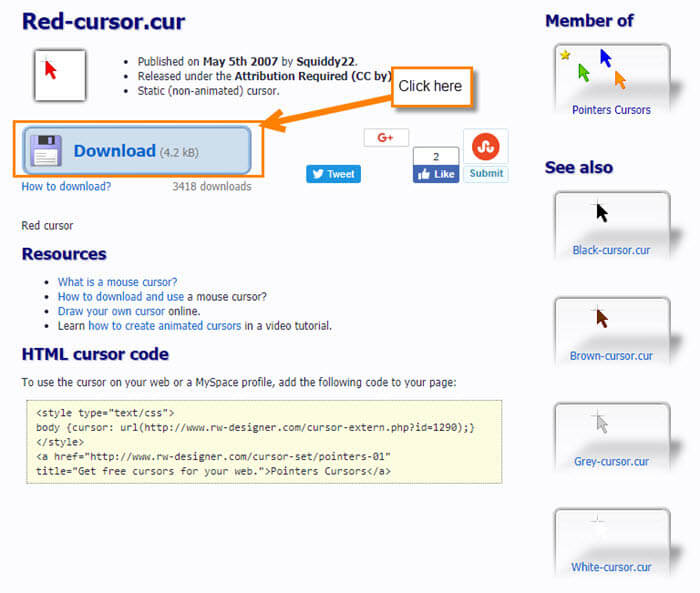
Step 2: Once here we will click on the red cursor. This will bring up the download page. From here all you need to do is click on the download link
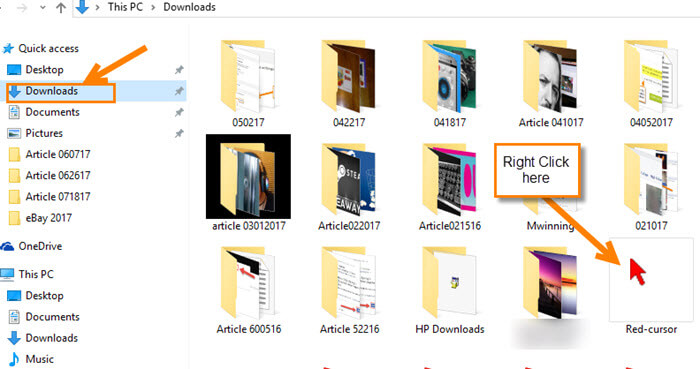
Step 3: After you have downloaded the cursor you will need to head to the Downloads Folder (this is where my computer downloads files from websites). Once on that page, find the cursor you have downloaded, right-click on the file and select COPY from the menu.

Step 4: Where do we paste this little cursor? There are a few ways to get to the next step, but we are going my way. Head down to the Taskbar and click on the File Folder icon. From the left menu click on your C: Drive.
![]()

Step 5: Once here, find the Windows Folder, then click on the Cursors Folder. Right-click and paste the cursor file. There will be a window that pops up and says, “You’ll need to provide administrator permission to copy to this folder“. To get by this, click on the Continue button.


Step 6: Now we get to activate our new pointer. To do this, we are looking for the Mouse properties so we can activate this feature. The easiest way I found to get there is to head to the Start Menu and click on the Sprocket (Settings Icon).
![]()
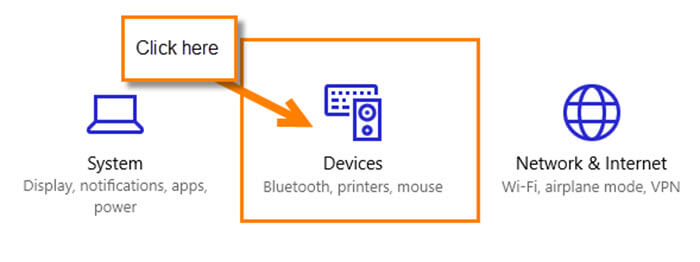
Step 7: On the next page you will need to click on the one called Devices.
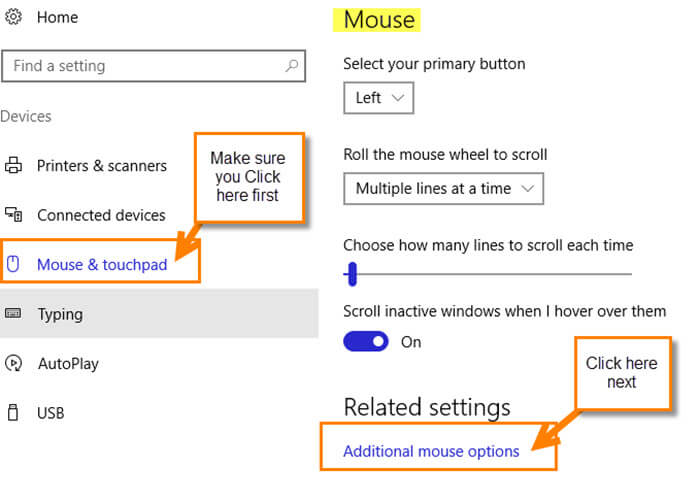
Step 8: Here you will want to make sure to click the Mouse and Touchpad link on the left if you are not already on the Mouse screen. From here select Additional mouse options at the bottom (some people might see this option on the right side of the screen).
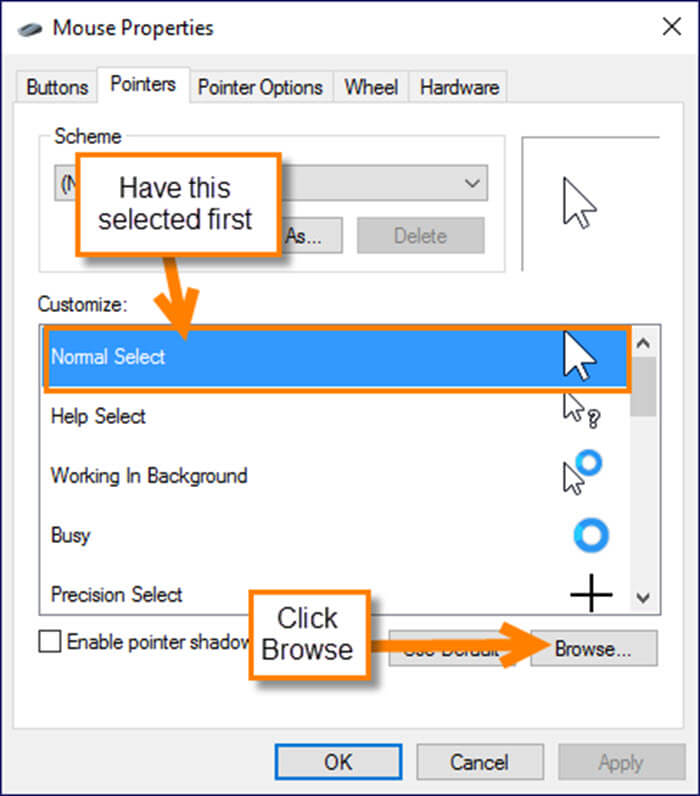
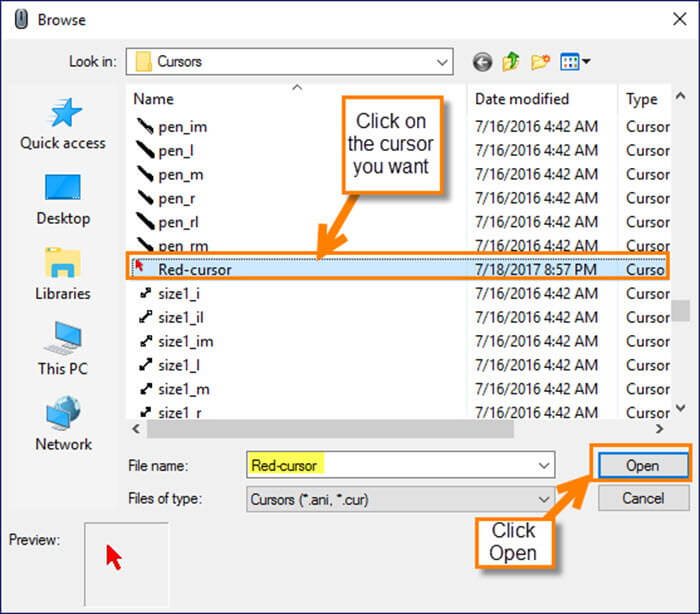
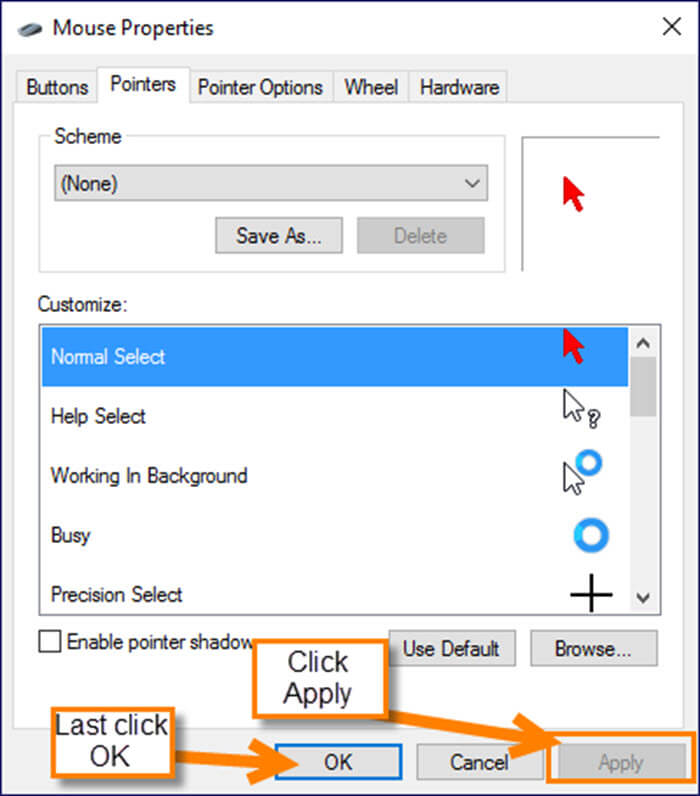
Step 9: After clicking on the Additional mouse options a pop up window will appear. This is the Mouse Properties window and this is where the magic happens. First, make sure to be under the Pointers TAB. Next, click on the Normal Select option at the top of the customize list since we are changing the main mouse pointer in this article. Now, click on Browse which will bring up the Cursors file folder where you pasted the new cursor. Find your new image and click on it. Then click Open button at the bottom. Then all you need to do is hit Apply.
And there you go! Now you know how to change that boring old mouse pointer in Windows 10. You can even change the other pointer options on the list. That way you can have the Busy spinning circle change to a spinning light saber. (Yes, I’m a Star Wars fan.) Time to get in there and see what you can do.
Editor’s Note: Although this article was directed towards Windows 10, the instructions can be followed for older versions as well. (Thanks to Mindblower for pointing this out.)
Bonus
Here are some great links to other mouse cursor pages that I know you will like:
- Minecraft – http://www.rw-designer.com/gallery?search=minecraft+cursors
- Starwars – http://www.rw-designer.com/gallery?search=Starwars&by=
- Star Trek – http://www.rw-designer.com/gallery?search=Star+Trek&by=
- Guns – http://www.rw-designer.com/gallery?search=Guns&by=
Do you know any sites with some good Mouse Cursors?