
Windows 10, by default, sends everything you search for in the Start Menu to their servers to give you results from Bing search — so you better make sure that you don’t type anything private into your own PC’s Start Menu. Or, you could just disable the Bing integration in the Start Menu.
Update, 5/19/22: We now have a solution that works in Windows 10’s May 2020 Update and Windows 11. In our experience, this also disables the Microsoft Edge advertisements that appear when you search for Chrome in Windows 10’s Start menu.
It’s worth noting that Android’s default search and even iOS will also send your search results to their servers to try and get more relevant results — but somehow it seems different when you’re on your personal computer in your house trying to search through your personal files.
We’re definitely glad that they included a way to easily disable the web integration — it’s just worth noting that if you want to use Cortana, you don’t have any choice in whether the Start Menu uses Bing, so you’re going to have to disable Cortana to disable the web integration.
How to Disable Bing in the Start Menu in Windows 10’s May 2020 Update
Starting with Windows 10’s May 2020 Update, there’s a new registry setting that controls this option. You must edit the Windows registry to disable web searches in the Start menu.
Warning: The Registry Editor is a powerful tool and making the wrong change can make your system unstable or even inoperable. This is a straightforward change and, if you follow the instructions, you should be fine. But if you’ve never used it before, consider reading about how to use the Registry Editor. We always recommend backing up your Registry (and your computer) before making changes.
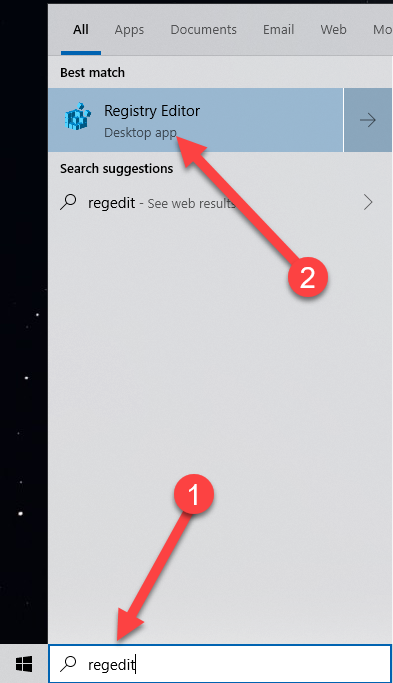
To start, open the Registry Editor by clicking Start and typing “regedit” into the search bar. Double-click the “Registry Editor” shortcut that appears (or press Enter) and click “Yes” to the UAC prompt.
Navigate to the following key using the left pane. You can also copy-paste the following address into the Registry Editor’s address bar and press Enter:
ComputerHKEY_CURRENT_USERSOFTWAREPoliciesMicrosoftWindowsExplorer
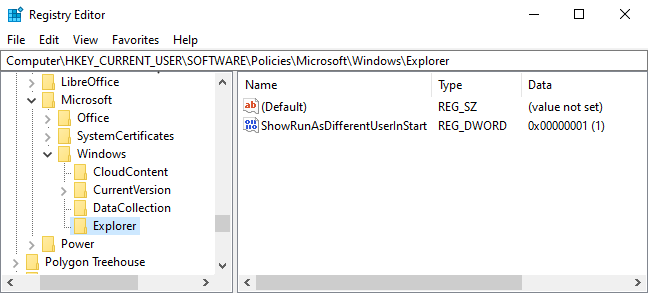
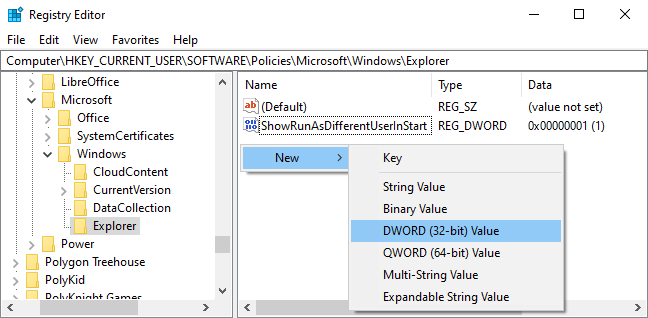
Create a new DWORD value by right-clicking inside the empty space in the right pane and pointing to New > DWORD (32-bit) Value.
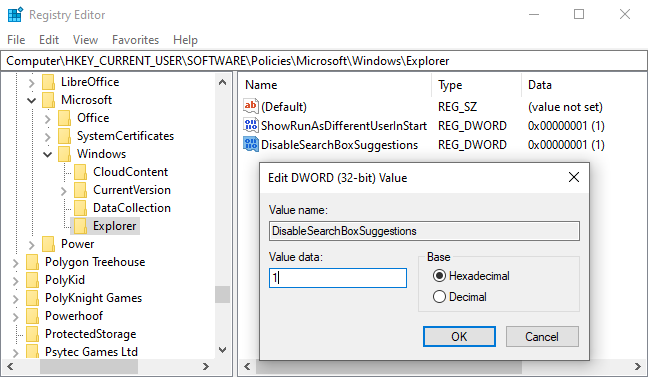
Name the value “DisableSearchBoxSuggestions”. Double-click it and set its value data to “1”.
You must restart your computer, log out and log back in again, or at least restart Windows Explorer for your change to take effect.
Download Our One-Click Registry Change for the May 2020 Update
If you’re not comfortable making Registry changes yourself, we’ve created two downloadable files you can use. One file disables web searching from the Start Menu, and the other file will re-enable web searches. Both are included in the following zip file, and each just functions by changing the values we demonstrated how to change above. Double-click the one you want and click through the prompts.
Download Disable Bing in Start Menu hacks
How to Disable Bing Integration in the Start Menu, the Old Way
Note: These instructions apply to older versions of Windows 10, including the November 2019 Update, the May 2019 Update, and the October 2018 Update.
To start, open the Registry Editor by opening the Start menu, typing “regedit”, and pressing Enter. In the Registry Editor, use the left sidebar to navigate to the following key:
HKEY_CURRENT_USERSOFTWAREMicrosoftWindowsCurrentVersionSearch
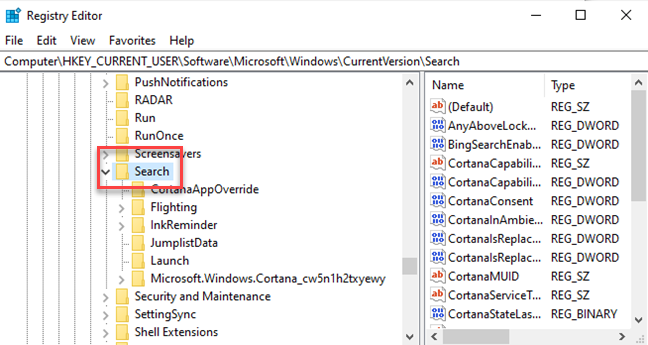
Right-click the Search icon and choose New > DWORD (32-bit) Value. Name the new value BingSearchEnabled.
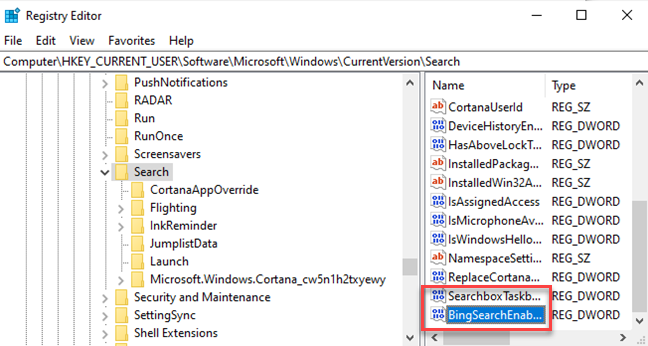
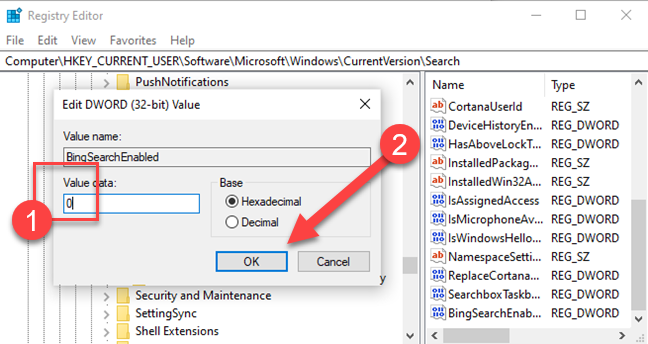
Double-click the new BingSearchEnabled value to open its properties dialog. The number in the “Value data” box should already be 0—just ensure it’s still 0. Click OK to continue.
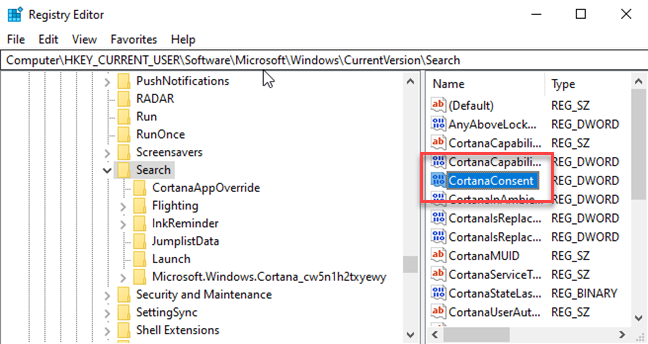
Below BingSearchEnabled, you should see CortanaConsent. Double-click this value to open its properties dialog. Change its “Value Data” box to “0”.
If you don’t see CortanaConsent, create it by following the same steps you used to create BingSearchEnabled.
You can close the Registry Editor now. If you search your start menu, you should now see only local results. If the change doesn’t take effect immediately, restart your PC.
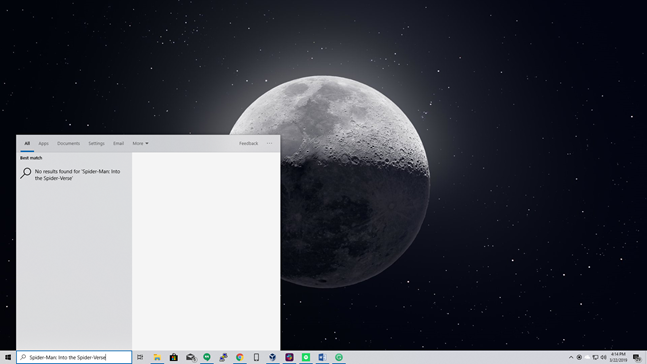
If you want web search results back, all you have to do is open the Registry Editor and change the BingSearchEnabled and CortanaConsent values back to 1.
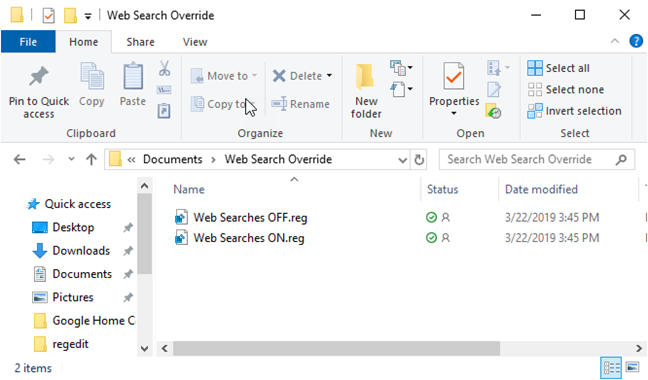
You can also run this registry hack instead. The change should be immediate—if it isn’t and you still see Bing results in your Start menu, restart your PC.
Download Web Search Override Files (older versions of Windows 10 only)
How to Disable Bing in the Start Menu, the Really Old Way
Update: Microsoft removed this easy graphical option from Windows 10’s Anniversary Update. Even if you turn Cortana off with a registry or Group Policy tweak, Windows 10 won’t disable web searches in the Start menu. You can, however, make the Start menu search Google instead of Bing, if you want.
Luckily Bing is really easy to disable, and you’ll just need to get to the Cortana search settings screen — the easiest way to do this is to type “cortana settings” into the Start Menu and choose the “Cortana & Search settings” item.
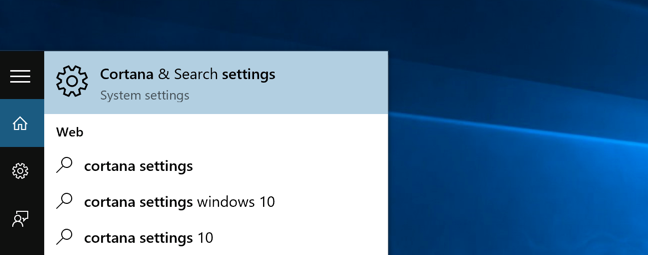
This will bring up the settings dialog, which is going to look different depending on whether you’ve already disabled Cortana or not.
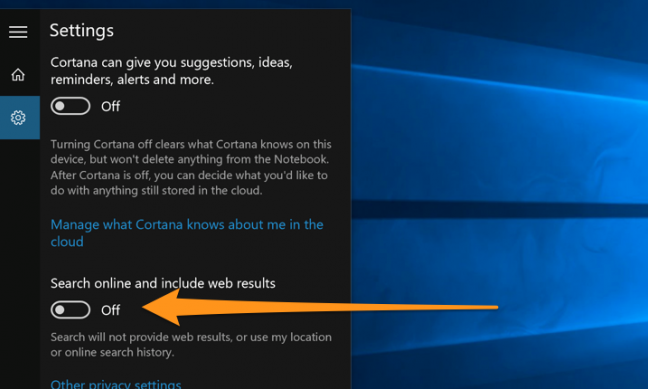
If you want to disable the Bing integration, you’re going to also have to disable Cortana — so flip that switch to Off.
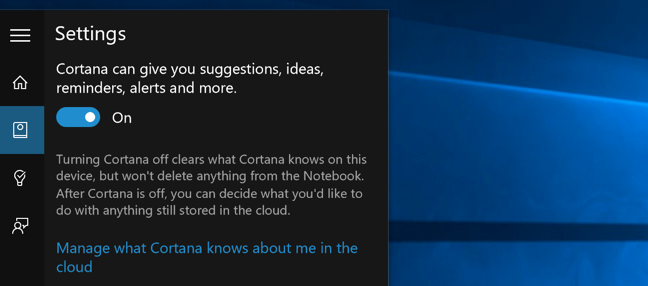
Now that you’ve disabled Cortana, the rest of the dialog will change and you’ll see an option for “Search online and include web results”, which you are going to want to disable as well — this is how you actually disable Bing from the Start Menu.
And now when you search for anything, it’s going to only search your own PC.
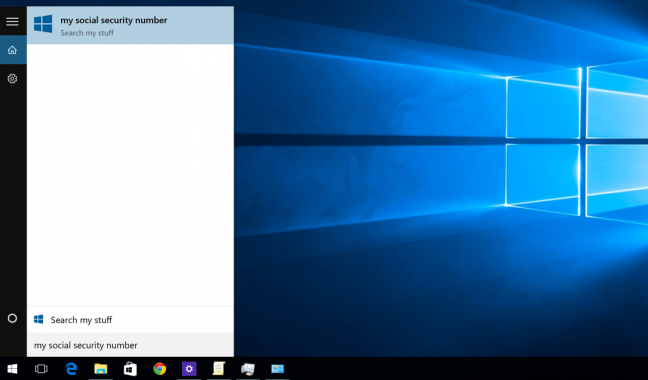
Notice how clean it is now — and it says “Search my stuff” instead of “Search the web”.
Note that If you want to disable the Search box from the Taskbar, you’ll need to right-click it and choose the Hidden option.
