

One of the new features that Windows 11 introduced was that a small check box appears at the side to highlight that the file/folder has been selected whenever you click on a file or folder. This is a good feature, especially for touchscreen devices. However, not everyone prefers them. I will address this in this tutorial and show you how to disable selection checkboxes in File Explorer on Windows 11 systems.
Disable Selection Checkboxes File Explorer
Turning off the selection checkboxes is very straightforward, and it will hardly take a minute. If you want to enable them sometime later, you can easily do that. I will show you both ways. Just follow the steps below:
Step-1: Click on the File Explorer icon on the taskbar. You can open File Explorer using shortcut keys Win + E.

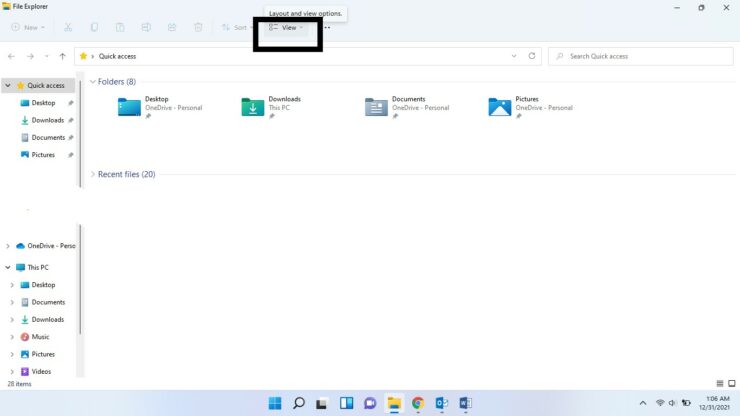
Step-2: When the explorer opens, click on View at the top of the Window.
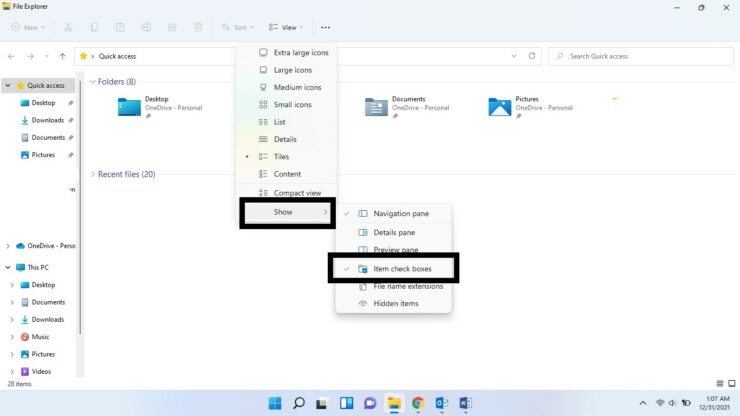
Step-3: Hover your cursor on Show. Click on the Item Check Boxes option. Once you do, the tick mark you see next to the option will disappear.
Now you have successfully disabled the checkboxes, and whenever you click on a file, you will no longer see the selection checks.
If, however, you wish to enable the feature again at a later stage. Follow all the above steps and this time, in Step-3, click on the Item Check Boxes option. A small tick mark will appear next to the option, indicating that the selection checks have been enabled successfully.
I hope this helps. Let us know in the comments below.
The post How to Disable Selection Checkboxes in File Explorer on Windows 11 Systems appeared first on Wccftech.