
To Emulate the GameCube on your Steam Deck:
- Download EmuDeck, install it, and use it to install the Dolphin emulator.
- Copy your GameCube games to the GameCube EmuDeck folder.
- Add your GameCube games to Steam with Steam ROM Manager.
Longing for the days of Nintendo’s most cubiform console? On Valve’s Steam Deck, you can emulate the GameCube with a tool called Dolphin (not to be confused with the Deck’s file manager). We’ll walk you through getting it running and show you some tips for making the most of the GameCube emulator.
Step 1: Install Dolphin, a GameCube Emulator, via EmuDeck
The first thing you must do to emulate the GameCube on your Steam Deck is open Firefox—this is the default browser in SteamOS, but you can use any browser you like—and summon the keyboard by pressing the “X” button, then type EmuDeck.com in the address line. Click the “Download” button on the home page’s upper right-side to get to the download section of the EmuDeck website and hit the “Download Installer” button.
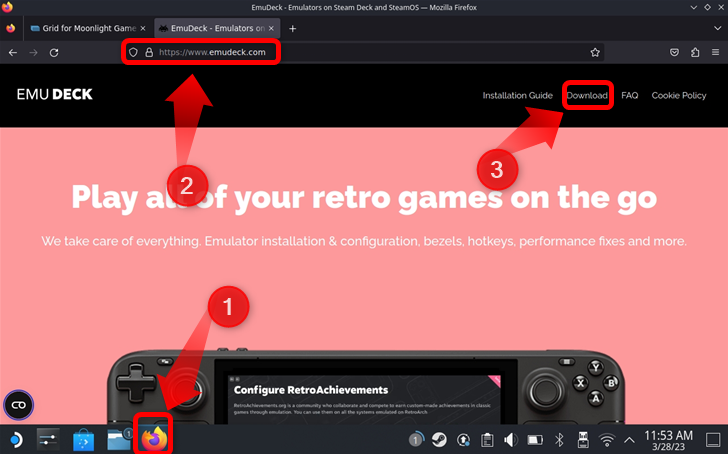
Note: EmuDeck is not a Steam Deck emulator; instead, the app can download and automatically set up virtually every emulator available for the Steam Deck, making emulation on Steam Deck a breeze to set up.
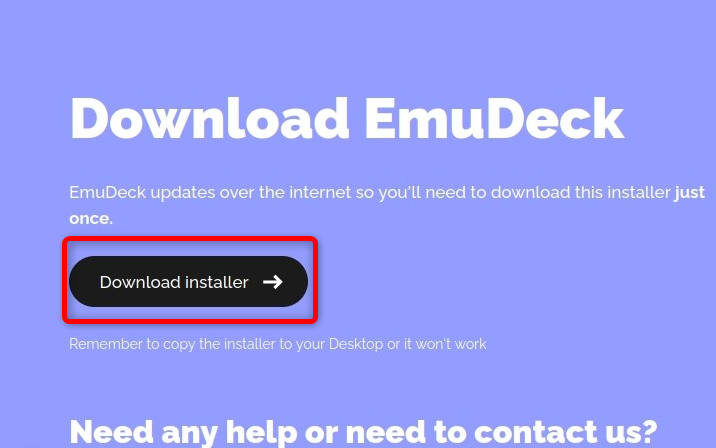
The page will scroll down to the download section. Once there, click the “Download Installer” button. Firefox will then download the EmuDeck installer and save it in your “Downloads” folder.
To install EmuDeck, you have to copy the installer to your desktop. To do this, open Dolphin, the default SteamOS file manager, click the “Downloads” button on the left side by pressing the right trigger or the right touchpad. Next, right-click the “EmuDeck.desktop” file by pressing the left trigger on your Steam Deck. Next, click the “Cut” option.

Next, paste the EmuDeck installer by right-clicking or pressing the left trigger and then clicking the “Paste One File” option.

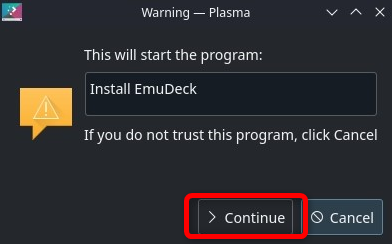
Now, double-click the “Install EmuDeck” icon on your desktop and click on “Continue” when prompted.
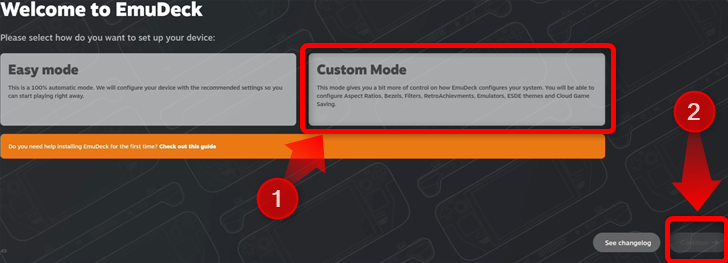
Wait for the installer to download some files, after which you’ll be greeted with the installation menu. Once inside the EmuDeck installer menu, click the “Custom Mode” button and then click on the “Continue” button.
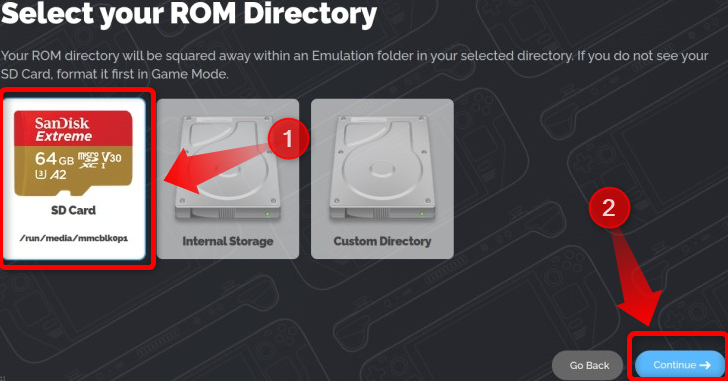
The first option laid before you is to select where you want EmuDeck to create your ROM directory. We recommend getting a microSD card to store your ROMs on. Otherwise, they’re going take up precious space on your internal drive. Plus, if you store ROMs on multiple cards, you can hot-swap them to move seamlessly between games.
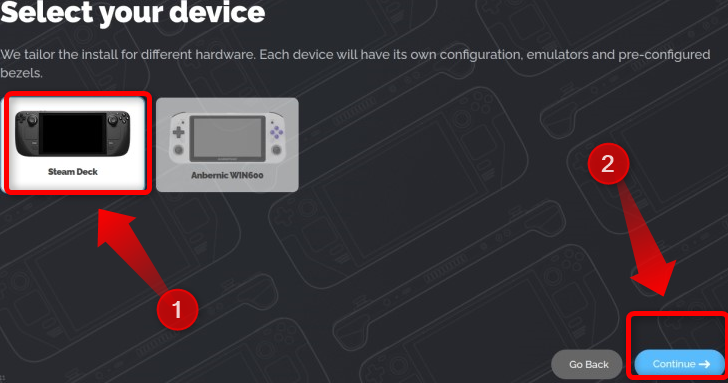
After selecting your drive, it’s time to choose your device; pick the Steam Deck.
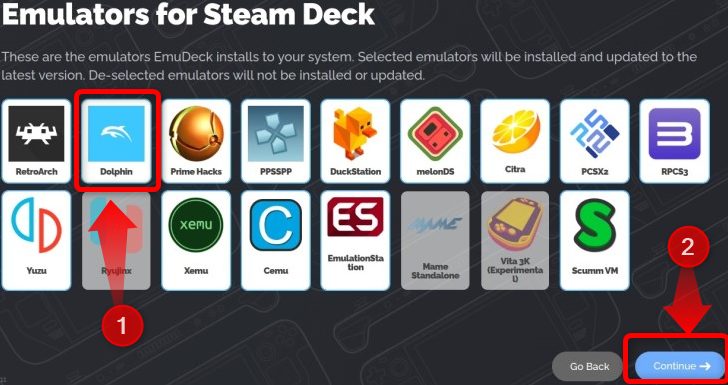
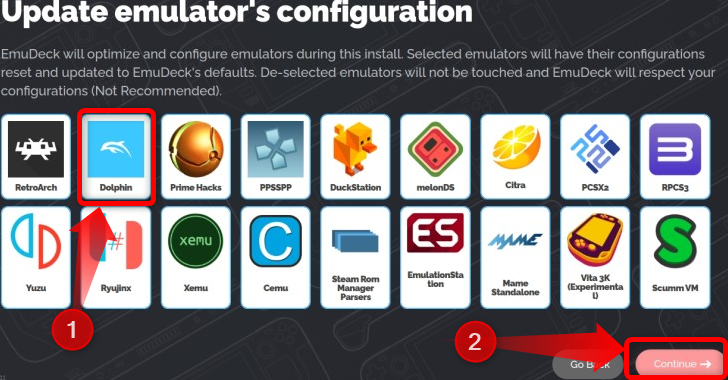
Next, pick the emulators you want EmuDeck to install. Since this is a guide on how to emulate GameCube on Steam Deck, make sure to select “Dolphin” from the list since that’s the GameCube emulator.
The following window lets you choose which emulators you want EmuDeck to optimize and auto-configure. Select “Dolphin” from the list. Also, we recommend you let EmuDeck set up every emulator you plan on using since that’s much easier than trying to configure them yourself. Manually setting up controls alone is enough to make you pull your hair out in frustration.
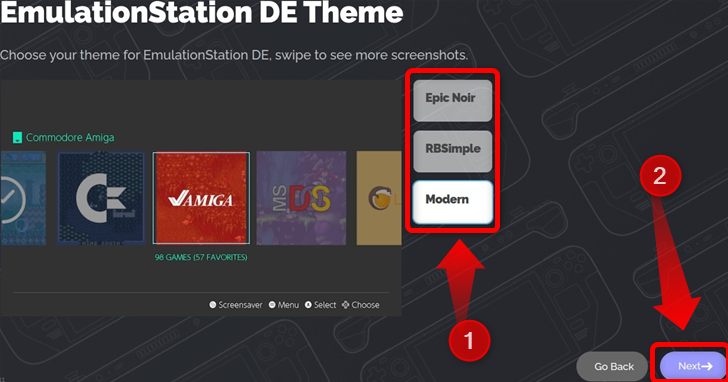
After this step, EmuDeck will ask you to select a theme for EmulationStation DE, a client app from which you can access your emulated games.
Next, you’ll have to toggle a number of other emulation-related settings, such as whether you want GameCube games to be in the 4:3 or 16:9 aspect ratio. Pick whichever settings you prefer, and once you finish with the setup process, EmuDeck will complete the installation by installing the selected emulators and setting them up.
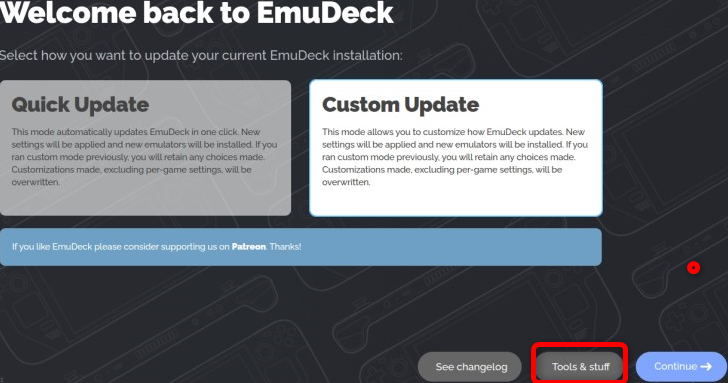
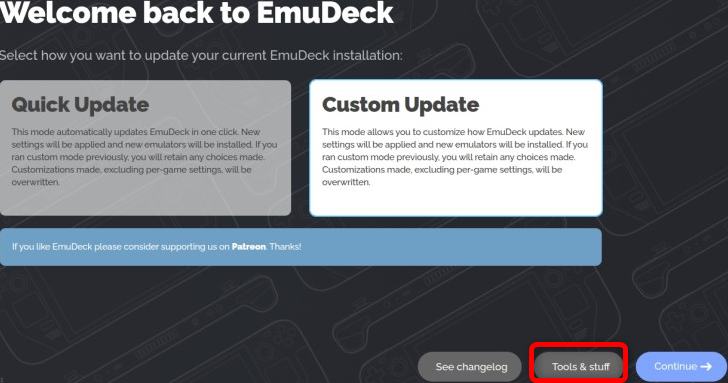
You can change these settings later by clicking on the EmuDeck shortcut on your desktop, then clicking the “Tools & Stuff” button.
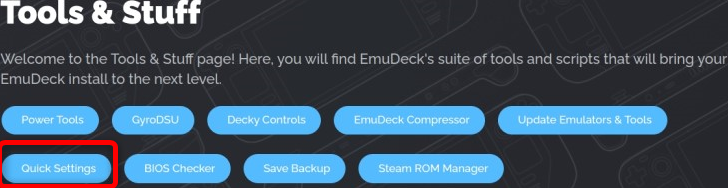
Once there, click the “Quick Settings button.”
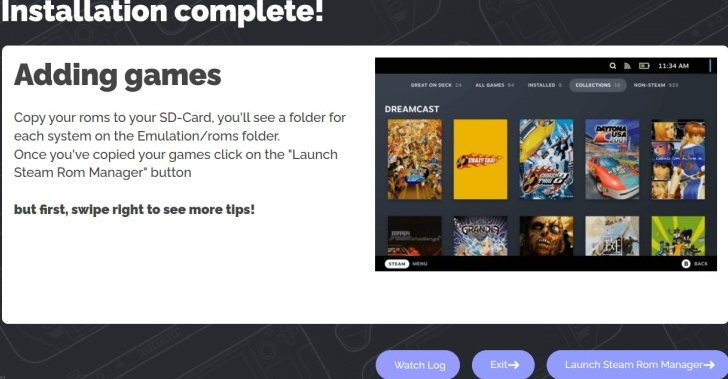
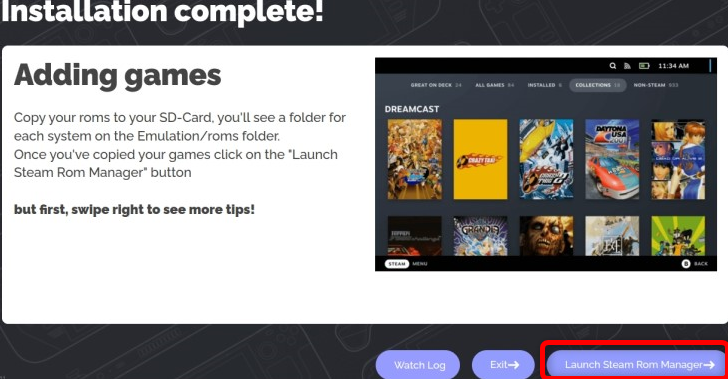
After the installation completes, as shown below, do not launch Steam ROM Manager. Instead, open the Dolphin file manager and locate your GameCube ROMs folder.
Step 2: Copy Your GameCube ROMs
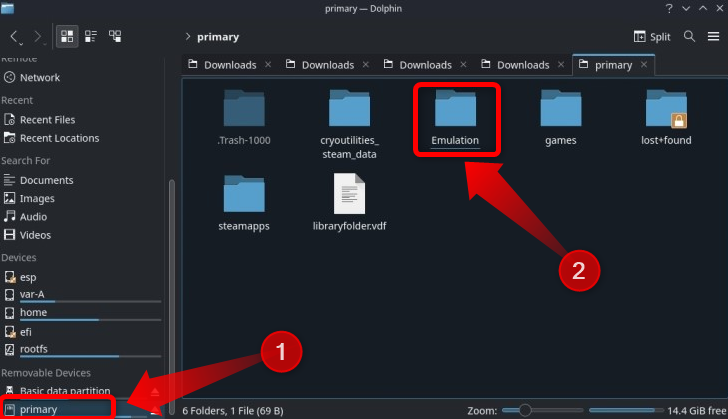
If you followed our advice and created your ROMs folder on your SD card, you can access it by clicking on the SD card tab located on the “Removable Devices” tab in the Dolphin file manager. Once there, you should see a folder named “Emulation.” Enter the folder.
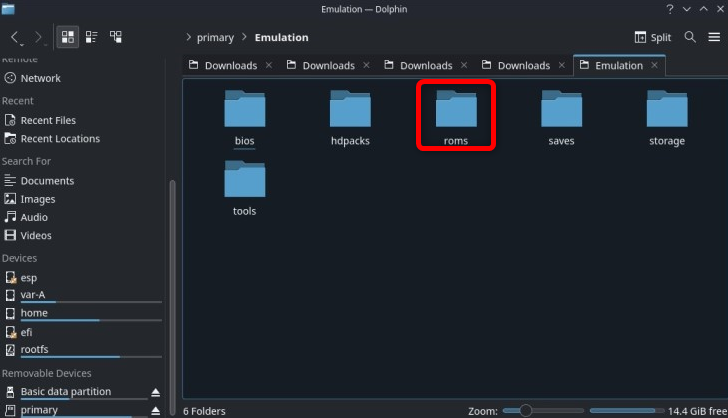
The next window should show you all of the Steam Deck emulation-related folders EmuDeck created during the setup process. Open the “roms” folder.
Once in the ROMs folder, look for a folder named “gamecube.” That’s the folder you want to copy your games in. The Dolphin emulator supports the following GameCube file types: CISO, DOL, ELF, GCM, GCZ, ISO, NKIT.ISO, RVZ, WAD, WIA, and WBFS.
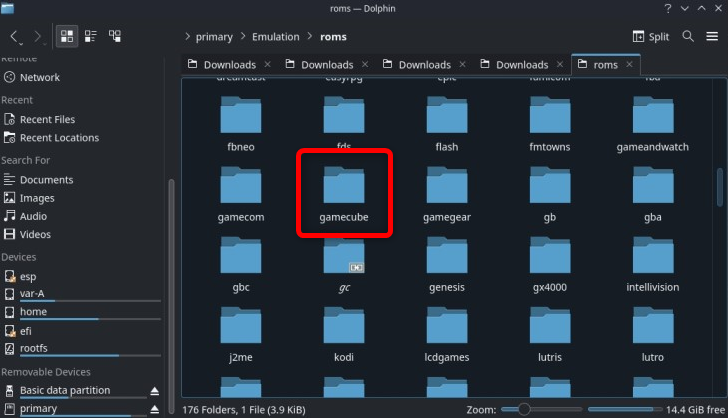
Note: Because downloading games you don’t own is illegal, we won’t show you how and where to get GameCube ROMs. If you own the game, however, with the right hardware, you can create your own ISO files.
Step 3: Add Your GameCube Games to Steam Deck Game Mode
After you finish copying games, you can launch Steam ROM Manager. You can do this by clicking the “Launch Steam ROM Manager” in case you’ve left EmuDeck working in the background.
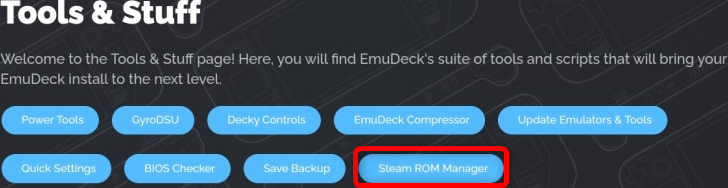
The other way to launch Steam ROM Manager is by clicking the “Tools and Stuff” button on the EmuDeck homepage.
Then, click the “Steam ROM Manager” button.
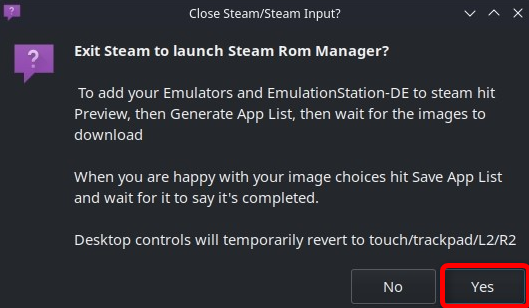
Whichever way you access Steam Rom Manager, allow EmuDeck to close Steam in order to launch Steam ROM Manager.
Once you open Steam ROM Manager, look at the right side of the app. There you’ll find a parser list that includes various consoles with a toggle button next to each console. Toggle the switch on for each console you want to see in your Steam Deck’s Game Mode. This will show each game for that console as a standalone game in Steam.
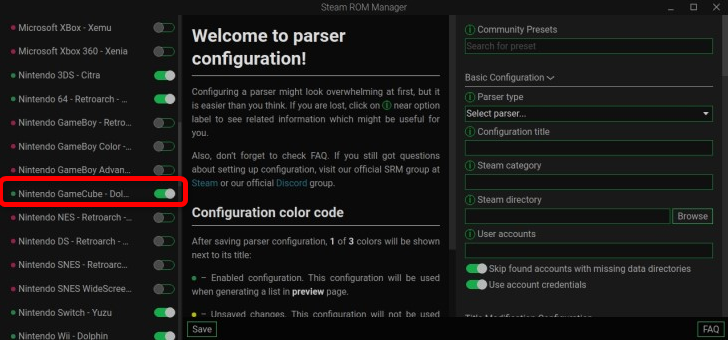
If you toggle the button off for a particular console, remember that games for that console will only appear inside the EmulationStation DE app. You won’t find them in your Steam library or in Steam Deck’s Game Mode. We also recommend you keep the EmulationStation toggle button on so you can easily access all your emulated games in one place.
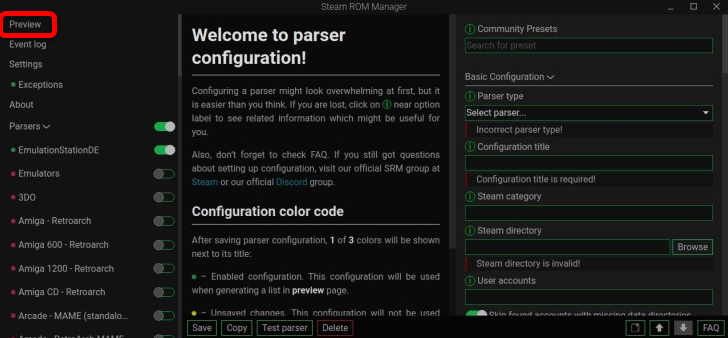
Once you finish picking which console games you want to see in Steam, scroll to the top of the page and click on the “Preview” button.
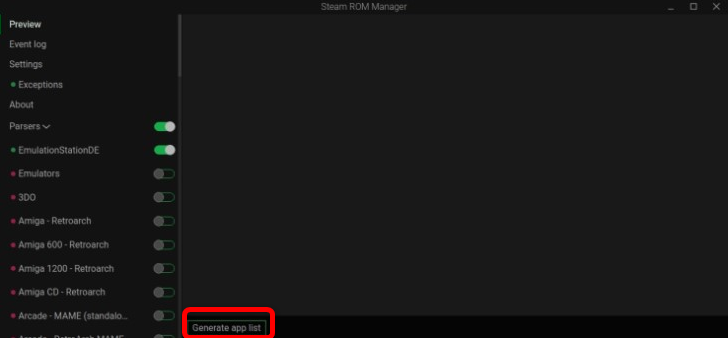
The following screen will have the “Generate App List” button shown on the lower left side. Click it.
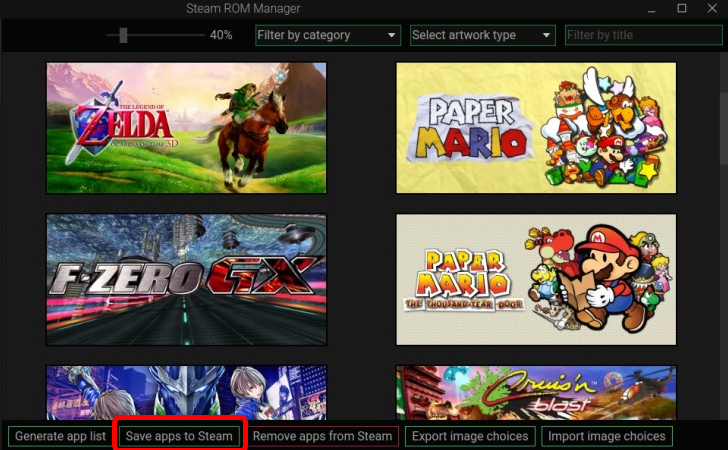
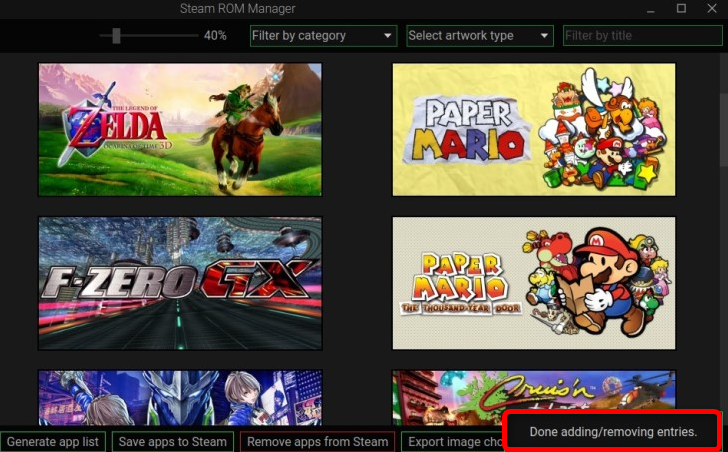
This will launch a new window where Steam ROM Manager will show you artwork for each game it locates in your “Emulation” folder. If you can’t find a game you’ve copied, you most likely copied it to the wrong folder, used a file type unsupported by the Dolphin emulator, or made some other mistake.
In any case, if you find your games and like their default artworks, click the “Save Apps to Steam” button. If you don’t like an artwork, you can customize it by hovering over the image with your mouse and clicking on an arrow to switch it or by tapping the artwork with your finger and then also tapping on an arrow to pick a different artwork.
You need to wait for Steam ROM Manager to add your GameCube games to Steam. This can take a few minutes when you have a bunch of games, so don’t worry if it takes a while. Once you see the “Done Adding/Removing Entries” notification, you can exit Steam ROM Manager.
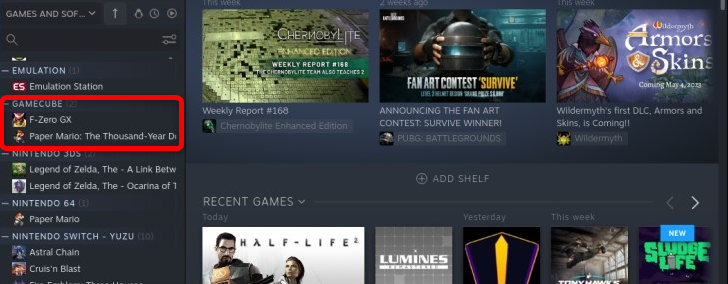
To test whether Steam ROM Manager did its job, open Steam while in Desktop Mode, go to your library, and see whether you can find a tab called “GameCube.” If you added games for other platforms and selected them to show in Steam in Steam ROM Manager, those should also be present. If the games are there, that’s it! Now you can emulate GameCube games on your Steam Deck!
Bonus: Tips for GameCube Emulation on Steam Deck
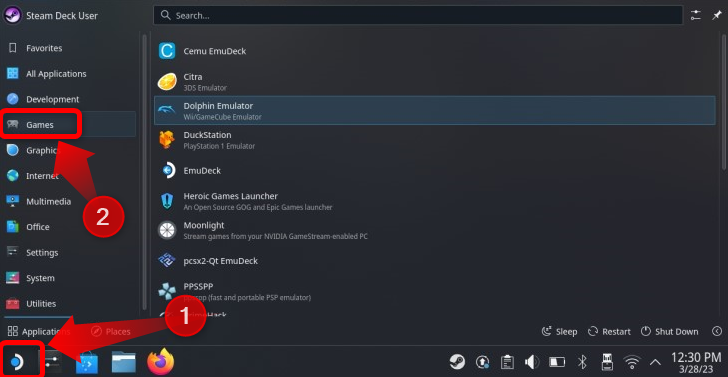
Note that you can tweak Dolphin settings if you want. We don’t recommend this unless you have a good reason since EmuDeck default settings are meant to be optimized for the Deck. If you still want to play around with settings, you can locate Dolphin by clicking the “Application Launcher” button and then the “Games” tab. Dolphin should be there. Now you can open it and tweak its settings to your liking.
Almost every emulator on Steam Deck supports controller shortcuts while in Game Mode, allowing you to save and load games or tweak some settings while playing games. These are the controller shortcuts for GameCube:
- Select+R1 – Save your game
- Select+L1 – Load the save stored in the selected save slot.
- Start+L1 and Start+R1 – Switch between save slots.
- Select+Up on the D-Pad and Select+Down on the D-Pad – Cycle through game profiles.
- Start+Up – Increase game resolution.
- Start+Down – Decrease game resolution. The default resolution setting is 2X the GameCube’s original resolution, which is fine for handheld mode. When playing emulated games, while your Steam Deck is hooked to an external monitor, you can increase the resolution to 3X.
- Start+Right on the D-Pad – Toggle between the 4:3 and 16:9 aspect ratios.
- Select+R2 – Fast forward—very handy for games where you can’t skip dialogues and cutscenes.
- Select+Y or Select+Start – Exit Dolphin and the game you’re currently playing.
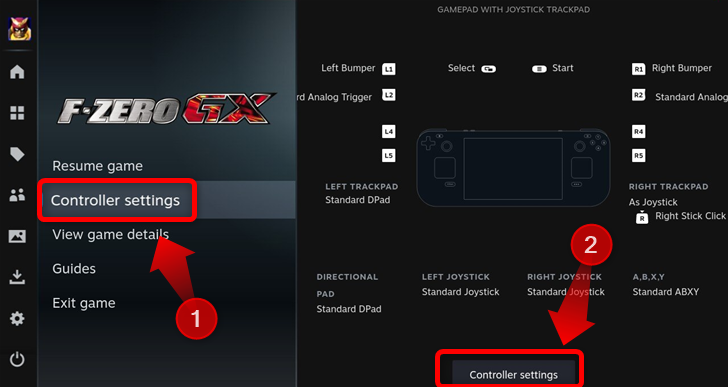
You can use separate controller settings for each emulated game, but only if you chose to show games for the specific system, in this case the GameCube, in Steam Rom Manager. To access controller settings, press the Steam button while inside a game. Then, press the “Controller Settings” tab with the “A” button. Next, press the “Controller Settings” button.
Once inside the controller settings menu, select the top tab and press the “A” button.
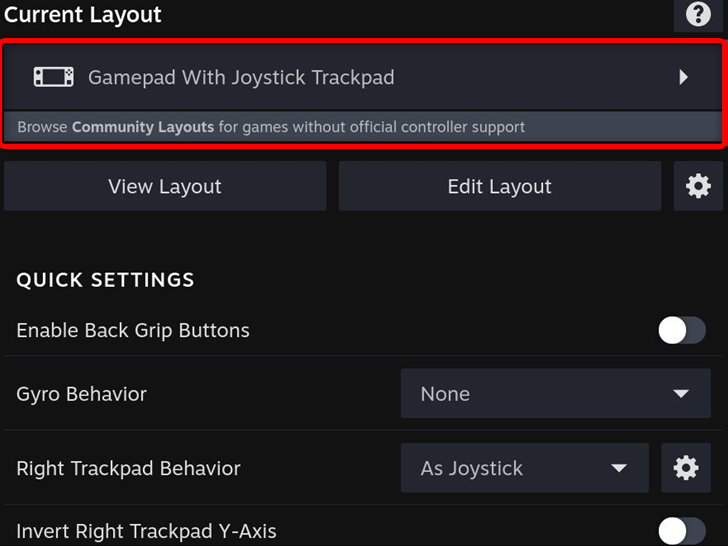
The following menu includes both default Steam controller templates as well as the “Community Layouts” tab, where you can find custom controller layouts made by other users.
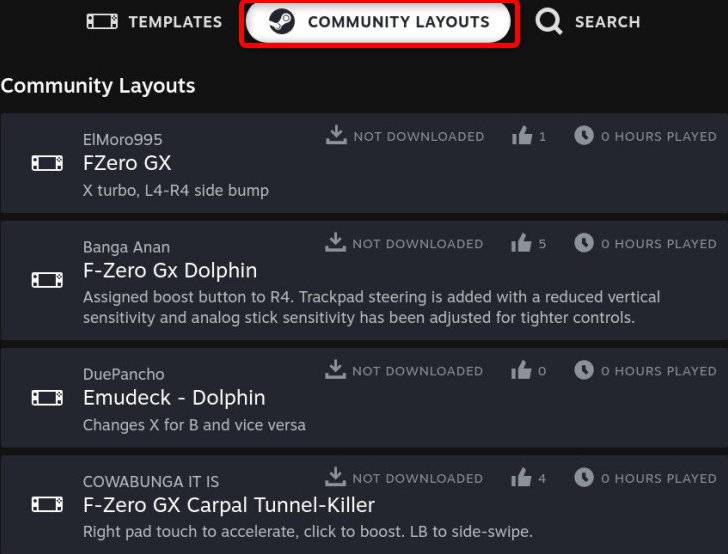
This is very handy for games with unique control schemes, such as inverted camera controls found on many GameCube titles, including Super Mario Sunshine.