
When I tried to install the Fall Creators Update for Windows 10 on my Surface Pro 4 device using Windows Update, I was greeted with a “Your PC ran into a problem” bluescreen message highlighting the stop code Memory Management.
The error happened during the installation of a feature update, but reports on the Internet suggest that it may also happen on boot, installation of minor updates, or while the PC is in use.
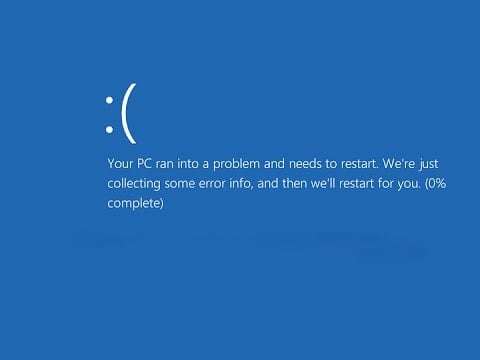
The full message on the bluescreen read:
Your PC ran into a problem and needs to restart. We’re just collecting some error info, and then we’ll restart for you.
If you call a support person, give them this info: Stop Code Memory Management
Good news is that the error message hints at the problem (something memory related caused the issue); bad news is that there is no “do this” fix to correct the issue as it may have multiple causes.
Fix Memory Management Bluescreens on Windows 10
The first thing that you may want to do is create a backup of your system. This is a precaution and ensures that you still have access to your data if the machine dies or something unexpected happens.
If you can boot into the Windows 10 environment do so afterwards. If you cannot, try booting into Safe Mode on Windows 10 instead.
Note: Many “help” sites out there suggest that you run a “repair” tool to fix the issue. This is an advertisement for the program, and you will have to buy the program to fix any issues that it finds. These programs don’t fix serious issues usually.
Step 1: Run Memory Diagnostics

The computer’s memory may have caused the memory management bluescreen on the device. Since this is all the information we have at the point, it makes sense to run memory diagnostics to make sure memory is not defect.
Note: Memory Diagnostics needs to run when Windows starts. You are prompted to restart right away, or run the diagnostics module on the next start of the computer.
- Tap on the Windows-key, type Control Panel, and select the item when it is displayed.
- Switch the “view by” mode at the top right corner to “small icons”.
- Select Administrative Tools from the list of control panel applets.
- Start Windows Memory Diagnostic when the Administrative Tools window opens.
- Select whether you want to restart the Windows machine right then and there, or run Memory Diagnostics on the next start of the system instead.
Tip: You can run a third-party tool like MemTest64 or MemTest86+.
Here is a quick video that demonstrates how to run the built-in Windows tool to fix Memory Management Error 0X0000001A in Safe Mode.
Step 2: Scan for corrupt Windows files and hard drive issues

- Open an elevated command prompt. Press the Windows-key, type cmd.exe, hold down the Ctrl-key and Shift-key, and hit the Enter-key on the keyboard.
- Type the command sfc /scannow as shown on the screenshot above.
Windows checks core files of the operating system to make sure they are not corrupt or missing. The process takes a couple of minutes to complete.
If you get “Windows Resource Protection did not find any integrity violations”, everything is fine and you can move on. If integrity violations were discovered, you may have found the issue that caused the memory management bluescreen.
Once you are done with that, run chkdsk C: f afterwards to check the primary hard drive of the computer for errors.
Step 3:
Smaller things you may want to try:
- If you experience memory management bluescreens during operations, make sure your PC is up to date. Use Windows-I to open the Settings application, and select Windows & Security > Windows Update to run a check for updates.
- Also, check the recently installed software or updates listing. If the bluescreen messages coincide with the installation of software or updates, try removing those to see if that fixes the issue.
- Make sure the PC is not overclocked or underclocked. You need to check the BIOS / UEFI for that. How you get there depends on the manufacturer and make of the BIOS / UEFI. On the Surface, hold down Volume UP while you hit the Power button. The Surface has no overclocking settings though, but many desktop motherboards have. Some tools may also enable overclocking functionality, make sure you run those and reset the values to their factory defaults.
- If your PC has multiple RAM units, try removing some of them to test if it makes a difference, or moving them to different slots.
- Remove any hardware that is not required if you update Windows, for instance a 56K modem using Device Manager.
- Run a full scan for malware. You can use Windows Defender for that, or a third-party solution like Malwarebytes.
Step 4: How I fixed the issue on my Surface Pro 4
My Surface Pro 4 threw the memory management error when I tried to upgrade to the Fall Creators Update. It did not matter how I tried to update: Windows Update and running the update from a bootable USB Flash drive ended in the error being displayed on the screen, and the earlier version of the operating system being restored.
I ran memory diagnostics and other check ups, and nothing came out of it. I made the decision then to clean install Windows instead.
The downside to this was that I would lose access to all files and programs installed on the device if the operation would complete successfully. I created a backup of the system to store the files safely, and started the process.
- Download the Media Creation Tool from Microsoft to get started.
- Follow the on-screen prompts to create installation media on a USB Flash Drive (or DVD if you prefer that).
- Boot the PC you want to upgrade using the installation media.
- Make sure you select to do a clean install and proceed with the installation.
The clean installation worked in my case, the Surface was not throwing any memory management errors during installation, and booted into the Windows 10 desktop just fine afterwards.
I had to copy my files back to the device afterwards, and install the software that I wanted to use on it as all of that was gone due to the clean install of the operating system.
Closing Words
The memory management bluescreen does not necessarily mean that the memory or the memory banks of the computer are damaged. While that is certainly a possibility, it can also be caused by software or drivers, and other things that are easier to fix.
Now You: How do you handle bluescreen errors?
The post How to fix Memory Management Bluescreens on Windows 10 appeared first on gHacks Technology News.