

CodeBuild is a managed build service, similar in function to Jenkins but focused specifically on automating building and testing. It can be used in conjunction with CodePipeline to build a fully automated CI/CD Pipeline.
Setting Up a Build Project
If you’re using CodePipeline, you should create your CodeBuild project from the dialog during “Add Build Stage.” This will configure it to use CodePipeline as the source. If you’re not using CodePipeline, you can create your build project from the CodeBuild Management Console, and manually enter in the details for your source control.
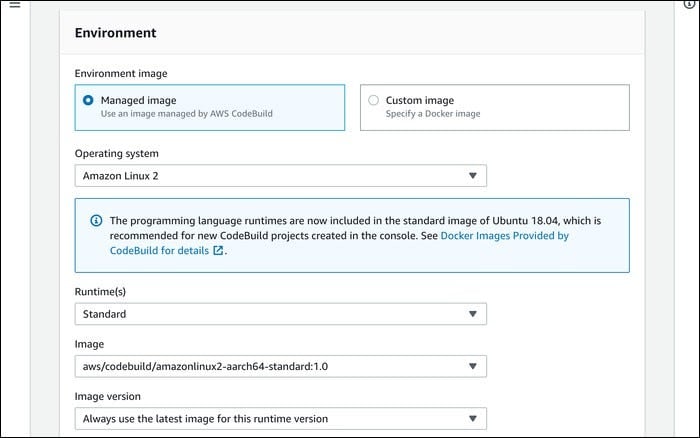
Anyway, the first thing you’ll configure is the environment your code will be built in. This shouldn’t matter for most projects, but for the ones that do, you can specify custom Docker images to have full control over it. Otherwise, the default settings of Amazon Linux 2 and the standard runtimes should be fine.
Under “Advanced Settings” for Environment, you’ll find the settings to change the compute settings, to select a different server type. You can also change environment variables from here.
For VPC settings, it’s best to leave this alone, unless you have a reason to do otherwise. The default settings (empty) are likely fine.

Next up, you’ll have to configure CodeBuild with a Buildspec file. This is a YAML template that defines the commands that CodeBuild will actually run. You can use an actual file, stored at the root of your project as buildspec.yml, or you can enter in a few build commands manually, if your configuration isn’t super complex.

Either way, you’ll likely have to take some time to figure out your Buildspec file. This will be highly dependant on the type of app you’re running, and what is necessary to build and test.
For example, the following configuration will install the modules necessary for a TypeScript project, compile with npm run build, and run npm test. The buildspec file has a few distinct phases, which you can use to run commands at different times.
version: 0.2
phases:
    install:
        runtime-versions:
            nodejs: 10
        commands:
            - npm install -g typescript
            - npm install
    pre_build:
        commands:
            - echo prebuild phase
    build:
        commands:
            - echo Build started on `date`
            - npm run build
            - npm test
    post_build:
        commands:
            - echo Build completed on `date`
cache:
    paths:
        - 'node_modules/**/*'
artifacts:
    files:
        - '**/*'
    name: yourBuildName-$(date +%Y-%m-%d)
You can consult AWS’s Buildspec reference for more information on how everything works.
Once you’ve got a file you’re happy with, you can choose to enable CloudWatch logs, or log to S3 instead.

Click “Create Build Project,” and your setup should be complete.
Testing Your Build
CodeBuild is usually ran as part of CodePipeline. If you’re using CodePipeline, you’ll have to finish up the setup for the deployment stage, and create your pipeline. It should run automatically, and send your source over to CodeBuild. Otherwise, you can start the build manually from the console, or using the AWS CLI:
aws codebuild start-build
--project-name <value>
This command has a lot of overrides as well.
You’ll be able to view your build’s output by clicking on the build in the management console. This will show you the logs from the build process, which can be crucial in tracking down errors.

If any command fails, the whole build will likely fail, so you’ll want to make sure everything is correct. If you’re using CodePipeline, changes to your buildspec.yml will trigger new pipeline updates, and new builds.