
Today we talk about Sogo. SOGo is a fully supported and trusted groupware server with a focus on scalability and open standards, is released under the GNU GPL/LGPL v2 and above. SOGo provides a rich AJAX-based Web interface and supports multiple native clients through the use of standard protocols such as CalDAV, CardDAV, and GroupDAV, as well as Microsoft ActiveSync. In this tutorial we’ll install on Debian 8, a new version will be available soon.
Server Preparation
Before we start I’ll suggest you to follow Debian 8 minimal server.
After login with your normal user, you had to become root. To do that launch the following command and insert your password:
[email protected]:~$ su
Password:
[email protected]:/home/user#
Now we wanna be sure to had the latest software installed, so lunch the command
apt-get update && apt-get upgrade
At this point, our system is up-to-date with latest software installed
Sogo Installation
In this tutorial, will install Sogo version 3, which is the new one. Also, version 2 is available for legacy reasons.
Sogo uses Standard protocols such as CalDAV, CardDAV, GroupDAV, HTTP, IMAP and SMTP are used to communicate with the SOGo platform or its sub-components. Mobile devices supporting the Microsoft ActiveSync protocol are also supported.
To install and configure the native Microsoft Outlook compatibility layer, please refer to the SOGo Native Microsoft Outlook Configuration Guide.
SOGo reuses many components in an infrastructure. Thus, it requires the following:
- Database server (MySQL, PostgreSQL or Oracle)
- LDAP server (OpenLDAP, Novell eDirectory, Microsoft Active Directory and others)
- SMTP server (Postfix, Sendmail, and others)
- IMAP server (Courier, Cyrus IMAP Server, Dovecot, and others)
If you plan to use ActiveSync, an IMAP server supporting the ACL, UIDPLUS, QRESYNC, ANNOTATE (or X-GUID) IMAP extensions is required, such as Cyrus IMAP version 2.4 or later, or Dovecot version 2.1 or later. If your current IMAP server does not support these extensions, you can use Dovecot’s proxying capabilities.
In this guide, we assume that all those components are running on the same server (i.e., localhost or 127.0.0.1) that SOGo will be installed on.
We add the the repository from sogo, so we we can use packaged version of the software, se we edit the file /etc/apt/sources.list with
nano /etc/apt/sources.list
and we add the line at the end
deb http://packages.inverse.ca/SOGo/nightly/3/debian/ jessie jessie
The last thing you got to do now is launch the commands:
apt-get update
apt-get install sogo
then you have to say ‘Y’ to continue install
[email protected]:~# apt-get install sogo
Lettura elenco dei pacchetti… Fatto
Generazione albero delle dipendenze
Lettura informazioni sullo stato… Fatto
I seguenti pacchetti saranno inoltre installati:
autotools-dev binutils cpp cpp-4.9 gcc gcc-4.9 gnustep-base-common gnustep-base-runtime gnustep-common gnustep-make gobjc gobjc-4.9 libasan1 libatomic1 libc-dev-bin libc6-dev libcilkrts5 libcloog-isl4 libcurl3 libgcc-4.9-dev
libgnustep-base1.24 libgomp1 libisl10 libitm1 liblasso3 liblsan0 libmemcached11 libmpc3 libmpfr4 libmysqlclient18 libobjc-4.9-dev libobjc4 libquadmath0 libsbjson2.3 libsope-appserver4.9 libsope-core4.9 libsope-gdl1-4.9
libsope-ldap4.9 libsope-mime4.9 libsope-xml4.9 libtsan0 libubsan0 libxmlsec1 libxmlsec1-openssl libxslt1.1 linux-libc-dev manpages-dev memcached mysql-common sope4.9-gdl1-mysql sope4.9-libxmlsaxdriver tmpreaper unzip zip
Pacchetti suggeriti:
binutils-doc cpp-doc gcc-4.9-locales gcc-multilib make autoconf automake libtool flex bison gdb gcc-doc gcc-4.9-multilib gcc-4.9-doc libgcc1-dbg libgomp1-dbg libitm1-dbg libatomic1-dbg libasan1-dbg liblsan0-dbg libtsan0-dbg
libubsan0-dbg libcilkrts5-dbg libquadmath0-dbg gnustep-base-doc gnustep-make-doc gobjc-multilib gobjc-4.9-multilib libobjc4-dbg glibc-doc libcache-memcached-perl libmemcached libanyevent-perl libyaml-perl libterm-readkey-perl nginx
mysql-server
I seguenti pacchetti NUOVI saranno installati:
autotools-dev binutils cpp cpp-4.9 gcc gcc-4.9 gnustep-base-common gnustep-base-runtime gnustep-common gnustep-make gobjc gobjc-4.9 libasan1 libatomic1 libc-dev-bin libc6-dev libcilkrts5 libcloog-isl4 libcurl3 libgcc-4.9-dev
libgnustep-base1.24 libgomp1 libisl10 libitm1 liblasso3 liblsan0 libmemcached11 libmpc3 libmpfr4 libmysqlclient18 libobjc-4.9-dev libobjc4 libquadmath0 libsbjson2.3 libsope-appserver4.9 libsope-core4.9 libsope-gdl1-4.9
libsope-ldap4.9 libsope-mime4.9 libsope-xml4.9 libtsan0 libubsan0 libxmlsec1 libxmlsec1-openssl libxslt1.1 linux-libc-dev manpages-dev memcached mysql-common sogo sope4.9-gdl1-mysql sope4.9-libxmlsaxdriver tmpreaper unzip zip
0 aggiornati, 55 installati, 0 da rimuovere e 0 non aggiornati.
È necessario scaricare 54,0 MB di archivi.
Dopo quest’operazione, verranno occupati 188 MB di spazio su disco.
Continue? [Y/n]
A popup will be opened like the one below
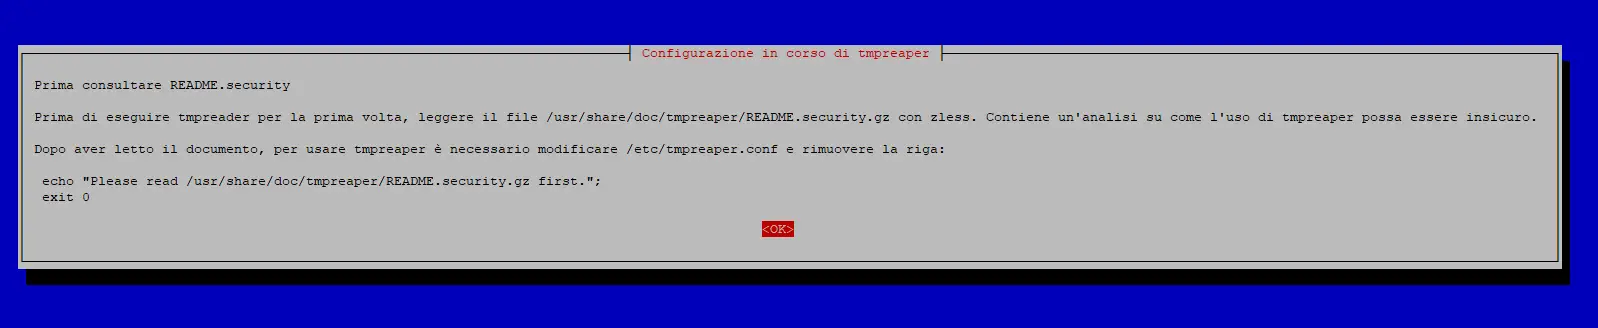
Click “ok” and go on.
After some time, Sogo will be installed on your system.
At the end of the install you should see something like this:
======= Important SOGo post-installation note =======
SOGo database schemas are _not_ automatically upgraded by
the packaging system.
Please check the list of database schema upgrade scripts
inside /usr/share/doc/sogo/ and apply them if needed.
Configurazione di unzip (6.0-16+deb8u3)…
Elaborazione dei trigger per libc-bin (2.19-18+deb8u10)…
Elaborazione dei trigger per systemd (215-17+deb8u7)…
Sogo Configuration
Now we had to add rpl and apache2 package with the command
apt-get install rpl apache2
Then, enable some much needed Apache modules:
a2enmod proxy proxy_http headers rewrite
Restart Apache for the changes to take effect:
service apache2 restart
Remove the tmpreader warning:
rpl 'SHOWWARNING=true' 'SHOWWARNING=false' /etc/tmpreaper.conf
Configure Memcached:
rpl '127.0.0.1' localhost /etc/memcached.conf
The we install MAriadb ad Mysql Server with the following
apt-get install mariadb-server phpmyadmin
Enter the desired root password, and flag apache2 for configuration file, you can configure the database for phpmyadmin during install, in this case, choose a password for that.
Next run the MySQL post-installation script mysql_secure_installation:
mysql_secure_installation
Configure it like this:
You already have a root password set, so you can safely answer 'n'.
- Change the root password? [Y/n] n
- Remove anonymous users? [Y/n] y
- Disallow root login remotely? [Y/n] y
- Remove test database and access to it? [Y/n] y
- Reload privilege tables now? [Y/n] y
Restart MySQL and Memcached:
# service mysql restart

# service memcached restart
Now, create a database for SOGo. Enter MySQL as root, attention to replace your_password and user data in the example data below (USER, YOUR REAL NAME, EMAIL).
mysql -u root -p

mysql> CREATE DATABASE sogo;

mysql> GRANT ALL ON sogo.* TO 'sogou'@'localhost' IDENTIFIED BY 'your_password';

mysql> USE sogo;

mysql> CREATE TABLE sogo_users (c_uid VARCHAR(10) PRIMARY KEY, c_name VARCHAR(10), c_password VARCHAR(32), c_cn VARCHAR(128), mail VARCHAR(128));

mysql> INSERT INTO sogo_users VALUES ('USER', 'USER', MD5('your_password'), 'YOUR REAL NAME', 'EMAIL');
mysql> flush privileges;
mysql> exit
The SOGo configuration has to be done by the ‘sogo‘ user itself. Enter the below commands and replace the ‘your_domain‘ and ‘your_password‘ values with your actual domain and password that you used in the above database creation procedure:
su - sogo -s /bin/bash

defaults write sogod SOGoTimeZone "US/Central"

defaults write sogod SOGoMailDomain "your_domain"

defaults write sogod SOGoLanguage "English"

defaults write sogod SOGoUserSources '({canAuthenticate = YES; displayName = "SOGo Users"; id = users; isAddressBook = YES; type = sql; userPasswordAlgorithm = md5; viewURL ="mysql://sogou:[email protected]:3306/sogo/sogo_users";})'

defaults write sogod SOGoProfileURL 'mysql://sogou:[email protected]:3306/sogo/sogo_user_profile'

defaults write sogod OCSFolderInfoURL 'mysql://sogou:[email protected]:3306/sogo/sogo_folder_info'

defaults write sogod OCSSessionsFolderURL 'mysql://sogou:[email protected]:3306/sogo/sogo_sessions_folder'

defaults write sogod SOGoAppointmentSendEMailNotifications YES

defaults write sogod SOGoLoginModule Calendar

defaults write sogod SOGoSieveScriptsEnabled YES

defaults write sogod SOGoSieveServer sieve://localhost:4190

defaults write sogod SOGoVacationEnabled YES

defaults write sogod SOGoMailMessageCheck every_5_minutes

defaults write sogod SOGoFirstDayOfWeek 1

defaults write sogod SOGoSuperUsernames '( "admin" )'

defaults write sogod SOGoDraftsFolderName "INBOX.Drafts"

defaults write sogod SOGoSentFolderName "INBOX.Sent"

defaults write sogod SOGoTrashFolderName "INBOX.Trash"

defaults write sogod NGImap4ConnectionStringSeparator "."

exit
Configure SOGo configuration file:
sed -i 's#yourhostname#your_domain#g' /etc/apache2/conf-available/SOGo.conf

sed -i 's#"x-webobjects-server-port" "443"#"x-webobjects-server-port" "80"#' /etc/apache2/conf-available/SOGo.conf

sed -i 's#https#http#' /etc/apache2/conf-available/SOGo.conf
a2enconf SOGo
Restart SOGo:
service apache2 restart
service sogo restart
Now, open your favorite browser and navigate to http://your_domain/SOGo . You should see the same page as the one in the image below:
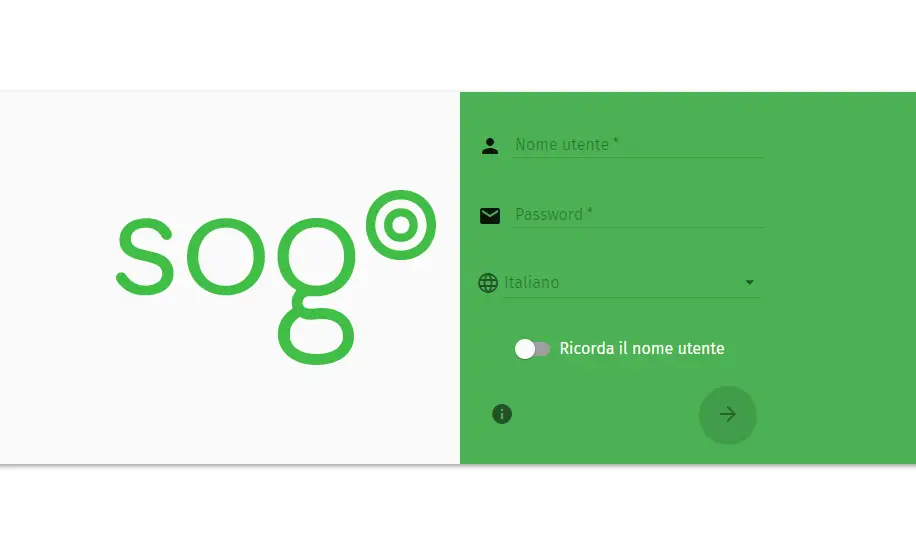
Now put your username and password and login to the new system, you should see the system up and running!
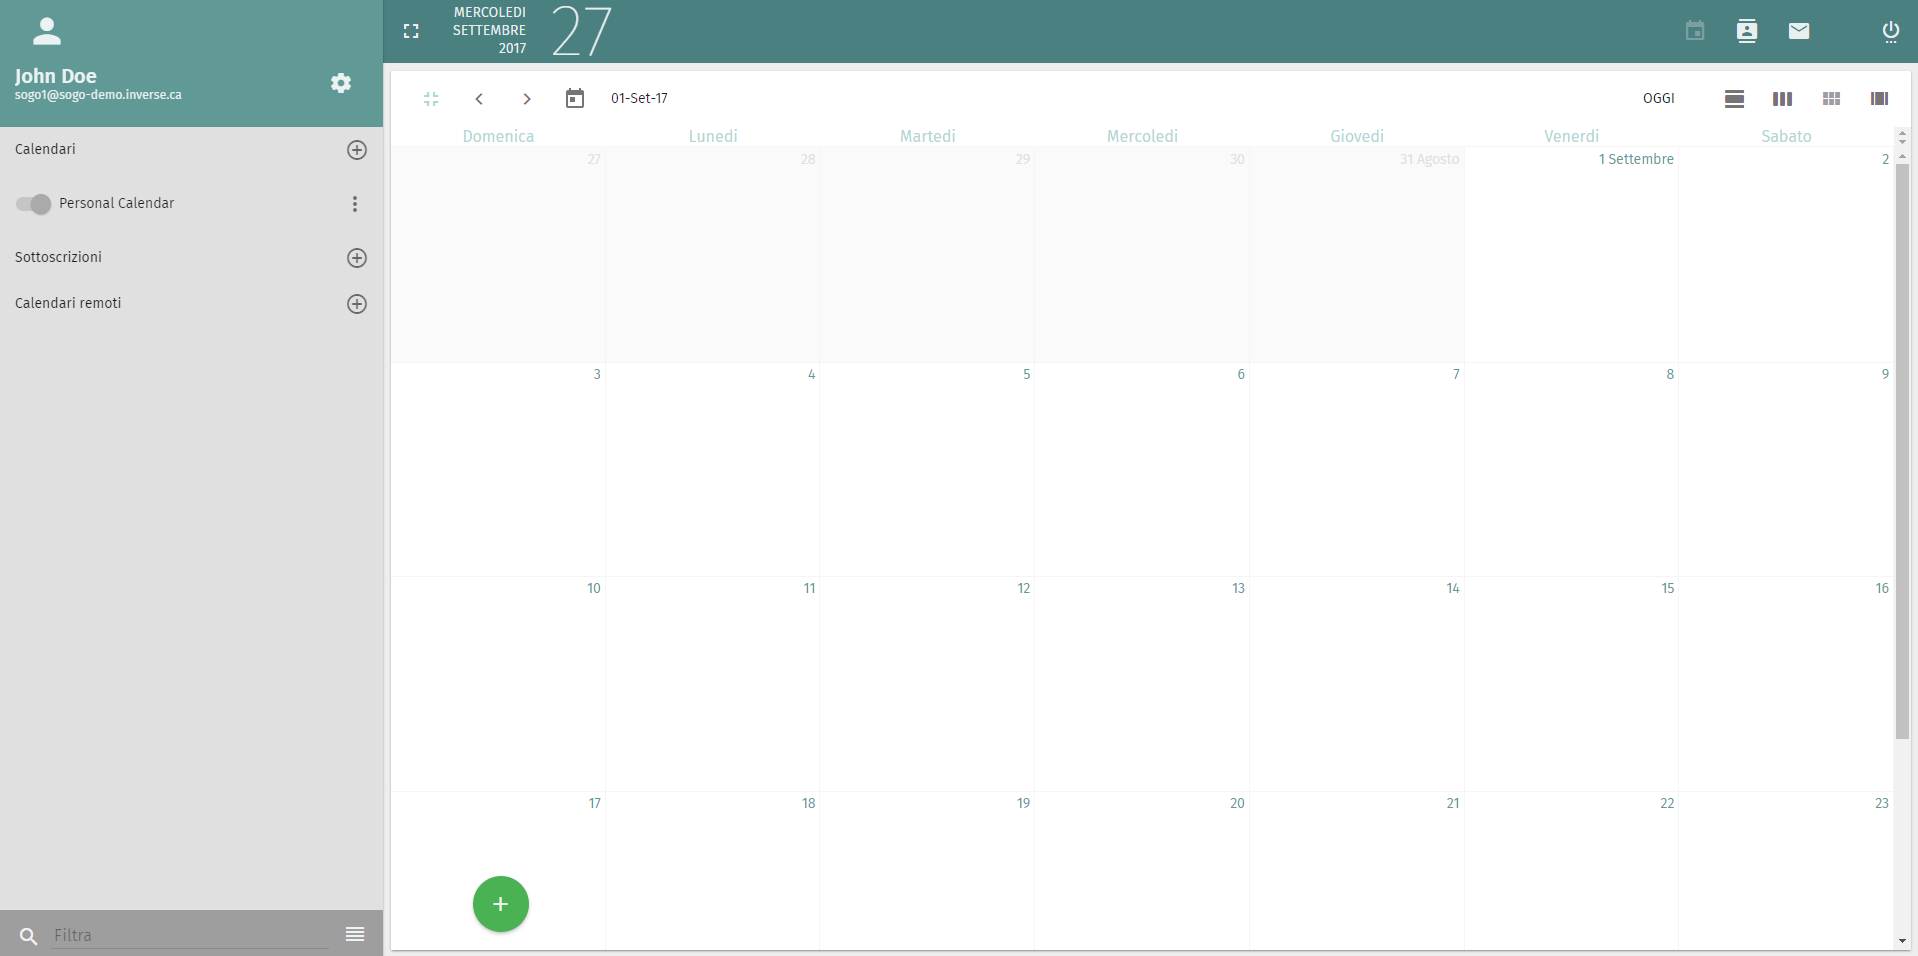
Sogo Features
You can now access your calendar…
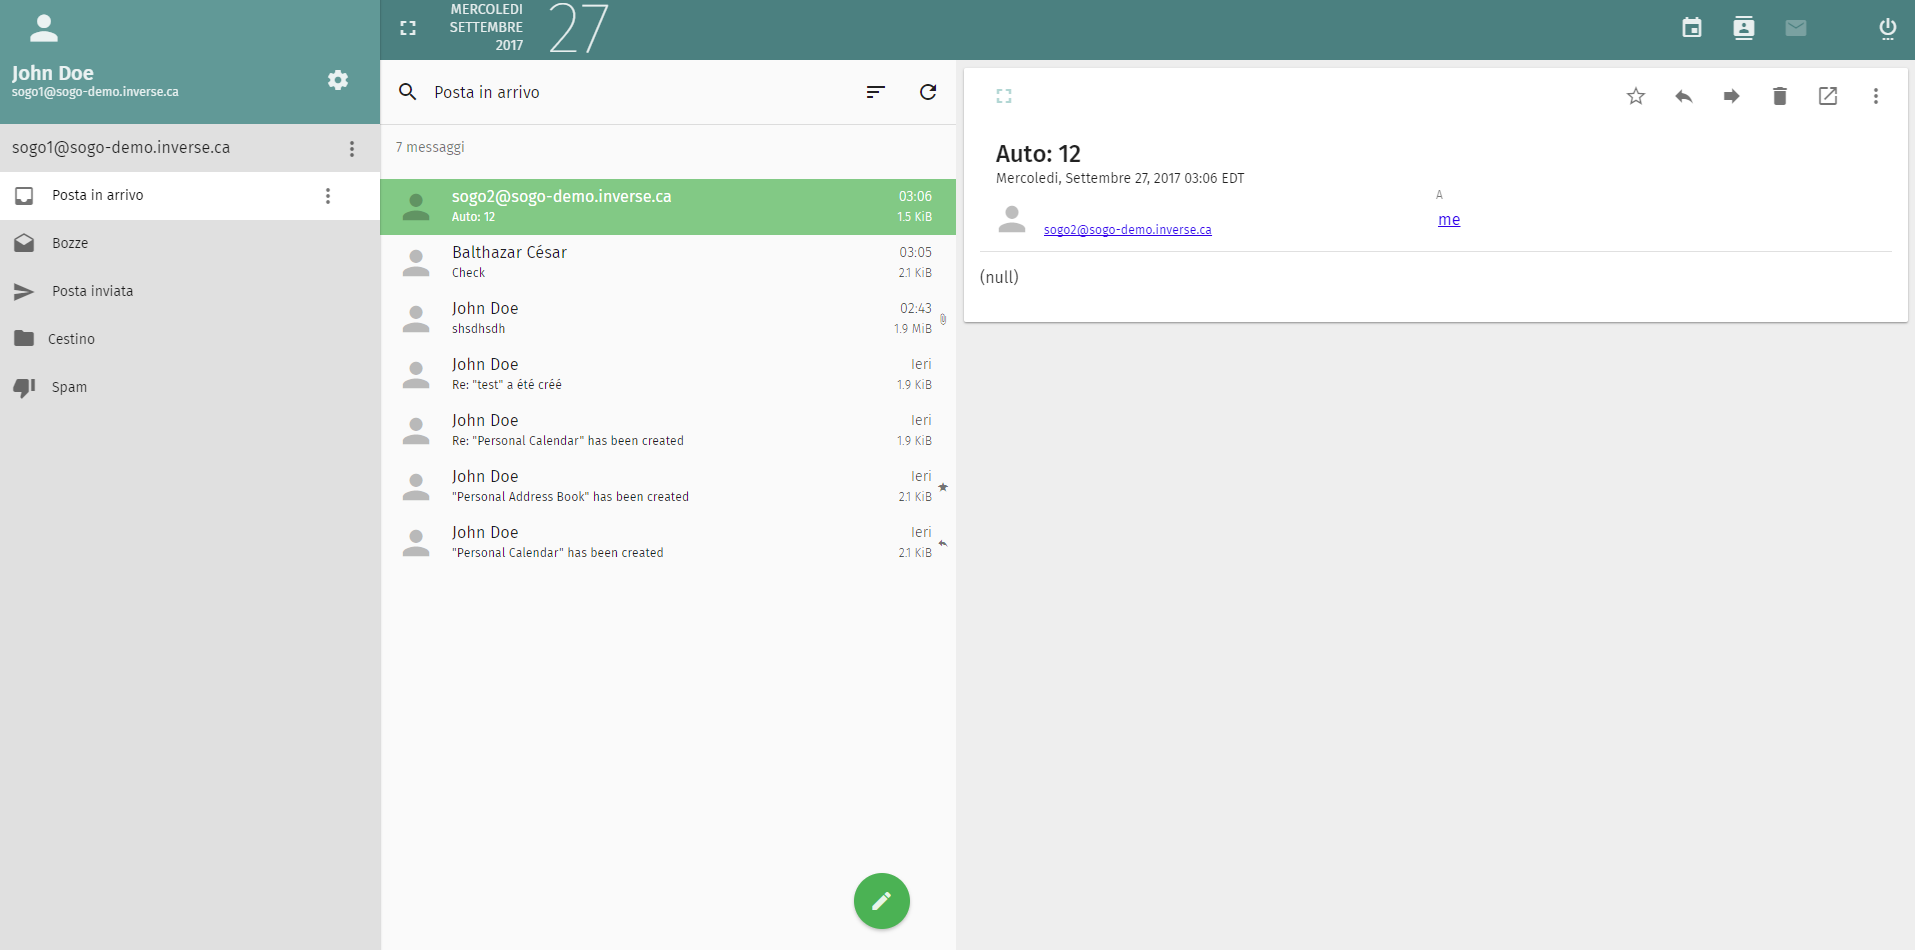
Your email…
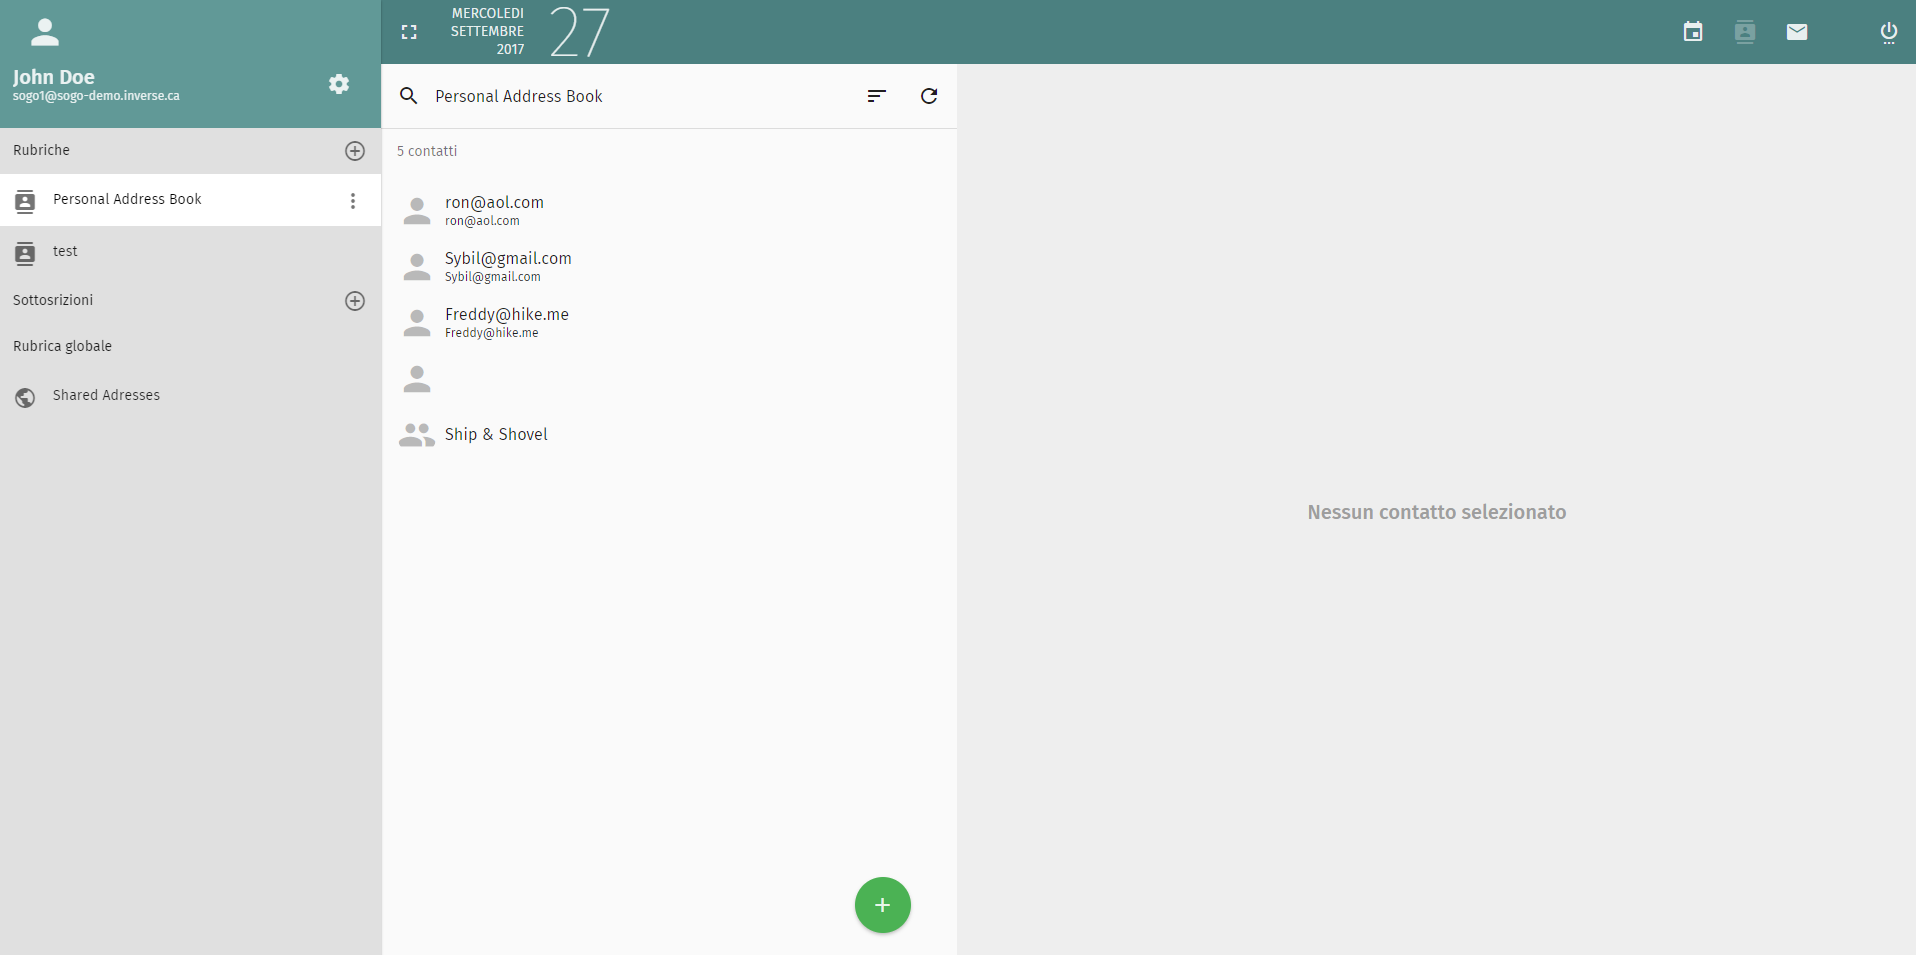
… and your contact!
You can find more advanced configuration settings in the official website at https://sogo.nu/, to quickly access advanced configuration, or parameters you can do a check in the official guides at https://sogo.nu/files/docs/SOGoInstallationGuide.html
There are also two demo versions of the software that are accessible from https://sogo.nu/ at the end of the page, here you can access the version 2 or version 3. As you can see version 3 is much better as user interface.