
Prior to the launch of the M1 Macs in November 2020 one of the benefits of using a Mac was that you had the choice of either running macOS on its own, or installing Windows for those occasions when you need to run Windows-only apps and games.
It’s still possible to run Windows on a Mac, but right now this will only work on a Mac with an Intel processor – not one with Apple’s M1 Chip.
In this article we explain how to install Windows on a Mac. There are a number of ways to do so: you can use Apple’s dual-booting Boot Camp Assistant, you can use third-party virtualisation software or you can run Windows apps via an emulator.
We also discuss the pros and cons of each approach in this article.
Which Macs can run Windows?
This depends on the version of Windows you’re trying to install, if you want to run Windows 10 any Mac with an Intel processor since late 2012 should support it.
Here’s the list of compatible devices:
- MacBook introduced in 2015 or later
- MacBook Air introduced in 2012 or later
- MacBook Pro introduced in 2012 or later
- Mac mini introduced in 2012 or later
- iMac introduced in 2012 or later
- iMac Pro (all models)
- Mac Pro introduced in 2013 or later
If you have an M1 Mac you are out of luck: Windows will not currently run on the Apple Silicon Macs. Read more here: Will Windows run on Apple Silicon and Windows on the Mac is dead (probably) but it doesn’t matter.
How much space does Windows need?
Your Mac will also need to have at least 64GB of disk space free if you are to install Windows in a Boot Camp partition. However, because Windows requires 128GB (once you install all the accompanying programs) Apple actually suggests that you create a 128GB partition.
What’s best Boot Camp or virtualisation?
There are two main methods if you need to install Windows on your Mac, and the option you choose will generally depend on the type of software you need to run.
The first, provided by Apple itself with the Boot Camp Assistant that is installed on all Intel Macs, is called ‘dual-booting’, as it gives you the ability to start up (or ‘boot’) your Mac using either Windows or macOS.
The Boot Camp Assistant can split your Mac’s hard drive (or solid state drive) into two sections, called ‘partitions’. It leaves macOS on one partition, then installs Windows on the second partition. You simply choose which operating system you want to run by pressing the Alt/Option key on your keyboard when you boot your Mac.
Installing Windows on a Boot Camp partition with this method effectively turns your Mac into a Windows PC, and devotes all of your Mac’s processor power and memory – and its graphics card if it has one – to running Windows alone.
That’s the best option if you want to play Windows games, or run high-end graphics and design software that needs all the power it can get.
The only disadvantage of Boot Camp is that you lose access to all your normal Mac apps while you’re running Windows, which means you have to shut down Windows and boot back into macOS if you want to use Mac apps such as Apple Mail or Photos.
This is where the other option, known as virtualisation, can come in handy. Instead of splitting your hard drive into separate partitions for macOS and Windows, you use a virtualisation program such as Parallels Desktop or VMware Fusion to create a ‘virtual machine’ that runs within macOS itself. For more options see best virtual machine software for Mac.
The virtual machine (VM) is simply an app that runs on the Mac just like any other Mac app. However, the virtual machine mimics the workings of a PC, allowing you to install Windows on the virtual machine, and then install any Windows apps that you need to run as well.
This is definitely the most convenient option, as it means that you can run your Windows apps on the Mac desktop right alongside all your normal Mac apps, so there’s no need to dual-boot back and forth between the macOS and Windows as you do when running Boot Camp.
But virtualisation has disadvantages too. Running Windows within a virtual machine means that you’re effectively running two operating systems at the same time, so you’re going to need plenty of processor power and memory to get decent performance when running your Windows apps.
Even so, most recent (Intel) Macs can still provide good performance when running Windows in a virtual machine, and it’s only 3D games and high-end graphics apps that need the extra power you can get from dual-booting with Boot Camp.
How to get Windows for Mac
If you want to run Windows 10 on your Mac you can download it as a ‘disk image’ file – sometimes also called an ‘ISO file’ – from Microsoft’s website.
You can download ISO files for Windows 7 and Windows 8.1 as well. However, these versions of Windows were originally sold on disk, so if you still have the original disk then it’s probably quicker to create the ISO file using the installer program on the disk. This is actually quite straightforward, and Apple covers this option on its website too.
Now you have Windows install files you just need to get Boot Camp or your Virtualisation software up and running so you can install it.
If you want to get Windows for free or find a way to run Windows for free on your Mac read: How to run Windows 10 on a Mac for free.
How to run Windows on a Mac via Boot Camp
One of the best things about running Windows via Boot Camp is that Apple provides Boot Camp Assistant as a free app that helps you to install Windows on your Mac.
You’ll find the Assistant located in the Utilities folder within the main Applications folder on your Mac – but before you run the Assistant there are a few things that you will need to run Windows in Boot Camp.
What you need
- Apple recommends that you have a minimum of 64GB of free storage available on your Mac’s internal hard drive (or solid-state drive) for installing Windows. Actually 128GB is recommended!
- You may also need a memory stick with at least 16GB of storage for the additional ‘driver’ software that Windows needs in order to control components such as your Mac’s monitor and camera, as well as your Mac keyboard and mouse (which, of course, are different from conventional Windows mice and keyboards). Some Macs will be able to download these necessary drivers though.
- You’ll need a fully paid-for copy of Windows, along with the licence number. Recent Mac models and any Mac running Catalina will only work with Windows 10, although older models may also work with Windows 7, or Windows 8.1. You can check which versions of Windows your Mac can run on Apple’s website.
The installation process will vary, depending on which version of Windows you’re using.
Once you’ve completed those preparations you’ll be ready to run Boot Camp Assistant and install Windows on your Mac. Here’s what to do.
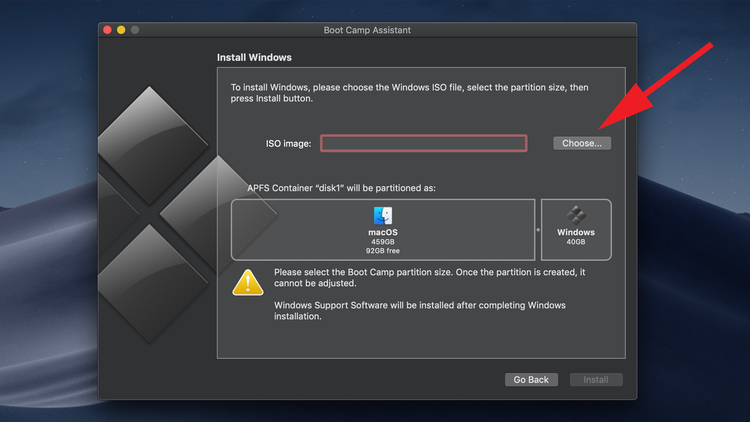
Step 1: Open Boot Camp Assistant.
When you run Boot Camp Assistant for the first time, it will prompt you with a number of options. The first option is to select the ISO image you want to use. Click the Choose button then navigate to the one you have created or downloaded. This will copy your Windows ISO file on to the USB memory stick so that you can install Windows.
Step 2: Download driver software
Next Boot Camp Assistant may tell you that it will download the driver software for Windows on to the USB memory stick as well. However, it will only download the drivers for Windows 8.1 and Windows 10, so if you want to install Windows 7 – which is still used by millions of people around the world, but is no longer supported by Microsoft – then you’ll have to head back to the compatibility tables on Apple’s website in order to locate the driver software that you need for your Mac, then follow the instructions to copy the drivers on to your USB memory stick.
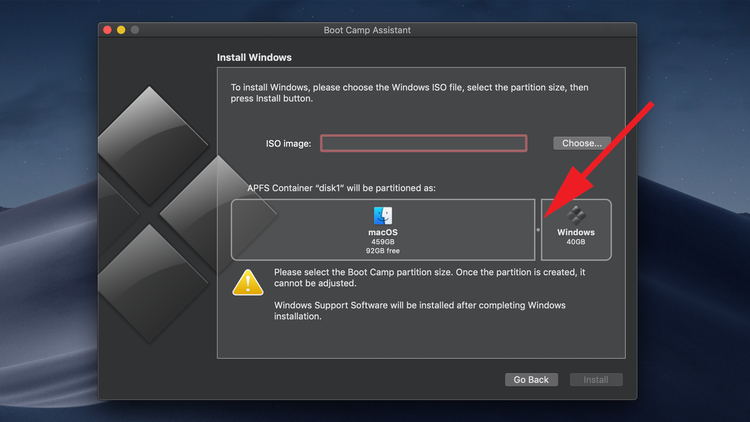
Step 3: Partition your drive
To allocate room for Windows, Boot Camp will need to split your Mac’s hard drive into two separate sections, known as ‘partitions’. This is shown at the bottom of the pane with the normal macOS on the left and the proposed Windows one on the right.
By default, Boot Camp Assistant offers to create a small Windows partition that is only 40GB in size, but you can use the slider control (the dot between the partitions) to adjust the size of the two partitions as required.
If your Mac has more than one internal hard drive or SSD, it’s possible to devote one of those drives exclusively to Windows.
However, Boot Camp doesn’t play well with external drives connected via USB or Thunderbolt, so it’s best to use your normal internal drive wherever possible. And if you have an external drive connected to your Mac for Time Machine backups then it’s a good idea to remove it as Boot Camp can get a bit confused if it detects an external drive during installation.
When you’re done, click the Install button at the bottom of the window to start the process.
Step 5: Install Windows
Once you’ve partitioned your Mac drive, Boot Camp will shut down your Mac and launch the Windows installer program from the USB memory stick. You can just follow the prompts to install Windows. As soon as Windows starts up you will also be prompted to install the additional Boot Camp drivers from the memory stick as well.
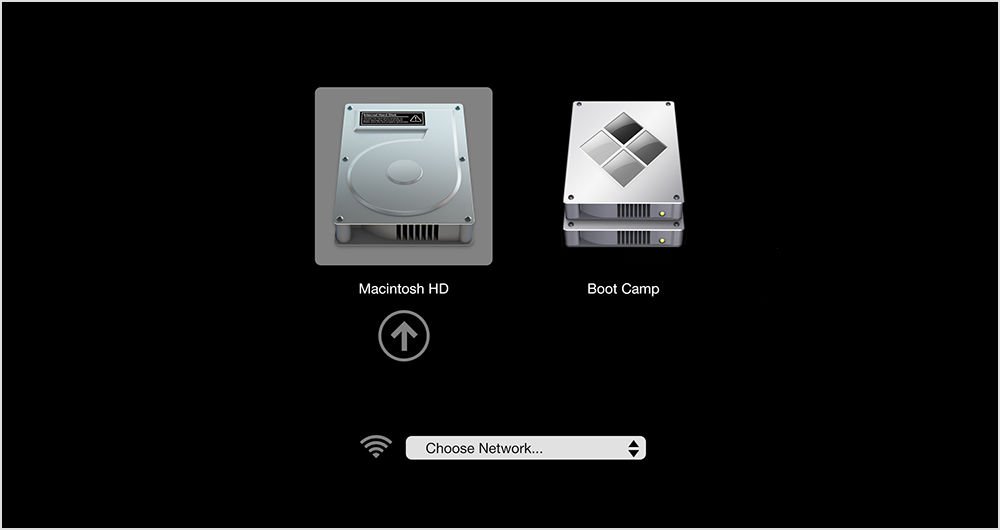
Step 6: Run Windows
Once that’s done you can simply ‘dual-boot’ between the macOS and Windows by pressing Alt (aka Option) on your keyboard when you turn the Mac on. You’ll see the two partitions with the macOS and Windows displayed on screen as the Mac starts up, and you can simply select whichever operating system you need.
How to run Windows in a Virtual Machine
Virtualisation programmes such as Parallels Desktop and VMware Fusion provide an ingenious and flexible alternative to the dual-boot approach of Boot Camp.
Instead of splitting your Mac’s hard drive into separate partitions, and then installing Windows on to the Boot Camp partition, these programs create a virtual machine – or VM – which is simply an app that runs on the Mac and acts like a PC.
You can then install Windows in the VM, along with whatever Windows apps and software that you need to run. The VM can run alongside other Mac apps, such as Safari or Apple Mail, so there’s no need to switch back and forth between the two operating systems, as you are forced to do with Boot Camp.
You may need to buy a copy of the VM software, as well as providing your own copy of Windows. Parallels starts at £69.99/$79.99, VMware is free for personal use, but will cost from $149 otherwise.
There is also a free virtualisation program, called VirtualBox, but it’s fairly complex and difficult to use, so we’ll focus first on using Parallels and VMware to install Windows. We do have a separate article discussing how to use VirtualBox though, if you feel ready for the challenge.
We have a separate in-depth guide to the Best virtual machine software for Mac.
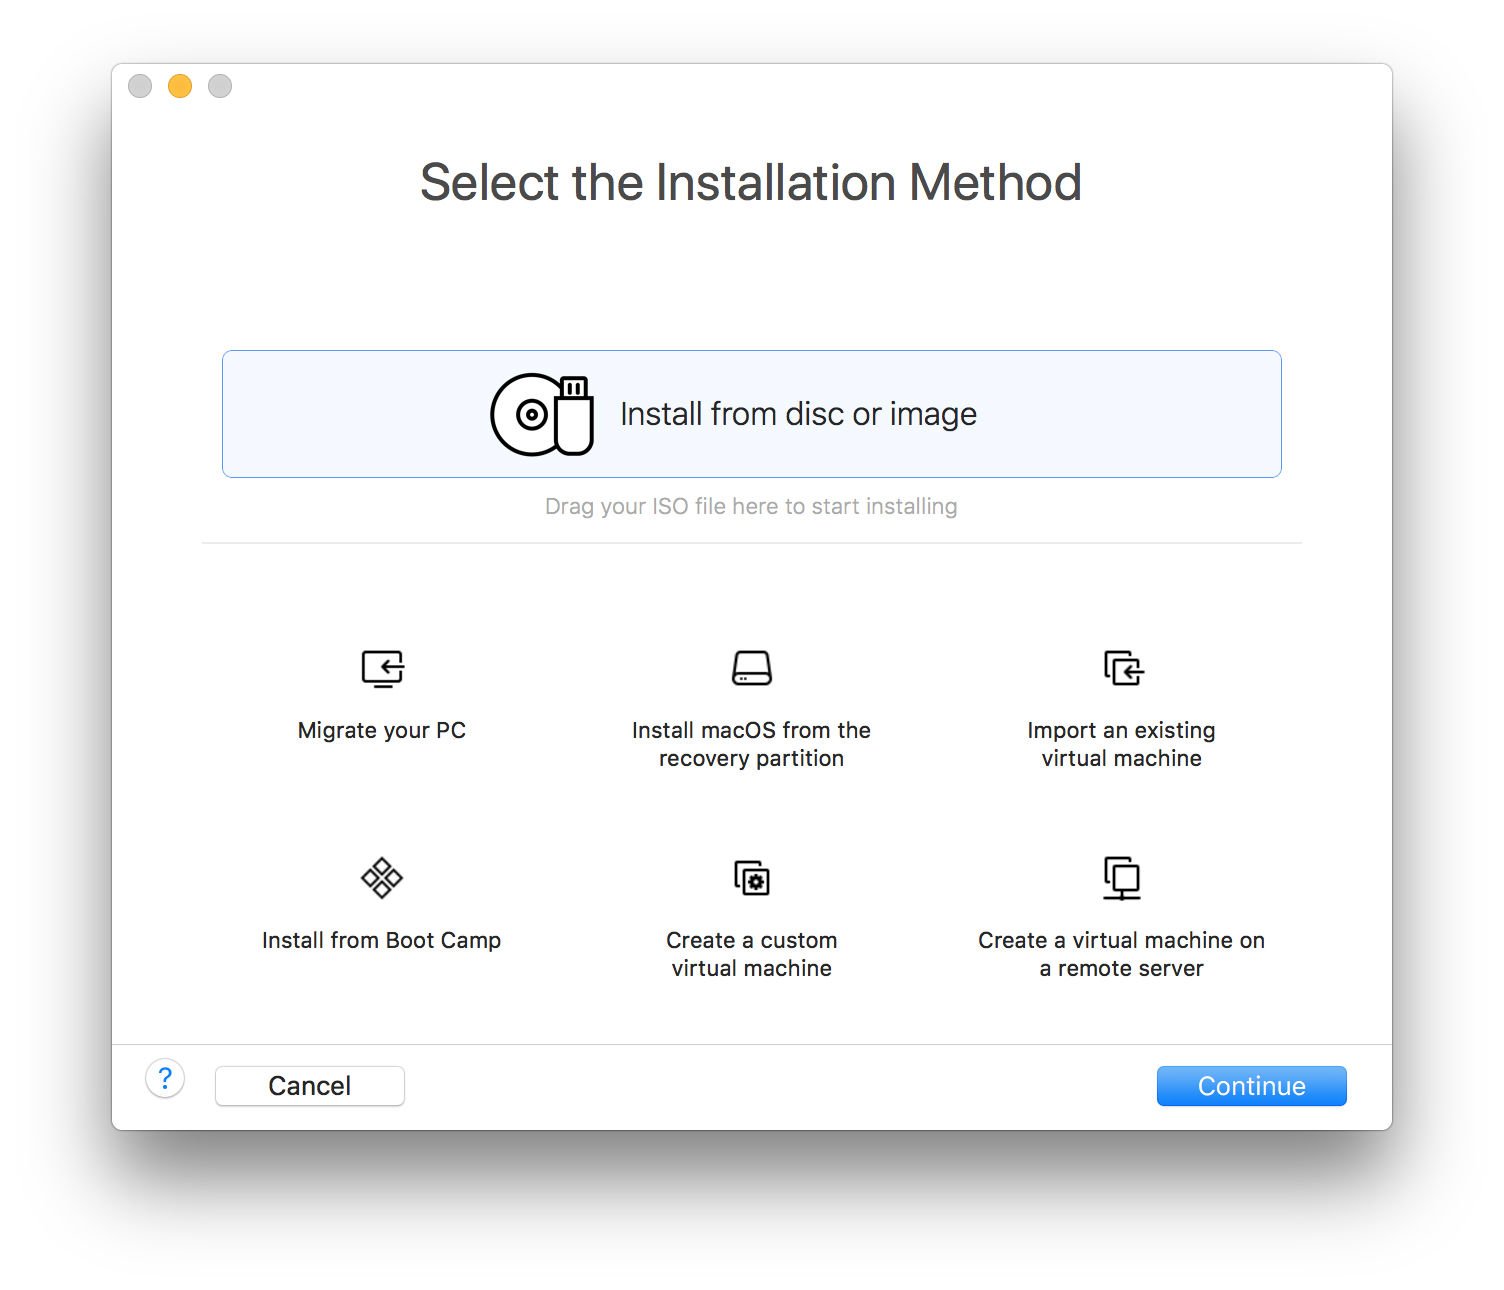
Run Windows on a Mac with Parallels
Parallels Desktop (version 16 at time of writing – read our Parallels Desktop 16 review) costs £69.99/$79.99 and has a more colourful graphical interface than VMware Fusion, but the two programs take the same basic approach. They provide several options for creating a new VM on your Mac, using an installer disk, or ISO file.

It’s also possible to connect an existing Windows PC to your Mac and create a VM on the Mac that is an exact copy of the PC, complete with Windows and all the Windows apps that you need. And, if you’re already using Boot Camp, you can even create a VM that duplicates your Boot Camp partition – which is a handy option for quickly checking a few files, or running apps that don’t need top performance, without having to shut the Mac down and boot into Windows.
Once you’ve decided how you want to install Windows, both programs allow you to adjust a number of important settings.
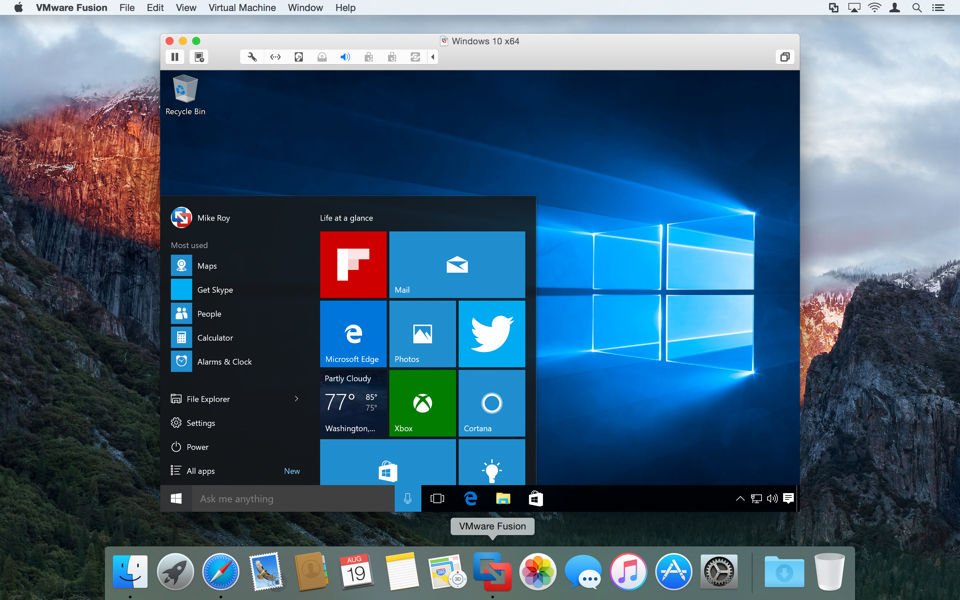
Run Windows on a Mac with VMware Fusion
VMware Fusion (now in version 12 – read our VMware Fusion 12 review) is a little more complicated, as it displays a window with a lot of settings that might seem a bit daunting to first time users. Parallels makes things a bit easier for beginners, by providing a number of predefined options that are suitable for productivity software such as Microsoft Office, or running heavy-duty 3D games, or design software.
VMware has various licensing options. The basic version- Fusion 12 Player – is free for personal use (details here). The commercial price of Fusion 12 Player is $149, while Fusion 12 Pro is $199, or it is an $79 upgrade from previous versions.
Hardware settings
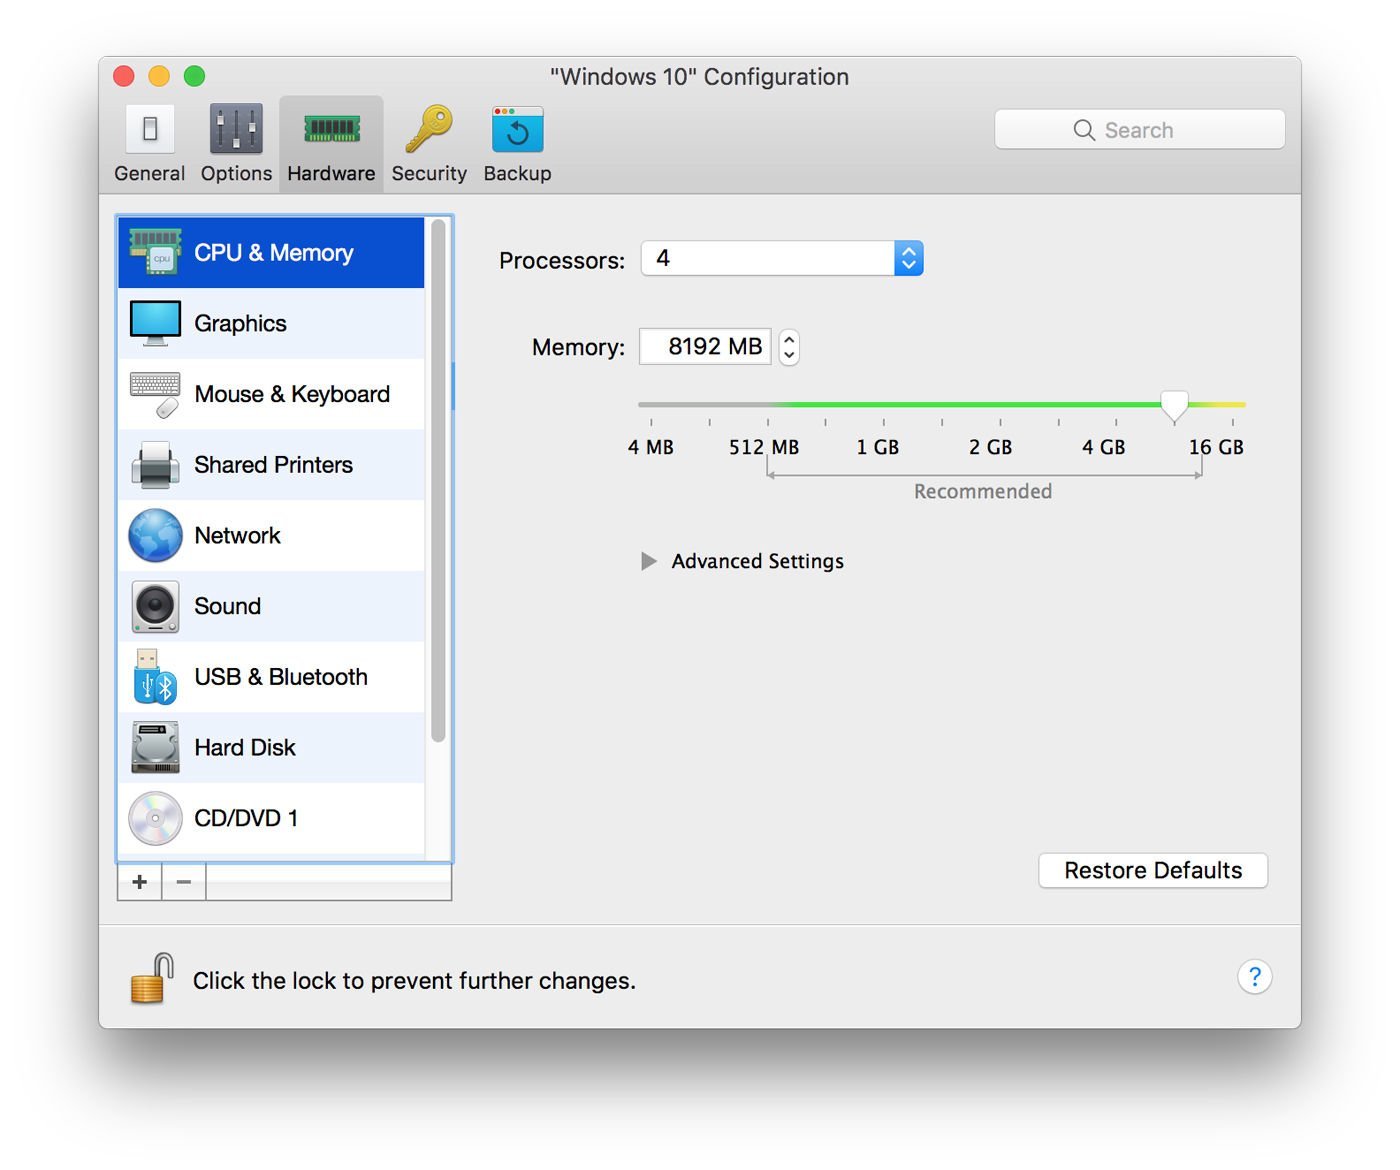
Both VMware Fusion and Parallels allow you to change the hardware configuration of your VMs if you need to, just as though you were choosing the physical hardware for a real Mac or PC.
If your Mac has a multi-core processor then you can devote multiple cores to your VM in order to improve performance. You can also allocate extra memory and disk space, and even increase the amount of video memory that your VM can use for handling 3D graphics in games and other graphics software.
Other options provided by both Parallels and VMware include the ability to connect external devices, such as a hard drive or even Bluetooth speakers to your Windows VM. You can also determine how your VM interacts with the macOS on your Mac, perhaps sharing specific folders and files that you need for a work project, or sharing your music or photo libraries.
Software settings
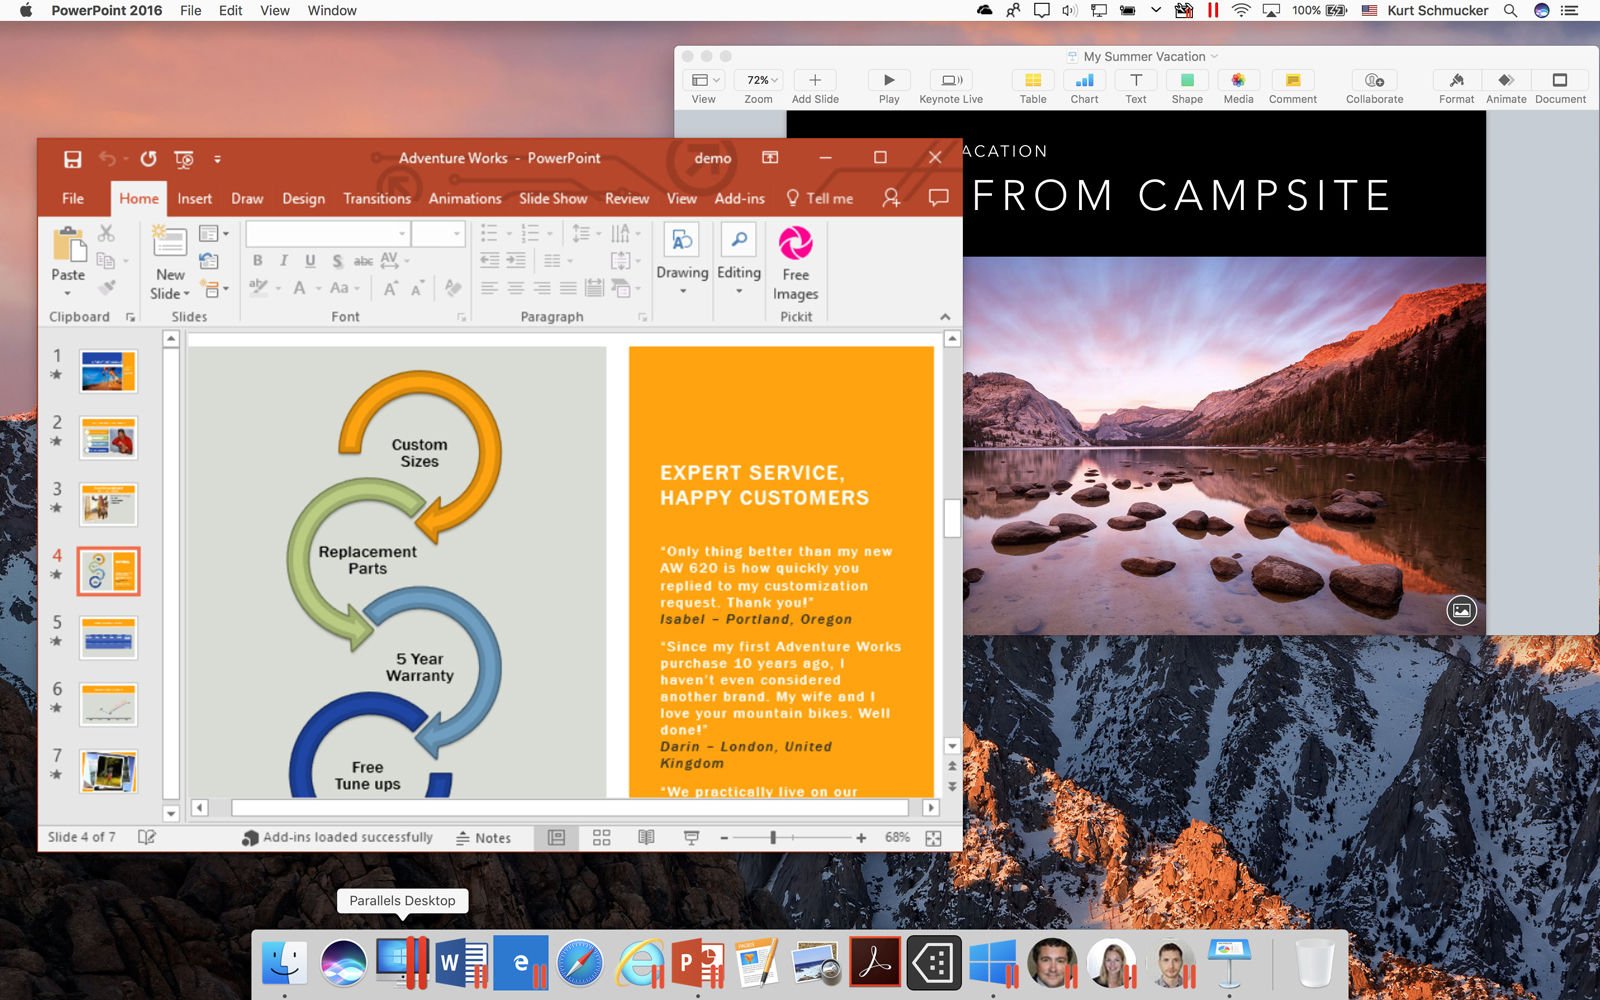
A key aspect of how your VM runs on your Mac is the way it appears when it’s running on the Mac desktop.
By default, both Parallels and VMware run their VMs in a window – so you get a kind of ‘Windows window’ that displays the Windows desktop floating in its own window on top of the Mac desktop. However, it’s also possible to expand the Windows desktop so that it fills the entire screen, making your Mac look just like a normal PC (whilst still allowing you to switch into Mac apps by using Command-Tab).
But a better option for many people is the ability to hide the Windows desktop altogether, so that individual Windows apps appear all on their own on the Mac desktop, just like ordinary Mac apps.
The number of different options available here can be a bit intimidating, but the great thing about virtualisation technology is that you can’t really break a VM. You can save different versions of your VM – just like saving different versions of a document in Microsoft Word. That allows you to experiment with different settings to see which options work best for you, and then simply revert back to a previous version of the VM whenever you want.
Can I run macOS on a Windows PC?
What about the opposite scenario? Is it possible to run macOS on a PC?
In a word: no. It is one of those ironies that although Microsoft is famed for its aggressive commercial practices, Apple is responsible for this particular impasse. Although you can run Windows on any X86 computer, Apple makes its own macOS software available only on Mac software.
Overtly the reasoning is laudable: macOS is designed to run on Apple’s own hardware, and the experience wouldn’t be as good on any old computer. This is one reason why you will never run an underpowered Mac.
But it is also fair to say that Apple creates software in order to sell hardware. The excellence of macOS is a killer app when it comes to selling Macs, and it doesn’t want to share. So if you want to experience the best of all worlds, you need to run Windows on your Mac.
That said, you could read how to create a Hackintosh and try.