How to make Windows 10 USB install media in Linux
Updated: January 4, 2020
The reason why I attempted this thing is a bit convoluted. It started, like any good story, with a
problem, a conflict, a conundrum. I had a laptop with a multi-boot system, Windows 10 and a whole bunch
of Linux distributions, and it was ill. Not booting. Nothing. I needed to recover it, and recover it I
did, one system after another, until only Windows 10 was left and acting rather stubbornly.
I thought using the Windows 10 install media could help, as I’d have better control over the
recovery tools and options than using the one that Windows offers on a botched startup. This meant
creating bootable media, and this turned out to be more complicated than I thought. I wanted to create
the USB media in Linux, without relying on any third-party tools that purport to do this. Why? Because
independence. If it works with standard tools, you can use it anywhere. Begin to commence.
Step 1: Download the Windows 10 ISO
This isn’t trivial. In Windows, it will only offer the Windows media creation tool. But we want the
raw ISO, so you should do this by changing the user agent of your browser, or download the image in a
Linux distribution, which is, after all, why we are here! First challenge of the day surmounted with
great success.
Step 2: Mount & copy and/or extract the ISO
Once you have the file downloaded, we need to extract it to a writable location, e.g. somewhere in
your home directory. If you mount the ISO as a loopback device, it will be read-only, and you will need
to manually copy the contents. Some Linux file managers cannot natively extract ISO files. Some can. I
had this error:
This disc contains a “UDF” file system and requires an operating system
that supports the ISO-13346 “UDF” file system specification.
All right, we need to do the manual mount & copy:
mount -o loop windows10.iso /mountpoint
cp -r -T /mountpoint/ /home/”user”/windows10data
Step 3: Compress install.wim
The reason we did the above is because one of the files – install.wim – contained in the ISO is
larger than 4 GB, and we need to compress it. And the reason for that is, depending on your system
firmware, your machine may not be able to boot NTFS-formatted devices (most likely not, in fact). So to
be on the safe side, our USB drive needs to be formatted as FAT32, and there’s the 4GB limit for
file size.
The file is located under sources, so in our case /home/”user”/windows10data/sources/install.wim. To
compress the file, we need a tool called
wimlib. You ought to find it in your distro’s repos. As I was using
Kubuntu 18.04 for this task, the package is indeed available.
sudo apt-get install wimtools
Now, the compression step (inside the folder containing the ISO files):
sudo wimlib-imagex optimize install.wim –solid
You may need sudo, because you could encounter an error like this:
[ERROR] Can’t modify “/home/roger/win/sources/install.wim”: Permission denied
ERROR: Exiting with error code 71:
The WIM is read-only (file permissions, header flag, or split WIM).
And the successful result look like this:
“install.wim” original size: 4463411 KiB
Using LZMS compression with 8 threads
Archiving file data: 9 GiB of 9 GiB (100%) done
“install.wim” optimized size: 3311533 KiB
Space saved: 1151878 KiB
The 4.4GB image was reduced to 3.3GB, a 30% reduction, so this means potentially we have quite some
room to grow before this method becomes inadequate for future use with Windows 10 ISO files and the
FAT32 filesystem.
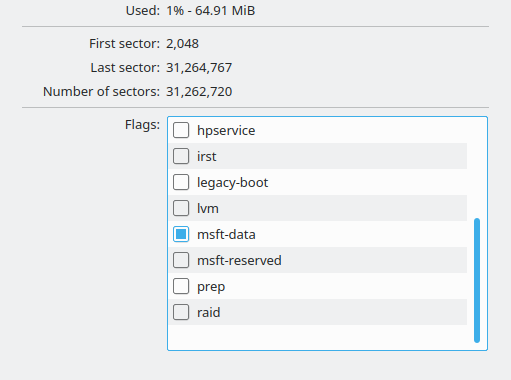
Step 4: Prepare USB device
Now, we need a thumb drive, at least 8 GB in size. It needs to be partitioned. You can use a tool
like
GParted or KDE Partition Manager, or if you’re savvy, fdisk or gdisk from
the command line, to prepare the device. First, you need to create a new
GPT partition table. Second, create a
single FAT32 partition. It should not have the boot flag. In other words,
it will be identified as “msft-data” partition.

You can also do this on the command line. For example, with gdisk:
sudo gdisk /dev/[your device here]
For example, something like this:
sudo gdisk /dev/sdb
GPT fdisk (gdisk) version 1.0.3
Partition table scan:
MBR: protective
BSD: not present
APM: not present
GPT: present
Found valid GPT with protective MBR; using GPT.
Command (? for help):
Please be EXTRA careful so you don’t accidentally initialize a wrong device and ruin your data! In
gdisk, you need the following steps:
- o – create new GPT partition table.
- n – create a new partition (you can use defaults for number, sectors).
- w – write data (once again, be extra careful with what you’re doing, lest you cry).
Once you exit the tool, format the partition:
sudo mkfs.vfat /dev/[your device, partition here]
For instance,
/dev/sdb. By default, the
mkfs.vfat command will choose the optimal FAT size,
but you can override this with the -F flag. However, in most cases, you will not need to make any
changes, and you will get the default FAT32 filesystem.
Disk /dev/sdb: 14.9 GiB, 16008609792 bytes, 31266816 sectors
Units: sectors of 1 * 512 = 512 bytes
Sector size (logical/physical): 512 bytes / 512 bytes
I/O size (minimum/optimal): 512 bytes / 512 bytes
Disklabel type: gpt
Disk identifier: 43479D21-6D76-2CA4-A7BA-596C08A99193
Device Start End Sectors Size
Type
/dev/sdb1 2048 31260671 31258624 14.9G Microsoft basic data
Step 5: Copy data to USB device
Now that we have everything ready, we need to copy the extracted ISO contents with the compressed
install.wim file onto the USB drive:
sudo mount /dev/[your device, partition here] /usb/mount/point/
sudo cp -r -T /location/windows10data /usb/mount/point/
One last screenshot, just showing the partition table, contents and whatnot.

And everything is ready now. We can proceed to commence to boot.
Step 6: Boot Windows 10 on target device
Bob’s your uncle at this point.
Optional: NTFS partition on USB device
Now, you may be wondering how Windows does this “officially” or how different tools (like woeusb or
Rufus) manage to handle the larger-than-4GB install.wim file. Well, it is possible to boot NTFS devices
on UEFI systems, but this requires some extra steps.
In essence, this involves the use of the
UEFI:NTFS bootloader. Without going into too many
details, because this is only an optional come-what-may in case you are severely limited with creating
and/or using the method listed above, the sequence of steps is as follows (there are alternatives, but
this is one way):
- Create a new GPT/MBR partition table on a USB device.
- Create an NTFS partition that spans the entire device minus 512 KB.
- Create a FAT16 partition that spans 512 KB in size.
- Add boot and lba flags to the FAT16 partition.
- Download the UEFI bootloader image from pbatard’s
Rufus GitHub repository. - Mount or extract the image (much like we did above).
- Copy the efi files contained in the image onto the FAT16 partition.
- Copy the Windows 10 ISO contents onto the NTFS partition.
Conclusion
There we are, the end of this tutorial. I hope you will find this useful, because quite often,
seemingly trivial actions can have unintended convoluted consequences, like we’ve seen here. If you do
not want to rely on third-party tools (much), and want to be able to create Windows 10 USB install
media in Linux, this guide provides you with the necessary steps.
We did learn quite some here, including how to manage ISO images, how to compress wim files, how to
partition and format devices, and there’s even an optional magic trick for booting NTFS devices on
UEFI hardware. This is what many USB creation tools do in the background, and now you’re in on the
secret. Well, that’s all for now. Now, off you go installing.
Cheers.