

Install Microsoft PowerToys from GitHub, launch it, and then navigate to Keyboard Manager > Remap a Key. Click the plus button, and then select the key you want to rebind from the list. You can click the trash can icon to remove a remapping at any time.
Would you like to use a different keyboard key to perform a certain task in Windows 10? Thanks to PowerToys, it’s easy to remap any key to another key or even a shortcut combination on your keyboard. Here’s how to set it up.
The Secret Is PowerToys
In the past, remapping keys in Windows 10 required a difficult-to-use third-party program. Today, Microsoft makes it easy with PowerToys, a free utility available for download online. Using PowerToys, you can make any key on your keyboard act like any other key—and even remap shortcuts.
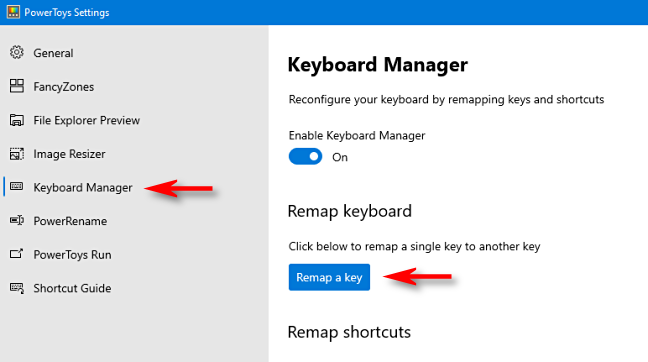
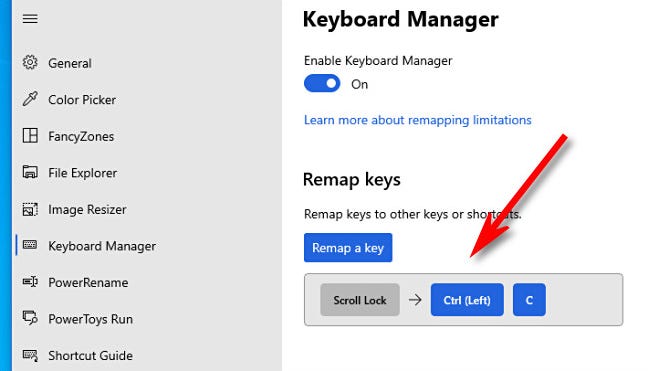
If you don’t already have PowerToys installed, download it for free from Github. After you install it, launch PowerToys Settings, then click “Keyboard Manager” in the sidebar. In the “Keyboard Manager” settings, click “Remap a Key.”
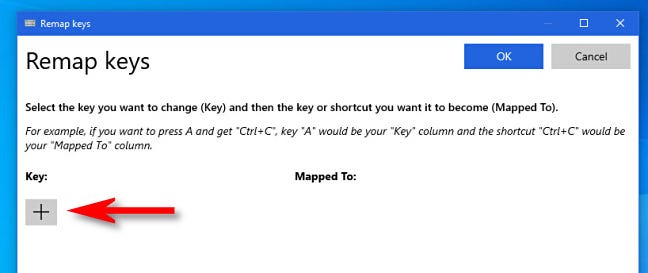
When the “Remap Keyboard” window pops up, click the plus button (“+”) to add a new key mapping.
After that, you’ll need to define which key you want to remap (in the “Key:” column), and what key or shortcut you want it to perform (in the “Mapped To:” column).
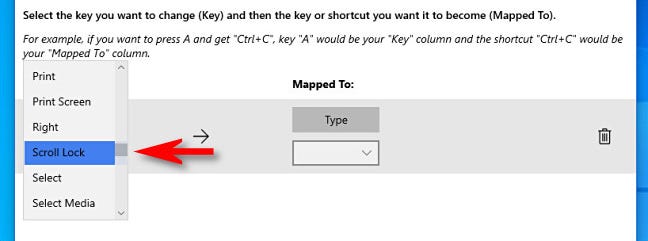
First, select the key you’ll be remapping in the “To:” column by either clicking the “Type” button and pressing the key on your keyboard, or by selecting it from the list in the drop-down menu. For example, we’ll pick Scroll Lock here, since it often sits unused.
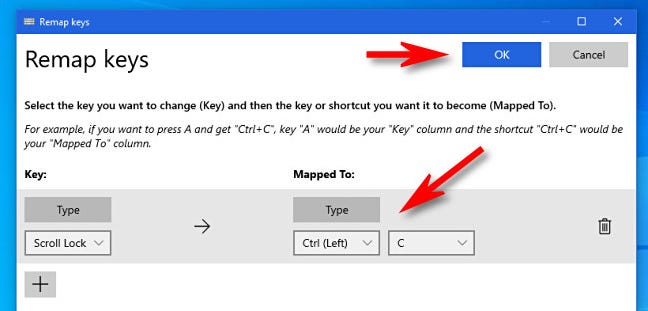
Next, select the key or shortcut you want to perform in the “Mapped To” column. For a single key, you can either choose it from the drop-down menu or click the “Type” button, then press it on your keyboard.
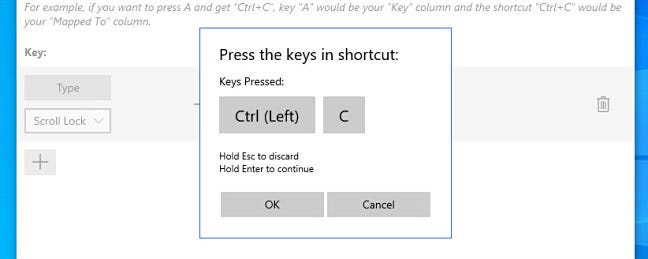
If you want to use a shortcut key combination, press the “Type” button, then press the combination on your keyboard. For example, here we’ve typed “Ctrl+C” for the standard Windows “Copy” shortcut.
After you have both “Key:” and “Mapped To:” columns defined, click “OK.”
If you see a warning that one key will be left unassigned, click “Continue Anyway.” This means that you won’t be able to access the original function of the key that you just remapped.
(In our example, there will be no way to use Scroll Lock unless you remap another key to perform the original Scroll Lock function).

Next, you’ll see the resulting mapping listed in the “Keyboard Manager” settings. That means your custom mapping has been saved and is now active.
If you want to add more mappings, click “Remap a key” again. When you’re done, close PowerToys Settings completely, and your remapped key (or keys) will remain in effect. Use them as much as you’d like. You can always go back and adjust your mappings later if necessary.
How to Remove the New Key Mapping
Later on, if you want to remove the custom mapping you made, relaunch Power Toys Settings, then click “Keyboard Manager” and “Remap a key” again. In the list of mappings, click the trash can icon beside the mapping you’d like to delete.
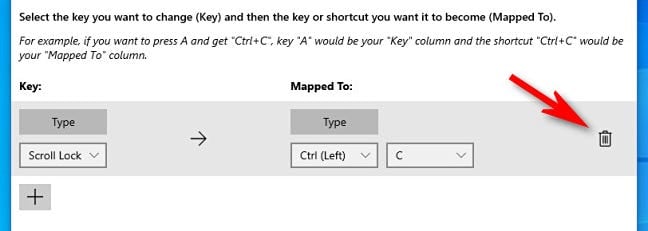
The mapping will be removed. After that, click “OK” to close the window. Then you can either exit PowerToys completely or create a new mapping using the guide above. Have fun!
How to Disable or Remap Keys Using SharpKeys [Alternative Method]
The major problem with PowerToys is that the remappings only work if the PowerToys application is running, so they won’t work on the login screen. There also seem to be issues with the remappings not working properly in games and some other places. The solution? Use the old-school Windows Registry key remapping technique… but do it the easy way, using the open-source SharpKeys application.
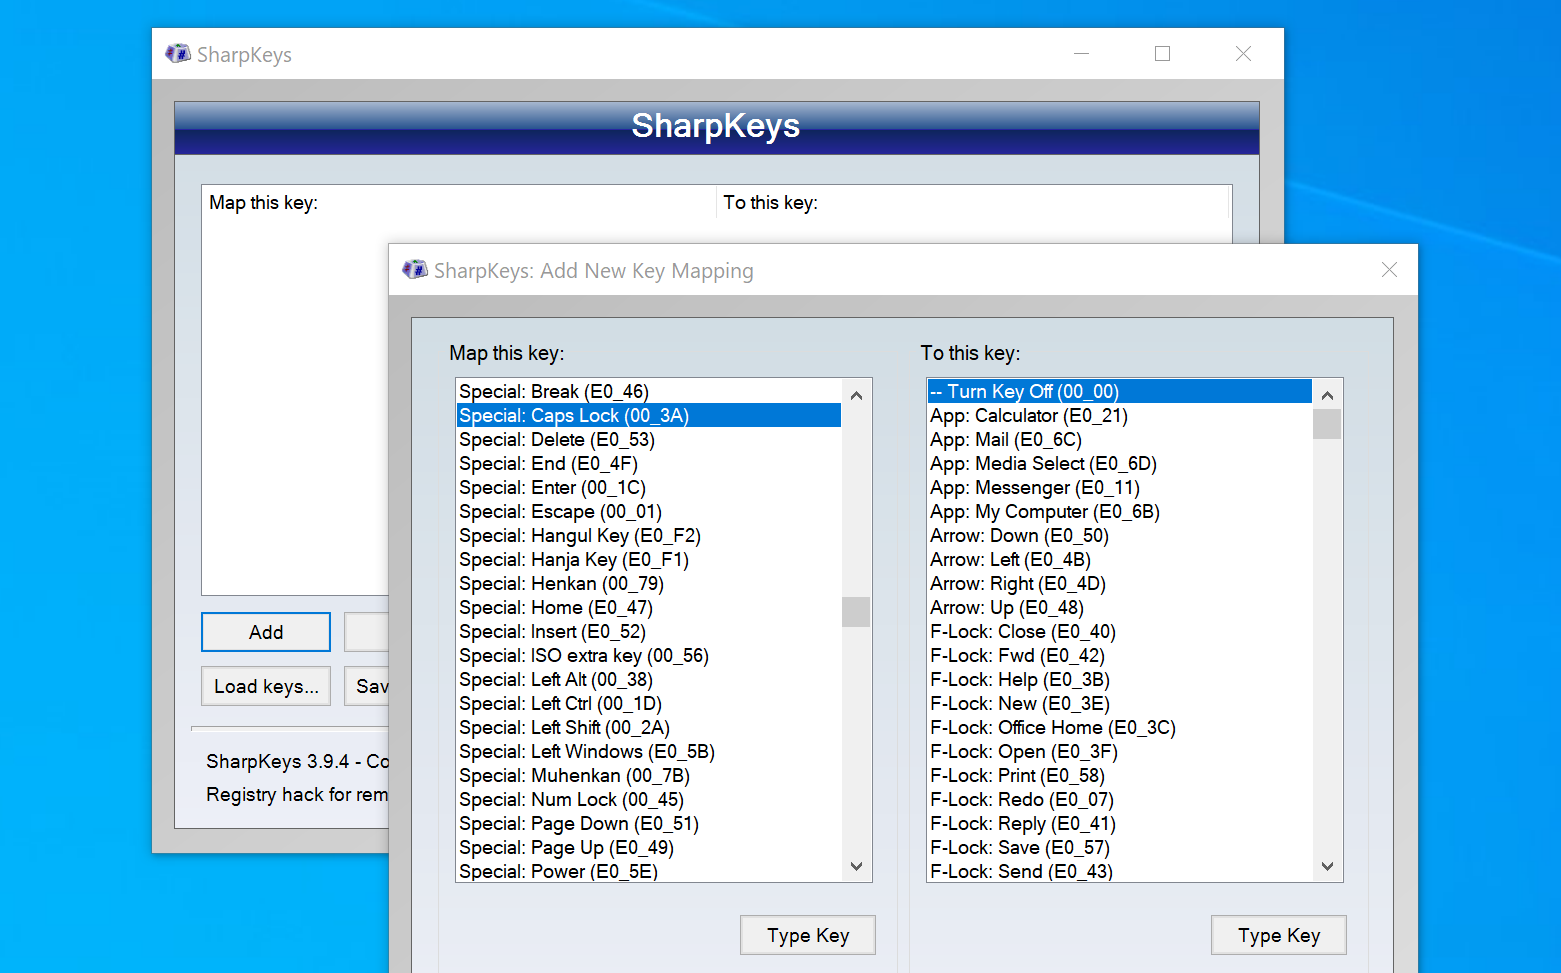
SharpKeys won’t let you remap shortcut key combinations, so you can’t remap ALT+C to CTRL+C, for example, but you can do things like remap or disable the Caps Lock key on any version of Windows.
Install the application from their Github project page or from the Microsoft Store, open it up (clicking through the annoying Windows SmartScreen warnings), and then click the Add button to open up the Add New Key Mapping dialog.
We’ve been using SharpKeys literally since Windows Vista was around. That’s a long time.