
If you are a developer, or just curious about what the next version of macOS will be like to use, you can install the beta of the upcoming version on your Mac. But what do you do when you no longer want to run the beta?
If the beta is causing havoc with your Mac, you are fed up with having to set aside hours each week while the latest update is installed, or you want to keep the most recent stable version rather than spoil things with the next update read on.
We’ll run through the simple steps to revert from the macOS Big Sur beta to the final version of macOS Big Sur, or even Catalina, in detail below, but essentially they are as follows:
- Leave the Apple macOS beta program
- Install macOS Big Sur (or Catalina) using one of the methods detailed below
It’s simple enough, but there are a few problems you may encounter along the way, so read on for a full explanation of the steps.
How to leave the macOS beta program
The first thing to do is remove yourself from Apple’s macOS beta program as this will stop the beta updates from arriving on your Mac.
Here’s what you should do:
- Open System Preferences on your Mac.
- Click on Software Update.
- On the left side, under the cog icon, you will see the message: “This Mac is enrolled in the Apple Beta Software Program”. If you want to stop receiving beta updates on you Mac click on Details.
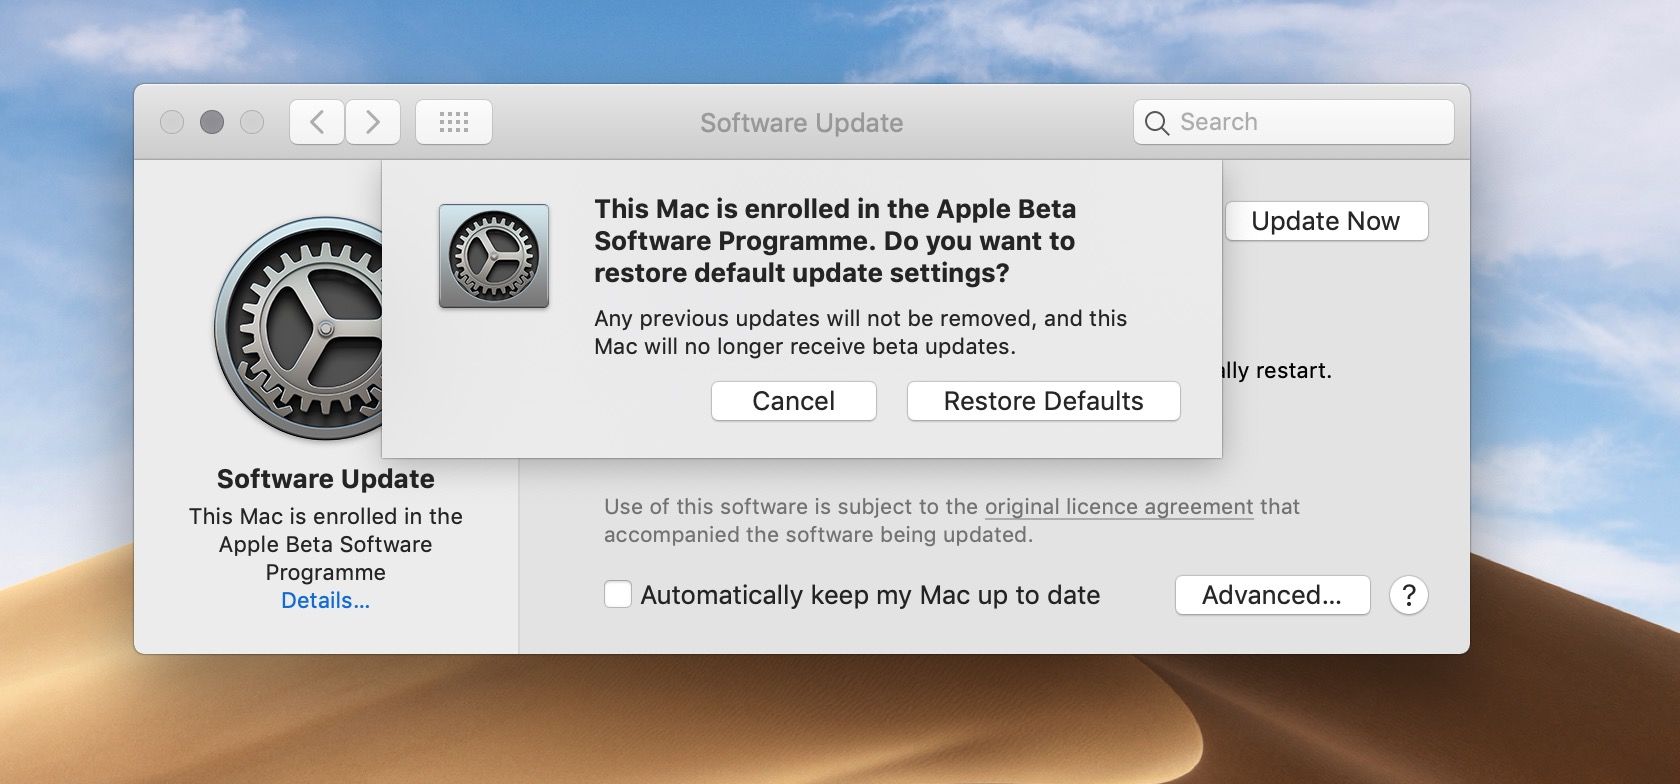
- A pop up will appear asking you to confirm that you want to restore default update settings. It will indicate that any current updates won’t be removed but you will no longer receive beta updates. To confirm this click on Restore Defaults.
As explained on the last screen, this won’t remove the beta from your Mac, it will simply mean you no longer receive further beta updates (unless you choose to sign up for the beta again).
How to remove the macOS beta from a Mac
Now that you have left the beta program you will no longer receive the updates – but you will be stuck with the latest version of the beta running on your Mac.
There are a few ways you can revert from the beta to the latest full version of the operating system on a Mac. The method will depend on which version of macOS you wish to revert to and whether you made a backup.
Luckily it’s easier to downgrade from a beta to macOS Big Sur or macOS Catalina than it was to downgrade from High Sierra or Mojave to anything predating High Sierra. This is because Apple started using a completely new filing system (APFS) from High Sierra onwards (SSDs only in High Sierra, all storage in Mojave).
If you want to remove the beta and return to a previous version of macOS you have a few choices: the simplest way is to install the current version of macOS via Software Update. However, there are a lot of different ways you can return to the earlier version of macOS, which we will discuss below.
How to install macOS Big Sur or Catalina
Having removed your Mac from the beta program, you will be able to install macOS Big Sur (or Catalina) on your Mac.
Follow these steps to install the current version of the macOS.
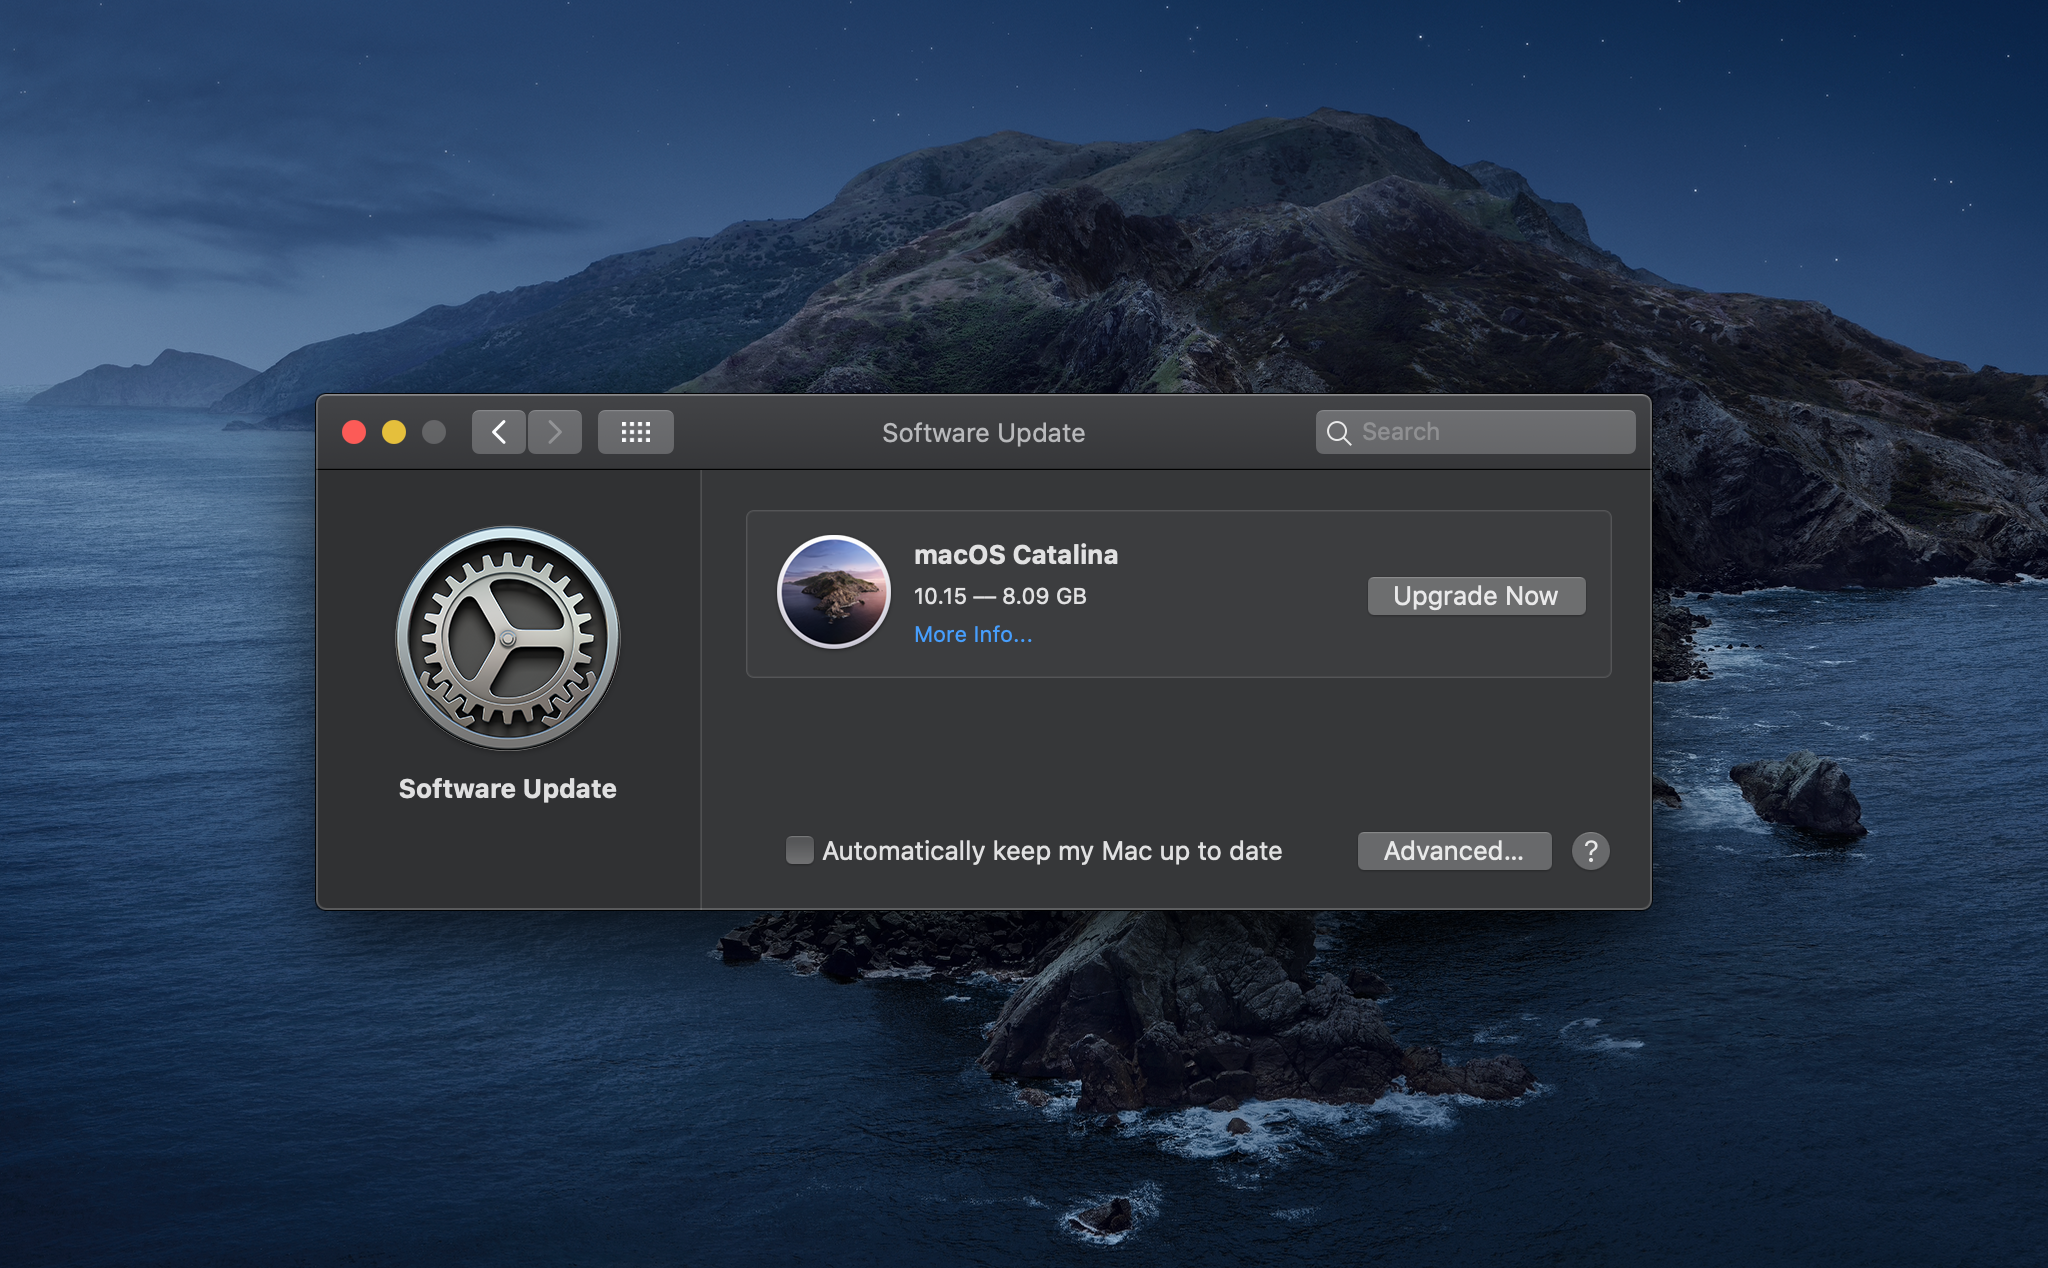
- Open System Preferences on your Mac.
- Click on Software Update.
- Your Mac should search for the update. When it confirms that an update is available for your Mac, you can click on More info to get the lowdown on what the update brings. Click Update Now when you are ready to update your Mac.
- You will see a message that to update you must restart your Mac. You can choose Not Now or Restart, depending on whether now is a good time for your Mac to be out of action for half an hour or more.
There is more advice about installing Big Sur on your Mac here. Including what to do if you encounter problems installing Big Sur.
What to do if your Mac won’t download Big Sur
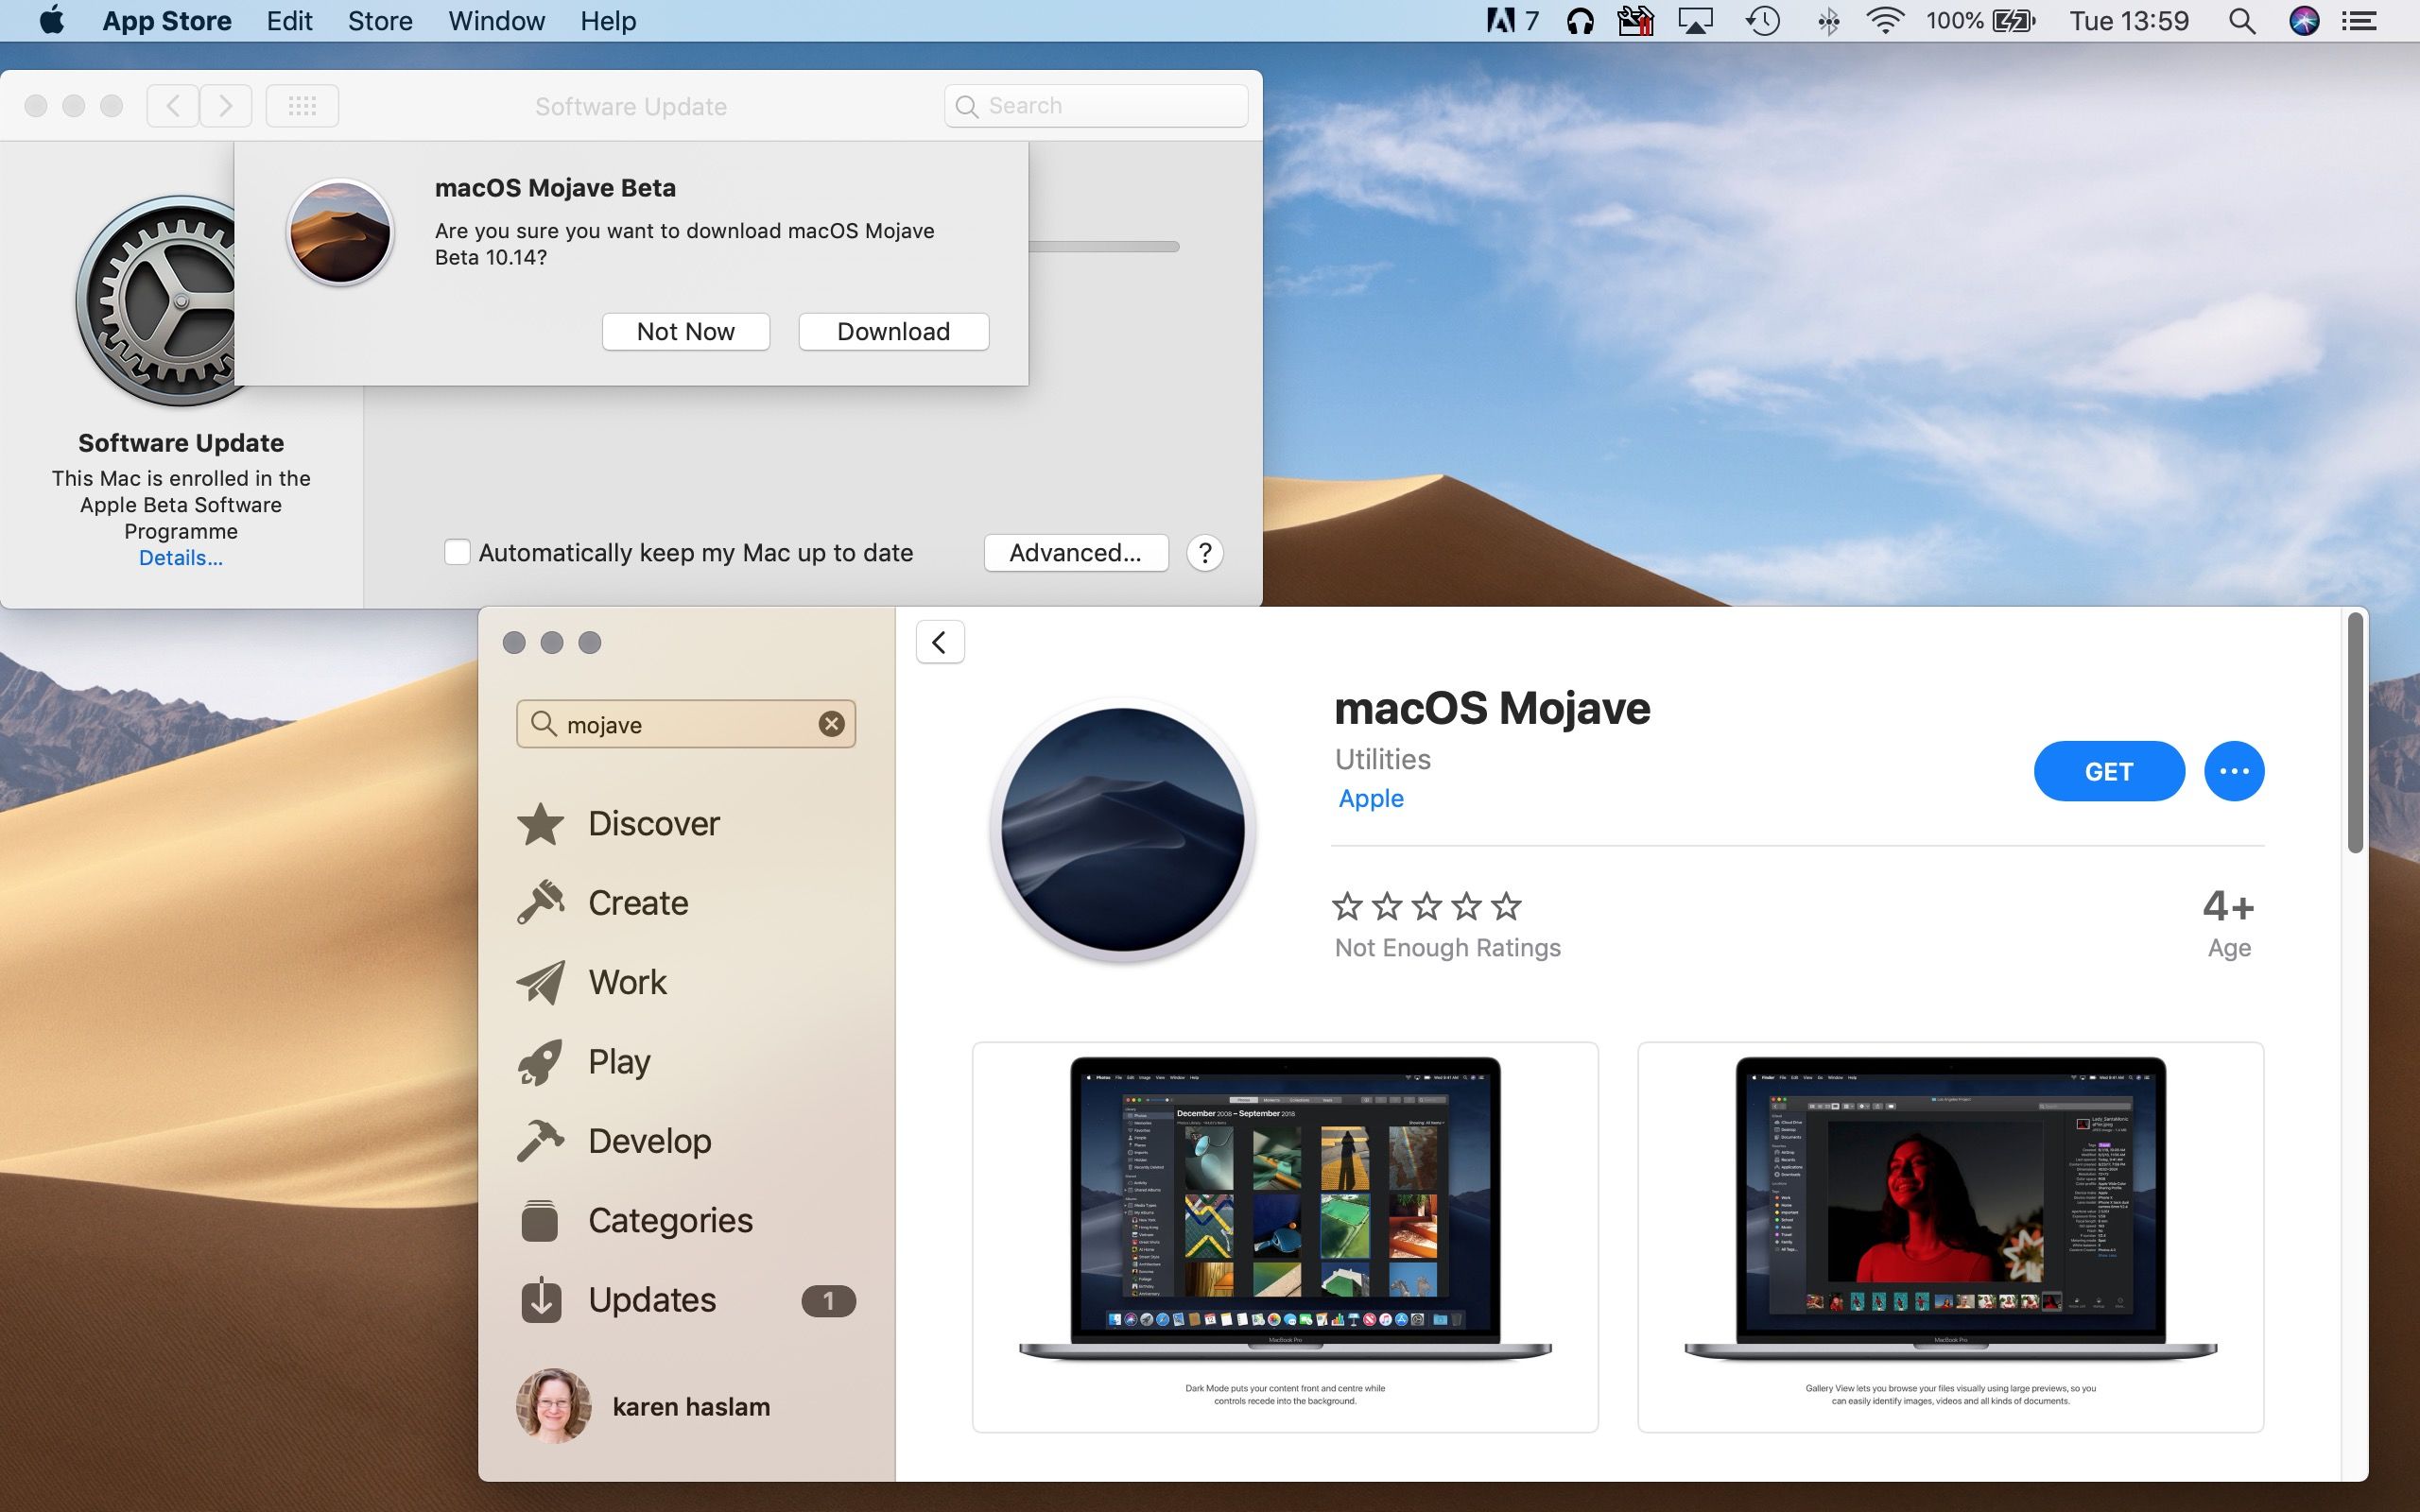
If you find that Big Sur isn’t available to download via Software Update – perhaps because your Mac erroneously believes it’s already running the software – you can trick your Mac into downloading the full version of the software and installing it by using the Mac App Store.
- Open the Mac App Store.
- Click on this link for Big Sur, or click this link to Catalina on the Mac App Store
- Click on Get and your Mac will offer to download the installers.
- The Software Update window up from System Preferences will open. Confirm that you want to download the software, you’ll also see a warning that you are downloading an older version of the OS, ignore it.
- Wait while the macOS downloads – it may take a while, and if your internet connection drops you might have to start again.
- Once it’s downloaded click on Open and wait while it installs. Expect this to take a while…
You may see a message that the software is already installed. Just confirm that you do want to go ahead with the download and once you have the installer you will be able to install the final version over the beta.
How to downgrade the beta via Time Machine
This is another option, but it’s important to remember that the backup will not include any changes you made since you started running the macOS beta. All the data on your Mac will be erased during the restore process and only the data from the last backup you made will be restored, so be sure to make a separate copy of anything you don’t want to lose (or at least copy it to iCloud).
Having unregistered your Mac from the beta program, as above, follow these steps:
- Plug in the hard drive on which your Time Machine back up is located.
- Restart your Mac.
- Hold down Option/Alt, Command + R until the Apple logo appears.
- Now you are in macOS Recovery, you’ll see the option to Restore from your Time Machine Backup. Select that and click Continue.
- Choose your Backup source and click on Continue again.
- Choose the correct backup – the last last one from before you installed the beta. (You can check this by looking at the macOS version column).
We have a guide to restoring from Time Machine here.

How to revert to Sierra or earlier
As we said above, it’s a little more complicated if you are reverting from Big Sur, Catalina, Mojave or High Sierra to a version of the macOS that predates them because Apple has made it harder to get old installers, and (probably related) Apple has switched to a new file system.
Back when Apple stopped trying to make APFS work on Fusion Drives back when it was beta testing High Sierra (an early version of that beta which did support it on Fusion Drives), the company issued the following instructions to downgrade from the APFS version to a HFS+ version. Since Mojave brings APFS to hard drives and Fusion Drives as well, it is likely that if your Mac is so equipped you will need to bear this in mind when downgrading.
- Make a Time Machine back up.
- Download the Mojave installer from the Mac App store.
- Create a bootable installer as above.
- Press Option/Alt as you start up your Mac.
- Choose the macOS Mojave installer as your startup disk.
- Select Disk Utility.
- Choose Show All Devices.
- Choose your drive and click on Erase.
- Change the format to MacOS Extended (Journaled).
- Change the name of your drive to something else.
- Quit Disk Utility.
- Choose Reinstall macOS and select the new drive name as your target.
- Once in Setup Assistant choose to migrate your data from your Time Machine back up (Time Machine isn’t using APFS, yet, so this should work, for now).
How to reinstall macOS using a boot drive
Currently it is easy to download the latest version of Catalina from the Mac App Store – but if you want to install an older version of the macOS it’s a lot more complicated because Apple made it difficult to download old versions of macOS in Catalina. It’s not easy, but luckily, we have instructions for how to get an older version of the Mac operating system here.
Having obtained the version of macOS you want you’ll need to follow these instructions: How to make a boot drive for macOS.
Once you have your boot drive ready, follow these instructions to reinstall the older version of macOS.
- Make sure you are connected to the internet
- Click on the Apple logo > Restart.
- Press Command + R until your computer reboots.
- When you enter Recovery mode click on Disk Utility > Continue.
- Select you Startup Disk.
- Click on Erase (yes, you need to erase your drive before you can continue).
- If your Mac is using APFS – likely if you were running High Sierra on a SSD, or Mojave on an SSD, Hard drive or Fusion drive, select APFS from the format list. In some rare scenarios your Mac might be using HFS+, if you have a Fusion Drive for example, in that case you’d need to choose Mac OS Extended (Journaled) from the format list.
- If Scheme is available, select GUID Partition Map.Click Erase.
- Wait for the Erase process to complete before you quit Disk Utility.
- Now, to install the macOS again… Make sure that the boot drive is plugged into your Mac.
- Click on Apple logo > Restart.
- Hold down Option/Alt while your Mac restarts.
- You’ll see a list of startup disk options, select your bootable drive containing the version of macOS you want to run.
- Click Continue and wait will it installs
Now you can recover your setting and data from the last back up you made prior to installing the beta.
How to revert from macOS beta using Recovery mode
It’s also possible to download and install an older OS using the built-in Recovery mode (this could be the quickest method – if you web connection is good) But it depends on what version you are reverting two. We run through how to do this here: How to reinstall macOS using Recovery Mode.
We’ll say it again: before you install the older version of the Mac operating system, make sure that you make a copy of all your important files. Remember you won’t be able to recover files that Time Machine backed up since you were running the beta – because this will recover that version of macOS too – so make a separate back up of these.