
Every version of the Windows operating system comes with specific hardware requirements. The newest version of Windows is no different.
The problem with the Windows 11 system requirements is that millions of PCs that can otherwise efficiently run Windows 11 cannot be used to install and run Windows 11 because of the TPM 2.0 and secure boot requirement. As per Microsoft, these are essential to offer better security.
Many users who have PCs that do not officially support Windows 11’s system requirements have installed Windows 11 or upgraded from Windows 10 with the help of workarounds out there (see how to create Windows 11 bootable USB for unsupported PCs) and now getting “System requirements not met” message on the screen.
Why is the “System requirements not met” watermark on Windows 11 desktop?
When you install Windows 11 on a computer that does not meet all the system requirements set by Microsoft, Windows 11 shows the “System requirements not met” watermark at the bottom right corner of the desktop.
The “System requirements not met” watermark on the Windows 11 desktop is to let the user know that he/she has installed Windows 11 on unsupported hardware and not all the features might work as expected.
If you have installed Windows 11 on an unsupported PC and want a clean desktop by removing the “System requirements are not met” watermark, you need to edit the Windows Registry.
This guide shows you how to edit the Windows Registry to remove the “System requirements are not met” message from Windows 11 desktop.
Remove “System requirements not met” from Windows 11
NOTE: Although editing the Registry is safe, we recommend creating a system restore point so that you can restore your Windows 11 PC to a previous date if something goes wrong.
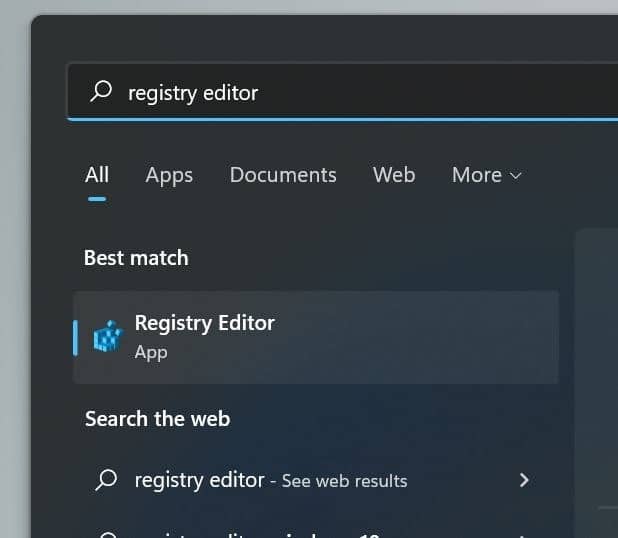
Step 1: Open the Registry Editor by typing the same in the search and then hitting the Enter key.
Click the Yes button when you get the User Account Control prompt to open Registry Editor with admin rights.
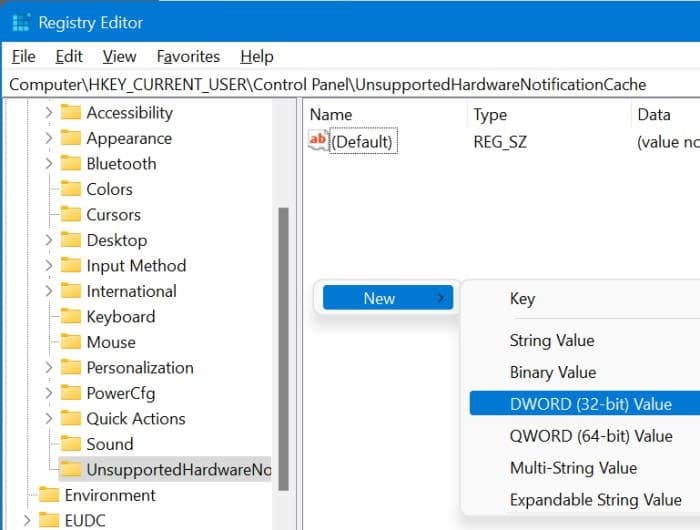
Step 2: In the Registry Editor, go to:
HKEY_CURRENT_USERControl PanelUnsupportedHardwareNotificationCache
NOTE: If you cannot find the UnsupportedHardwareNotificationCache key, go to HKEY_CURRENT_USERControl Panel, right-click on the Control Panel key, select New and then select Key. Name the new key as UnsupportedHardwareNotificationCache.

Step 3: On the left side, select the UnsupportedHardwareNotificationCache key. On the right side, perform a right-click, select New and then select DWORD (32-bit) Value. Name it SV1 if you are running Windows 11 stable build, Beta, or Release Preview. If you are on an Insider build, name it SV2.
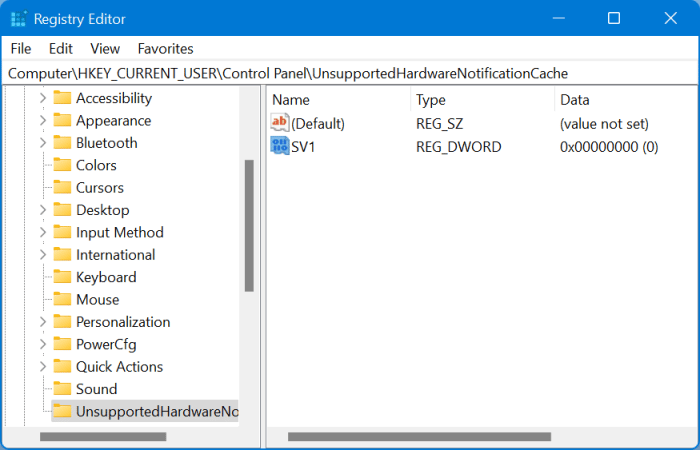
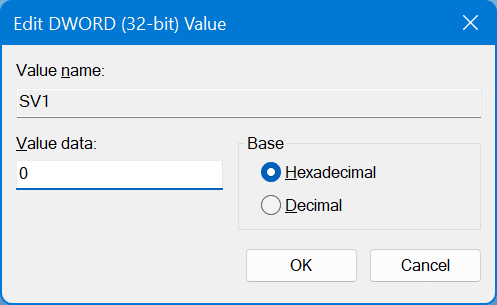
Step 4: Finally, double-click on the SV1/SV2 and change its value data to 0 (zero). That’s it!
Step 5: Either restart your computer or restart the File Explorer process via Task Manager to get rid of the “System requirements not met” message.
How to check if your computer meets Windows 11 system requirements?
The easiest way to tell if your PC meets the hardware requirements set for Windows 11 is to run Microsoft’s official PC Health Check app.
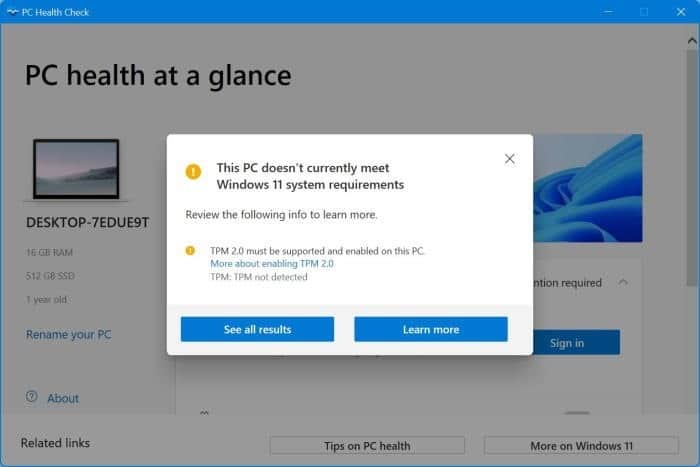
The tool scans your PC’s hardware and tells if your PC can run Windows 11. Moreover, if your PC cannot run Windows 11, it shows which hardware component does not meet the set requirements. So, it’s a good idea to download and run the PC Health Check app.