
If you want to run ChatGPT in the Ubuntu terminal, you can use a Python program called ShellGPT to send text prompts to ChatGPT and display the response. To run ShellGPT you must install it and obtain a ChatGPT API key.
Want to use the ChatGPT in a terminal window on your Ubuntu Linux PC? ShellGPT lets you use all the features of the famous AI chatbot, on the command line. Here’s how to set ShellGPT up and start using it.
What Is ShellGPT?
ShellGPT is a Python program that lets you access OpenAI’s ChatGPT from the command line of a terminal window. It sends your text prompts and your ChatGPT API key to ChatGPT and prints out ChatGPT’s response.
It’s just like running ChatGPT on your own computer, without any of the hassle, and regardless of the computing power of your computer. You’ll need to have a ChatGPT API key, but it only takes moments to get one, and they’re free.
ChatGPT is probably the most famous of the new-wave of large language model AI chatbots, developed using deep learning techniques and massive data sets.
It’s able to hold convincing and lifelike conversations, and can generate prose and other text format responses on just about any topic you can imagine. Just keep in mind that it’s a simulation of a knowledgeable, intelligent person. It isn’t genuinely intelligent, and it’ll happily make stuff up.
None of the following steps are difficult, and you should be up and running in ten minutes or so.
Step 1: Install the Python Tools
Ubuntu usually ships Python as standard, but you can check if it is present by asking for its version number.
python --version

If Python isn’t installed, you can install it using this command.
sudo apt install python3
We also need pip, the python package manager.
pip --version

It wasn’t installed on our test computer, so we added it using apt.
sudo apt install python3-pip

We’re going to install ShellGPT in a Python virtual environment. This sandboxes ShellGPT from your system Python files and libraries, and means it cannot accidentally interfere with your other Python programs. It’s just a safe precaution.
To do that, we’re going to need to install the Python virtual environment packages.
sudo apt install python3-venv

Step 2: Prepare a Python Virtual Environment
Create a directory to install ShellGPT into. We named ours “shellgpt”, just to keep things obvious. Change into your new directory when it’s been created.
mkdir shellgpt
cd shellgpt

Next, we use the -m (module) option and run the Python virtual environment module and create a new virtual environment inside our new directory. We created one called “shellgpt.”
python3 -m venv shellgpt

This gives us a private, virtual environment called “shellgpt”, inside our “shellgpt” directory. To activate it we need to run a script called “activate.” This is located in the “bin” directory of our virtual environment.
source shellgpt/bin/activate

Note the “(shellgpt)” in front of the command prompt.
Step 3: Create a ChatGPT API Key
To access the features of ChatGPT, you’ll need an OpenAI API key. You can use an existing API key if you have one, or you can create one on the OpenAI website.
Follow the link and either log in or sign up.
When you’re logged in, click your account name in the top-right corner and select “View API Keys” from the menu.

On the API keys web page, click the “Create New Secret Key” button.

Type in a name for your key—it can be anything—and then click the green “Create Secret Key” button.

Your new key is displayed to you. You only get to see your key this one time. If you log out and back in, you’ll see an entry for the key, but you won’t be able to view the entire key string. So, copy the key and paste it into an editor, and save the file with an obvious name.
Step 4: Export the API Key
We need to make the key available to ShellGPT. The easiest way is to export it as an environment variable. You can do this on the command line, but it only lasts until you reboot your PC. Adding the export command to your “.bashrc” file exports the environment variable for you automatically, each time you open a terminal window.
To do it on the command line, type “export OPENAI_API_KEY=” and then paste your API key by pressing “Shift+Ctrl+v”, so that it looks like the screenshot below.
export OPENAI_API_KEY=<your secret API key>

To put the export command in your “.bashrc” file, use your favorite editor and add the command to your file.
gedit ~/.bashrc

Save your changes and close the editor. To force your terminal session to reread your “.bashrc” file, use the source command.
source ~/.bashrc

Step 5: Install ShellGPT
With all of the preparation out of the way, we can install ShellGPT using the Python pip command.
python pip shell-gpt

The installation will begin, and a variety of package names will scroll by in your terminal window.
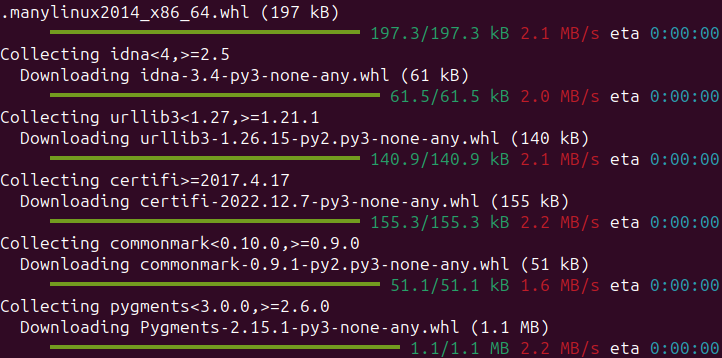
When it’s finished we can, finally, use ShellGPT to access ChatGPT.
Step 6: Use ShellGPT
The ShellGPT command is sgpt. We provide our text prompts to this command, and press “Enter.”
sgpt "Who is Thursday named after?"

ShellGPT acts as the middleman between us and ChatGPT, and displays the response from ChatGPT.
That’s great, it’s all working. But it’s a bit long winded to have to cd into the directory we created the virtual environment in, and then issue the source shellgpt/bin/activate command before we can use ShellGPT.
A better way is to create an alias that does all of that for us. Edit your “.bashrc” file and add this line.
alias chatgpt="cd ~/shellgpt/;source shellgpt/bin/activate"
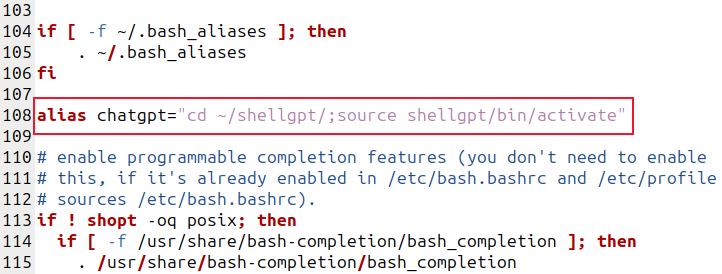
Remember to use the names of the directory and virtual environment that you created. We called our alias “chatgpt”, but you can use whatever name you prefer. Save your changes, and use source to read the “.bashrc” file again.
source ~/.bashrc

Now, at a normal command prompt, entering the name of your alias and hitting “Enter” places you in your Python virtual environment, which is activated and ready for your input.
chatgpt

Learning ShellGPT Commands
The ShellGPT GitHub page has much more information on using ShellGPT and its command line options.
For example, the --code option limits the output of ShellGPT to show program code only. Normally, if we ask it to generate some code, it does so, but it generates a description too.
sgpt "Show me an example of a recursive function in C"

By adding the --code option, the description is suppressed. This would be handy if you want to redirect the output into a file.
sgpt --code "Show me an example of a recursive function in C"

ShellGPT, through ChatGPT, can also generate syntax-correct Bash commands and shell scripts.
“In Conclusion”
In conclusion, ShellGPT is a powerful tool for programmers and system administrators alike. Its ability to assist with tasks such as managing operating systems and programming languages makes it an invaluable asset to any team. With its intuitive interface and vast knowledge base, ShellGPT is sure to become a go-to resource for those looking to streamline their workflow and increase productivity.
Or at least, that’s what it says.
