
The stable version of Windows 11 will arrive by the end of 2021, but the preview release is already available. You can use Parallels 17 to run Windows 11 on Intel and M1 Macs today. Here’s how.
What Is Required to Run Windows 11 on a Mac?
Parallels 17, a virtual machine application, supports Windows 11 prerelease versions on macOS Monterey. The home version of the app costs $80, but if you already have an older version, snag the upgrade for $50. Browse the Parallels website to buy the relevant version.
On Intel Macs, you can use Windows 11 after installing the Windows 10 Insider Preview build. To do this, you’ll need a Microsoft account registered with the Windows Insider Program.
While the M1 Macs can run Windows software, they cannot run the standard Windows 11 version. So, you need to install Windows 10 on ARM first and then switch to Windows 11.
Why Use Parallels?
There are in fact multiple ways you can run Windows on a Mac. You can with Boot Camp, but it means you’ll need to dual-boot it with macOS, sacrifice some storage space, and use only one of the OSes at a time. On the other hand, with a virtual machine app like Parallels, you won’t have to dual-boot or reboot your Mac every time you use Windows 11.
How to Install Windows 11 in Parallels on Mac
First, you’ll need to download and install the Parallels 17 or higher on your Mac.
Make sure you permit Parallels Desktop to access your Mac’s Desktop, Documents, and Downloads folders to function correctly.
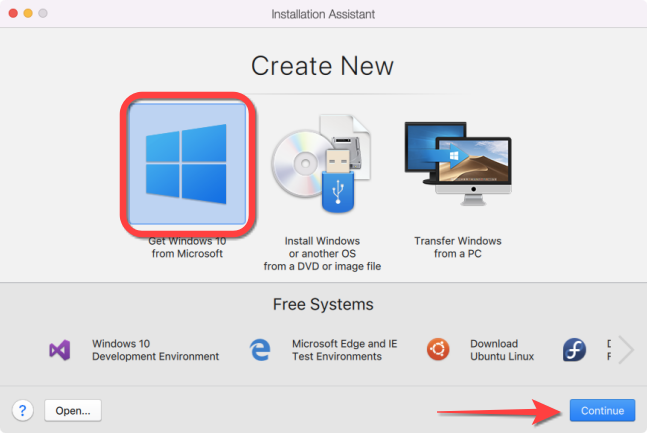
Open the Parallels app and run its virtual machine wizard. Then, click on the “Get Windows 10 from Microsoft” and select the “Continue” button.
Note: M1 Mac users need to download a copy of Windows 10 on ARM Insider Build and install the VHDX file using the Parallels installation wizard.
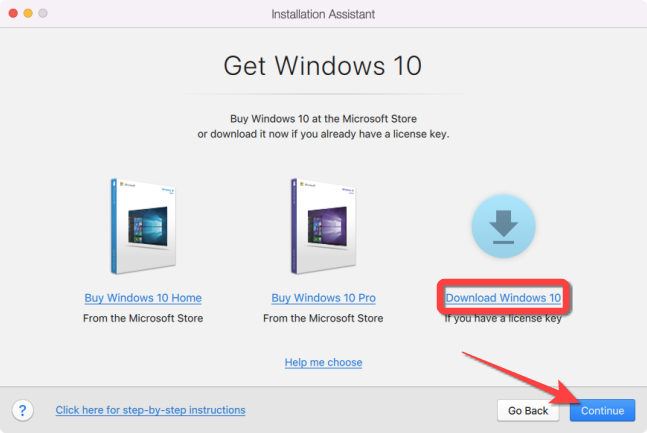
Select “Download Windows 10” and click the “Continue” button.
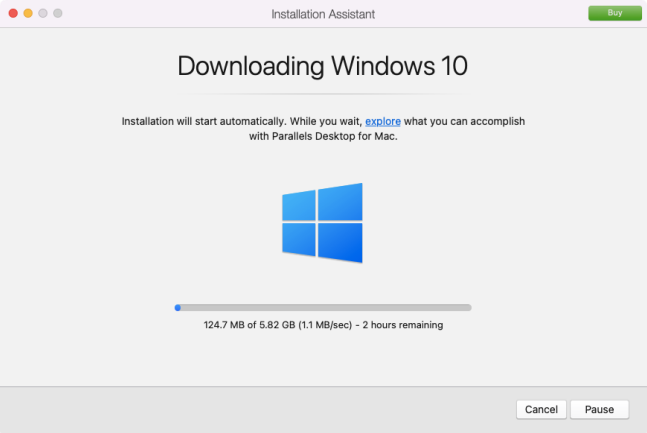
The wizard will download the latest build of Windows 10 and install it. This might take a few minutes.
After the Parallels Wizard finishes installing, select “Click to Continue.”

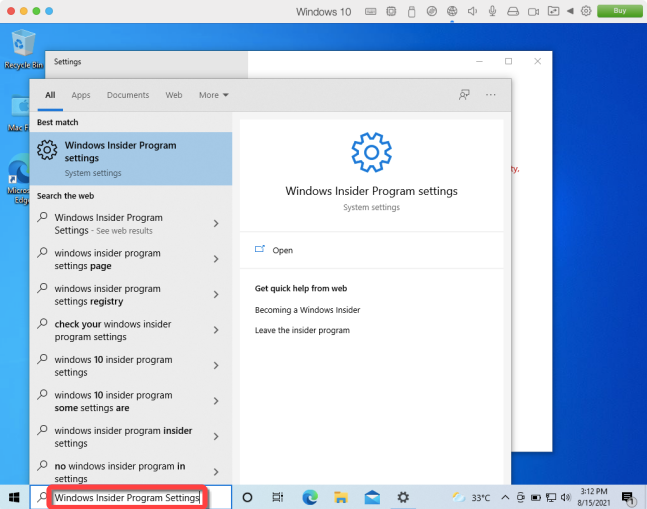
In the Windows 10 virtual machine, type “Windows Insider Program Settings” in the search box and hit Enter.
Advertisement
On the left column, select the “Get Started” button in the Windows Insider Program section of the Settings app.
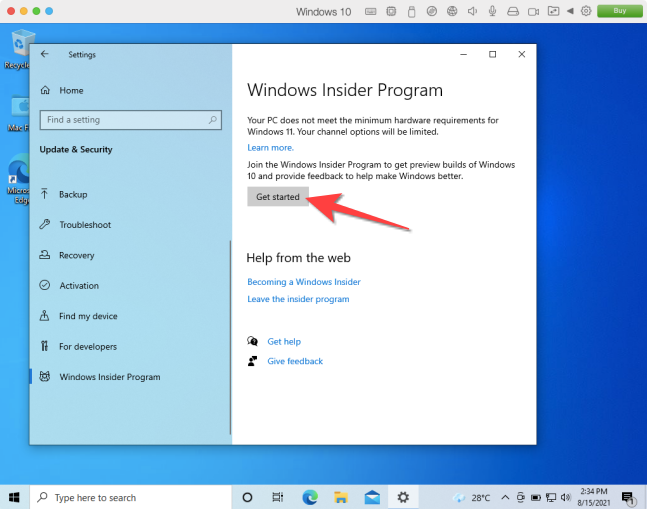
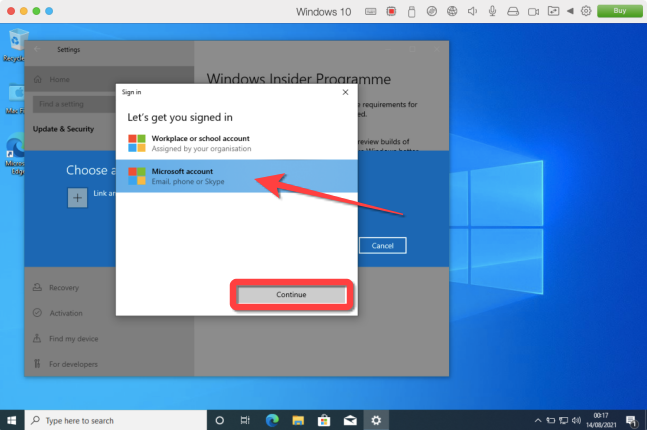
Then, link your Microsoft account that’s registered to the Windows Insider Program.
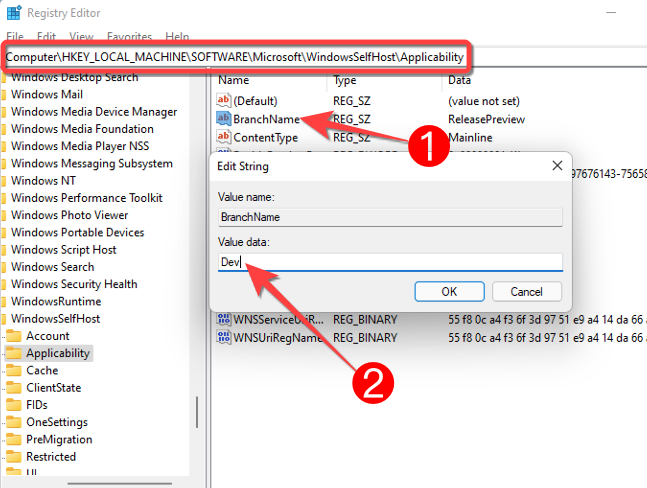
After this, you’ll see the Release Preview Channel available for Windows 10 Insider Program account. Next, you’ll need to edit specific Registry keys and switch from Release Preview Channel to Dev Preview Channel.
Open the Registry Editor in Windows 10 with Administrative privileges. After permitting it to make changes, you can navigate to the following key or copy-paste in the address bar of the Registry Editor:
HKEY_LOCAL_MACHINESOFTWAREMicrosoftWindowsSelfHostUISelection
From the right-hand side pane, double-click the “UIBranch” key and type “Dev” in the “Value data” box.

Next, navigate to or copy-paste the following key in the address bar of the Registry Editor:
HKEY_LOCAL_MACHINESOFTWAREMicrosoftWindowsSelfHostApplicability
From the right-hand side pane, double-click on the “BranchName” key and type “Dev” in the “Value data” box.
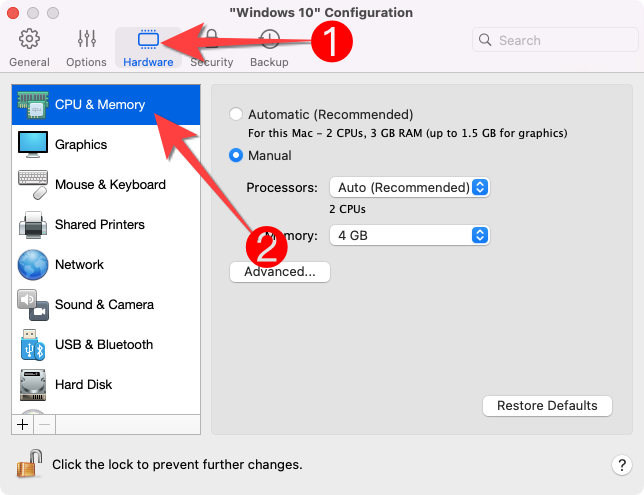
Before you proceed, shut down Windows 10 and check whether the Parallels has at least 4GB of memory assigned. To check, click the gear-shaped “Configuration” icon in the top-right corner of the Parallels window.
![]()
Select the “Hardware” tab and choose “CPU & Memory” to see the memory assigned. Change the value to at least 4GB if less than that is automatically assigned.
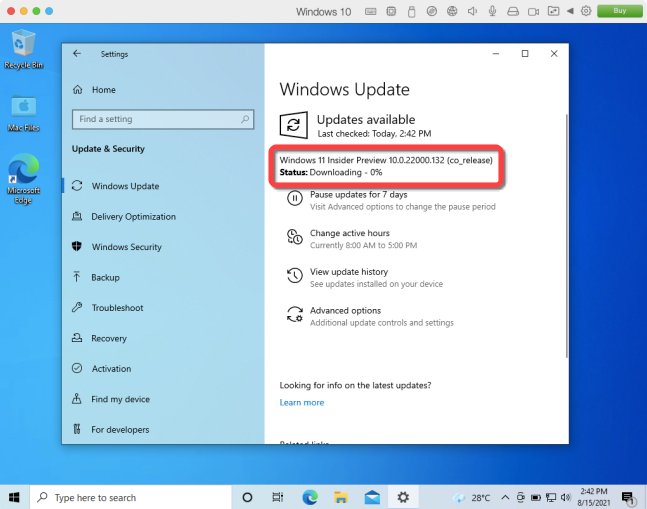
Next, restart the Windows 10 VM and head to Windows Update to fetch fresh updates. The download of the Windows 11 Insider Preview build should begin.
Once the Windows 11 installation is complete, restart Windows to apply the changes.
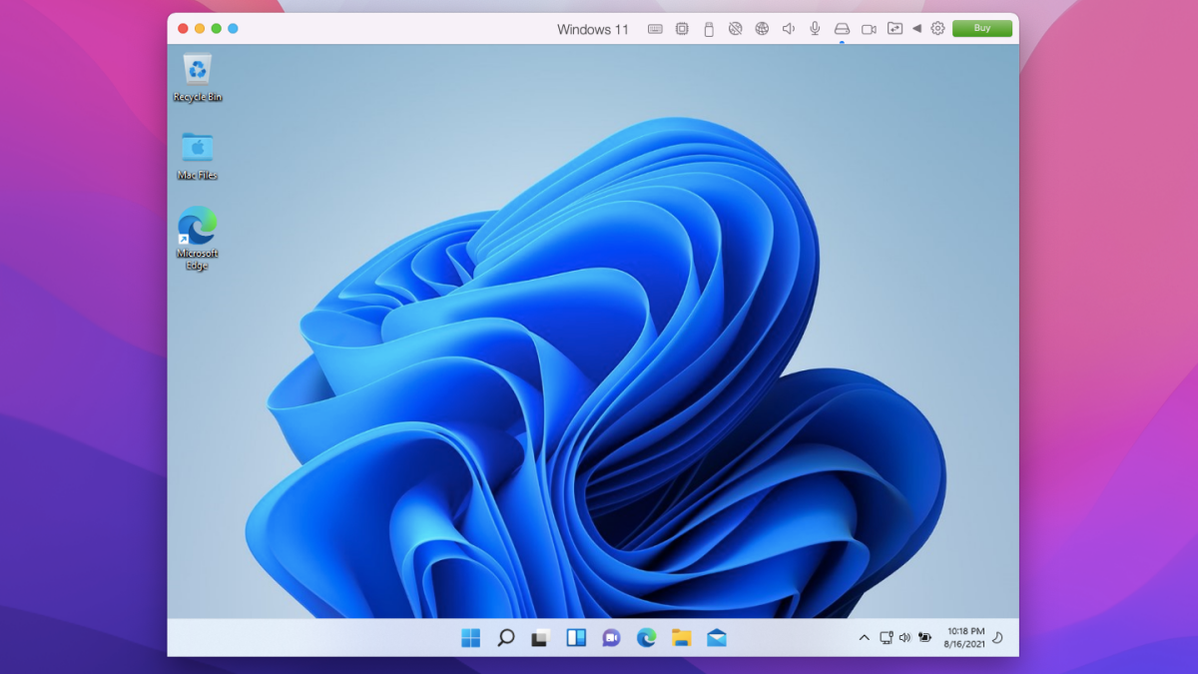
That’s it! You can enjoy Windows 11 on your Mac using the Parallels Desktop 17 or higher version. Once Windows 11 is available to the public, try other ways to run Windows software on a Mac.