
Guitarix is the best virtual amplifier and effect emulator for Linux, so if you are a guitar or a bass player the following quick guide on how to set it up and use it is for you.
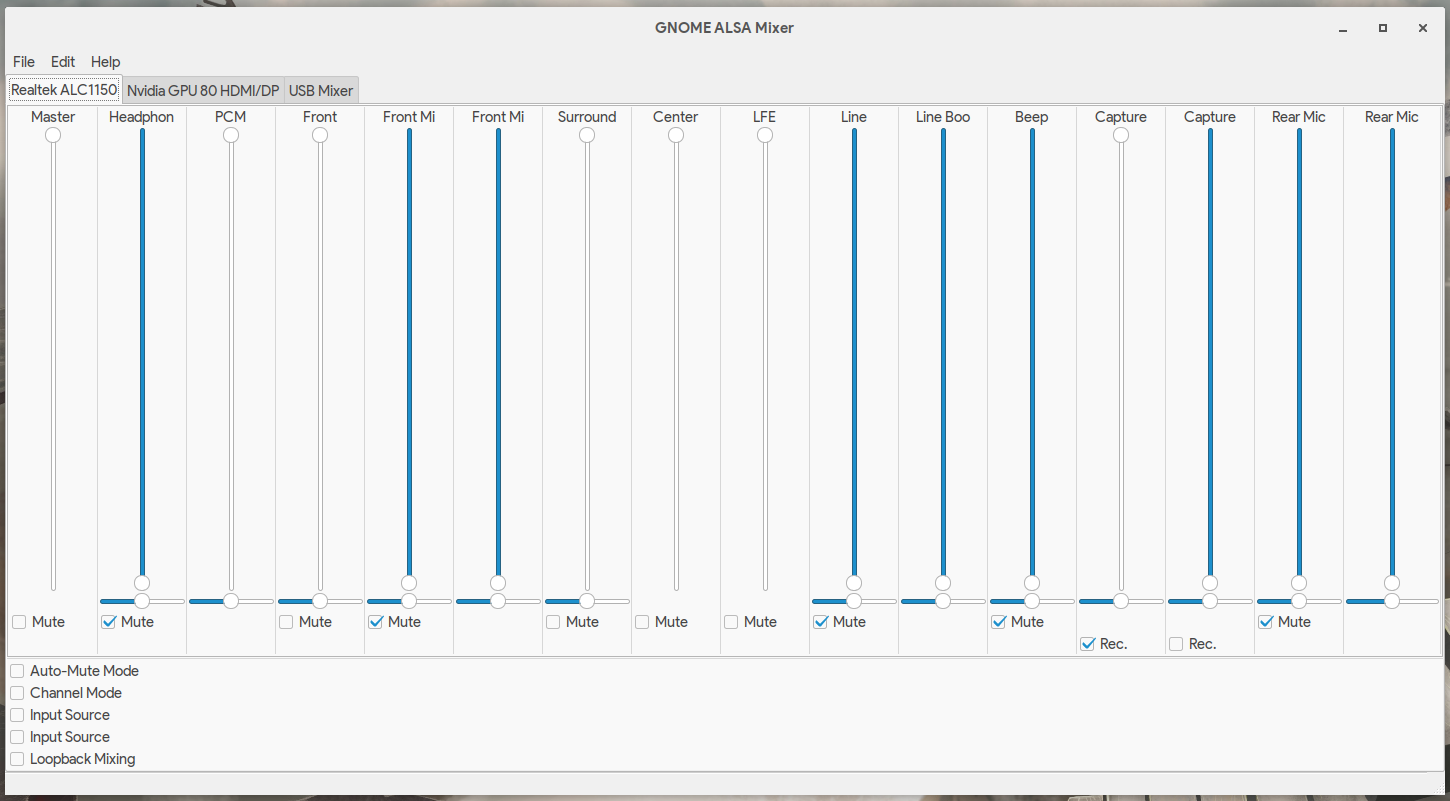
The first part is the most confusion as we will have to set up the jack connections and audio. Start by connecting your guitar/bass to the audio card by using a 6.3mm to 3.5mm adaptor and connecting the instrument to the microphone port. Next, open your ALSA Mixer (I am using GNOME ALSA Mixer) and check the “Rec.” box on the primary capture channel.
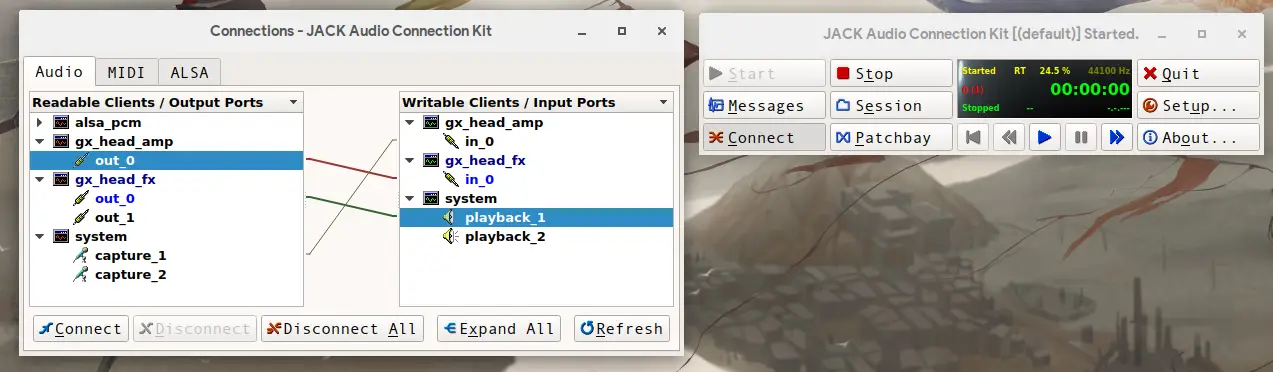
Next, launch Guitarix and select the “Start Jack” option when asked. Once the program is launched, fire up the “Qjackctl” utility which we will need in order to set up the connectivity. Click on the “Connect” button and a new window with the JACK audio connections will open up. There you may select two items from the two lists and then hit the “Connect” button each time to link them. What we want to do here is to pass our instrument’s sound which is basically the “capture_1” through the GX Head Amp, then pass this from the amp to the GX Head FX, and finally from there to the playback which is our speakers or headphones. If that sounded confusing, just copy the diagram shown in the following screenshot.
If you did things right, you should be hearing the sound of your instrument coming out of your speakers by now. Get back to Guitarix and press the “Tuner” button located on the top panel. If it is updating itself then you have done it. If it looks dead then you have failed to connect the pieces so you have to turn back to the previous step.

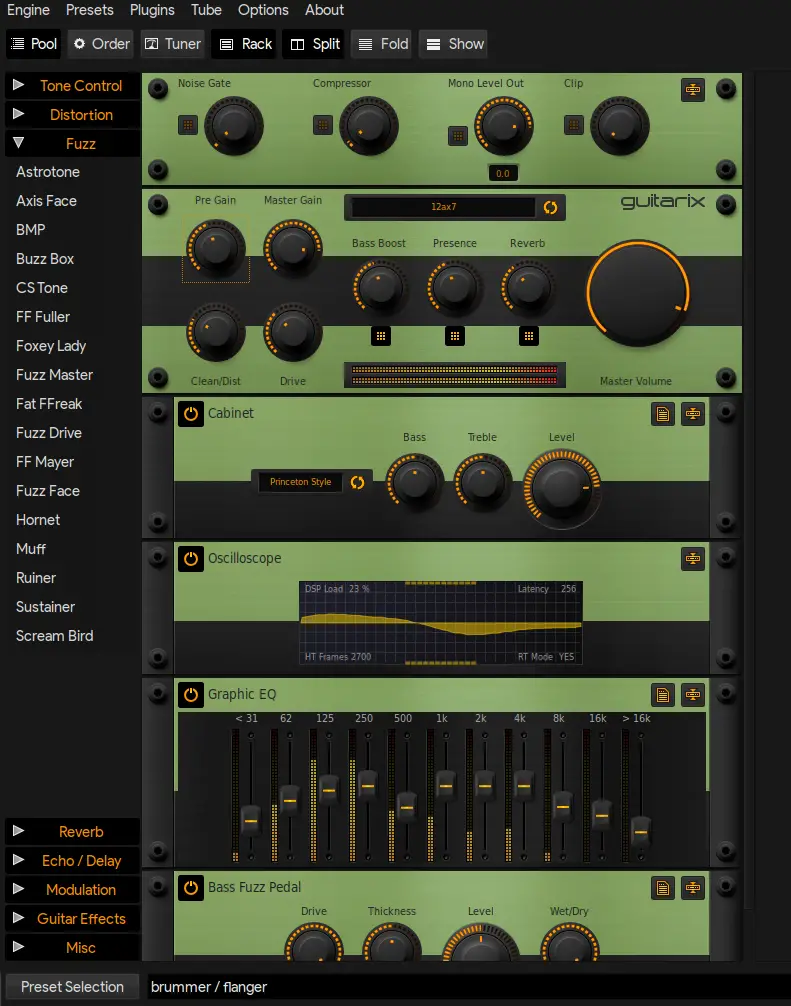
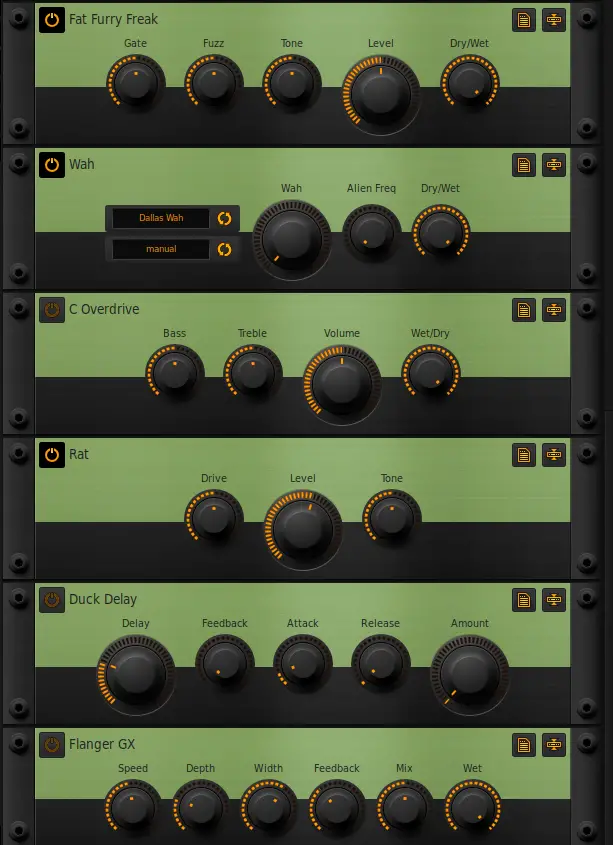
Supposing that all is well, you may start exploring your sound on Guitarix by starting with the basic settings of the amp head, pre-amp effect head, and cabinet. It is up to you to set these the way you want them, and then continue to add more from the Pool of the available stuff that is revealed when the “Pool” button on the top left is pressed. Just keep in mind that your sound will go from top to bottom, passing the available effects and audio processing units one by one, and one after another in the specific order that you have placed them.
You may re-order the effects that you added by selecting the Order mode and dragging the items into the desired position. This is also the mode that allows you to remove items by pressing the black button on their right side.
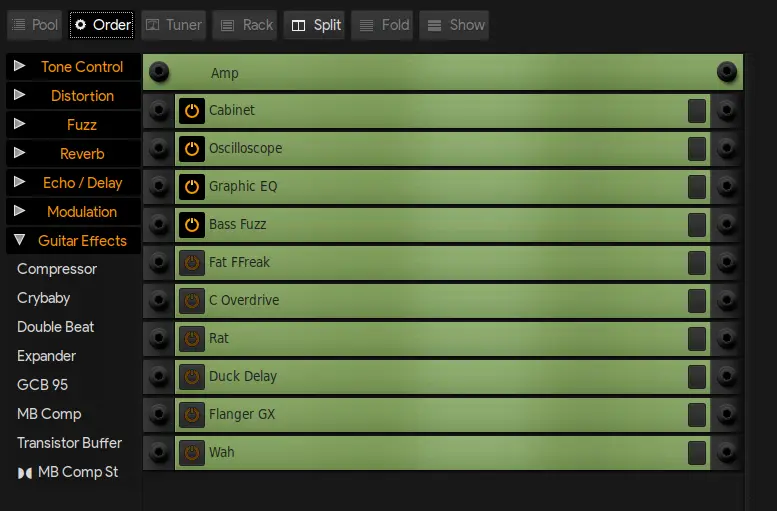
When on the rack mode, you may enable or disable the effects by clicking on the power button located on their top left. The items that you add are disabled by default, so you have to activate them.
Finally, on the bottom left, you will find pre-built presets that you may simply select and add from the items menu. These presets add effect items and settings that will provide you with a distinctive sound that was configured specifically for a certain tonal character. Simply put, you get to try “complete packs” and see if you like something.

If you don’t, do not despair. There are many presets for Guitarix available here and here (and probably elsewhere as well), so you can download these “.gx” files and then paste them on “/.config/guitarix/banks”. Have fun!