
The Samsung Galaxy A53 5G is one of the best smartphones under $500. In addition to offering a delightful design and powerful hardware, it also provides the best in class software support that even beats some of the best flagships on the market. If you just picked up the Galaxy A53 and want some help setting it up, you’ve come to the right place. Follow these simple steps to successfully set up your brand new Galaxy phone.
- After taking out the Galaxy A53 from the box, it’s time to power it on. Press and hold the power button on the left side until you see the Samsung logo on the screen. Wait until the phone boots up.
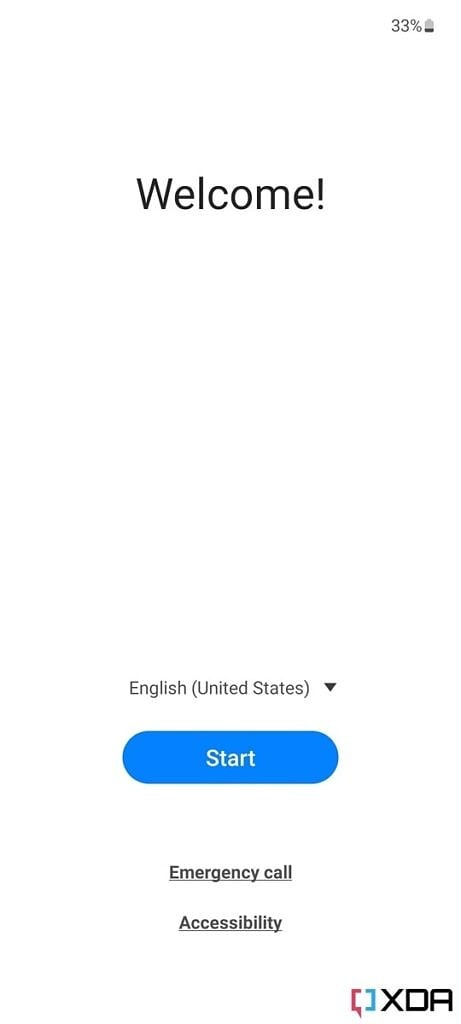
- On the welcome screen, choose the language of your choice. If you’re specially abled, you can also access the Accessibility features to guide you through the setup. Select Start once you’re ready.
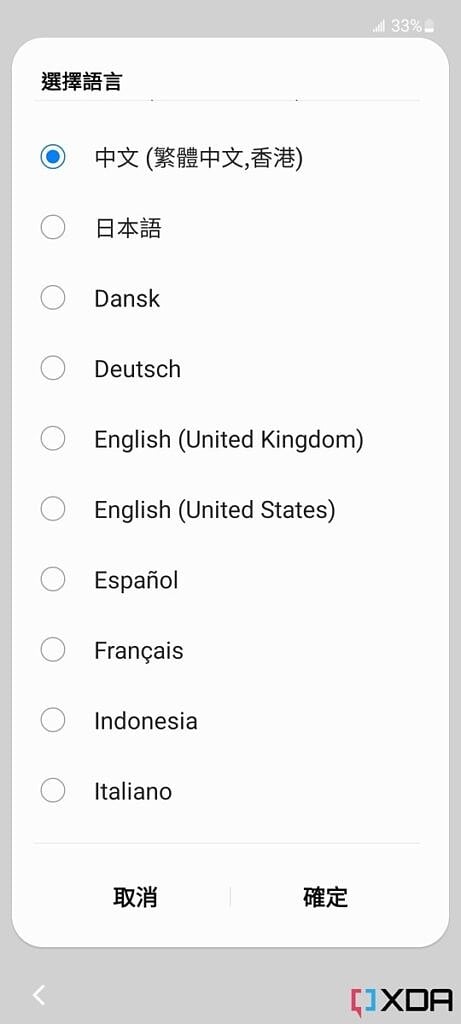
- Select your preferred language and select Next.
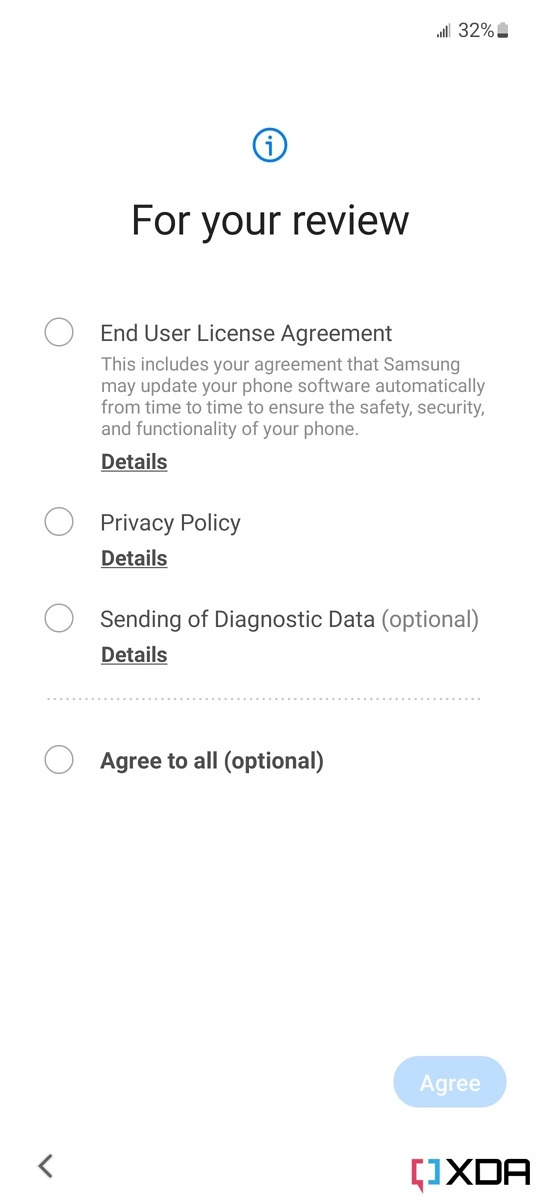
- Select the check boxes next to the Privacy policy and End user license agreement. You can’t proceed without accepting them. Sending diagnostic data is optional. It helps Samsung improve software and services by collecting data about how you use your phone, app crashes, etc. Hit “Agree” to go to the next screen.
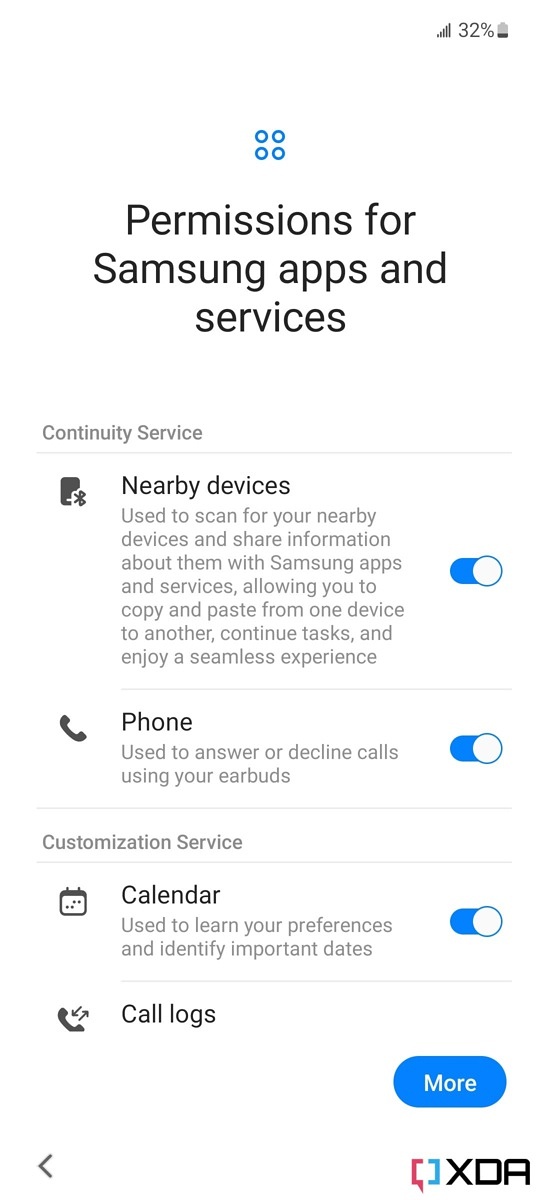
- Review permissions for Samsung apps and services. Some features might not work out of the box if you decide to toggle off some permissions. For example, if you deny Phone permission, you won’t be able to pick up or reject calls using your earbuds. But you can always enable them from device Settings later on. Click Agree when you’ve made the necessary changes.
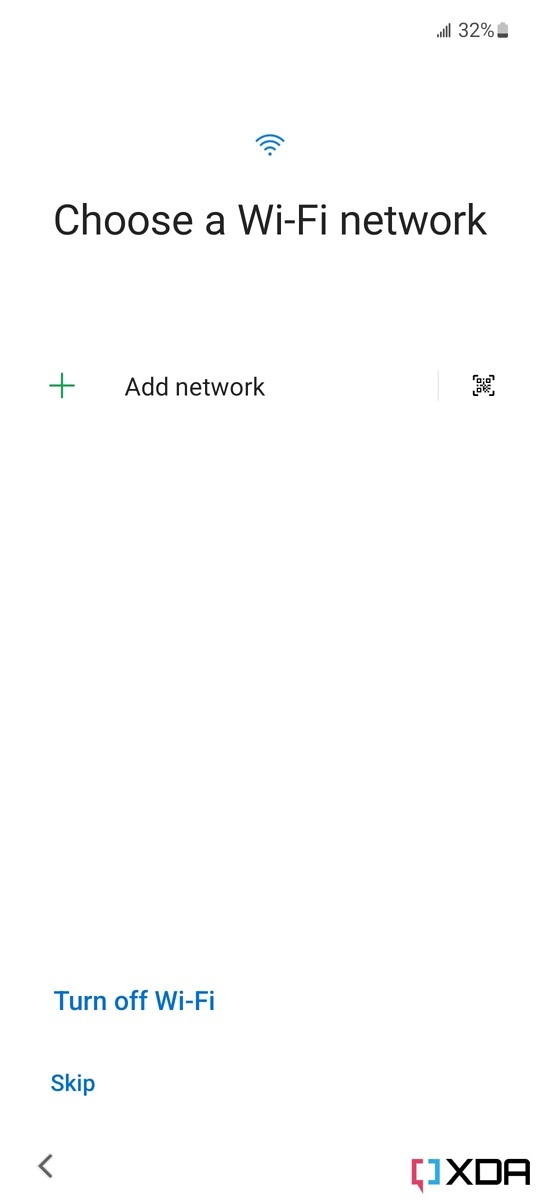

- It’s time to connect your phone to the internet to finish the rest of the setup. Select your Wi-Fi network from the list of available networks and enter the password to connect your phone. If you don’t have Wi-Fi, you can also use mobile data (assuming you have inserted the SIM card). You can also set up the phone offline, but you’ll miss out on critical steps such as adding your Google account and restoring your backup.
- Once the Wi-Fi/mobile data is connected, the phone will check for pending updates.
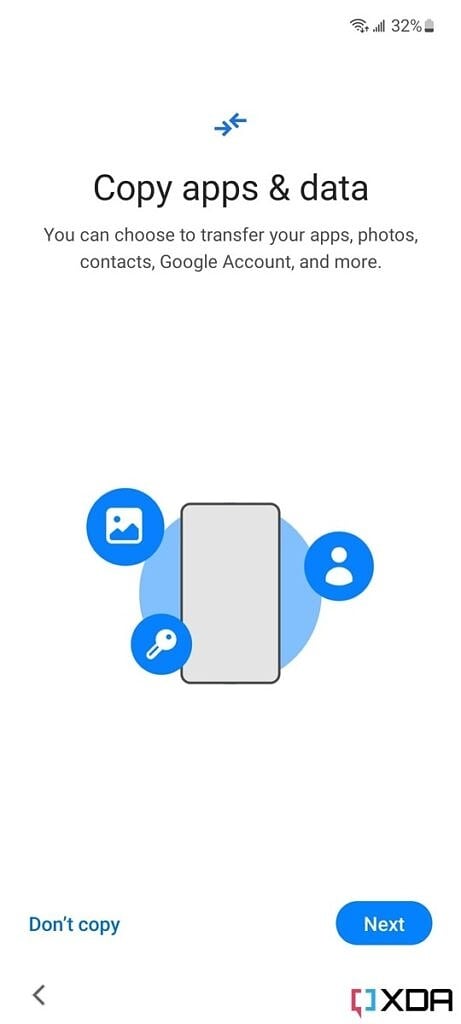
- On the next screen, you’ll be asked if you want to copy apps and data from your old smartphone. Choose Next and follow the on-screen prompts to restore your apps, photos, contacts, and other data. If you want to start fresh, choose Don’t copy.
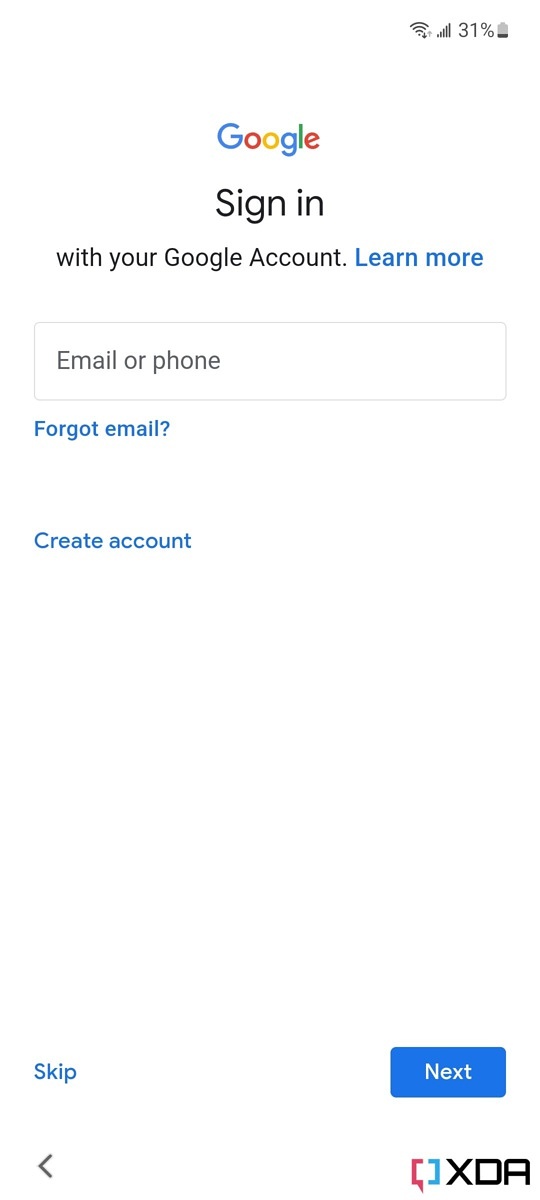
- You’ll be prompted to sign in with your Google account on the next screen. This is needed to let you access the Play Store and other Google services. Enter your Gmail address/phone number and password to log in. If you don’t remember these details, use the Forgot email or Forgot password options to recover your account. You can also Create a new account from this screen.
- Agree to the Google Term of Services, Google Play Terms of Services, and Privacy Policy and proceed to the next step.
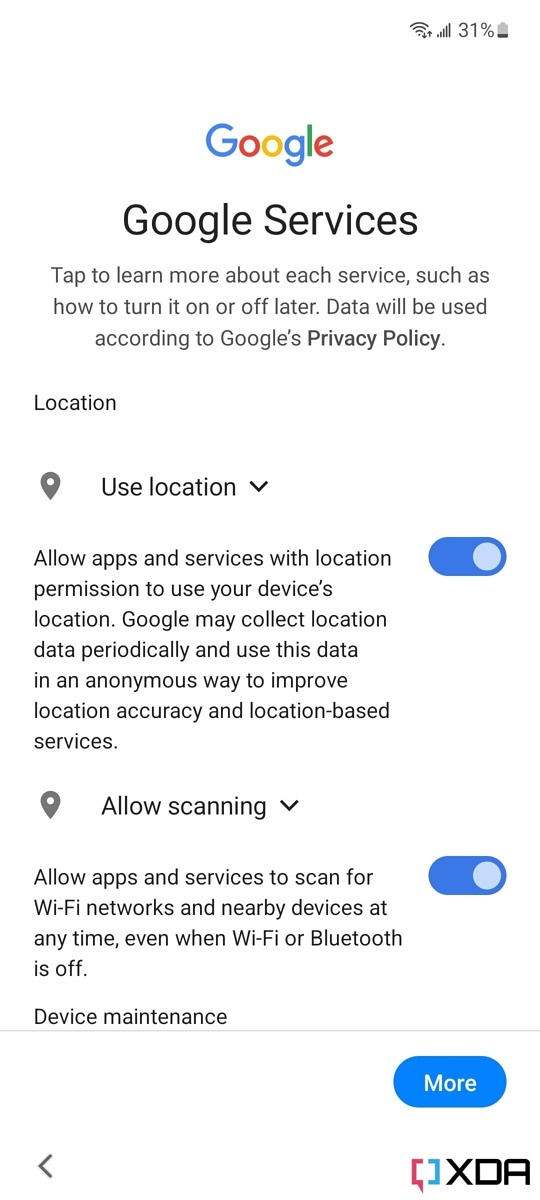
- Review backup, location, and device maintenance settings. Keep Back up to Google Drive toggled turned on so that your apps, app data, contacts, and device settings automatically back up to Google Drive. If you don’t want apps to access your device location, you can disable the Location and Wi-Fi scanning permissions here.
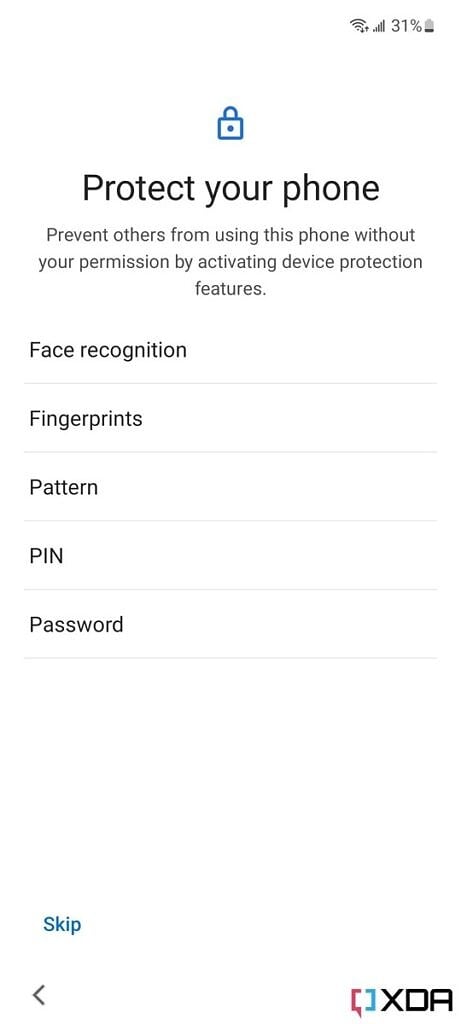
- Now, you’ll be prompted to set up a device security method to protect your phone. Fingerprints is the most secure option, but should you prefer convenience over extra protection, you can also choose face recognition. You can also set up a Pattern lock, PIN, or a Password. Follow the on-screen instructions to set up the desired security method.


- Next up, you’ll be asked if you want to install additional apps. These include first-party Samsung apps and third-party apps like LinkedIn and Microsoft Office. If you don’t want them, uncheck the boxes and select Ok.
- Wait for the phone to apply settings and get things ready. You might have to stare at this screen for a couple of minutes.
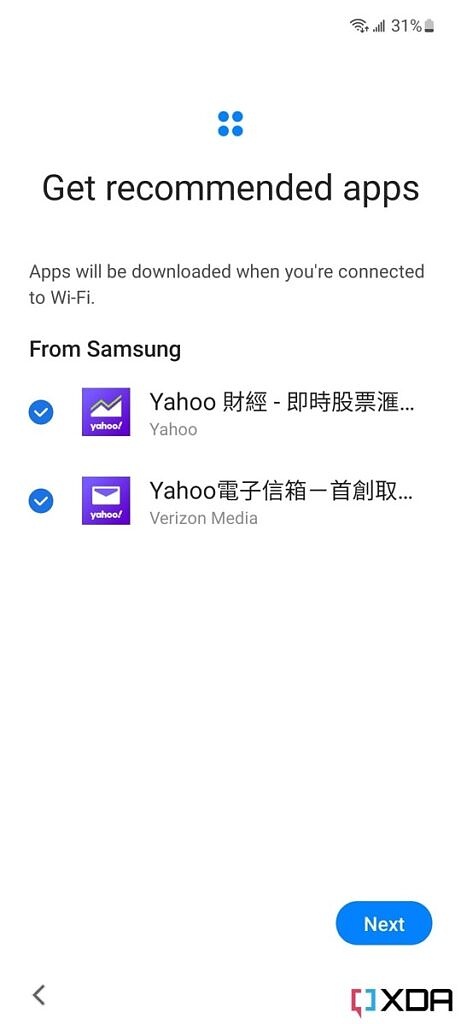
- You’ll be again prompted to install recommended apps, which are nothing but regional third-party apps that earn Samsung revenue when you install them. It’s safe to ignore them or install them as you see fit and select Next.
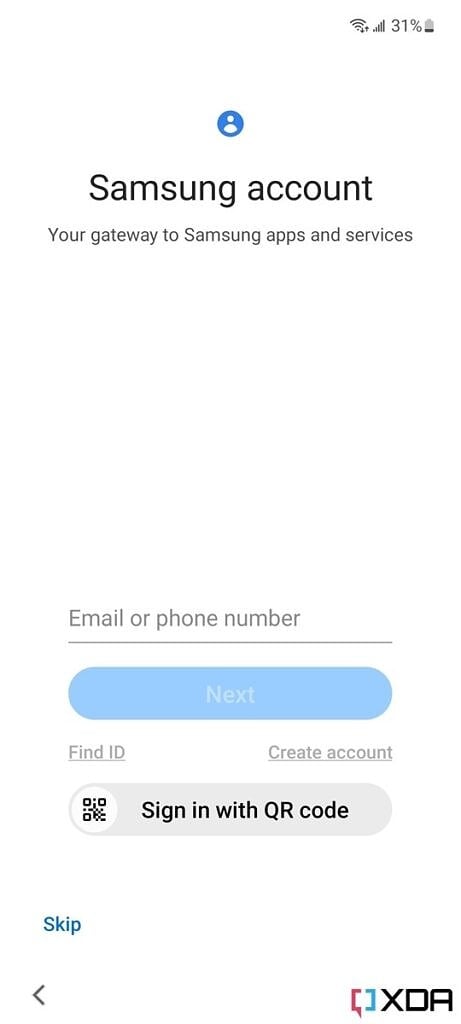
- The final step involves adding your Samsung account. If you want to use Samsung services like Samsung Health, you’ll need a Samsung account. This is a completely optional step, and you can always do it later by selecting Skip.

- That’s it! Select Finish and you’re ready to use your shiny new Galaxy A53 5G.
Samsung Galaxy A53 5G

- The Galaxy A53 is one of the best mid-range smartphones under $500.
Using a protective case will go a long way in keeping your brand new phone safe against drops, falls, and scratches. If you’re looking for recommendations, these are the best cases for Galaxy A53 5G to buy in 2022. While you’re at it, be sure to check out the best accessories for the Galaxy A53 5G.
The post How to set up the Samsung Galaxy A53 5G: A step-by-step guide appeared first on XDA.