
Jenkins is an automation server forked from the Hudson project, it has support for many SCM (Source Control Management) software systems including Git, SVN, and Mercurial. Jenkins provides hundreds of plugins to automate your project. Jenkins offers support for a’master/slave’ architecture, allowing it to host a large number of project builds.
How Jenkins ‘master/slave’ works?
Jenkins master/slave architecture is used for distributed build environments, where the workload of building projects is distributed to multiple agent nodes, and we can use different environments for each build.
In the Jenkins ‘master/slave’ architecture, a master represents itself as a basic Jenkins installation, and handles all tasks for build system. Jenkins master node will be used for scheduling jobs, monitoring slave nodes, dispatching builds to slave nodes, recording and representing the build result, and also executing build jobs directly.
The Jenkins slave nodes set up for offload build projects from the master, and it’s required an establish connection between the master and slaves. Jenkins slave nodes can run on a variety operating systems like Windows and Linux, and there is no need to install full Jenkins packages on it.
In this tutorial, we will learn how to set up Jenkins master-slave architecture using the latest Ubuntu version Ubuntu 18.04 LTS. We will learn to set up the Jenkins master server, and then add other Ubuntu nodes as a Jenkins slaves.
Prerequisites
- Ubuntu 18.04
- master – 10.0.15.10
- slave01 – 10.0.15.21
- slave02 – 10.0.15.22
- Root privileges
What we will do?
- Install Jenkins Master
- Configure Jenkins Master Credentials
- Configure Slave Agent Nodes
- Add New Slave Nodes
- Prepare Slave Agent Nodes to Execute Build
- Testing
Step 1 – Install Jenkins Master
In this tutorial, we will not cover the basic Jenkins installation. There are a number of articles on HowtoForge that cover the Jenkins installation.
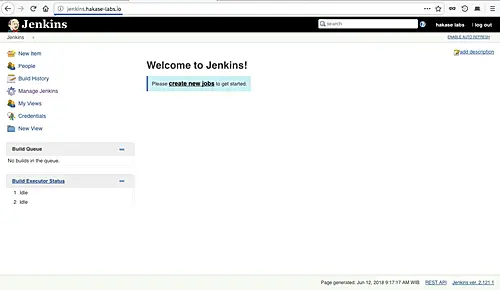
Following is our Ubuntu 18.04 master server with Jenkins installed on it.
Step 2 – Configure Jenkins Master Credentials
When you got the master server Jenkins installed, we need to configure the master server itself. By default, there are different ways to start Jenkins agent nodes, we can launch the agent nodes through SSH, windows administrative account, and via Java Web Start (JNLP), pick the best way depending on your environment setup and operating system.
For this guide, we will launch the agent nodes through ssh, and we need to setup Jenkins credentials on our master server.
Generate SSH Key
We will be using the ssh key authentication to setup our agent nodes, so we need to generate the ssh key for the Jenkins user and then upload the key to each server node manually using ‘ssh-copy-id’.
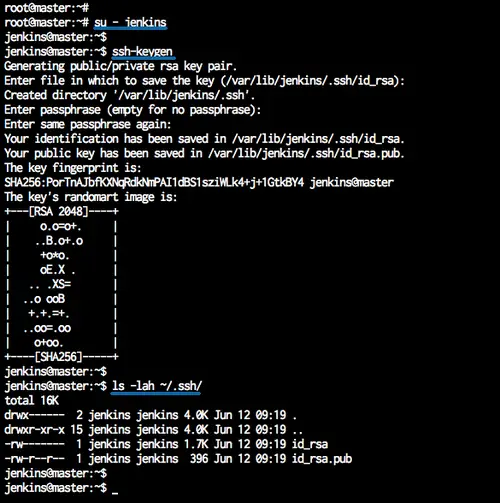
On the Jenkins master server, login to the Jenkins user and generate the ssh key.
su – jenkins
ssh-keygen
And you will get the ‘id_rsa’ private and ‘id_rsa.pub’ public key in the ‘.ssh’ directory.
Setup Credentials on Jenkins
Open your Jenkins dashboard and click on the ‘Credentials’ menu on the left.
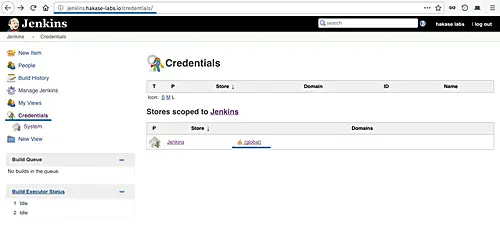
And click the ‘global’ domain link.
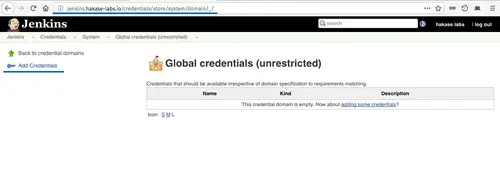
Now click ‘Add Credentials’.
Now choose the authentication method.
- Kind: SSH Username with private key
- Scope: Global
- Username: jenkins
- Private key: Enter directly and paste the ‘id_rsa’ private key of Jenkins user from the master server.
Click ‘OK’.
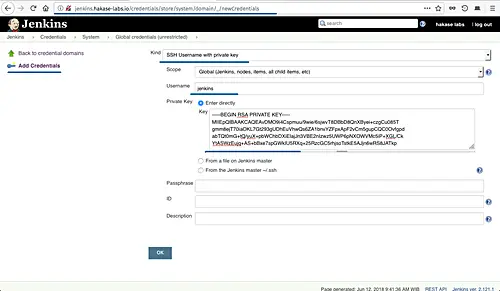
And the Jenkins credential with ssh auth key method have been created.

Step 3 – Set up Slave Nodes
Now we will setup slave nodes server by installing java on those server, and create a new Jenkins user.
Install Java
Install the ‘software-properties-common’ packages and add the java PPA repository.
sudo apt install software-properties-common apt-transport-https -y
sudo add-apt-repository ppa:openjdk-r/ppa -y
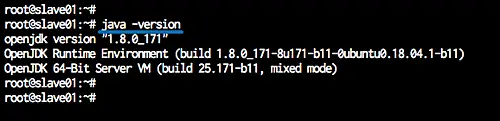
Now install java OpenJDK using apt command below.
sudo apt install openjdk-8-jdk -y
After the installation is complete, check the installed java version.
java -version
And you will get Java OpenJDK 1.8 installed on the system.
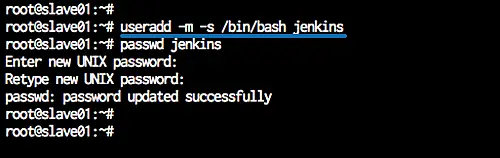
Add New Jenkins User
Now add the ‘Jenkins’ user to all agent nodes.
Run the command below.
useradd -m -s /bin/bash Jenkins
passwd Jenkins
The ‘Jenkins’ user for agent nodes has been created.
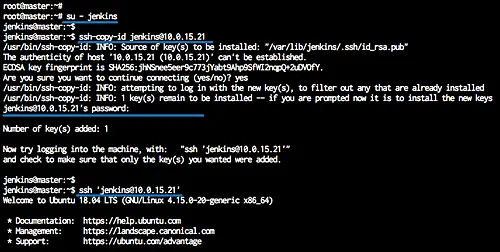
Copy the SSH Key from Master to Slave
Next, we need to upload the key ‘id_rsa.pub’ from the master to slave server nodes. We need to upload to each server nodes using ‘ssh-copy-id’ command as below.
ssh-copy-id [email protected]
ssh-copy-id [email protected]
Type the Jenkins user password.
The ssh key ‘id_rsa.pub’ has been uploaded to all agent nodes.
Step 4 – Add New Slave Nodes
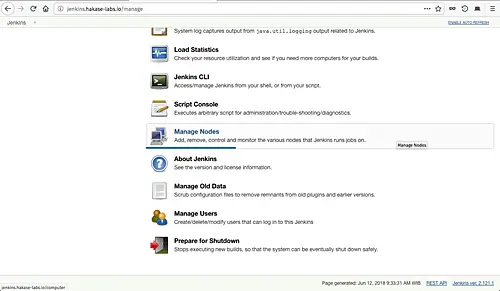
On the Jenkins dashboard, click the ‘Manage Jenkins’ menu, and click ‘Manage Nodes’.
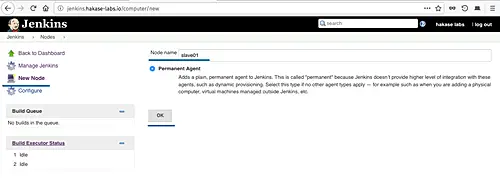
Click the ‘New Node’.
Type the node name ‘slave01’, choose the ‘permanent agent’, and click ‘OK’.
Now type node information details.
- Description: slave01 node agent server
- Remote root directory: /home/jenkins
- Labels: slave01
- Launch method: Launch slave agent via SSH, type the host ip address ‘10.0.15.21’, choose the authentication using ‘Jenkins’ credential.

Now click ‘Save’ button and wait for the master server to connect to all agent nodes and launch the agent services.
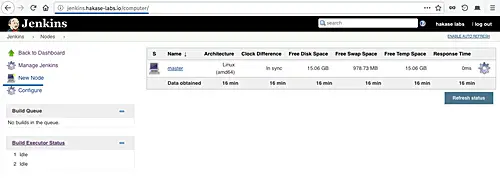
Below are the results when the master server is connected to all agent nodes.

Jenkins slave nodes has been added to the master server.
Step 5 – Prepare Slave Agent Nodes to Execute Build
In this step, we will configure the Jenkins master to execute build on the slave agent nodes.
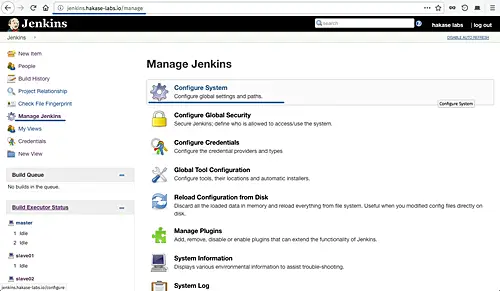
Click on the ‘Manage Jenkins’ menu and then click ‘Configure System’.
Now go to the ‘Slave Setups’ section and define all you need as shown below.
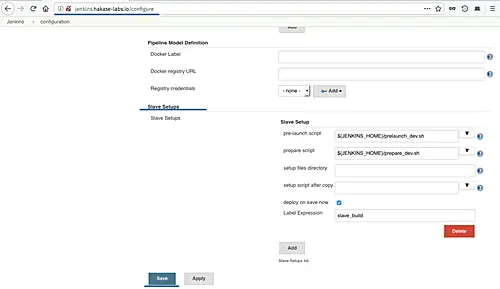
More info about the ‘Slave Setups’ on link.
Click ‘Save’ button and now we’re ready to execute build on slave agent nodes.
Step 6 – Testing
Now we want to create a new simple build for Jenkins, and we want to execute the build on the bot ‘slave01’ and ‘slave02’ agent nodes.
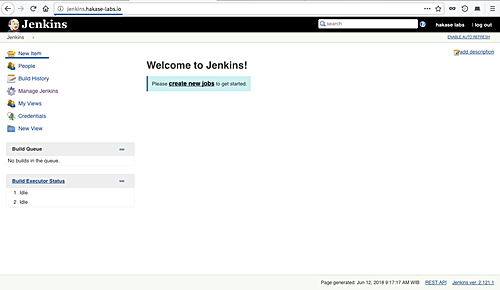
On the Jenkins dashboard, click the ‘New Item’ menu.
Type the item name, choose the freestyle project, and click ‘OK’.

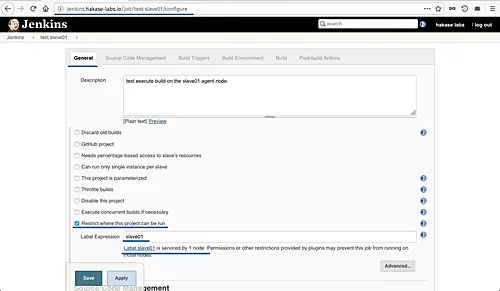
On the general section, type the job description and check the ‘Restrict where this project can be run’ option.
On the ‘Label Expression’, specify the node such as ‘slave01’.
Move to the build section and choose the ‘Execute shell’ option, type the command as below.
top -b -n 1 | head -n 10 && hostname
Click ‘Save’ button, and you will be redirected to the job page.

Click the ‘Build Now’ to build the project, and then click item on the ‘Build History’ section.
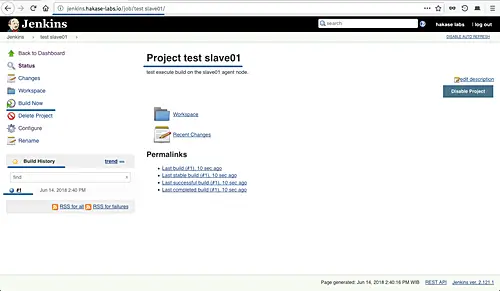
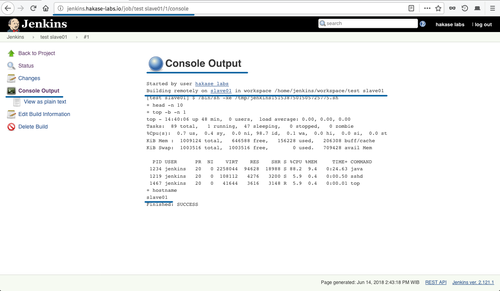
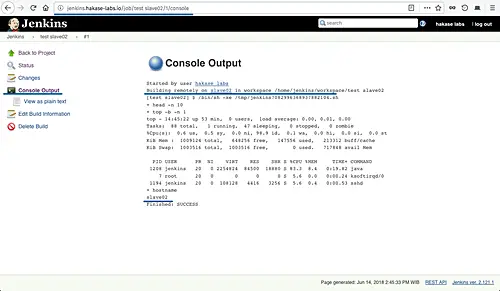
And the following is my result.
Build on the ‘slave01’ agent node.
Build on the ‘slave02’ agent node.
Installation and configuration of Jenkins master/slave architecture and the distributed builds Jenkins has been completed successfully.
References