

Most Docker images are distributed without any verification that they’re what they claim to be. You can increase trust in your images by digitally signing them. This proves to users that you published the image, not an imposter.
Docker’s signing system is known as content trust. It’s exposed through the docker trust CLI command. Content Trust uses key sets to let registries verify the identity of prospective publishers. Users of signed images can be confident they come from the expected source.
Generating Keys
You’ll need a key pair to start using Content Trust. Key pairs can be issued by certificate authorities or generated by the Docker CLI.
Run docker trust key generate your-name to create a key. You’ll be prompted to enter a passphrase. This will need to be supplied each time you use the key to sign or verify images. Press enter at each prompt to continue.
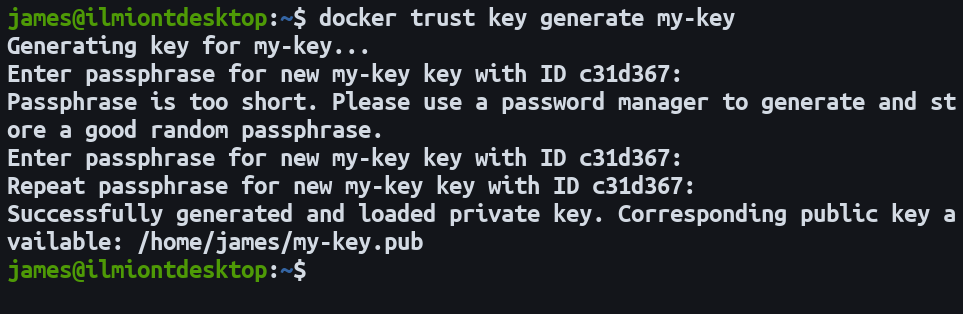
Once you’re done, two files will be generated in ~/.docker/trust: the private key and its corresponding public key. Similarly to SSH keys, the private key should never be shared and must not be lost. If you need to move between machines, you can import a private key file into another Docker installation using docker trust key load my-key.pem.
Adding Your Public Key to Your Registry
Docker Hub supports all the features of docker trust. If you’re using a private Docker Registry server, a more involved setup process is required.
Advertisement
The Registry server doesn’t offer built-in signature support. You need a separate Docker Notary service that handles signature verification for image pushes and pulls. Notary has three components, the server, a signing service, and a MySQL database. It should be deployed on the same URL as your registry server.
You can get Notary up and running by using its Docker Compose file:
git clone https://github.com/theupdateframework/notary.git
docker-compose up -d
This basic deployment will run with a self-signed TLS certificate. It’s intended for development use only. You’ll need to trust the certificate authority file fixtures/root-ca.crt in the repository before clients can successfully connect.
sudo mkdir -p /usr/share/ca-certificates/extra
sudo cp fixtures/root-ca.crt /usr/share/ca-certificates/extra/notary.crt
sudo update-ca-certificates
The commands above will copy the certificate file into the ca-certificates storage location. update-ca-certificates reloads all certificates, adding the Notary authority to your system.
If you’re going to run Notary in production, you’ll need to setup authentication so only authorized users can add new keys. The NOTARY_AUTH environment variable should be set when starting the service with docker-compose. This accepts Base64-encoded credentials in username:password format. You’ll be prompted to supply these when interacting with Notary.
export NOTARY_AUTH=$(echo "username" | base64):$(echo "password" | base64)
docker-compose up -d
Advertisement
Now you’re ready to add your public key to your Notary server. Keys are added on a per-repository basis. This lets you isolate images from each other and enables support for delegated third-party contributors. You can add other individuals with publish rights later on by getting them to repeat the command with their private key.
docker trust signer add your-key-name registry.example.com/my-imageYou’ll need to enter the key’s passphrase. It’ll then be available on your registry server.
Signing Images
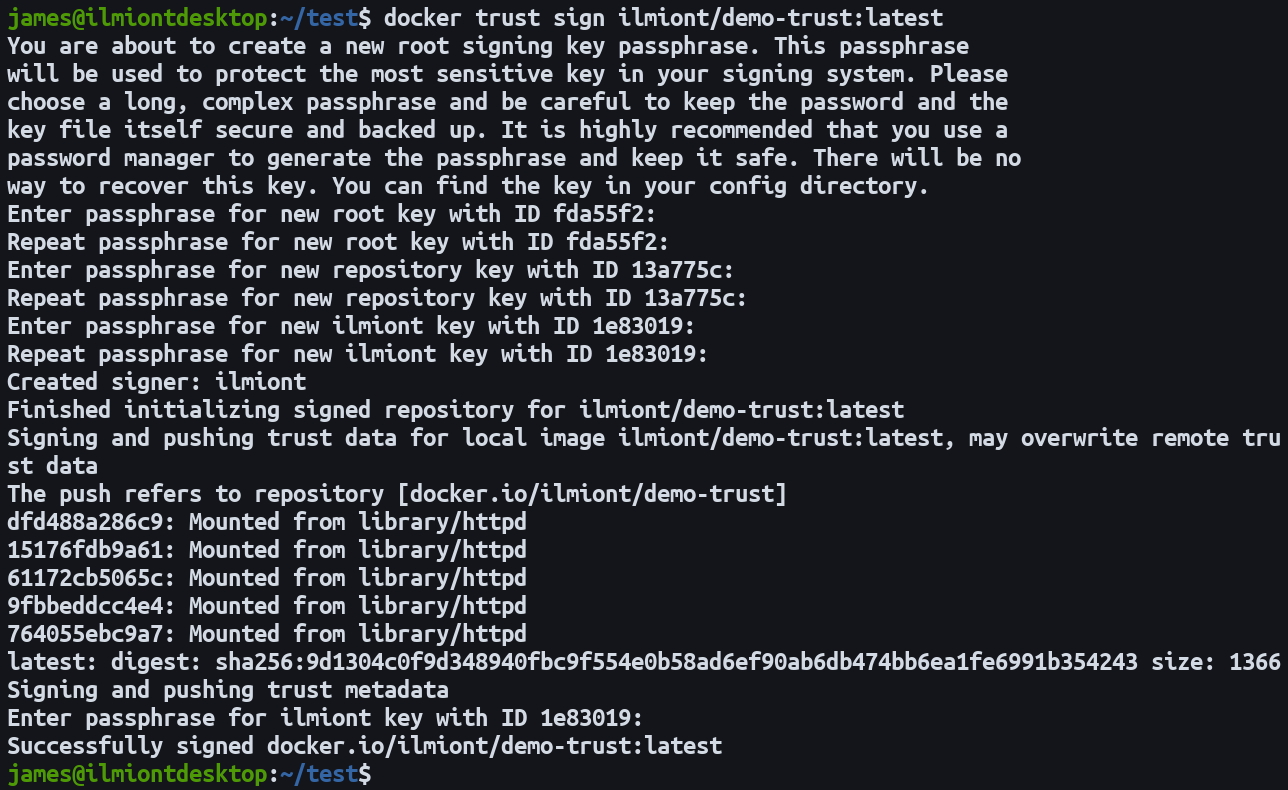
Once your key’s on the registry, you can start to sign images. Use the docker trust sign command. Make sure each image is tagged with the correct registry URL.
docker trust sign registry.example.com/my-image:latestThis command will sign the image with your key and then push it straight up to the registry. There’s no need to manually run docker push afterwards. You’ll need to setup a repository key and passphrase to protect the individual image’s trust data. Follow each prompt to setup your signing keys.
If you’ve got existing workflows using docker push, you can opt for that command instead of docker trust. Complete the preceding steps to create a key and add it to Notary. Set the DOCKER_CONTENT_TRUST environment variable to have Docker CLI commands detect Content Trust and apply it automatically.
export DOCKER_CONTENT_TRUST=1
docker push registry.example.com/my-image:latest
You’ll see the shell output matches what docker trust sign produces. Docker performs the same actions as the more explicit command.
Verifying Trusted Images
The DOCKER_CONTENT_TRUST variable reappears with greater importance when it comes to verifying images you pull. Docker does not attempt to verify images by default, even if they contain trust data. You must set the environment variable in your shell to activate content trust validation.
export DOCKER_CONTENT_TRUST=1
docker pull registry.example.com/my-image:latest
Advertisement
When the variable is set, all image pulls will be checked against their registry’s Notary server. If Notary can’t provide any trust data, the image is treated as unsigned and the pull will be aborted. This protects you from images published by malicious actors masquerading as a genuine publisher.
Docker Enterprise users can configure an optional daemon setting to prevent Docker Engine from working with untrusted images already on the host. These may have arrived in tar archives from an unsafe source.
Edit /etc/docker/daemon.json and add the following key:
{
    "content-trust": {
        "mode": "enforced"
    }
}
Reload the Docker daemon configuration with systemctl reload docker to apply the change.
You can inspect the trust status of an image using docker trust inspect. This will show the signatures associated with the image, allowing you to check whether it’s been signed.
docker trust inspect registry.example.com/my-image:latest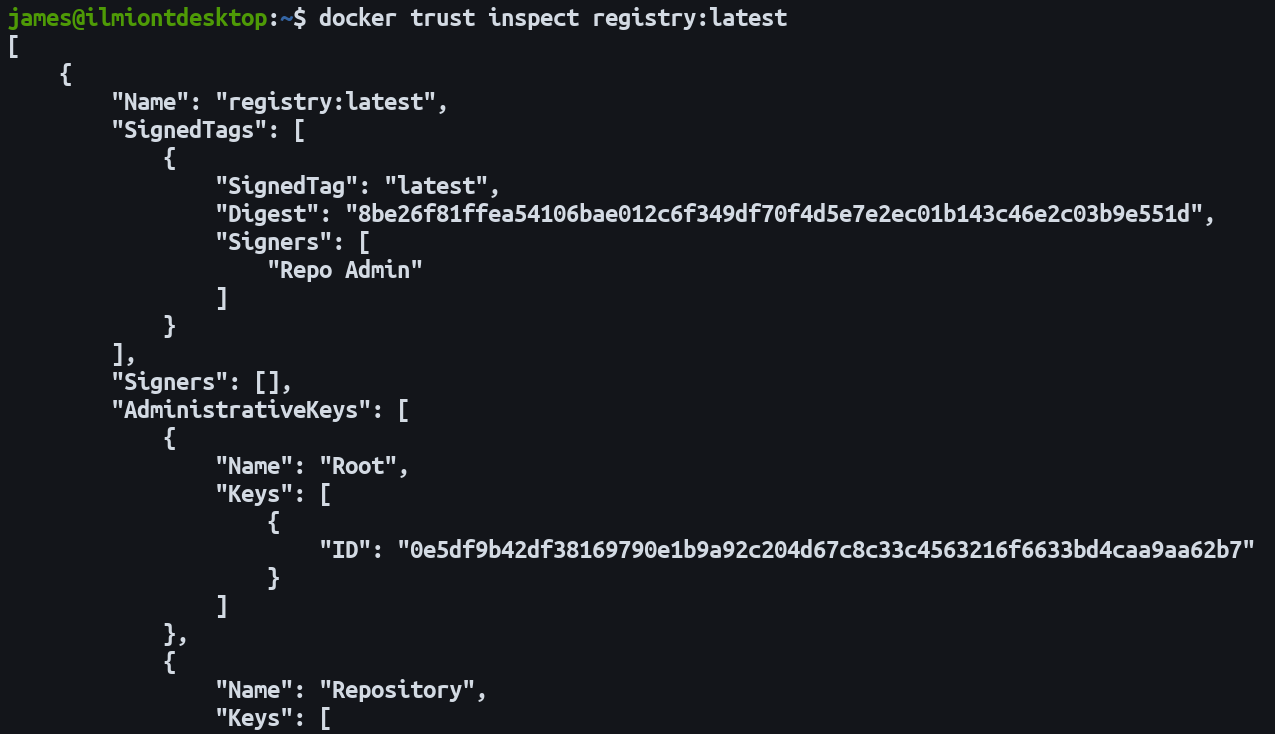
If you’ve published an image which you no longer want to sign, use the docker trust revoke command. This will delete the image’s trust data, causing it to fail all subsequent Docker client verifications.
docker trust revoke registry.example.com/my-image:latestSummary
Docker Content Trust adds digital signatures to the Docker ecosystem, increasing safety when using images. If you push images to Docker Hub, you’ve already got everything you need to use the feature. Set the DOCKER_CONTENT_TRUST environment variable and use Docker commands as normal.
Advertisement
For self-hosted registry users, setup is more complicated but still worth the effort in a trust-critical environment. At the time of writing, Notary still hasn’t got an official stable release and the documentation lives in its GitHub repository.