
If you’ve had your Mac for a few years you may be looking longingly at the Apple website wishing you could justify the expense of buying a new one. But luckily you don’t have to fork out for a replacement computer to enjoy speed increases: in this article we gather some simple tips to enhance the performance of your current device.
Lou Hattersley, Vic Lennard, Kenny Hemphill and Martyn Casserly also contributed to this article.
How to make a Mac run faster
Below we will run through the various checks you should make to speed up your Mac if it is running slow. We’ll cover why you need to have around 10% of your Mac’s total storage free to keep it running well and how you can free up that space if need be. We’ll also look at how to find out if a particular app is gobbling up all the processing power and how to shut it. And we’ll look at other changes you can make to your Mac to make it run faster, including adding RAM.
We also offer the following quick tips to speed up your Mac:
- Restart your Mac. If you haven’t restarted it for a while your RAM could be maxed out.
- Delete unnecessary files, apps and other items that are taking up space – especially if you have less than 10% of your Mac’s storage free.
- Update your software in case there is a software issue that is causing the problem.
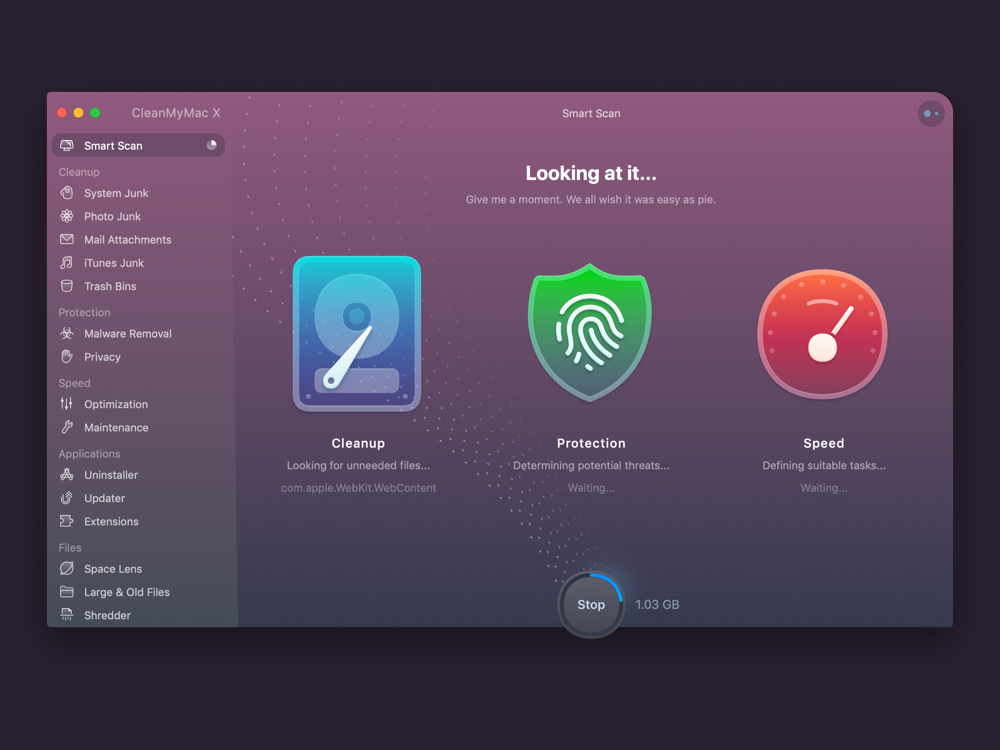
CleanMyMac X | Look inside your macOS
- Buy from MacPaw
Find hidden junk, large old folders, background apps, and heavy memory consumers. Use CleanMyMac X to free up space on your Mac and tune it for maximum speed. The new version effectively blocks adware, browser pop-ups, and virus extensions.
Close unnecessary apps
It might sound obvious but the best place to start is to close down any programs that are running unused in the background.
If you haven’t shut your Mac down recently your Mac may be devoting memory and CPU space to a program you haven’t used since last week, instead of to the apps you want.
A quick way to see which apps are running is to glance at the Dock at the bottom of the screen. Programs that are running will have a dot underneath them (if you can’t see this dot, open System Preferences and click Dock and ensure there is a tick next to ‘Show indicator lights for open applications’.)
Alternatively you can press Command + Tab to bring up the App Switcher and tab through to see which apps are open.
There are a few ways you can shut down these apps. Right-click (or Ctrl-click) on their icon in the Dock and choose Quit, or if you are using the App Switcher, select a program and press Command-Q to quit it.
If when you Right-click on the icon in the Dock you see the Force Quit option against it you likely have identified the culprit because a problem with that app is probably slowing down your whole system.
Should you not get any options at all or just a spinning beach ball, you can use the Apple menu to shut the unresponsive app down. To do this, click on the Apple logo in the top left corner then select the Force Quit option. In here you’ll see a list of all open applications, simply highlight the one you think is playing up and click the Force Quite button.
Use Activity Monitor to identify memory hogs
Some apps are more power hungry than others, and sometimes apps have issues that cause them to grab more than their fair share of your system resources.
If you want to see which apps are using up your system resources, open the Activity Monitor in the Utilities folder. (Or press Command-space bar and start to type ‘activity’ and press enter to open it from there).
Activity Monitor shows all the processes on your Mac (some of which you can’t, or shouldn’t, close) so go to the menu bar at the top of the screen and click View > Windowed Processes before you do anything.
Now, back in Activity Monitor, click on the CPU button and the “%CPU” column to list all programs by the amount of CPU they are using. You can also use this to see what Memory, Disk and Network different processes are using.
If you see that one app in particular is gobbling up a lot of CPU power then you can close it from here by selecting the app with the mouse and clicking on the x in the menu barat the top of the Activity Monitor.
Take note of the apps that are using the most power – they might be due an update which would make them work more efficiently.
Edit preference panes
Next, open System Preferences and check in the row at the bottom. This is where custom items are added to your System Preferences. If you’re not using them, they’re taking up your CPU’s capacity unnecessarily.
Right-click on an item and choose Remove From Preference Pane.
Stop programs from opening at startup
Open System Preferences and click Users & Groups. Now click on the Login Items tab to view which programs and services are launched when you first power up (or log in) to your Mac.
Highlight an item in the list that you don’t want and click on the Delete from Login Items (-) button at the bottom of the list.
Find out how much space is free
Part of your Mac’s performance depends on empty drive space. The Mac needs to be able to write and read its swap files and contiguous free space helps. This brings up the thorny issue of defragmenting a Mac.
Defragging a Mac is unnecessary because macOS but has its own built-in safeguards that prevent files from becoming fragmented in the first place. This is probably the reason why there isn’t a defrag option in Disk Utility.
But for these safeguards to work, you need at least ten percent of your disk drive empty. Replacing your hard disk with a larger capacity model is one answer but it will still fill up eventually.
Therefore, if you want your Mac to run at its best and you don’t have 10 percent of your storage space available you need to offload some of your larger files.
Your hard drive hosts a number of big files and folders. These include email files and backups, old versions of apps that you no longer need, and photos. If you frequently upload photos to your Mac and download music you may find that you quickly use up the space.
There are a few ways to find out how much space you have available. One way is to open the Apple menu by clicking on the Apple logo in the top left of your screen and then click on About This Mac.
Choose Storage from the tabs and it will calculate how much of your storage is being used, and also show you what is using it.
In newer versions of macOS you can click on Manage to get options for optimising your storage or storing photos and videos in iCloud rather than on your Mac.
You can also use paid software such as WhatSize or OmniDiskSweeper to view your disk usage.
We have a couple of articles that will offer more guidance about deleting space hogs on your Mac:
Here’s how to free up space on a Mac, plus we look in more detail at How to delete Other storage on the Mac here.
Sort out your syncs
If you use iCloud to sync files across multiple desktops and sync your photos to iCloud Photos, you may be suffering slowdowns while your system syncs in the background.
If you think this is happening to you there are a few things you can try.
If you use iCloud Desktop, avoid storing large documents on your desktop – don’t drag and drop a humongous video file onto your desktop unless you really really need access at the other location. In fact if you only store the documents you need access to on your iCloud desktop you may speed things up – and spend less time waiting for the files you actually need to sync up.
If you use iCloud Photos on your Mac and you don’t want that to be busy syncing images, avoid opening the app in the first place. If it proves problematic, turn off iCloud Photos on that device. We have more ideas of ways to stop Photos using all your system resources in the next tip.
Move your photos
You might be surprised by how much of your Mac’s storage is taken up by photos and home videos.
You may consider paying for iCloud Photo storage, thinking that this would mean you could delete photos from your Mac as they would be stored in the cloud, but unfortunately that isn’t how iCloud Photos works. Delete the photos from the Mac that they are stored on and you delete them from all your devices.
Of course if you already have iCloud Photos this might mean that a lot of space is being taken up on your Mac by photos that are stored in iCloud – photos taken on your iPhone, for example. In that case you might be better off turning off iCloud Photos sync on your Mac.
You may like to use another service to back up your photos in the cloud. You could try DropBox or Google Drive for example. Read about how to back up your Photo library in the cloud here: How to back up your Apple photo library.
If you would prefer not to use a cloud service, a better idea would be to set up a separate storage device and move the photos currently stored on your Mac there.
To do so, follow these steps:
How to move photos to a external hard drive
- Quit Photos.
- Copy the Photos Library by dragging it from the startup volume to your external volume.
- Once complete, hold down the Alt/Option key and launch Photos.
- In Photos, select Photos > Preferences, and in the General tab, click Use as System Photo Library.
We explain those steps in more detail here: How to move your Photos library to an external drive
Move your music
Another big folder is likely to be your Music library (iTunes on older versions of macOS), especially if you have movies and TV shows as well as music.
As with Photos, you could free up disk space by offloading your music files to an external drive. Here’s how to move your Mac’s iTunes Library to another location.
Your music library then needs to be relinked via the preferences/advanced tab.
Alternatively you could subscribe to iTunes Match, which, for £21.99 a year, will move all your music into the cloud so you can delete it from your Mac, and access it on any of your devices.
Once your music is in iTunes Match you can just download the tracks you want to listen to when you want to listen to them.
Read all about setting up iTunes Match here.
Empty the trash & downloads
An obvious way to free up space on your Mac is by emptying the Trash (right-click on Trash in the dock and choose Empty Trash).
You should also delete any items you’re unlikely to need from the Downloads folder. Click on Downloads to the right of the Dock and the arrow at the top to open it in the Finder and see everything that’s in there.
If you’re running the latest version of macOS you’ll be able to set the Trash to automatically delete items regularly. To do so follow the following steps:
- Click on the Apple logo in the Menu bar
- Choose About this Mac
- Click on Storage
- Click on Manage
- Turn on Empty Trash Automatically (this will delete items from the Trash after 30 days)
Delete old and large files
One quick way to recover a lot of space quickly is to open the Finder and choose Recents (in older versions of Mac OS X you could choose All My Files), then either choose to sort by date or size.
Choose size and you can selectively delete the biggest files.
Choose date to selectively delete the older files.
If your finder window isn’t showing sizes, go to View > Show view options, and choose Size.
Remove unwanted apps and programs
It’s often a good idea to start removing apps that you really don’t use. You can just drag and drop apps into the Trash, but we advise you to invest in a program like CleanMyMac X (£29.95 for a one year subscription) that can show you how much hard drive space apps are taking up and when you last used them, and can delete apps and all associated files.
You could also free up some space by removing widgets used in the Notification Centre. To do this, click on the bullet list icon on the top right of your screen and select the Today view. If you see any widgets that are no use, for example Stocks, click on Edit at the bottom of the screen and click on the minus icon beside that app. Then click on Done.
Make sure your software is up to date
Make sure you regularly perform a software update for macOS and all the apps installed on your Mac.
How you update the software depends a bit on the version of macOS you are running.
If you are running Mojave, Catalina, Big Sur or later open System Preferences, click on Software Update and wait while your Mac checks for updates. If there is one to install, do so.
If you are running an older version macOS, click on the Apple icon in the Menu bar and choose Software Update, if it’s there, or App Store > Updates otherwise.
The good thing about the way that software update used to work is that you could see all the apps that needed updating at the same time as finding out if there was an update to macOS that you needed to install.
Now if you want to check if your apps need updating you have to go the the App Store and click on Updates.
If you have apps purchased outside of the App Store they will need to be updated separately. You’ll usually find Check for Software Update if you click on the program name in the Menu bar.
You should also make sure that macOS keeps itself up to date. Click on System Preferences > App Store and ensure that Automatically Check For Updates is ticked. You can also tick Install App Updates which will automatically ensure that apps are updated.
Empty your Mac’s Caches
Macs use a number of caches, small files retained on the hard drive with the intention of re-using them. As such, they can increase the performance of your Mac.
Some are controlled by the system, others by individual apps. For instance, a web browser will cache web pages so that when a website is revisited, the pages can be read from hard drive rather than re-downloaded.
The problem is that not all apps are well behaved in this area. Have a look at your user caches by hitting Command+Shift+G from your desktop to bring up Go To Folder and then typing ~/Library/Caches/.
Don’t be surprised if a number of gigabytes are residing here. The biggest ones are likely to be for your web browser and the likes of iTunes and Spotify.
As user caches are rebuilt when needed, you can safely delete these, especially for apps that are no longer used. Safari, Firefox and iTunes all allow you to clear caches directly within the apps.
While you could go through all these cache files, deleting them, there are a number of useful utilities you can use to do this for you.
For example, CleanMyMac X from MacPaw (£29.95/$34.95) can clear your cache quickly for you. Open the app, choose System Junk and then click Scan followed by Clean.
Alternatives are OnyX (free) and Mojave Cache Cleaner (£12.15/$14.99). All these apps do far more than just deleting caches.
Empty your Safari cache
Speaking of Cache, Safari sometimes gets clogged up with data. Cleaning this out will help speed up Safari in macOS.
In older versions you can just open Safari and choose Safari > Reset Safari and check Remove all Website Data. (Leave the other options unticked.) Now click on Reset. This can help speed up sluggish web browsing.
In later versions you’ll need to open the Preferences dialog box, then select the Privacy icon and click the ‘Manage Website Data…’ button. You can then delete all cookies and cache by clicking the Remove All button.
If you just want to remove the cache and not the cookies or browser history, things are more complicated. But the hidden Safari Developer menu can be used to achieve this.
The Developer menu can be activated by selecting Safari > Preferences, clicking Advanced, then putting a tick by Show Develop Menu in Menu Bar. (This option is right at the bottom.)
A new Develop menu option appears to the left of the Window and Help menu options. Close any open Safari windows and select Empty Caches on the Develop menu. Then click File > New Window to start Safari with a clean cache.
Read: How to clear Safari Cache and Cookies on a Mac for more advice about clearing Safari cache.
Repair Permissions on your Mac
In older versions of macOS it was necessary to repair permissions from time to time. This was achieved by opening Disk Utility and choosing your main hard drive from the sidebar (in most Macs there will only be one).
Next, click on First Aid and Repair Permissions. This will ensure that all the files on your Mac have the correct permissions, which will help keep things ticking along.
Since the arrival of Mac OS X El Capitan way back in 2015, you can no longer repair permissions in Disk Utility. It’s gone because the new System Integrity Protection (SIP) that arrived in El Capitan prevents permissions on files being modified which, according to Apple at least, means there should be no need to repair permissions.
Turn off visual effects
Most Macs can run macOS without any trouble. However, you can turn off some features that might be slowing your Mac down.
For example, some people prefer to keep the Dock static to prevent slowdown.
Click System Preferences > Dock & Menu Bar and untick the following boxes:
- Animate opening applications
- Automatically hide and show the dock
Now beside ‘Minimize windows using’ and change Genie Effect to Scale Effect.
Also turn off Magnification if you have that option selected.
Install more RAM
Historically, upgrading RAM has been the go-to solution for improving your Mac’s performance. Before you go ahead and spend money, however, it’s worth trying to figure out how much of a difference it will really make, if any.
The easiest way to do this is to fire up Activity Monitor (it’s in Applications/Utilities), click on the Memory tab and keep an eye on the memory pressure gauge at the bottom of the window. If it’s permanently green, you’re probably not going to see a huge difference by upgrading. If it turns red regularly, it’s worth the expenditure.
How much RAM you add and how you add it is dependent on your Mac. But as a rule of thumb, the effort of performing the installation compared with the marginal cost of bigger RAM modules means that it’s worth maxing out your Mac’s RAM in one go.
That will often mean removing the existing modules and replacing them. It’s a good idea, though not essential, to buy all the RAM you fit at the same time from the same manufacturer. If you decide just to fill empty slots, the same applies. And you should pair RAM modules of the same capacity, if possible.
The biggest hurdle will be whether it is possible to upgrade the RAM in your Mac, it’s easy to add more RAM to an iMac, but many modern Macs cannot be user upgraded at all, which is why our usual advice is to buy as much RAM as you can afford as a build-to-order option when you first buy your Mac.
If you want more information about installing RAM in a Mac read this tutorial.
Get rid of desktop clutter
Every file on your desktop is a window with an image in it – either an icon or a preview of the file. Each of those windows and their contents is stored in RAM so that when you switch to the Desktop or use QuickLook, your Mac can show you what’s in the window.
In other words, the more files you have on your desktop, the more data is stored in RAM. That could result in your Mac running more slowly, especially if your Mac’s memory is already under pressure.
Organise files properly in the appropriate user folder – Documents, Pictures, Movies etc – and you may see an improvement in the speed of your Mac.
That said, since macOS Sierra you can choose to share the Desktop across multiple Macs, so your Desktop files will be stored in iCloud – but as we said earlier, the syncing can be a big drain on your Mac, so it’s possible that the background syncing is what’s slowing down your Mac.
Restart regularly
Few aspects of Macs cause more arguments than the one about what to do at the end of the day: shut down or sleep? We address that here: Should I shut down my Mac every night?
The old argument of leaving a computer on as much as possible was based on the wear and tear of restarting the hard drive, but the restart argument rests on more than just this.
The main advantage of sleeping your Mac is to be able to continue where you left off quickly. Back in the days of slow hard drives starting up your Mac again might have been something you did while making a cup of tea, but modern Macs are much faster to start up.
The disadvantages of waiting for a minute (possibly less) while your Mac starts up will no doubt be outweighed by the speed improvements if you’re marginal on RAM.
macOS uses swap files, spaces on your hard disk that allow your Mac to pretend it has more RAM than it actually has, for virtual memory. Once the number of swap files exceeds five or so, your Mac starts to slow down. Then it’s time to reboot.
If you run maintenance or backup scripts at night, your Mac can always be set to shut down after these.
If you do leave your Mac running at night note that means caches don’t get flushed and applications that hog RAM don’t let it go. Restarting your Mac clears the caches and shuts down applications. The result is a Mac that’s refreshed and should perform better.
Manage Spotlight
Spotlight, particularly in recent versions of macOS, is a terrific tool. But if you use multiple drives, particularly on older Macs, it can take Spotlight time to index and re-index the filesystem. That in turn will slow down your Mac.
The answer is to limit the files Spotlight indexes. This is done in the Spotlight pane in System Preferences. Once you’ve opened the pane, click on the Privacy tab. You can now drag any folders or volumes that you don’t need to search on to the window.
That will stop Spotlight indexing the folder or volume and thus reduce the number of files it needs to index, meaning it spends less time indexing and should improve performance on your Mac.
Turn off File Vault encryption
File Vault allows you to encrypt every file you store on your Mac to keep it safe from prying eyes. It also uses lots of processor cycles, however, to encrypt and de-crypt those files.
If you use it, switch it off and see if you notice a difference in performance.
Click on the Security & Privacy tab in System Preferences, then on the File Vault tab. Click the padlock, type in an admin password, and click Turn off File Vault.
The nuclear option
If all else fails, and you’ve tried everything we’ve suggested to speed up your Mac without success, there is one more option: a clean reinstallation of the OS.
It’s not a job to be undertaken lightly – you’ll need to delete your entire boot drive. But, it will clear all the files that have collected in the system Library and the user Libraries over the years and which may be causing the Mac to run slowly.
Remember to make at least one, preferably two, complete back ups of your bit drive before you start so you can copy documents, images, music and anything else you need back once you’ve installed the new OS.