
Here’s how to update DirectX:
- Open Settings in Windows 11 by pressing Windows+i.
- Select “Windows Update” on the left-hand menu.
- Click “Check for Updates” on the right
- Install any available DirectX updates.
Updating to the latest DirectX version ensures you can run the latest and the greatest games on your PC. It also enhances the multimedia-watching experience on your computer. We’ll show you how you can update DirectX on your Windows 11 machine.
Why Update DirectX?
The main reason to update DirectX is that a newer version enhances the gaming experience on your Windows 11 PC. You can expect improvements in FPS and animations in your games. Since DirectX plays a role in all kinds of multimedia functions, an updated version of DirectX can also improve your experience in things like watching videos.
You may also want to update DirectX if you have an issue with your PC, particularly graphics-related problems. The latest version may patch issues in the version you have installed, allowing you to have a bug-free experience.
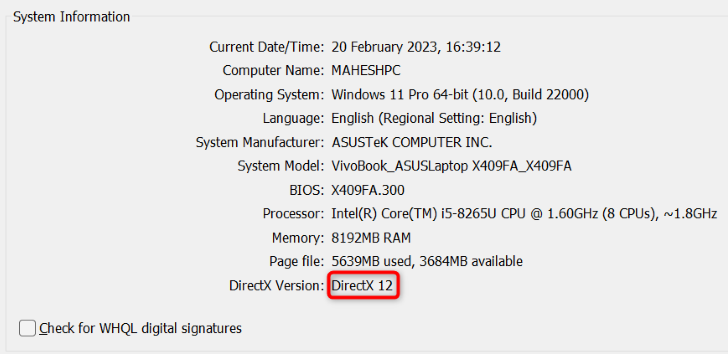
As of February 2023, the latest DirectX version is 12. Earlier versions include DirectX 11, 10, 9, and 8, but Windows 11 has always come with DirectX 12 preinstalled.
Check the Current DirectX Version on Windows 11
If you’d like to see what DirectX version your system is currently running, use a command in your the Run dialog box and you’ll see the version number.
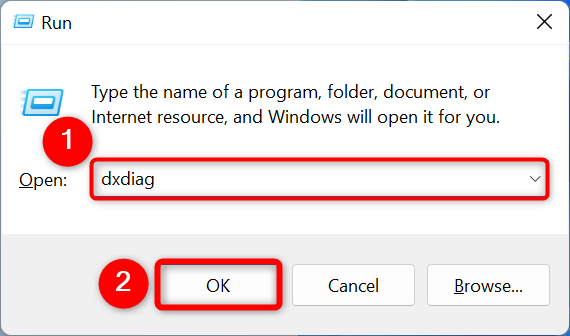
To do that, first, open the Run dialog box by pressing Windows+R. Then, type the following in the box and press Enter (or click “OK.”)
dxdiag
You’ll see a “DirectX Diagnostic Tool” window. Here, at the top, select the “System” tab.

In the “System” tab, you’ll see a “System Information” section. Here, next to “DirectX Version,” you’ll see the current version installed on your PC.
Get the Latest DirectX Version on Windows 11
All DirectX updates come to your PC through Windows Update—there’s no way to download a DirectX update outside of it. We’ll check for updates there.
To start, open the Settings app by pressing Windows+i. Then, in the left sidebar, select “Windows Update.”

On the right pane, at the top, click “Check for Updates.”
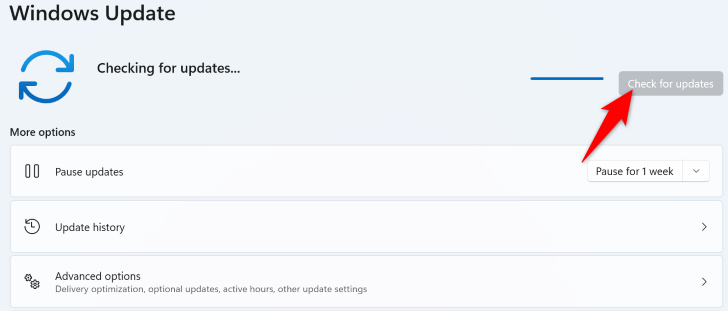
Download and install the available Windows updates. This will also update your DirectX version if a newer version is available.
Once the update is finished, you’ll be running the most recent version of DirectX on your computer.
What to Do If There’s No DirectX Update?
If you don’t see a DirectX update in Windows Update, that means a newer version of the tool is not available. Windows Update is the only way to update DirectX, and there are no standalone updates available for this tool anywhere.
In case you’re looking to resolve your gaming, graphics, or other multimedia-related issues on your PC, like lag or visual artifacts, try updating your graphics card drivers. That helps resolve most graphics-related issues with your PC.