
Have you ever thought of a filter that you’d love to use on Snapchat? Have you ever seen someone using a Snapchat filter that you have no clue how to get? Well look no further, this guide will introduce you to the wonderful world of custom Snapchat filters.
There are many times when I personally have seen a filter that I had no clue how that person got. I would scroll through the pre-loaded filters looking for it to no avail. That is until I learned about the custom filters feature that Snapchat provides its users. Not only is there a way to submit your own filters you’ve made, but there is also a gallery of filters that others on Snapchat have made for your personal use. It’s an amazing feature that Snapchat provides, and if you’re just as confused as I was about the feature, follow this guide to get you started.
Making Custom Filters
To start off, creating a new filter will cost you money. The cost is dependent on the amount of time the filter is available, and the area that the filter is available in.
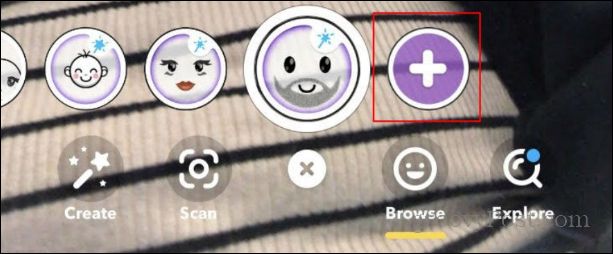
But before that, let’s discuss how you even start making a filter (or lens). First, you have to press on the screen, just as you would make the preloaded filters appear. When the menu for filters pops up, you’re going to want to scroll all the way to the end of the filters. Here you can click the + symbol (circled in red on the image below)
Then, a screen will appear telling you you can buy your own custom filters and lenses. There will be an option to start. To continue, click the “Get Started” button.

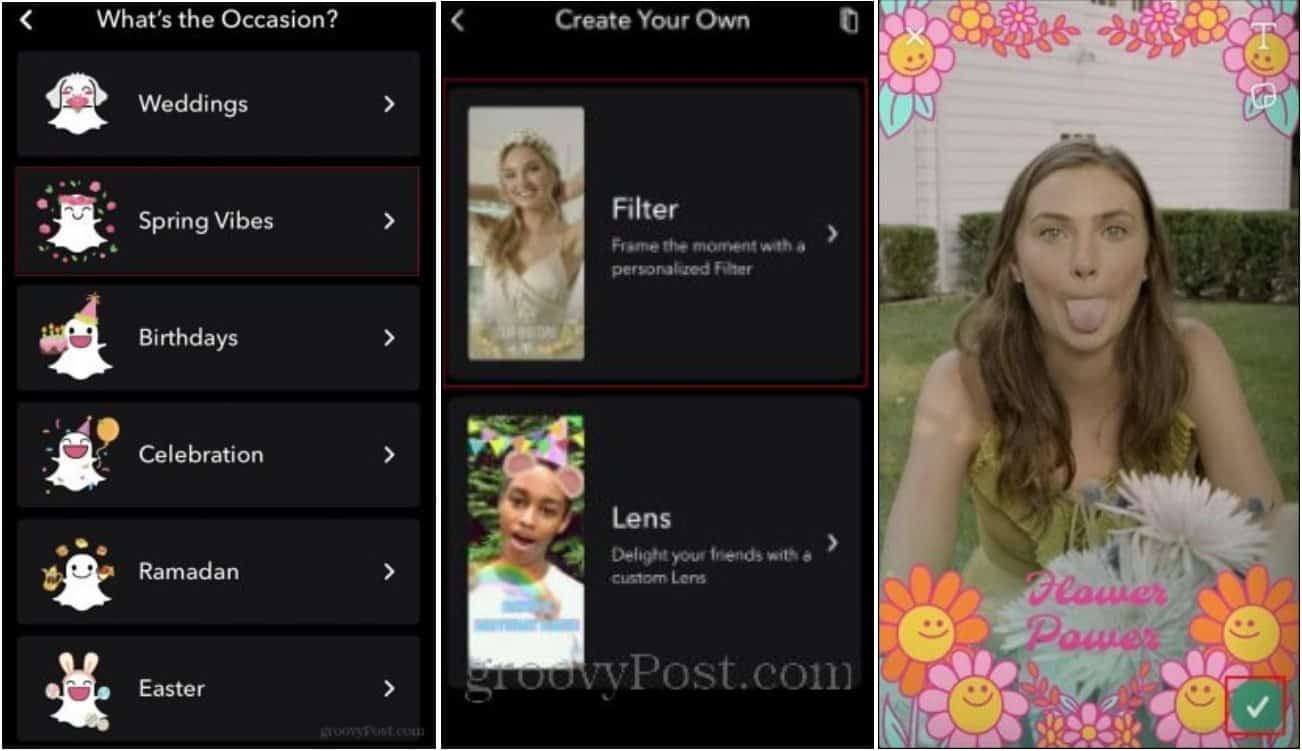
Afterward, you will be presented with two options. You can either create a filter or a lease. In this example, I’m going to be creating a Spring Vibes filter. So, I’ll click filters, and then Spring Vibes at the top. Once those are selected they will present you with an example of what the filter will look like. If you’re happy with the product, click the checkmark.
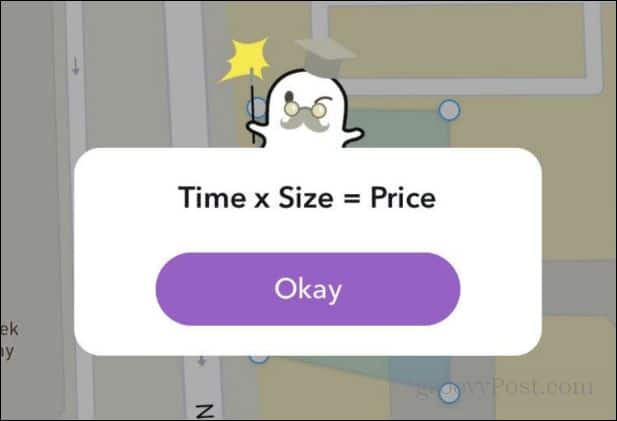
The app will then calculate the price of the filter depending on the start date and time and the end date and time. It also calculates the cost depending on the size of your geolocation border. This geolocation indicates where the filter will be available to people. Once Snapchat has calculated the price of the filter, you can confirm your filter.
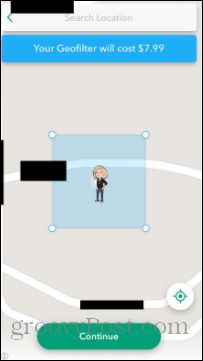
You will then see an overview of your order. Once you confirm the information you’re seeing is correct, you can click Next and you’ll be able to use the filter you’ve created.
The Gallery of Filters
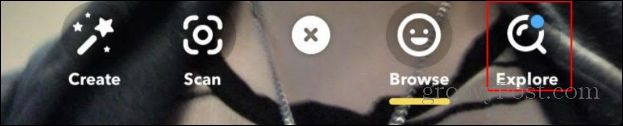
Now let’s talk about getting lenses and filters that others have created. If you go to the bottom of the screen beneath the preloaded filters, you’ll see a little magnifying glass. This is the “explore” option where you can select from a wide variety of lenses and filters.
To use a filter, you need to first find the one you want to use. Once you locate the lens/filter, you can select it and you will be brought to a camera with the lens/filter. Here you can take a picture using the filter.

Another cool thing you can do is use filters you see other people using. Let’s say you’re going through someone’s story, and they have a filter you want to use. At the bottom of the screen, there will be a button that shows the filter they’re using. If you don’t see that button because they’ve either attached a link as well or tagged someone, you can slide up on their story. Here will be a list of all clickable links, including the filter they’re using.

As you can see there are a variety of fun options when it comes to the filters on Snapchat. Since it’s release, Snapchat has implemented many new features that allow for wider use of their camera. Filters are just one small but fun aspect of what Snapchat has available. So go out and go crazy! Have fun with your new filters.