
![]()
Microsoft PowerPoint offers many types of animations. You can add effects to text, images, and shapes. But if you want to create your own, you can select a motion path animation to move your object wherever you like.
With motion path animations in PowerPoint, you can make your object zigzag, loop, spiral, or swoosh. Once you select the motion path you want to use, you can customize the points to create the exact path you want your object to take.
Add a Motion Path Animation
Open your PowerPoint presentation and select the slide where you want to create the animation. Either insert the object you want to animate or select it if you’ve already added it to the slide.
Go to the Animations tab and click the arrow at the bottom of the Animation selection box. This opens the full collection.

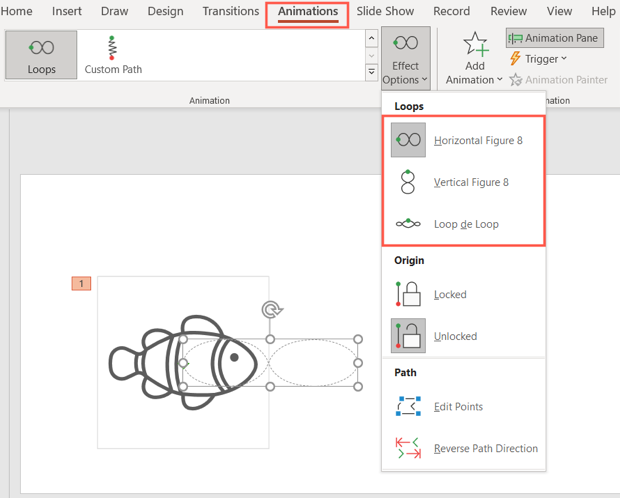
Scroll toward the bottom and you’ll see a few options in the Motion Paths section. If you want to use one of these, simply select it to apply it to your object. Notice you can choose Custom Path which allows you to draw the path yourself.

For additional options, click “More Motion Paths” at the bottom of the window.

In the Change Motion Path box, you’ll see Basic, Lines and Curves, and Special paths. To see a preview before you apply it, check the box for Preview Effect at the bottom. Then, choose one to see it in action.

When you find the path you want to use, select it and click “OK.”

If you want to combine motion paths so that your object ends in a certain spot, check out our how-to.
Customize the Motion Path
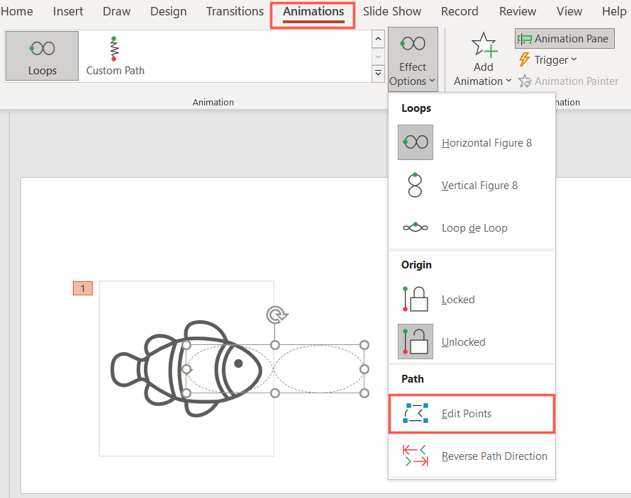
After you apply the motion path, you may have options to change the direction. Select the animated object and go to the Animations tab. Click the Effect Options drop-down arrow to view your choices. Note that not all paths offer extra effects, but most let you reverse the path direction.
Along with changing the direction of your motion path, you can edit the points. Click the Effect Options drop-down arrow and pick “Edit Points.”
You’ll then see the motion path with the points as squares. Select and drag a point to move it.

You can also right-click a point for options like making it a smooth, straight, or corner point. Additionally, you can add more points or remove one.

If you want to change the start action or duration, or add a delay, select the animation and use the tools on the Animations tab.

Remember, you can preview your animation as you make edits to it using the Preview button on the left side of the ribbon on the Animations tab. This helps to see if you need more adjustments or want to reorder the animations.
Animations can spruce up your slideshow. So if a motion path animation is what you need, you have plenty of options in PowerPoint.