
Microsoft Windows 10 is a very versatile operating system and multitasking is one thing that no other OS can match. You can run multiple apps at the same time and switch between them with just a gesture or a click. If you have access to two or more screens, you can run Split Screen in Windows without the need for switching between them.
Multitasking has become even better with the recent build of Windows 10. Microsoft has released a new update which lets you snap Windows easily and quickly. This new feature is called Snap Assist and it lets you snap the windows quickly to the screen.
Here is a step by step guide to tell you how you can enable this feature and use it on your Windows 10 PC or laptop.
Steps to Enable Snap Assist on Windows 10
- To enable the Snap Assist feature, go to Start then click on Settings.
- In the Settings page, click the System option and then select Multitasking from the left pane.
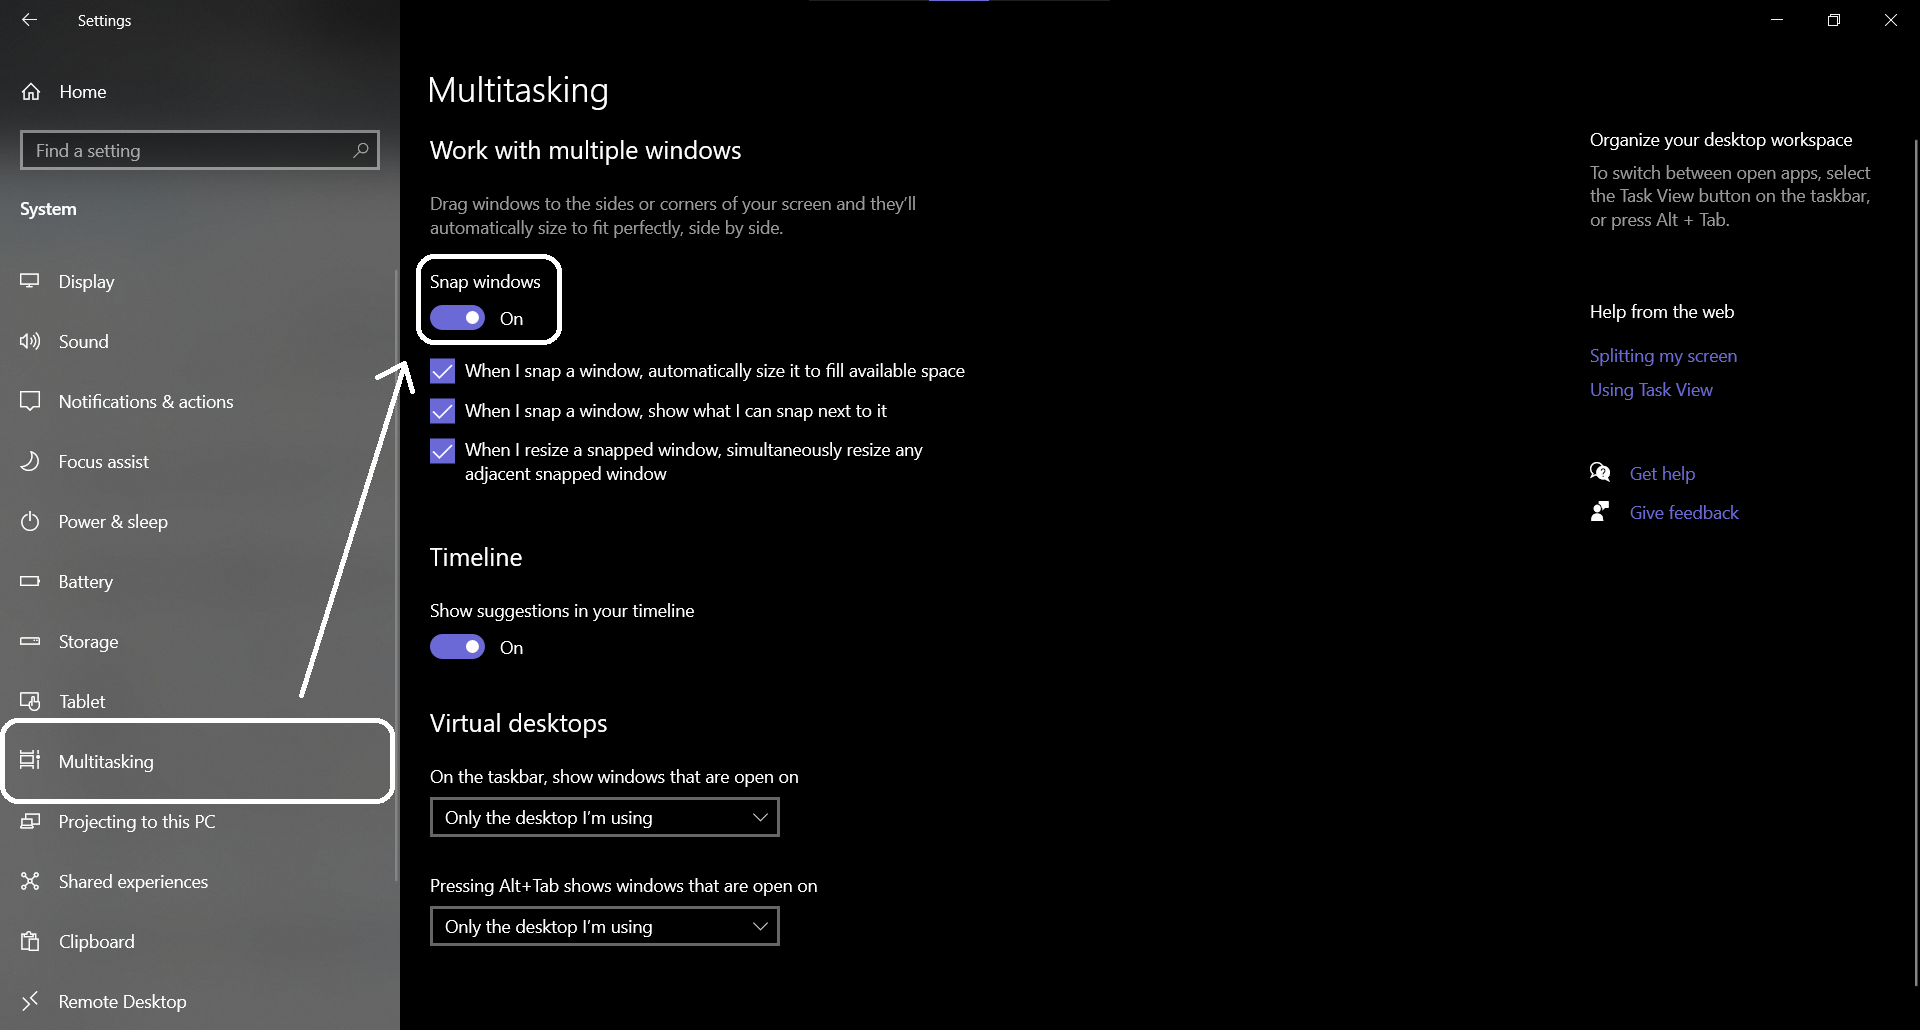
- Enable the Snap Windows option and three more features will become available to you.
- These three options below the Snap Windows toggle does exactly it says on the option.
- You can customize using these three options so it responds the way you want.
How to Use Snap Assist in Windows 10
- Open multiple apps on your desktop.
- Select the one which you want to snap and drag it to the right or left edge(extreme edge) of the screen.
- When you see an animation, you can drop the window there and you will see other windows on the other half of the screen.
- From that other half, you can select the window which you want to snap to that other half of the screen
Wrapping up
There you go, now you can use Split Screen in Windows. You don’t even have to resize the windows just to put them side by side. You can also snap them in the corners but that situation only comes in handy if you have a big monitor.
The post How to Use Snap Assist to Split Your Screen in Windows 10 appeared first on Gadgets To Use.