

In many apps, pressing Command and + (plus sign) at the same time will let you zoom in, and Command with – (minus) will let you zoom out on a Mac. You can also zoom system-wide or zoom in on specific text by enabling those features in Accessibility settings.
When you have trouble seeing something on your computer screen, do you lean in closer or put on your reading glasses? You can make it easier to see anything on your Mac screen using the Zoom feature.
We’ll show you various ways to zoom in and out on a MacBook or desktop Mac. You can use a keyboard shortcut, gesture, or both. You can even enlarge text when you hover your cursor over it and customize its view.
How to Zoom In on a Mac
To zoom in on a window or specific app such as Safari, hold Command and press the Plus (+) key. Different apps may use other shortcuts, toolbar buttons, or menu actions, so refer to your specific apps’ documentation.
Additionally, once you enable zoom options in the Accessibility settings, you can use a shortcut, your trackpad, or a scroll gesture to zoom in on any window or part of the screen:
- Keyboard Shortcut: Press Option+Command+= (equal sign) to zoom in. You can also use Option+Command+8 to switch between no zoom and your last zoom level.
- Trackpad: Double-tap your trackpad with three fingers to zoom in. You can also double-tap and drag on your trackpad to change the zoom level.
- Scroll Gesture: Press the modifier key you chose and then use your mouse or trackpad to scroll up.
How to Zoom Out on a Mac
To zoom out of a window or a specific app like Safari, you can hold Command and press the Minus (-) key. Again, other apps may use different shortcuts, toolbar buttons, or menu actions to zoom out.
With accessibility zoom option(s) enabled, you have more options for zooming out on your Mac, no matter which app you’re using. Depending on which options you’ve enabled, you can use one or more of the following:
- Keyboard Shortcut: Press Option+Command+- (minus sign).
- Trackpad: Double-tap your trackpad with three fingers to zoom out after you zoom in.
- Scroll Gesture: Press the modifier key you chose and then use your mouse or trackpad to scroll down.

How to Enable Accessibility Zoom on a Mac
To start zooming anywhere on your Mac, you’ll need to enable the Zoom feature in the Accessibility settings. From there, you’ll choose the methods you want to use.
Open System Preferences with the Dock icon or from the Apple icon in the menu bar. Then, select “Accessibility” on the left and “Zoom” on the right.

You’ll see each of the following options you can use to zoom in on your Mac.
Keyboard Shortcuts and Trackpad Gestures
Enable the toggles for using keyboard shortcuts and/or trackpad gestures to zoom in and out. With these settings, you’ll see the shortcuts and gestures to use directly below the settings.

Scroll Gestures
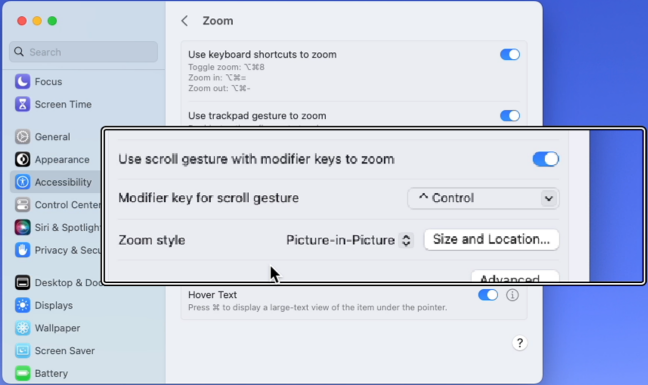
Next, you can turn on the toggle for using a scroll gesture with a modifier key. If you enable this option, choose the modifier key you want to use in the drop-down box. You can pick the Control, Option, or Command key.

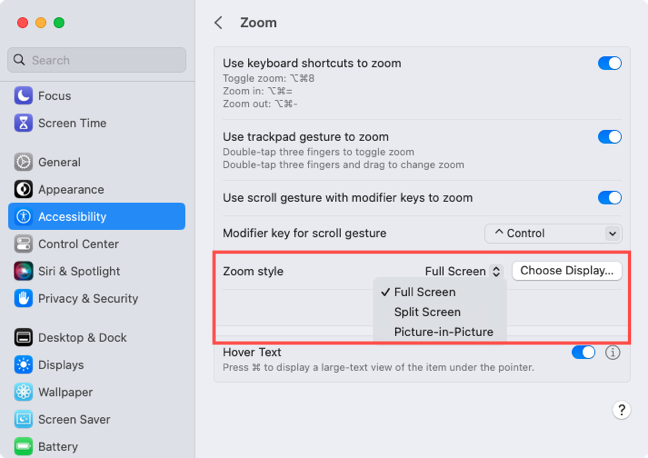
Zoom Style
Then, pick the zoom style you want to use on your Mac. You can pick from Full Screen, Split Screen, or Picture-in-Picture. Depending on the option you select, you can adjust its options.
- Full Screen: Select “Choose Display” to pick the monitor you want to zoom if you use more than one display.
- Split Screen or Picture-in-Picture: Select “Size and Location” to choose the window placement and size.
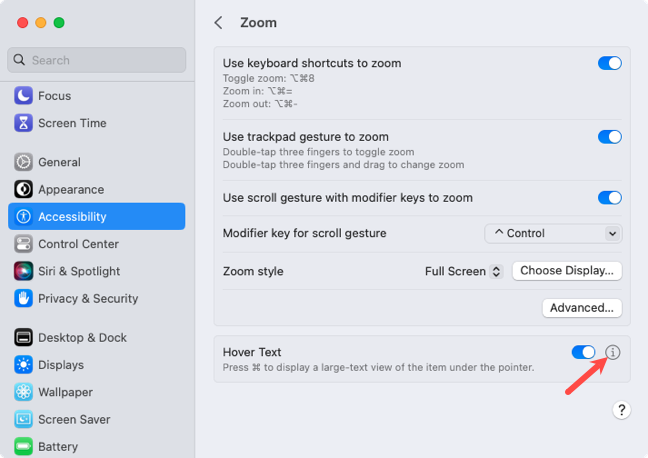
Hover Text
Another zoom option you can enable on your Mac is Hover Text. As you can see from the description, you hold the Command key as you hover your cursor over text to zoom (more detail below).

Optional: Touch Bar Zoom
If you have a Mac with a Touch Bar, you can enable this option as well. You then touch and hold your Touch Bar to see a larger version of it on your screen.
How to Zoom With Hover Text
If you enable the Hover Text option in the Zoom settings on your Mac, you can make adjustments to how the zoom looks for complete flexibility.
In System Preferences > Accessibility > Zoom, press the Info icon (small letter “i”) to the right of Hover Text.
You can then adjust the text size, style, and entry location along with the activation modifier and an option to triple-press the modifier for activation lock.

Next, you can change the colors for the text, insertion point, background, border, and element-highlight.

Select “Done” when you finish and then check out the Hover Text zoom.
Hold Command, or the modifier key you selected if you changed it, and use your cursor to hover over text. You’ll see the text pop making it easy to read. Release the modifier key to remove the zoom.

Using one or more of these zoom methods can help you see just about anything on your Mac screen bigger and better. For more, look at how to magnify your iPhone screen using Display Zoom.