Install Timeshift in Ubuntu Linux. Here is how to use TimeShift to backup Ubuntu and restore Ubuntu to default. Timeshift for Linux is an application that provides functionality similar to the System Restore feature in Windows and the Time Machine tool in Mac OS.
Timeshift protects your system by taking incremental snapshots of the file system at regular intervals. These snapshots can be restored at a later date to undo all changes to the system.
System restore tool for Linux. Creates filesystem snapshots using rsync+hardlinks, or BTRFS snapshots. Supports scheduled snapshots, multiple backup levels, and exclude filters. Snapshots can be restored while system is running or from Live CD/USB.
In RSYNC mode, snapshots are taken using rsync and hard-links. Common files are shared between snapshots which saves disk space. Each snapshot is a full system backup that can be browsed with a file manager.
Timeshift – Features & Functions
Timeshift is similar to applications like rsnapshot, BackInTime and TimeVault but with different goals. It is designed to protect only system files and settings. User files such as documents, pictures and music are excluded. This ensures that your files remains unchanged when you restore your system to an earlier date. If you need a tool to backup your documents and files please take a look at the excellent BackInTime application which is more configurable and provides options for saving user files.
Unlike similar tools that are scheduled to take backups at a fixed time of the day, Timeshift is designed to run once every hour and take snapshots only when a snapshot is due.
This is more suitable for desktop users who keep their laptops and desktops switched on for few hours daily. Scheduling snapshots at a fixed time on such users will result in missed backups since the system may not be running when the snapshot is scheduled to run.
By running once every hour and creating snapshots when due, Timeshift ensures that backups are not missed.
Minimal Setup
- Timeshift requires very little setup. Just install it, run it for the first time and take the first snapshot. Cron job can be enabled for taking automatic snapshots of the system at regular intervals. The backup levels can be selected from the Settings window.
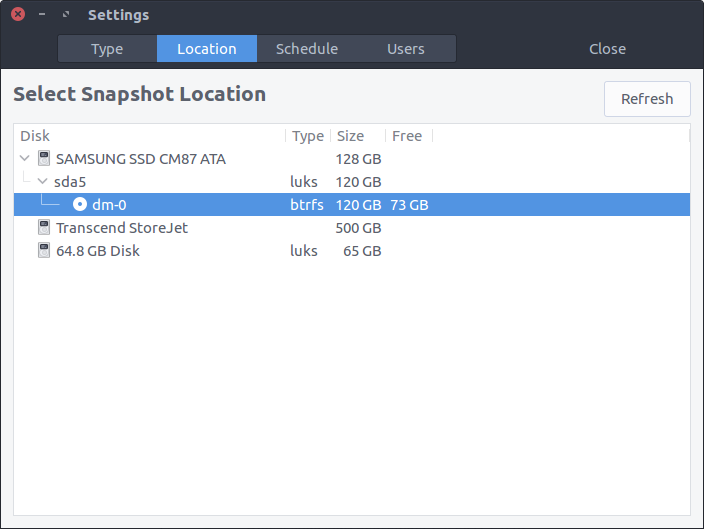
- Snapshots are saved by default on the system (root) partition in path /timeshift. Other linux partitions can also be selected. For best results the snapshots should be saved to an external (non-system) partition.

Multiple Snapshot Levels
- Multiple levels of snapshots can be enabled – Hourly, Daily, Weekly, Monthly and Boot
- Number of snapshots to retain can be specified for each level
- Boot snapshots provide an additional level of backup and are created every time the system starts. Boot snapshots are created with a delay of 10 mins so that system startup is not affected.
Rsync & BTRFS Snapshots
- Supports rsync snapshots on all systems
- Supports BTRFS snapshots on BTRFS systems
It is strongly recommended to use BTRFS snapshots on systems that are installed on BTRFS partition. BTRFS snapshots are perfect byte-for-byte copies of the system. Nothing is excluded. BTRFS snapshots can be created and restored in seconds, and have very low overhead in terms of disk space.
Timeshift is designed to protect system files and settings. It is NOT a backup tool and is not meant to protect user data. Entire contents of users’ home directories are excluded by default. This has two advantages:
- You don’t need to worry about your documents getting overwritten when you restore a previous snapshot to recover the system.
- Your music and video collection in your home directory will not waste space on the backup device.
You can selectively include items for backup from the Settings window. Selecting the option “Include hidden items” from the Users tab will backup and restore the .hidden files and directories in your home folder. These folders contain user-specific config files and can be included in snapshots if required.
Note: It is not recommended to include user data in backups as it will be overwritten when you restore the snapshot.
Ubuntu-based Distributions
Ubuntu, Linux Mint, Elementary OS, etc.
Packages are available in the Launchpad PPA for supported Ubuntu releases. Run the following commands in a terminal window:
sudo apt-add-repository -y ppa:teejee2008/ppa
sudo apt-get update
sudo apt-get install timeshift
DEB and RUN packages are available on Releases page for older Ubuntu releases which have reached end-of-life.
Other Linux Distributions
Download the .RUN installer from Releases page and execute it in a terminal window:
sudo sh ./timeshift*amd64.run # 64-bit
sudo sh ./timeshift*i386.run  # 32-bit
Installer can be used on the following distribution types:
- RedHat based – Fedora, RedHat, Cent OS, etc (supports dnf and yum)
- Debian based – Debian, Ubuntu, Linux Mint, Elementary OS, etc (supports apt)
- Arch based – Arch Linux, Manjaro, etc (supports pacman)
UnInstall
Run the following command in a terminal window:
sudo apt-get remove timeshift
or
sudo timeshift-uninstall
Remember to delete all snapshots before un-installing. Otherwise the snapshots continue to occupy space on your system. To delete all snapshots, run the application, select all snapshots from the list (CTRL+A) and click the Delete button on the toolbar. This will delete all snapshots and remove the /timeshift folder in the root directory.
If you used the installer to install Timeshift, you can remove the installed files with following command:
sudo timeshift-uninstall
Install Timeshift To Backup And Restore Ubuntu To Default originally posted on Source Digit – Linux, Ubuntu Tutorials & News, Technology, Gadgets & Gizmos.
