Does your iPhone say Security Lockout and you can’t get to the home screen? This article is for you if you find yourself in this situation and unsure of what to do. We’ll explain what Security Lockout means, why it occurs, and how to fix it so you can unlock your iPhone.
What is Security Lockout?
Some users assume their iPhone is broken or hacked when they get the Security Lockout message, but this is not the case. Security Lockout simply means that the iPhone is locked down for security purposes, which typically occurs if you repeatedly enter the wrong passcode on the iPhone’s lock screen. This is a security feature included in iOS 15.2 or later to keep your device safe. When iOS receives a string of failed passcode attempts, it suspects security issues and therefore locks down your iPhone to protect your data from hackers and other unauthorized access.
While Security Lockout is intended to protect your iPhone from prying eyes, it also accounts for the possibility that you will forget your passcode. As a result, it won’t lock down your iPhone permanently from the start, but will give you several chances to try again to enter your passcode after waiting for some time. Each subsequent failed attempt will extend the time you have to wait. That’s why you may see a countdown timer on the Security Lockout screen that says “try again in 15 minutes” or “try again in 1 hour”.
In fact, in most cases, the iPhone will initially display iPhone Unavailable after several consecutive failed passcode attempts. As the number of failed attempts increases, Security Lockout appears. In iOS 15.2 and later, Security Lockout with a 15-minute timer typically occurs after the ninth failed passcode attempt. After the tenth and eleventh failed attempts, Security Lockout will last 1 hour. After the twelfth incorrect passcode entry, the iPhone displays only Security Lockout and no longer has a timer, which means the iPhone will remain in Security Lockout forever until you take steps to unlock it.
How to get iPhone out of Security Lockout?
If a countdown timer appears on the screen, you just need to wait until it expires and enter the correct passcode to get your iPhone out of Security Lockout and unlocked. But what if you forgot your iPhone passcode, there is no timer on the Security Lockout screen, or the timer won’t go down? In these cases, all you can do is erase your iPhone to get rid of Security Lockout. If you are wondering if you can bypass the Security Lockout and passcode on your iPhone without erasing your data, the answer is no. Let’s now go through four efficient techniques to erase and unlock an iPhone that says Security Lockout.
Method 1: Unlock iPhone directly from the Security Lockout Screen
If you have an Apple ID signed in on your iPhone, you may see the Erase iPhone option on the Security Lockout screen. This option allows you to quickly erase and unlock your security-locked iPhone by entering only your Apple ID passcode, without the need to use a computer.
You just need to tap Erase iPhone, tap Erase iPhone again to confirm that you want to erase and reset the iPhone, and then enter your Apple ID password. Your iPhone will then automatically erase itself.
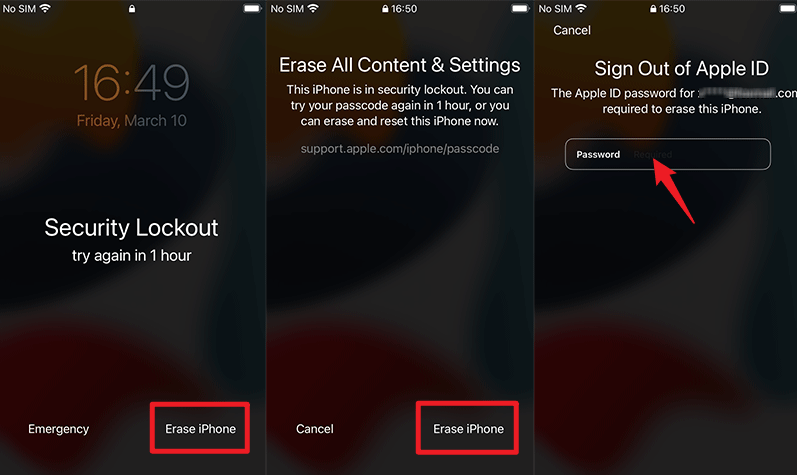
Tip: The Erase iPhone typically appears only if Find My iPhone is enabled and there haven’t been more than 12 failed passcode attempts. If there is no Erase iPhone option on your Security Lockout screen, please go to another method to unlock your iPhone.
Method 2: Bypass Security Lockout from another Apple device
If you have another Apple device that shares an Apple ID with your iPhone that is in Security Lockout, you can use the “Find My” app on that device to remotely erase and unlock your iPhone.
Step 1: Go to your other Apple device, open the Find My app, and then select the Devices option.
Step 2: In the Devices list, select your iPhone that is in Security Lockout, tap Erase This Device, and then tap Continue.

Step 3: Follow the on-screen instructions and the Find My app will erase your iPhone to bypass the Security Lockout screen.
Method 3: Unlock Security Lockout with iPhone Passcode Refixer
If none of the above methods work for you, iSumsoft iPhone Passcode Refixer is the best choice to unlock an iPhone that says Security Lockout. This is a powerful and easy-to-use iPhone unlocking tool that can unlock any iPhone that has been locked or disabled due to passcode or security issues.
Install iSumsoft iPhone Passcode Refixer on your Windows PC, then follow the steps below to unlock your iPhone that shows Security Lockout.
Step 1: Open iSumsoft iPhone Passcode Refixer on your PC and select the Unlock Lock Screen option.
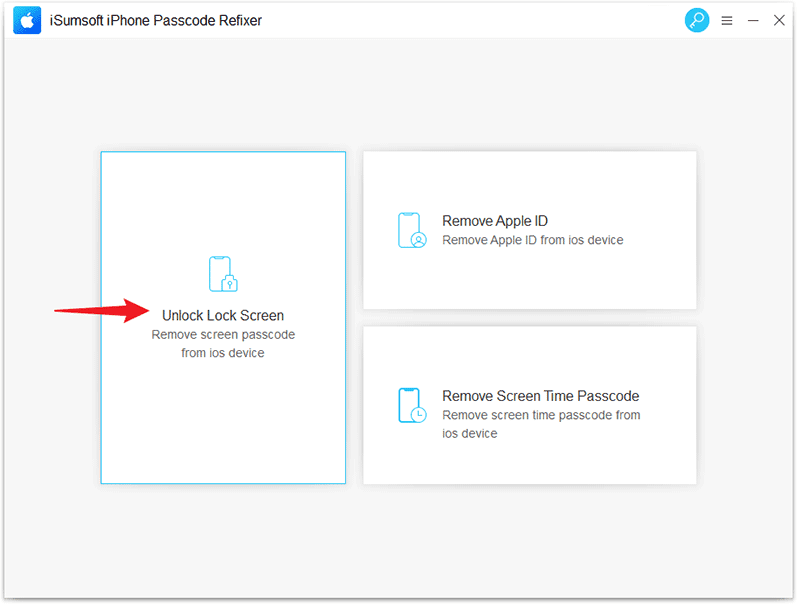
Step 2: Then, you need to click Start to confirm that you want to use this option to unlock your security locked iPhone.
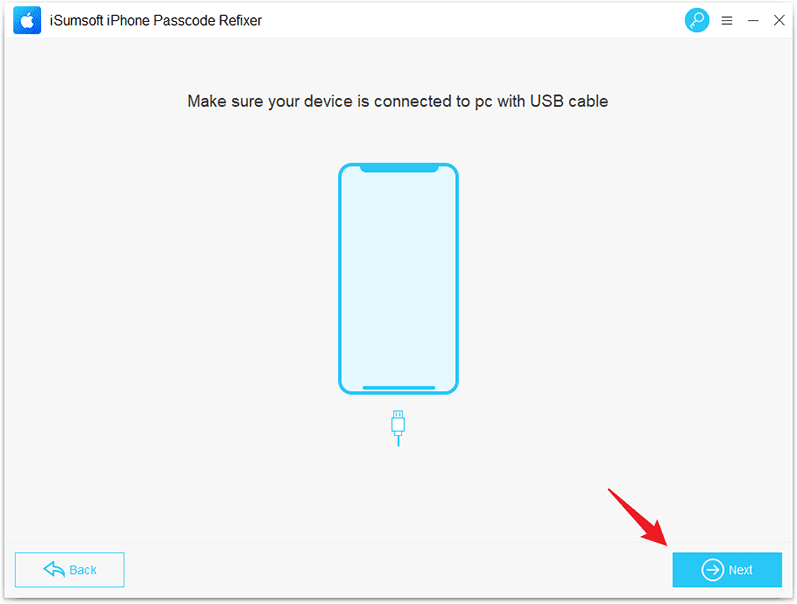
Step 3: When prompted to connect your iPhone, make sure it is connected to your PC via a USB cable, then force restart it to enter recovery mode. After finished, click Next, and the software will immediately detect your iPhone.
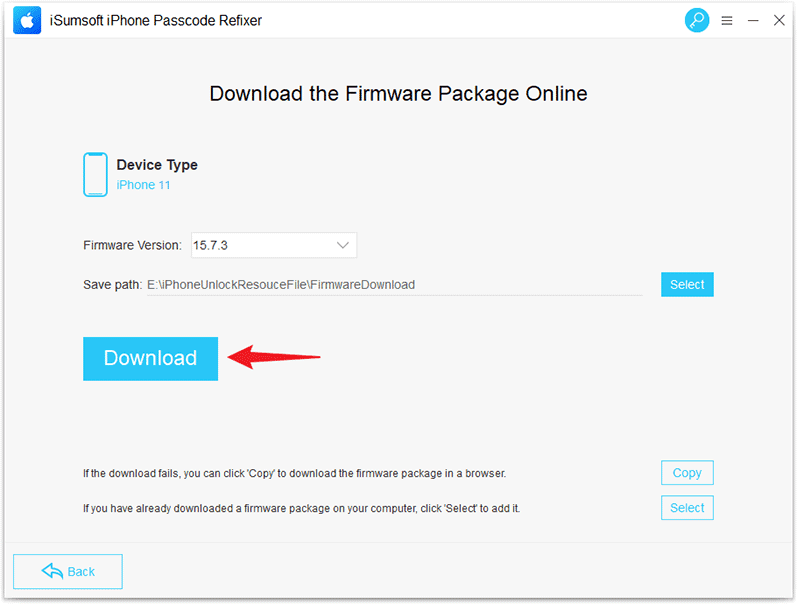
Step 4: Click Download to start downloading the firmware package required to unlock your iPhone, and then wait a few minutes for the download to finish.
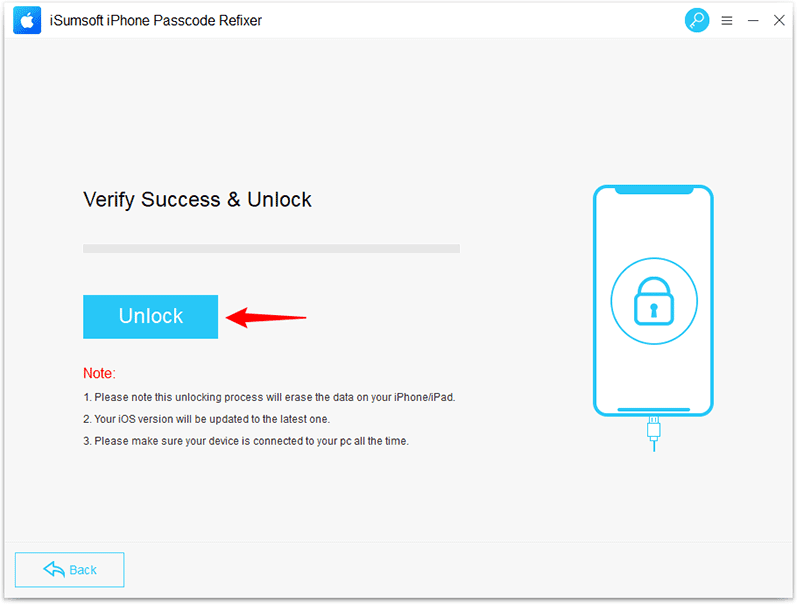
Step 5: Once the firmware is ready, the Unlock button will appear. Click the Unlock button and the software will start unlocking your iPhone.
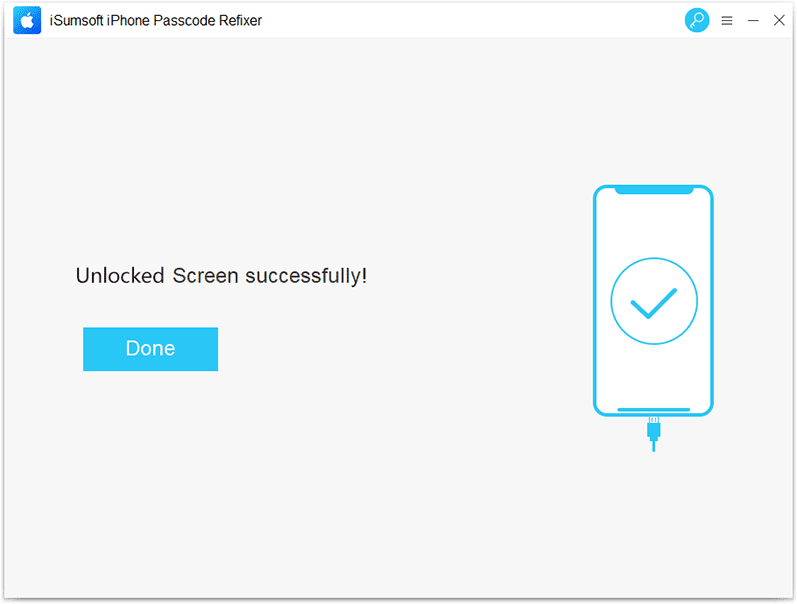
Step 6: When the software page shows “Unlocked Screen successfully”, your iPhone is out of Security Lockout and unlocked.
Method 4: Fix iPhone Security Lockout with iTunes or Finder
Finally, you can fix the Security Lockout issue by restoring your iPhone to factory settings using iTunes or Finder on your computer.
Step 1: Connect your iPhone to your computer with a USB cable, and then put it in recovery mode.
Step 2: Launch iTunes if you’re using a Windows computer; Finder if you’re using a Mac.
Step 3: iTunes or Finder will automatically detect your iPhone and bring up a dialog box with Update and Restore options. Choose the Restore option.
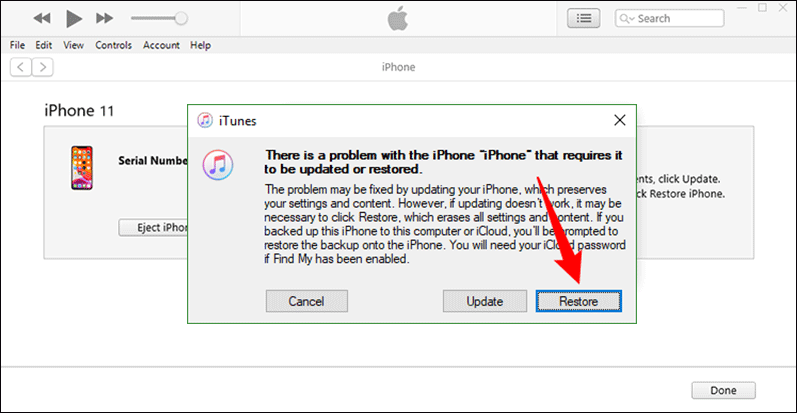
Step 4: Choose Restore and Update, and iTunes or Finder will automatically restore your iPhone to factory settings to get rid of Security Lockout.
Wrapping Up
Security Lockout is an essential security feature built into iOS 15.2 and later, and Apple doesn’t offer the option to disable or turn it off on your iPhone. This means that you can’t prevent Security Lockout occurring after several consecutive failed password attempts. To unlock an iPhone that says Security Lockout, you either have to enter the correct passcode or erase the iPhone. An Apple ID allows you to quickly erase your iPhone to get it out of Security Lockout. If this does not work, you will need to connect your security-locked iPhone to your computer and use iSumsoft iPhone Passcode Refixer or iTunes to unlock it. You cannot unlock an iPhone that is in a Security lockout without losing data unless you have previously backed it up.
