
GIMP, is the most popular free and open-source image editor and perhaps the best Adobe Photoshop alternative on Linux.
When you install GIMP on Ubuntu or any other operating system, you’ll find a few brushes already installed for basic image editing. If you need something more specific, you can always add new brushes in GIMP.
How? Let me show you that in this quick tutorial.
How to add brushes in GIMP

There are three steps involved in installing new brushes in GIMP:
- Get new brush
- Put it in the designated folder
- Refresh the brushes in GIMP
Step 1: Download new GIMP brushes
The first step is to get new brushes for GIMP. Where do you get it from? From the internet, of course.
You can search on Google or alternative private search engines like Duck Duck Go for ‘GIMP brushes’ and download the ones you like from a reputed website.
GIMP brushes are usually available in .gbr and .gih file formats. The .gbr file is for regular brushes while .gih is used for animated brushes.
Did you know?
For the versions 2.4 and above, GIMP makes installing and using Photoshop brushes (.abr file) quite straightforward. All you need to do is place the Photoshop brush files in the proper folder.
Do keep in mind that the latest Photoshop brushes might not work with GIMP flawlessly.
Step 2: Copy the new brushes into its location
After you get your brush file, the next step is to copy and paste it to the right folder in GIMP configuration directory.
On Windows, you’ll have to go to a folder like “C:Documents and Settingsmyusername.gimp-2.10brushes“.
I’ll show detailed steps for Linux because It’s FOSS is a Linux-focused website.
After selecting the brush files press Ctrl+h in your Home folder to see hidden files in Linux.

You should go to .config/GIMP/2.10/brushes folder (if you are using GIMP version 2.10). If you are using some other version, you should see an equivalent folder under .config/GIMP.
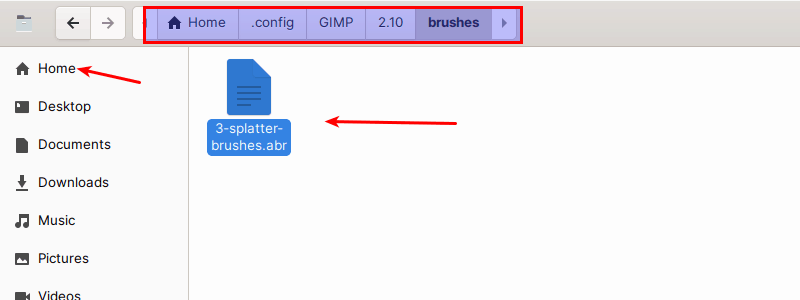
Paste the brush files in this folder. Optionally, you can hide the hidden files by pressing Ctrl+h again.
Step 3: Refresh the brushes (to avoid restarting GIMP)
GIMP will automatically load brushes when it’s launched. If you are already running it and don’t want to close it, you can refresh the brushes.
In GIMP go to Windows->Dockable Dialogues->Brushes in the main menu.

Locate the refresh icon in the Brushes dialog on the right side bar.

If your brushes are not present, you can always try to restart GIMP.
Bonus Tip!
Adding new brushes in GIMP also allows you easily watermark images. Just use your logo as a brush and add it to the images in a single click.
I hope you enjoyed this quick GIMP tip. Stay tuned for more.