
Most Android smartphones and tablets already have dozens (or even hundreds) of settings for changing everything from notifications to system colors. There are even more settings hidden away in the Developer options, which are mostly intended to help with creating Android applications, but some of them can come in handy for other situations too.
Even though some of the features accessible through the Developer options can be helpful, it’s not always clear which option does what. Although none of the features in the Developer options will break your phone or tablet, enabling some of them can cause unintended problems. That’s why we’re going over everything you can do with Developer options in this roundup, so you can know exactly which setting does what.
How to access Developer Options on Android
Developer options are hidden by default, so you need to enable them before you can access any of the available settings. The exact process here depends on what version of Android you’re running, and some device manufacturers (such as Samsung) move around where some of the menus are located.
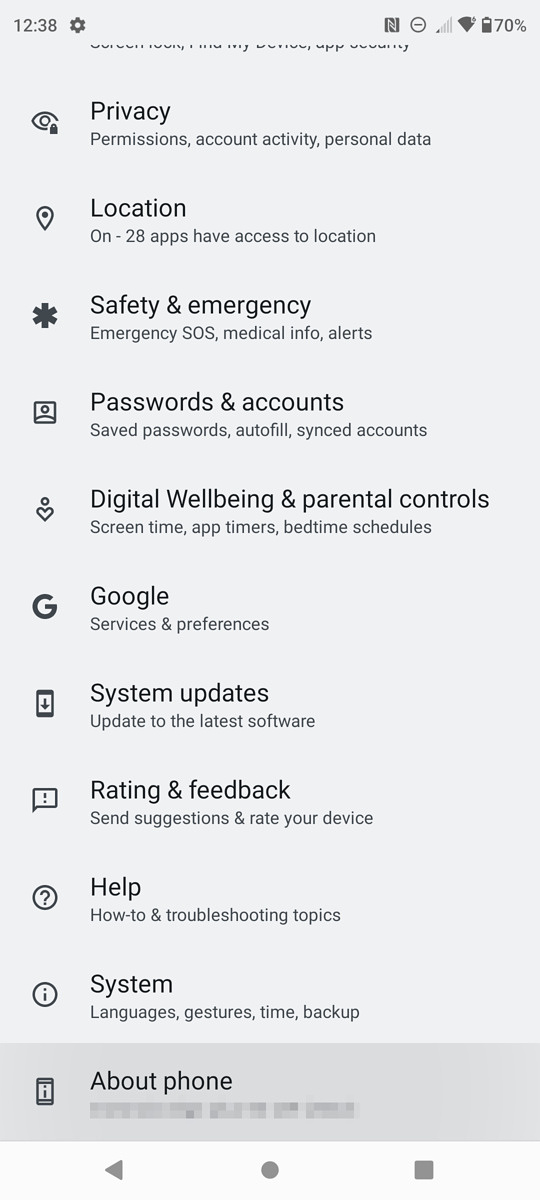
The first step is to find where the Build number is located in the Settings app on your device. Generally, you can find it by opening the Settings app on your device, then navigating to About Phone > Build Number. Android 8.0 and Android 8.1 have it located under System > About Phone > Build Number. If you have a tablet, this is usually called ‘About tablet’ instead. The location might vary for customized builds of Android — for example, Samsung devices have it under About phone (or tablet) > Software information > Build number.

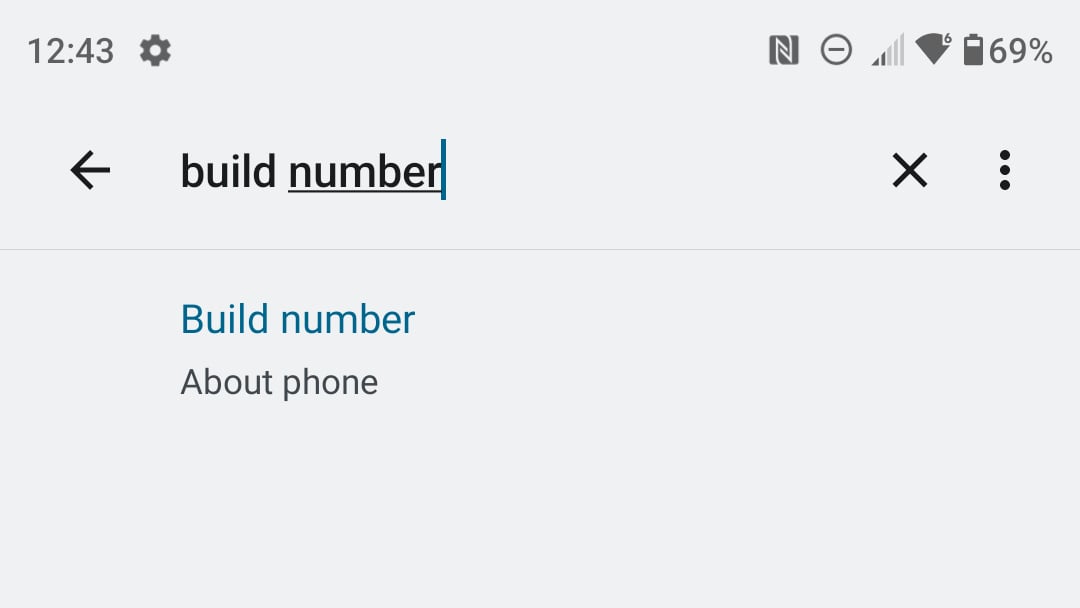
If you can’t find it, you might be using a device with a custom build of Android that moves where some settings are located. If your Settings app has a search button (it’s usually near the top of the screen with a magnifying glass icon), press it and search for “build number.” If it comes up, press it, and it should be highlighted on the about page.
Once you finally reach the Build number entry, you have to keep tapping on the build number until you see a confirmation message. Older devices simply enabled Developer options immediately, while phones and tablets with newer versions of Android usually require you to enter your lock screen password to confirm. You should see a popup that says “You are now a developer” when you’re done, as seen in the screenshot below.
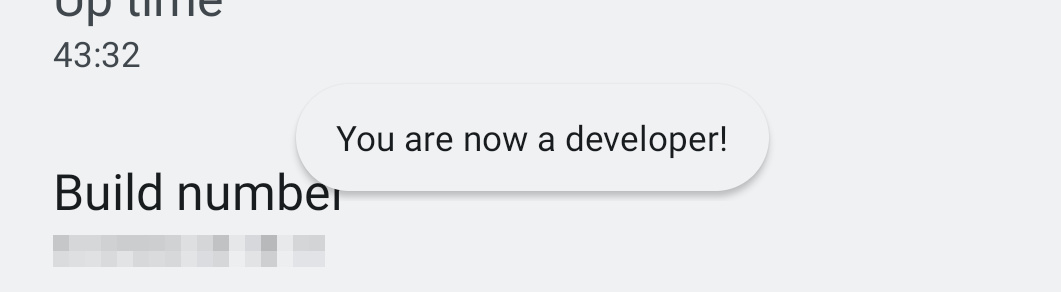
This message should appear once you have enabled Developer options.
After that, you should now have a new Developer options menu available in your Settings app. Again, the exact location of the Developer options menu depends on your version of Android version and device manufacturer. Some devices (like recent Samsung phones and tablets) place Developer options near the bottom of the main Settings screen, while others move them to a System menu or another location. If you have a search button in your Settings app, you can try tapping it and typing “developer options” to find the menu.
Explaining every setting in Developer Options
We’re going to go over every option in the Android Developer options menu, and what they do. The exact order and position of these options might vary by device, and some manufacturers add a few of their own that we’ll cover here. This list is also based on Android 12L/12.1 — future versions of Android might add or remove some of these options.
Main Options
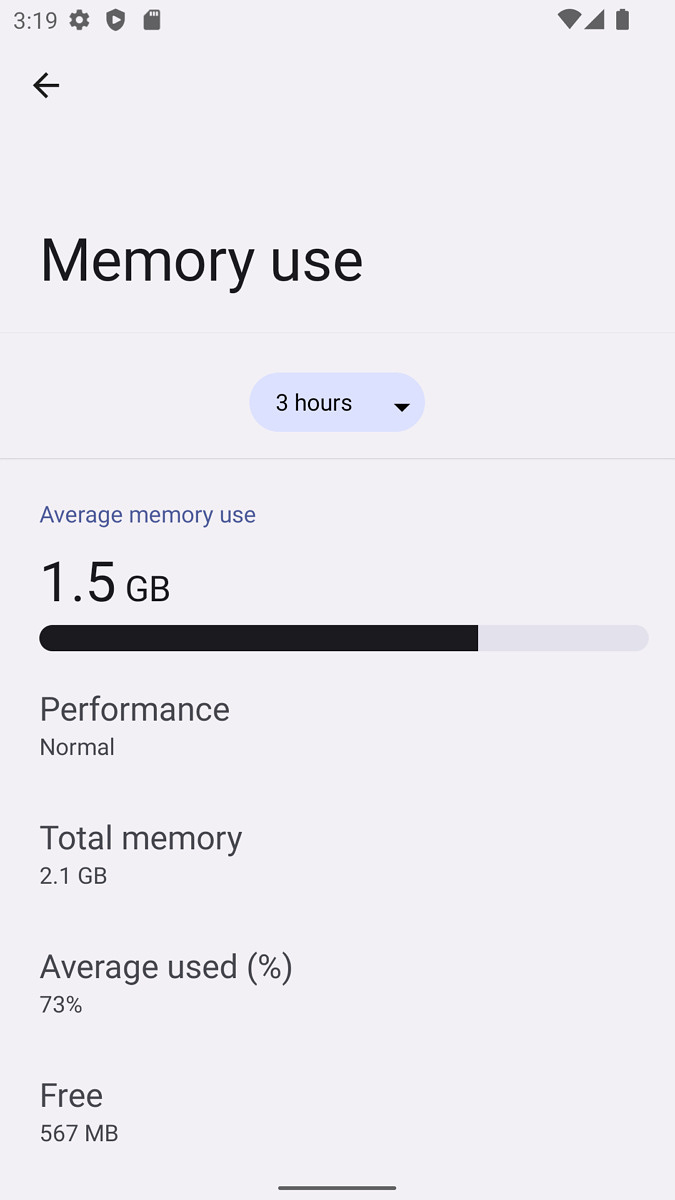
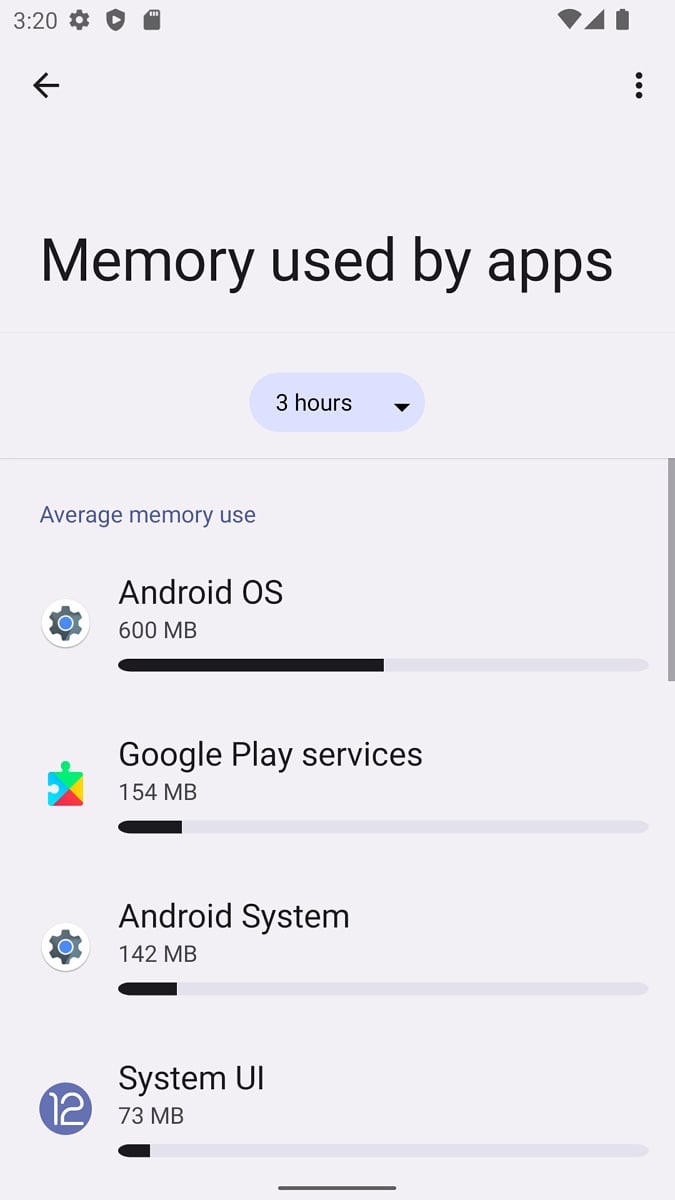
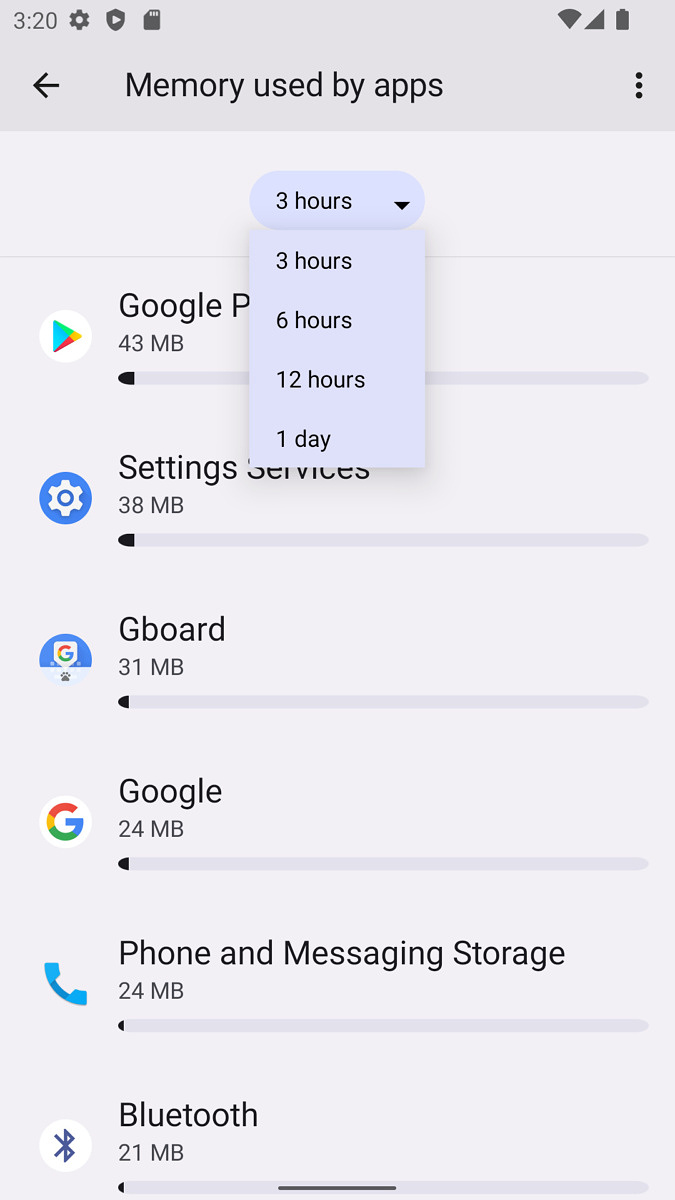
Memory: Tapping this opens a screen showing how much RAM (Random Access Memory) your device is currently using, along with averages based on intervals of 3 hours, 6 hours, 12 hours, or 1 day. You can also see a list of apps on your phone sorted by how much memory they are using. If you notice your device reloading apps often when switching between applications, it might be a good idea to check this screen and see if one app is misbehaving.
Bug report: This allows you to generate a bug report for the Android system. Google might ask for a bug report if you file bugs with Android or other core system components.
Bug report handler: This changes which application handles the Bug Report shortcut on your device. There’s usually no reason to change this.
Desktop backup password: This creates a backup password for using adb commands to back up and restore device apps and data.
Stay awake: Enabling this toggle will prevent your phone from sleeping (the screen turning off) when the device is charging. This can be helpful for testing apps or other tasks where you don’t want to unlock your device over and over again for a period.
Enable Bluetooth HCI snoop log: This saves all Bluetooth HCI packets to a file stored at /sdcard/btsnoop_hci.log, which can then be opened with a tool like Wireshark to analyze and troubleshoot Bluetooth data.
OEM unlocking: This toggle is required to be enabled when unlocking the bootloader, but it’s not the only step for unlocking the bootloader. This option doesn’t appear on all devices.
Running services: This opens a screen showing you all the applications and system processes running on your device, and how much memory each one is using. It’s similar to the above-mentioned Memory screen, but this one is more helpful for checking the current state of your device.
Picture color mode: This switches your device to using the sRGB color space, which used to be helpful in the days before most devices used sRGB by default. Nowadays, this switch usually doesn’t have any effect.
WebView implementation: This changes which application is responsible for rendering embedded web content in Android applications. You shouldn’t touch this unless you have a good reason to, or you could end up losing some app data (like if an app uses local storage with WebView).
Automatic system updates: Turning this off prevents your device from applying system updates during the restarting process if an update has already been downloaded. Some devices might override this behavior, or have another toggle somewhere else for how system updates are handled.
DSU Loader: The DSU Loader feature was introduced in Android 11, and allows you to temporarily boot into a Generic System Image.
System UI demo mode: Demo mode is mostly intended for capturing clean screenshots without any distracting details. It displays the clock at 12:00, the battery level at 100%, and hides all notification icons.


Quick settings developer tiles: This screen gives you the option to add some toggles for other Developer options to your device’s quick settings (where the Wi-Fi and Bluetooth toggles are).
Debugging
USB debugging: Enabling this allows the Android Debug Bridge utility on a computer to communicate with your device over USB. ADB can be used to sideload apps, change system settings with commands, grant permissions to apps, and more. However, some applications and games refuse to launch if USB debugging is enabled.
Revoke USB debugging authorizations: Connecting to your device with ADB for the first time requires you to authorize that computer. This option revokes all ADB authorizations, which can be helpful if you don’t have access to some of the computers you may have used in the past.
Wireless debugging: This allows you to use ADB over a local Wi-Fi network, instead of only USB. Wireless debugging has been available for years in Android, but Google only added this toggle with Android 11.

Wireless debugging dialog
Disable ADB authorization timeout: Most devices automatically revoke USB debugging authorizations after they haven’t been used for seven days, as a security measure. This toggle turns that feature off — you shouldn’t use this unless you have a really good reason.
Bug report shortcut: This adds a new button in the power menu for generating a bug report.
Enable verbose vendor logging: This includes more information in bug reports, possibly including private information.
Enable view attribute inspection: This allows you to inspect views in applications using the Layout Inspector in Android Studio, which can come in handy while developing apps.
Select debug app/Wait for debugger: Normal bug reports and debugging doesn’t always provide all the information you need when developing an app, especially when it comes to figuring out why an app crashes at startup. This option allows you to select a debugger application that can be initialized before a given app, configured with the “wait for debugger” option.
Verify apps over USB: This checks applications sideloaded through ADB for harmful code, similar to how applications downloaded on your device are verified using Google Play Protect. This might be handy if you’re downloading applications from the web on your computer and installing them using ADB.
Verify bytecode of debuggable apps: This is another security measure, and it’s enabled by default.
Logger buffer size: This changes the maximum file size for the logger (also known as “logcat”). A longer buffer can show older activity, while a shorter buffer only contains logs for the most recent activity.
Feature flags: Google sometimes includes experimental features in Android Developer Previews and Betas, and this is where they are located. Most devices running a stable version of Android have an empty Feature flags menu.
Enable GPU debug layers: This option allows Vulkan validation layers to be loaded from local device storage. Google has some documentation with more information.
Graphics Driver Preferences: This allows you to override the system graphics driver for specific applications with a different driver. Most devices don’t have another option for a graphics driver, but Esper has a blog post explaining how this works, if you’re interested in the technical side.
App Compatibility Changes: This menu allows you to test each individual API change in the current version of Android against an older app, which is helpful for the development process of updating an application. It only works for debuggable apps, so it’s not too useful outside of software development.

Refresh rate counter from ‘Show refresh rate’ setting
Show refresh rate: This adds a Fraps-like counter at the top of the screen for checking the current refresh rate, which is helpful for devices that dynamically switch between refresh rates. Keep in mind this is not a frame rate counter.
Allow screen overlays on Settings: Modern versions of Android don’t allow overlays to run while you’re in the Settings app, to prevent possible security risks. This setting overrides that — don’t flip it unless you have a good reason.
System Tracing: This is a helpful tool for performance optimization during app development.
Networking
Wireless display certification: This setting used to enable you to cast your device’s screen to any TV or monitor that supports Miracast, but Google ripped out the code for it years ago in favor of its own Chromecast standard, so this toggle doesn’t really do anything on most devices
Enable Wi-Fi Verbose Logging: This shows the Received Signal Strength Indicator, or RSSI for short, on each network in the Wi-Fi settings. The RSSI value can tell you the strength of a given Wi-Fi signal, but apps like WiFi Analyzer are usually a better tool for the job.
Wi-Fi safe mode: This option is available on some devices, and it prioritizes network stability over performance.
Wi-Fi scan throttling: This limits how often your device scans for Wi-Fi networks, which can sometimes reduce battery drain, but also means it will take longer for your device to connect to known networks.
Wi-Fi non-persistent MAC randomization/Enhanced Wi-Fi MAC randomization: Android uses either persistent MAC randomization or non-persistent MAC randomization when connecting to Wi-Fi networks, depending on which is needed. This option forces Android to always use non-persistent MAC randomization, which essentially tricks the network into thinking you have a new device every time you connect. This might be helpful for networks with capacitive logins or other configuration issues.
Mobile data always active: Android shuts off your mobile data connection whenever you’re connected to Wi-Fi, because keeping both connections alive increases battery drain. This option reverses that behavior, which might be helpful if you don’t want to wait for LTE or 5G to reconnect when you disconnect from Wi-Fi. Be warned: this will very likely reduce your battery life.
Tethering hardware acceleration: This setting is on by default, and improves tethering connections with special hardware features. You probably don’t need to mess with it.
Default USB configuration: This changes what mode is used when you plug your device into a computer (or other USB host) — most devices have “No data transfer” as the default option. If you’re constantly transferring files over USB, for example, you could set choose “File transfer” here to avoid selecting it each time. Keep in mind the setting only applies when your device is unlocked.
Show Bluetooth devices without names: Android usually ignores Bluetooth devices that don’t have a name, but this setting shows them with their MAC addresses alongside all other Bluetooth devices.
Disable absolute volume: Modern versions of Android support absolute volume for Bluetooth outputs, which usually gives you the most control possible over volume. However, some headphones and headsets might be finicky with this enabled. Turning this on (which turns absolute volume off, not on) might help in situations where speakers or headphones are too quiet.
Enable Gabeldorsche: This enables the new Bluetooth stack Google began working on in Android 11, which is called Gabeldorsche (a reference to the history of Denmark). There’s no reason most people should use this right now, and it’s actually hidden on some devices.
Disable Bluetooth A2DP hardware offload: This changes how Bluetooth audio is transmitted, and can sometimes fix buggy Bluetooth headphones and speakers.
Bluetooth AVRCP Version/Bluetooth MAP Version: These change how Android handles media controls over Bluetooth. You probably don’t need to mess with these settings.
HD audio: This toggle is on by default, and switches Bluetooth audio from the lower-quality SBC codec to a higher-quality codec. If no better codecs are available, or you don’t have a Bluetooth audio device connected at all, this setting might be grayed out.

Bluetooth Audio Codec: This menu displays every audio codec supported by your Android device, and when you have a Bluetooth device connected, the options not supported by your headphones or speakers will be grayed out. There’s usually no reason to change the audio codec here (Android automatically picks the best one available), but this menu is a great way to quickly check with codecs a Bluetooth audio device works with.
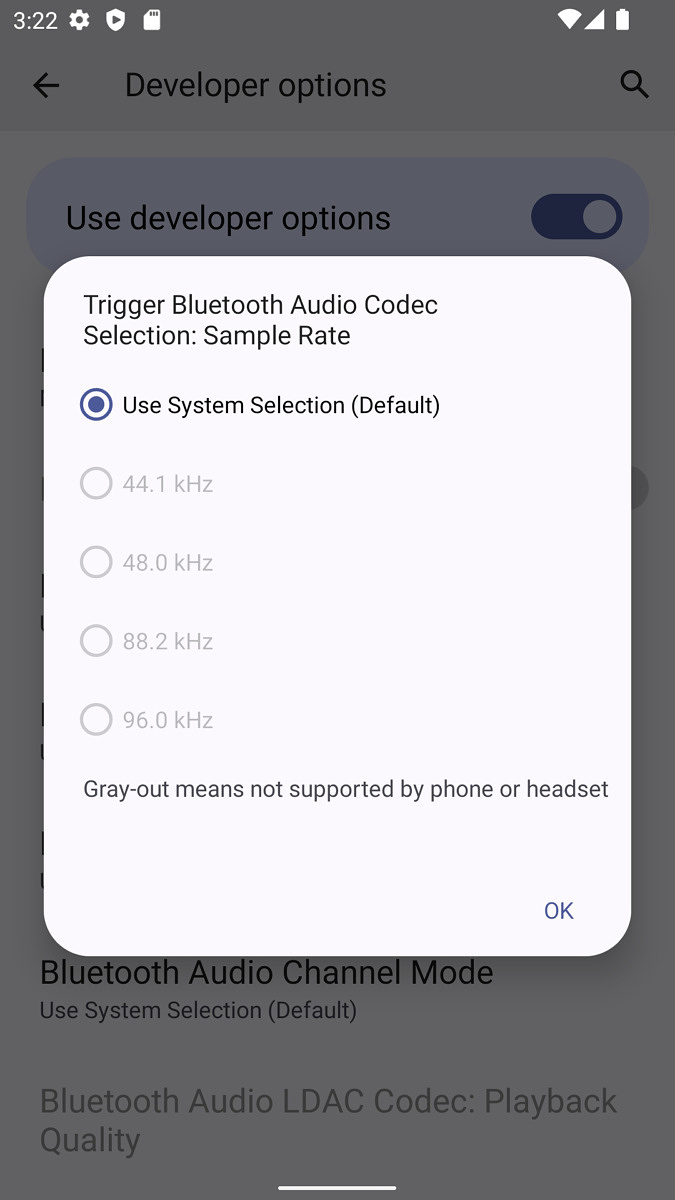
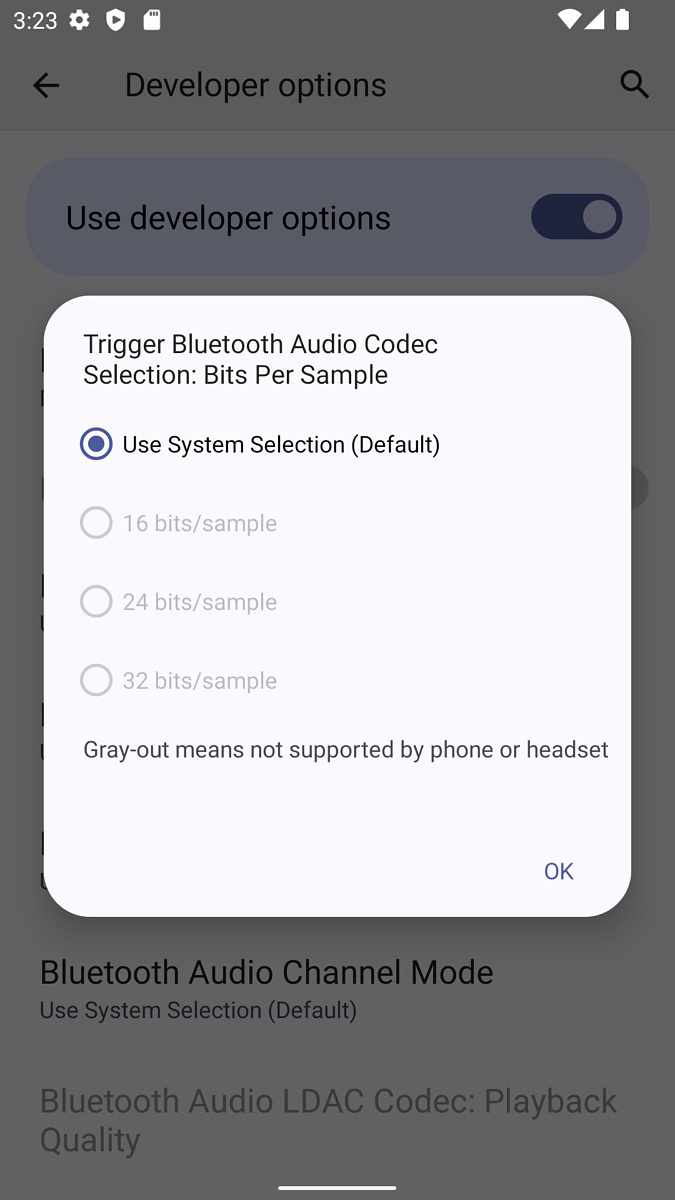
Bluetooth Audio Sample Rate/Bits Per Sample: This changes some of the quality settings for Bluetooth audio. You probably don’t need to mess with these.
Bluetooth Audio Channel Mode: This changes if your Bluetooth audio device uses Mono or Stereo audio. Unfortunately, as with the codec selector, you can only choose from modes supported by the audio device.
Maximum connected Bluetooth audio devices: Some phones and tablets can connect to multiple Bluetooth audio devices at once. The default is already the highest-allowed option, so there’s usually no reason to change anything here.
Input
Show taps: This shows a dot on the screen where any fingers are currently touching the screen. This feature is useful during screen recordings to show where you’re tapping the screen, but some built-in screen recorders have an option to enable this automatically during recording.
Pointer location: This is similar to ‘Show taps,’ but it displays the actual coordinates of your taps at the top of the display.
Drawing
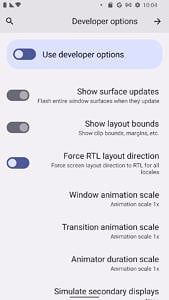
Show surface updates: This flashes the entire screen when anything changes in the current app’s state. This can be useful for debugging apps, but if you’re sensitive to motion, absolutely do not enable this.
Show layout bounds: This shows a grid-like layout on all elements, making it easier to see margin areas on certain elements. Again, this is only really helpful when developing apps.
Force RTL layout direction: This forces all text to be displayed as right-to-left, even if the current language is written as left-to-right. This option can be helpful for testing how apps will look in languages like Arabic, without actually changing the device language.
RTL layout direction
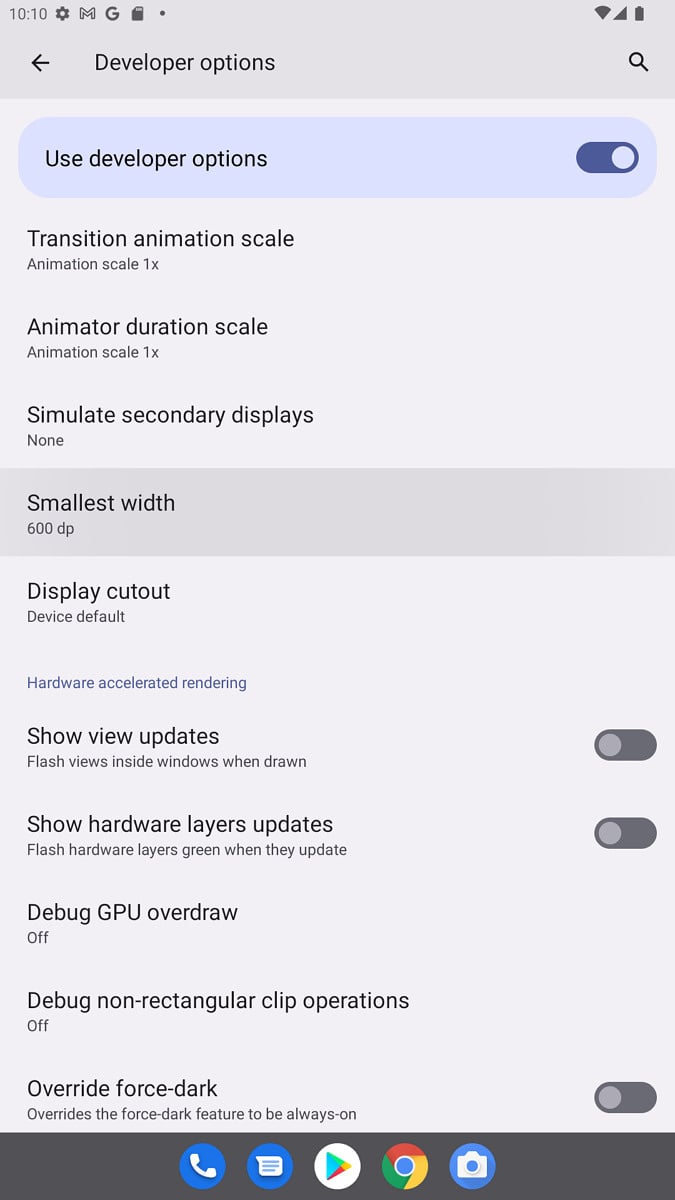
Window animation scale/Transition animation scale/Animator duration scale: These three options change the speed of most animations in Android. Setting them to values like 0.5x can sometimes make your device feel faster, but can also result in a choppier experience.
Simulate secondary displays: This simulates a monitor connected to your Android device, with the result displayed on a translucent layer on the top of the screen. This can be helpful when testing applications that respond to external displays.
Smallest width/Minimum width: This is another way to change the scaling for applications on Android — a smaller value increases the size, and a higher value makes everything smaller. The ‘Display size’ setting in the normal Settings app is usually the best way to change the screen scaling, but this setting can go much larger and smaller. If your device has Android 12L/12.1 or later, setting a high enough value here will cause the taskbar intended for tablets to appear.
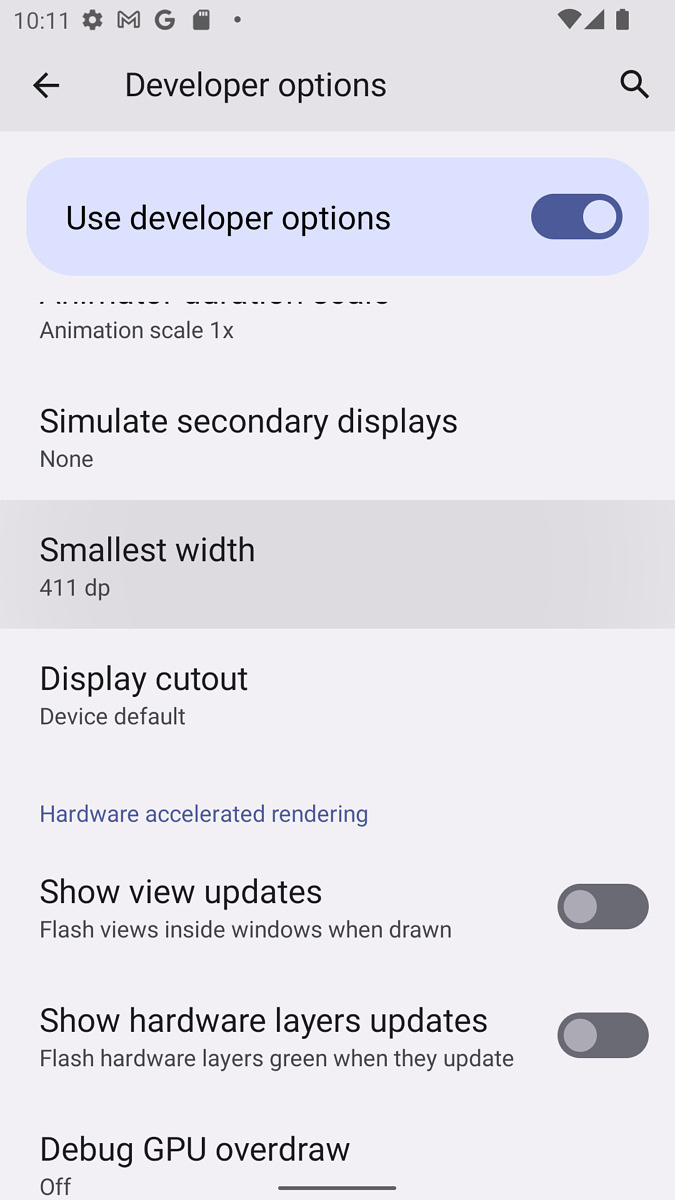
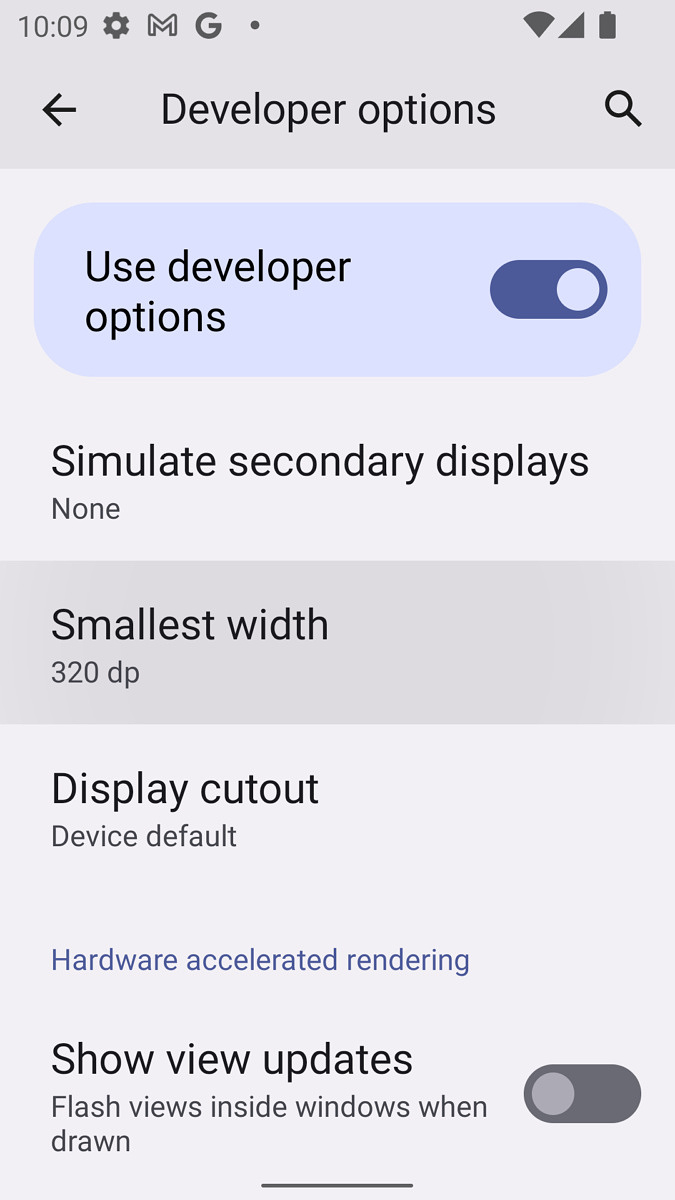
Display cutout: This is where you can customize the notch, camera hole, or other cutouts on your device’s screen. If your device already has a cutout, the ‘Hide’ option will push the status bar down to make it invisible.
Hardware-accelerated rendering
Show view updates/Show hardware layers updates: These are similar to the above-mentioned ‘Show surface updates’ setting. There’s no reason to use them unless you’re a developer testing an app.
Debug GPU overdraw: This uses color-coding to visualize how many times the same pixel has been drawn in the same frame. The visualization shows where an app might be doing more rendering than necessary.
Debug non-rectangular clip operations: This turns off the clipping area on the canvas to create unusual (non-rectangular) canvas areas.
Override force-dark: This setting was added in Android 10, and is supposed to force apps to have a dark theme, even if they don’t have one. However, it never worked across all applications when it was new, and it seems to be even less reliable now. Most Android apps also have a native dark mode at this point, so it’s not as necessary.
Force 4x MSAA: This forces multisample anti-aliasing (MSAA) in all apps using OpenGL ES 2.0.
Disable HW overlays: Hardware overlays allow apps that display something on the screen to use less processing power. Without the overlay, an app shares the video memory and has to constantly check for collision and clipping to render a proper image. Don’t mess with this option unless you have a good reason to.
Simulate color space: This can switch display colors between a few different modes, including a monochrome option.
Media
Disable USB audio routing: This prevents Android from automatically using newly-connected USB audio devices, such as headphone adapters or USB headsets. It might be helpful if you want to plug in a device that offers an audio output, but don’t actually want to use the audio part — for example, a USB dock or adapter with a 3.5mm headphone jack among other ports.
Media transcoding settings: This menu has options for changing how the device loads media files. Don’t touch these.
Monitoring
Strict mode enabled: This is a tool for developers to monitor accidental storage or network access on an application’s main thread.
Profile HWUI rendering: This is a way to monitor GPU activity on your device, though it isn’t too helpful outside of testing applications during development.
Apps
Don’t keep activities: This will forcefully close applications as soon as they are moved to the background — essentially the same as swiping them out of the Recents screen. There’s no reason to use this unless you’re testing an app and need to reload it constantly for testing.
Background process limit: This changes the maximum number of applications that are kept in background memory before they are cleared. Again, there’s no reason to change this, and changing it might make your battery life worse — relaunching apps constantly takes more processing power than keeping them in the background.
Always show crash dialog: Pretty self-explanatory, this will show a popup message whenever an application crashes for easy bug reporting.
Show background ANRs: Enabling this will show ‘App not responding’ messages for apps running in the background, in addition to the default behavior of showing them for frozen apps open on your screen.
Suspend execution for cached apps: Android applications aren’t supposed to run when they are cached in memory, but this option completely prevents them from doing so. This option can improve battery life at the cost of performance (it might longer for cached apps to be restored when opened again), but real-life results are mixed.
Show notification channel warnings: Most Android apps sort their notifications into categories, which can be turned on or off individually from the Android settings. Enabling this option shows a warning when an app sends a notification that isn’t assigned to a category. This is mainly helpful for developers to make sure all their notifications are in a category — if you’re trying to find out which channel a notification came from, just press and hold on it from the notifications panel.
Reset notification importance: Android attempts to sort your notifications over time by importance, and tapping this button resets that behavior.
Standby apps: This lists all the applications currently on standby on your device.
Force allow apps on external: Android apps can choose whether or not they can be installed on external storage (usually the microSD card slot) with a manifest setting, but this option overrides that. Changing this and moving unsupported apps to external storage could cause strange behaviors, so it’s probably best to leave this alone.
Force activities to be resizable: This option forces all applications to be resizable, which can be a (buggy) fix for apps that don’t work in split-screen mode or can’t be resized on Chromebooks.
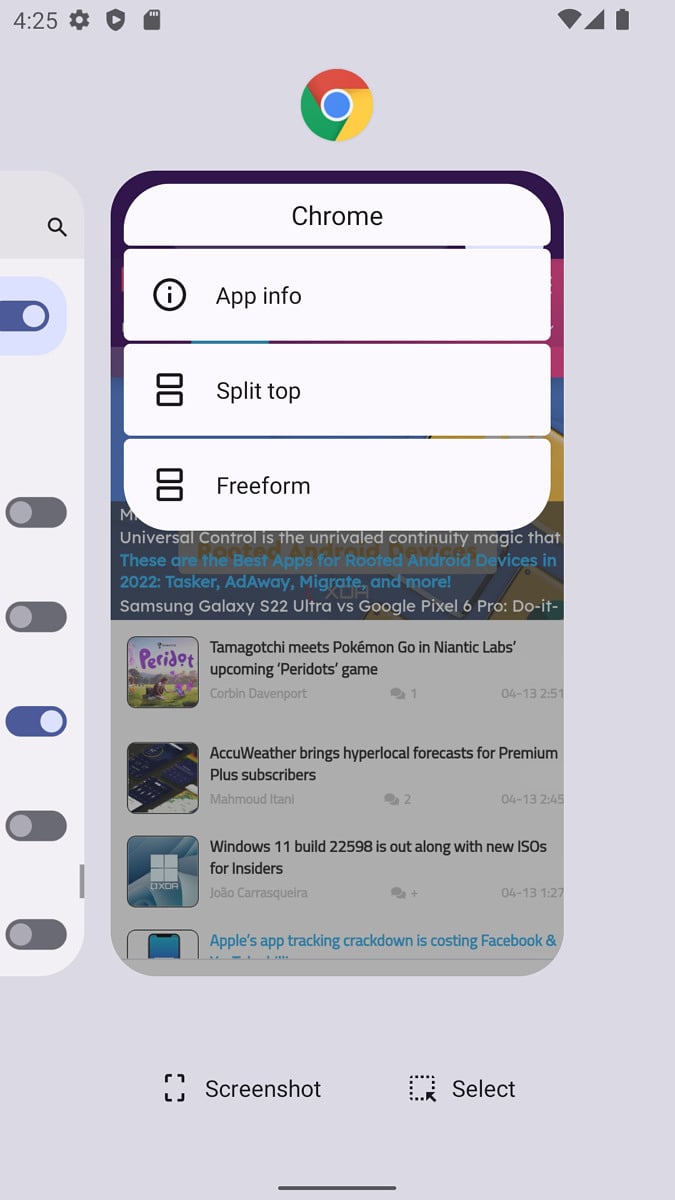
Enable freeform windows: This option allows applications to open in floating windows, even if the device wasn’t intended for freeform mode (like most phones). Once you enable this, hold down on an app’s icon in the Recents screen and select ‘Freeform’ to turn it into a floating window. Some custom versions of Android have a custom implementation of this already, like ‘Pop-up View’ on Samsung Galaxy phones and tablets.

Force desktop mode: If you connect an external display (for example, a monitor over USB Type-C), this will force it to use a simplistic desktop interface with freeform windows and a custom launcher. The exact implementation of this varies by the Android skin and version, and some devices have their own behavior that overrides this option.
Enable non-resizable in multi-window/Multi-window for all apps: This allows applications not built for resizing (like many games) to be used in multi-window mode.
Reset ShortcutManager rate-limiting: Android limits how many times an app can update its shortcuts on the home screen and other system locations to prevent performance slowdowns. This option resets the rate-limiting timer, which is mainly just useful for development.
Other sections
Autofill: All the options in this section are for testing Android’s Autofill framework, and there’s no reason to change any options here unless you’re testing an app that uses Autofill data (or an Autofill provider).
Storage: This only contains one option, which can show any shared data blobs in the Android system. In most cases, this will be empty with a message like “There is no shared data for this user.”
Location: The ‘Select mock location app’ option can be used in conjunction with apps like GPS Joystick to spoof your device’s physical location. Check our our location spoofing guide for more details.

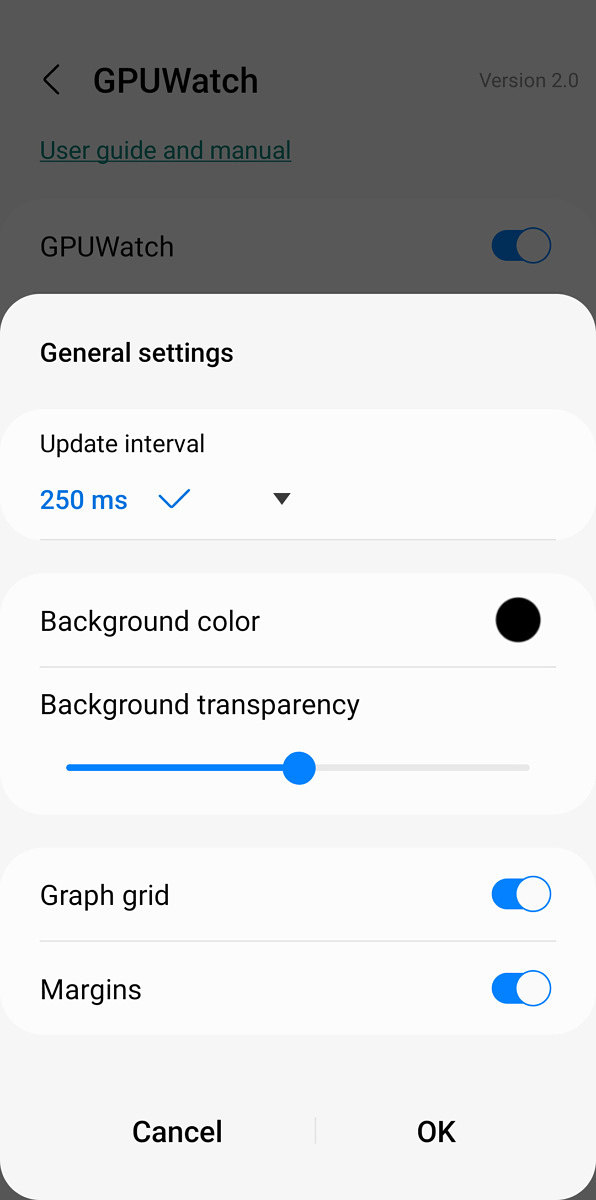

Games: Some Samsung Galaxy devices have a section called ‘Games’ in the Developer options with a setting for GPUWatch, which adds overlays for the FPS and CPU load. As opposed to the refresh rate counter in the ‘Display’ section, this shows the current FPS value from the current application or game, which is often lower than the actual display refresh rate.
We hope this guide explains these settings beyond what you can see on your screen on your device.
The post Android Developer Options Explained: Here’s everything you can do with these settings appeared first on xda-developers.